Apache Archiva on AWS User Guide
Overview
This image runs Apache Archiva, the open source build-artifact repository manager - a central, governed store for the binary artifacts your builds produce and consume. Archiva manages internal Maven, Gradle and Ivy repositories for your own releases and snapshots, and remote proxy connectors that cache dependencies from Maven Central and other upstreams, so your teams resolve dependencies from one location instead of hitting the public internet on every build.
Archiva runs as a self-contained standalone distribution: a bundled Jetty servlet container serves the Archiva web application, and an embedded Apache Derby database holds the security store (users and roles) and the Archiva configuration. It runs on OpenJDK 8 - the version Archiva 2.2.x requires - and is fronted by nginx as a reverse proxy. Jetty binds 127.0.0.1:8080 and is reached through nginx on port 80 (and 443 once you add TLS). The repository storage, security database and search index live on a dedicated EBS data volume mounted at /var/lib/archiva, independently resizable and separate from the operating system disk.
On the first boot of every deployed instance, a one-shot service creates a single administrator account with a per-instance password through the Archiva security API, verifies it, and writes the login to /root/archiva-credentials.txt with mode 0600. No shared or default credentials ship in the image.
Prerequisites
Before you deploy this image you need:
- An Amazon Web Services account where you can launch EC2 instances
- IAM permissions to launch instances, create security groups, and subscribe to AWS Marketplace products
- An EC2 key pair in the target Region for SSH access to the instance
- A VPC and subnet in the target Region, with a security group allowing inbound port 22 from your management network and inbound ports 80 and 443 from the networks your developers and build agents will reach Archiva on
- The AWS CLI (version 2) installed locally if you plan to deploy from the command line
Step 1: Launch the Instance from the AWS Marketplace
Sign in to the AWS Management Console, open the EC2 service, and select Launch instance. Under Application and OS Images choose AWS Marketplace AMIs and search for Apache Archiva. Select the cloudimg listing and choose Select, then Continue on the subscription summary.
Pick an instance type of t3.medium or larger. Choose your EC2 key pair under Key pair (login). Under Network settings select your VPC and subnet, and either create or select a security group that allows inbound port 22 from your management network and inbound ports 80 and 443 from the networks your users use. Leave the root volume at the default size or larger; the image adds a separate data volume for the repository store automatically.
Select Launch instance. First boot initialisation takes under a minute after the instance state becomes Running and the status checks pass.
Step 2: Launch the Instance from the AWS CLI
The following block launches an instance from the cloudimg Apache Archiva Marketplace AMI into an existing subnet and security group. Replace <ami-id> with the AMI ID shown on the Marketplace listing, <key-name> with your EC2 key pair name, <subnet-id> with your subnet ID, and <security-group-id> with a security group that opens ports 22, 80, and 443 as described above.
aws ec2 run-instances \
  --image-id <ami-id> \
  --instance-type t3.medium \
  --key-name <key-name> \
  --subnet-id <subnet-id> \
  --security-group-ids <security-group-id> \
  --block-device-mappings '[{"DeviceName":"/dev/sda1","Ebs":{"VolumeSize":30,"VolumeType":"gp3"}}]' \
  --tag-specifications 'ResourceType=instance,Tags=[{Key=Name,Value=archiva-01}]'
The command prints a JSON document on success. Note the instance ID, then retrieve its public address once it is running with aws ec2 describe-instances --instance-ids <instance-id> --query "Reservations[].Instances[].PublicIpAddress" --output text.
Step 3: Connect and Retrieve the Administrator Login
Connect over SSH with the key pair you selected and the public IP address from step 2. The SSH login user depends on the operating system of the AMI variant you launched:
| AMI variant | SSH login user |
|---|---|
| Apache Archiva 2.2 on Ubuntu 24.04 | ubuntu |
The first boot service runs before the SSH daemon becomes ready, so the credentials file is always in place when you log in for the first time.
ssh <login-user>@<public-ip>
sudo cat /root/archiva-credentials.txt
You will see a plain text file containing the Archiva URL, the administrator username (admin) and the password. From the same SSH session you can confirm the deployment is healthy - the health endpoint is open and served by nginx:
curl -fsS http://127.0.0.1/health
ok
An ok response confirms nginx is fronting the application. You can also confirm the Archiva application and its security store are answering behind the proxy - this endpoint returns true once the per-instance administrator has been provisioned:
curl -fsS -H "Referer: http://127.0.0.1:8080/" http://127.0.0.1:8080/restServices/redbackServices/userService/isAdminUserExists
true
A true response confirms the full stack - nginx, Jetty and the Archiva security store - is serving and the administrator account seeded on first boot is present.
Step 4: First Sign-in
Open a web browser and navigate to http://<public-ip>/. Archiva presents its welcome page with Login and Register in the top right.
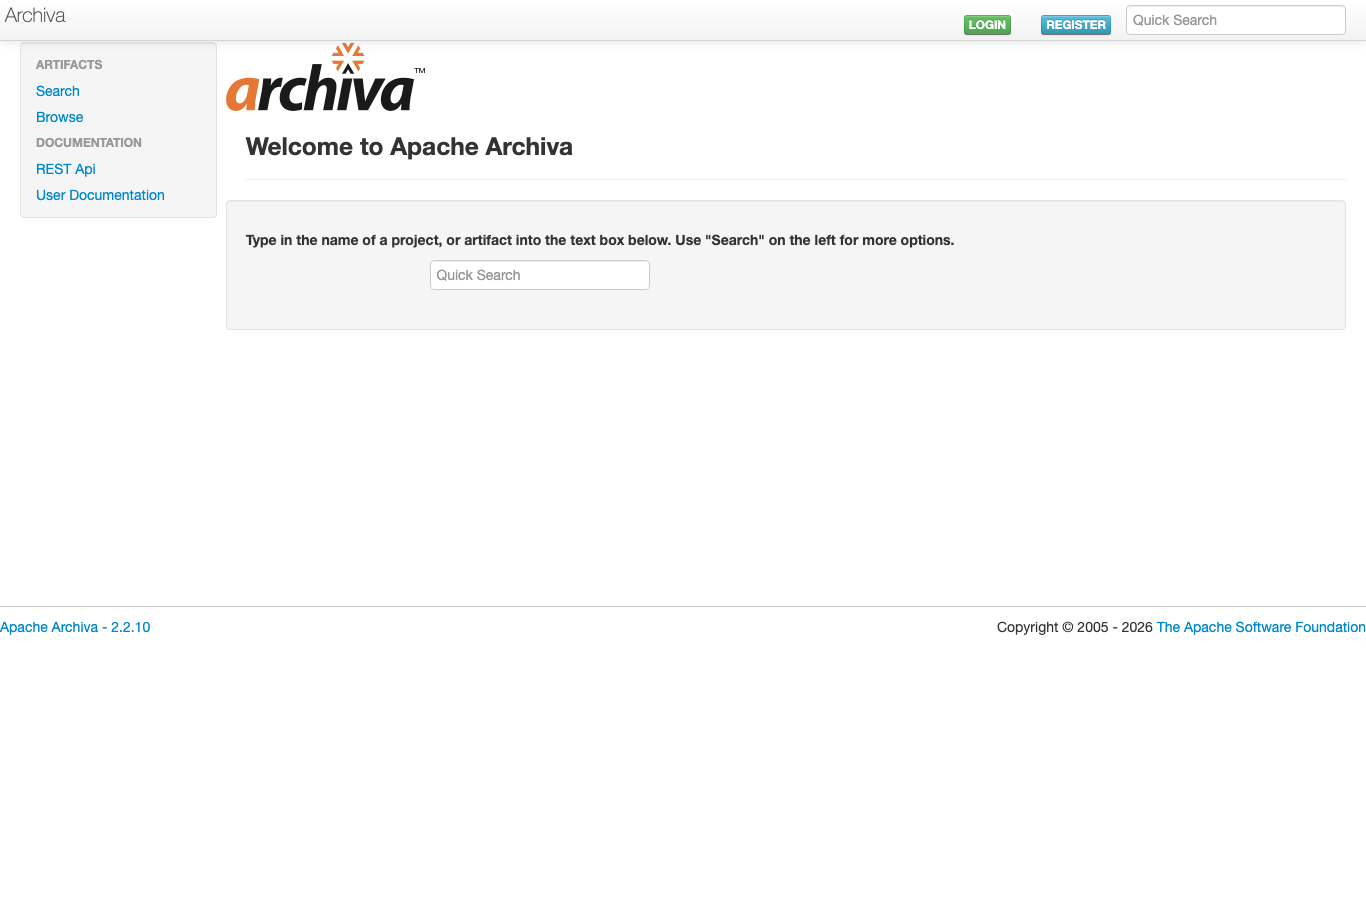
The Apache Archiva welcome page, served on first boot behind nginx.
Select Login, enter the username admin and the password from /root/archiva-credentials.txt, then select Ok. After signing in the full administration menu appears in the left navigation.
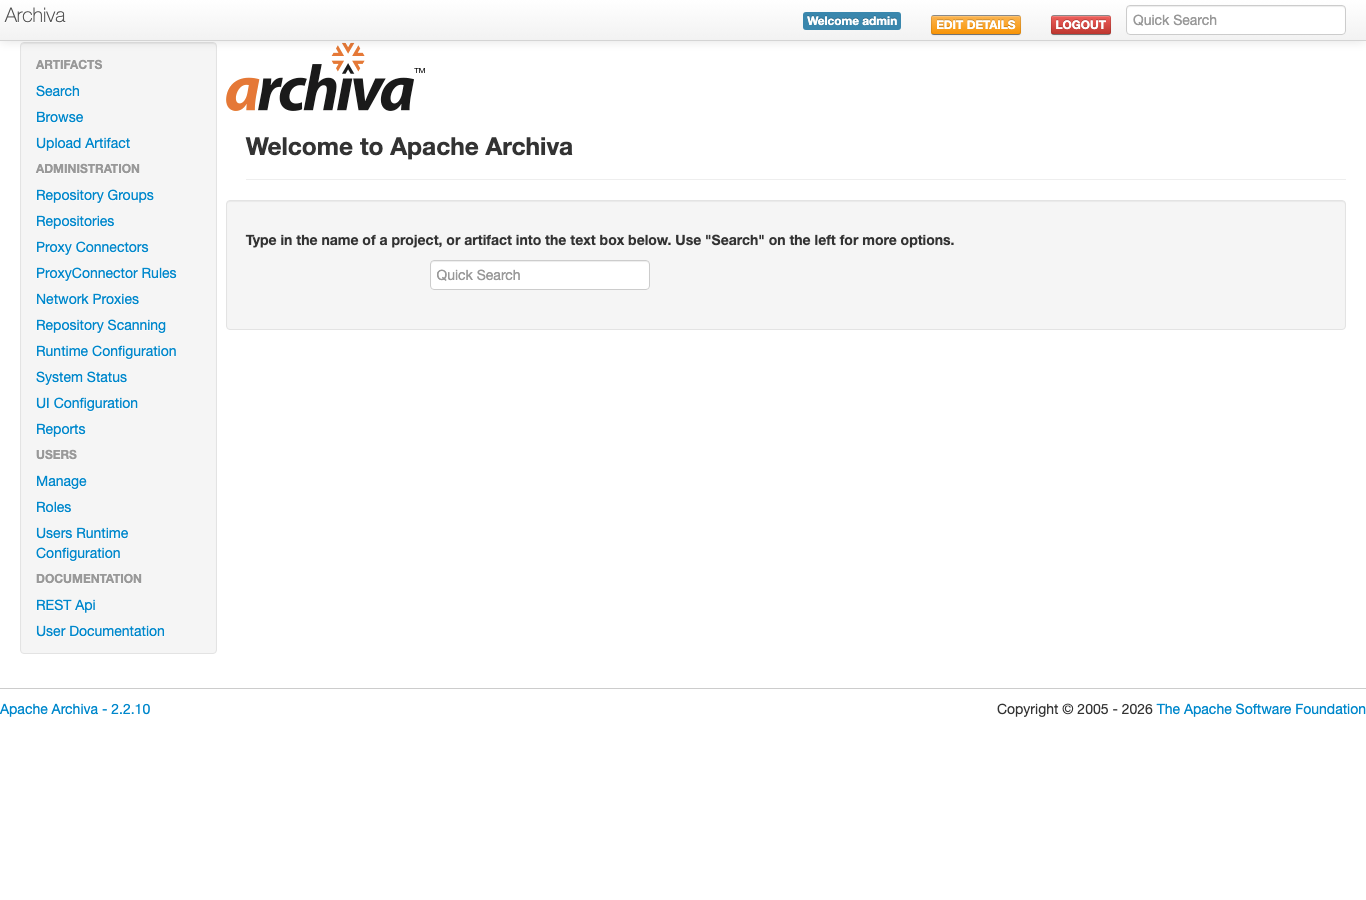
Signed in as the per-instance administrator, with the Artifacts, Administration and Users menus.
Step 5: Review the Managed Repositories
Select Repositories under Administration. Archiva ships with two managed Maven 2.x repositories - internal for releases and snapshots for snapshot builds - and a central remote repository that proxies Maven Central. The Managed Repositories Management and Remote Repositories Management tabs let you add, edit and remove repositories.
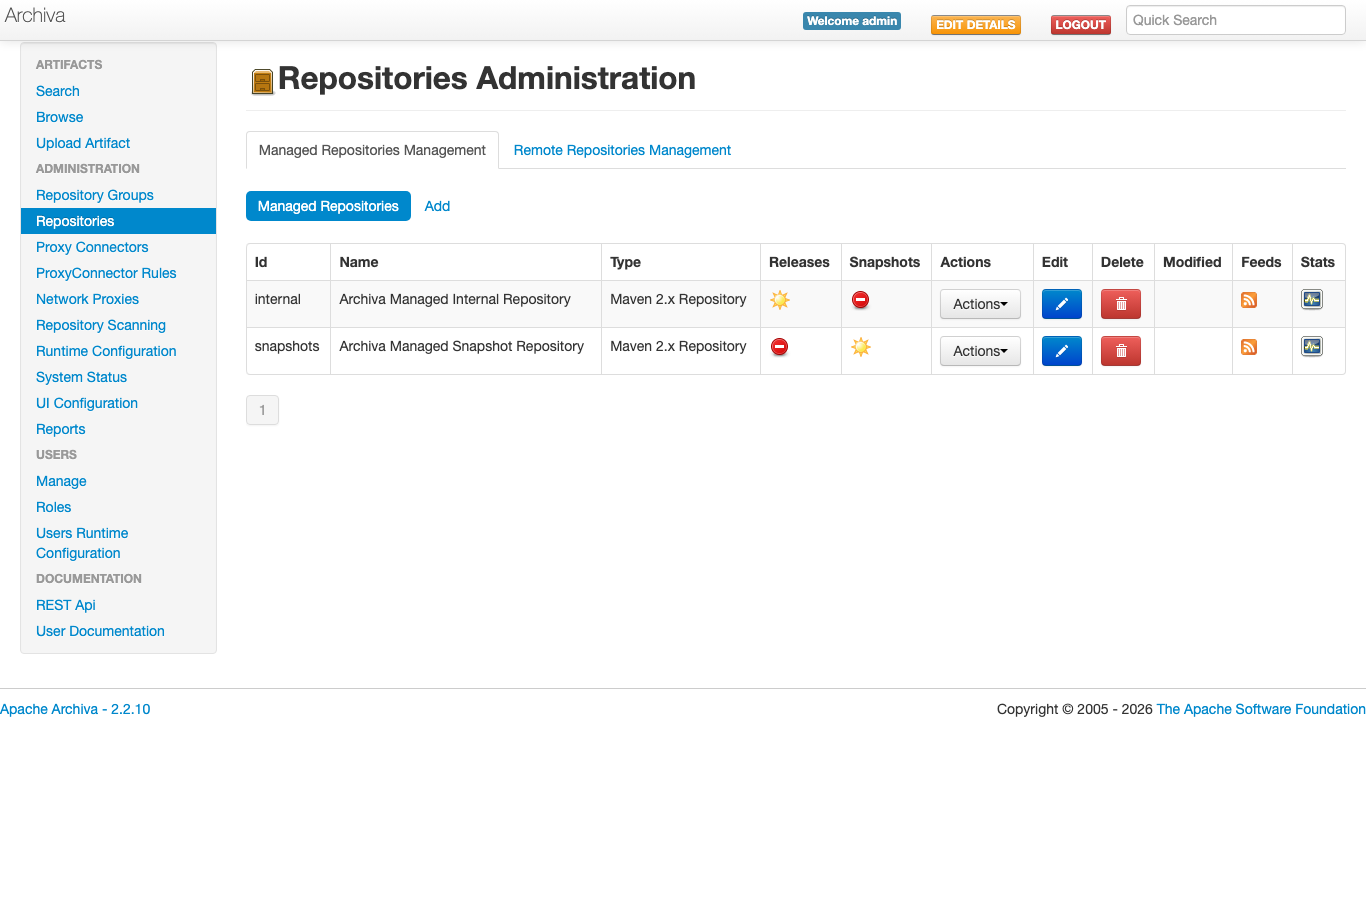
Repositories Administration - the default managed release and snapshot repositories.
Step 6: Point Maven at the Repository
To resolve dependencies through Archiva's proxy and to deploy your own artifacts, point your build at the repository. Add the internal repository as a mirror in your Maven settings.xml so all dependency resolution flows through Archiva:
<settings>
  <mirrors>
    <mirror>
      <id>archiva-internal</id>
      <url>http://your-archiva-host/repository/internal/</url>
      <mirrorOf>*</mirrorOf>
    </mirror>
  </mirrors>
</settings>
To deploy a build to the internal and snapshots repositories, add matching <distributionManagement> entries to your project POM pointing at http://your-archiva-host/repository/internal/ and .../snapshots/, and a <server> entry in settings.xml with your Archiva username and password. Gradle and Ivy consume the same repository URLs. Browse deployed artifacts and their POM metadata under Browse, and search the index with the Search box.
Step 7: Administer Users and Roles
Open Manage under Users to review and create accounts. The image ships the single per-instance admin account created on first boot, plus the built-in read-only guest. Add developer and deployer accounts here, and assign per-repository roles under Roles so each team can read, deploy to, or manage only the repositories they should.
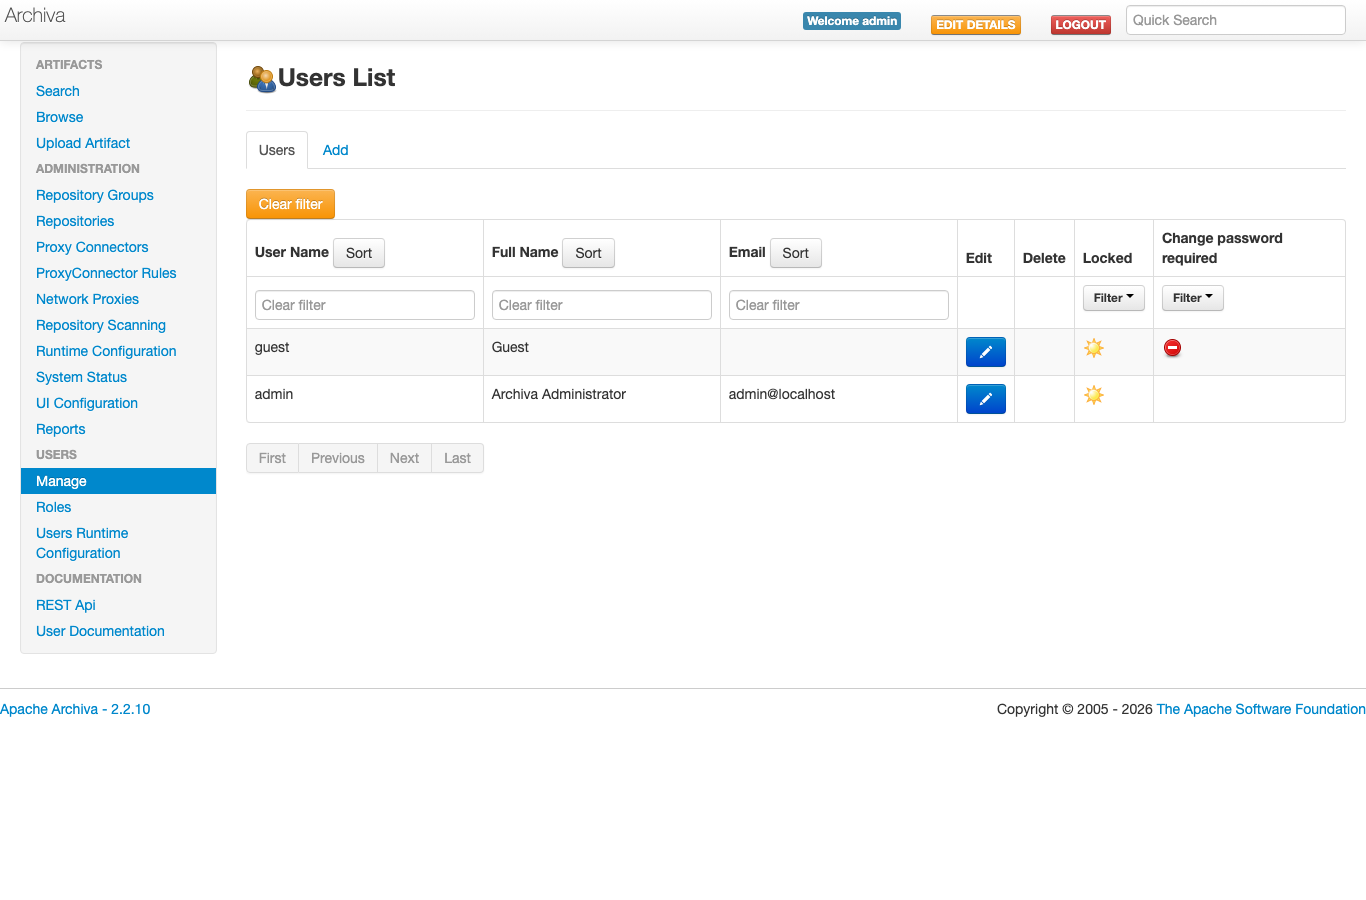
Users List - the per-instance administrator seeded on first boot, ready for you to add your team.
Every action in the web application is also available through the Archiva REST API under http://<public-ip>/restServices/ - useful for scripting repository creation and user management.
Step 8: Enable HTTPS with Let's Encrypt
For any production deployment serve Archiva over HTTPS so logins and artifact transfers cannot be intercepted. The image ships with nginx, which certbot can configure automatically.
The following assumes you have a DNS record pointing your fully qualified domain name at the instance's public IP address.
sudo apt-get update && sudo apt-get install -y certbot python3-certbot-nginx
sudo certbot --nginx -d archiva.your-domain.example \
  --non-interactive --agree-tos -m you@your-domain.example \
  --redirect
certbot obtains a certificate and rewrites the nginx server block to serve HTTPS and redirect HTTP. Renewal is handled automatically by the certbot systemd timer.
Step 9: Backups and Maintenance
Archiva keeps everything - the embedded security database, the managed repositories, and the search index - under /var/lib/archiva on the dedicated data volume. Because that is a separate EBS volume you can take a coordinated EBS snapshot of it for point-in-time backups, or archive the tree to object storage:
sudo systemctl stop archiva
sudo tar czf <backup-dir>/archiva-$(date +%F).tgz -C /var/lib archiva
sudo systemctl start archiva
Ship the archive to an Amazon S3 bucket or another object store. To upgrade Archiva, follow the official upgrade notes and replace the distribution under /opt/archiva, keeping the data volume in place. The services run under systemd - check their state at any time:
systemctl is-active archiva nginx
active
active
Step 10: Scaling and Operations
- Put the web tier behind an Application Load Balancer and terminate TLS there for high availability
- Add remote proxy connectors for additional upstreams (Gradle Plugin Portal, JCenter mirrors, internal Nexus) under Proxy Connectors
- Grow the repository store by extending the EBS data volume and running
sudo resize2fson/var/lib/archiva - Schedule Repository Scanning to keep the search index current after bulk deploys
Each of these is documented in the official Apache Archiva documentation at https://archiva.apache.org/docs/2.2.10/.
Support
cloudimg provides 24/7/365 expert technical support for this image. Guaranteed response within 24 hours, one hour average for critical issues. Contact support@cloudimg.co.uk.
For general Apache Archiva questions consult the documentation at https://archiva.apache.org/. Apache Archiva is a trademark of the Apache Software Foundation; use here is nominative and does not imply affiliation or endorsement.