
Apache DolphinScheduler on AWS User Guide
Overview
This image runs Apache DolphinScheduler as an all in one standalone deployment. DolphinScheduler is a distributed, easy to extend platform for scheduling and orchestrating data workflows: you design pipelines as visual DAGs in a web console, wiring together shell, SQL, Python, Spark and other task types with dependencies, retries and time based triggers, then monitor every run, its logs and its history from the same interface.
The standalone server bundles the master, worker, API server, alert server and the web user interface in a single managed Java Virtual Machine process, backed by an embedded H2 metadata database. The application listener binds to the loopback interface on port 12345 and is fronted by nginx on port 80, which reverse proxies the web interface and the REST API. DolphinScheduler enforces its own username and password authentication, so it is reached through its own sign in form.
The administrator password is rotated on the first boot of every deployed instance. Two instances launched from the same Amazon Machine Image never share a password. The shipped default administrator password is replaced with a fresh per instance value that is written to /root/apache-dolphinscheduler-credentials.txt with mode 0600, so that only the root user can read it.
All scheduler state, the H2 metadata database, the workflow repository, execution logs and the JVM working tree, lives on a dedicated EBS data volume mounted at /var/lib/dolphinscheduler, so projects, workflow definitions and run history persist across reboots and the volume can be resized independently of the operating system disk.
Prerequisites
Before you deploy this image you need:
- An Amazon Web Services account where you can launch EC2 instances
- IAM permissions to launch instances, create security groups, and subscribe to AWS Marketplace products
- An EC2 key pair in the target Region for SSH access to the instance
- A VPC and subnet in the target Region, with a security group allowing inbound port 22 from your management network and inbound port 80 from the network you will reach the DolphinScheduler web interface from
- The AWS CLI (version 2) installed locally if you plan to deploy from the command line
Step 1: Launch the Instance from the AWS Marketplace
Sign in to the AWS Management Console, open the EC2 service, and select Launch instance. Under Application and OS Images choose AWS Marketplace AMIs and search for Apache DolphinScheduler. Select the cloudimg listing and choose Select, then Continue on the subscription summary.
Pick an instance type of m5.large or larger. The standalone server runs the master, worker, API and alert services together in one JVM, so it benefits from at least two vCPUs and 8 GiB of memory. Choose your EC2 key pair under Key pair (login). Under Network settings select your VPC and subnet, and either create or select a security group that allows inbound port 22 from your management network and inbound port 80 from the network you will reach the web interface from. Leave the root volume at the default size or larger.
Select Launch instance. First boot initialisation, which brings up the standalone server and rotates the administrator password, takes approximately two to three minutes after the instance state becomes Running and the status checks pass.
Step 2: Launch the Instance from the AWS CLI
The following block launches an instance from the cloudimg Apache DolphinScheduler Marketplace AMI into an existing subnet and security group. Replace <ami-id> with the AMI ID shown on the Marketplace listing, <key-name> with your EC2 key pair name, <subnet-id> with your subnet ID, and <security-group-id> with a security group that opens ports 22 and 80 as described above.
aws ec2 run-instances \
  --image-id <ami-id> \
  --instance-type m5.large \
  --key-name <key-name> \
  --subnet-id <subnet-id> \
  --security-group-ids <security-group-id> \
  --block-device-mappings '[{"DeviceName":"/dev/sda1","Ebs":{"VolumeSize":20,"VolumeType":"gp3"}}]' \
  --tag-specifications 'ResourceType=instance,Tags=[{Key=Name,Value=apache-dolphinscheduler-01}]'
The command prints a JSON document on success. Note the instance ID, then retrieve its public address once it is running with aws ec2 describe-instances --instance-ids <instance-id> --query "Reservations[].Instances[].PublicIpAddress" --output text.
Step 3: Connect and Retrieve the Administrator Password
Connect over SSH with the key pair you selected and the public IP address from step 2. The SSH login user depends on the operating system of the AMI variant you launched:
| AMI variant | SSH login user |
|---|---|
| Apache DolphinScheduler on Ubuntu 24.04 | ubuntu |
The first boot service rotates the administrator password before it writes the credentials file, so the file always contains the current password when you log in for the first time.
sudo cat /root/apache-dolphinscheduler-credentials.txt
You will see a plain text file containing the DolphinScheduler URL, the administrator username (admin), and the per instance administrator password. Copy these values somewhere secure (a password manager or encrypted vault). Do not commit them to source control.
From the same SSH session you can confirm the deployment is healthy. The nginx health endpoint needs no authentication:
curl -fsS http://127.0.0.1/health
It prints ok. For a deeper check, the DolphinScheduler actuator health endpoint reports the status of every bundled service:
curl -s http://127.0.0.1/dolphinscheduler/actuator/health
A JSON document with "status":"UP" for the alert, api, db, master and worker components confirms the full standalone stack is registered and healthy.
Step 4: First Login to the DolphinScheduler Web Interface
Open a web browser and navigate to http://<public-ip>/. The root path redirects to the DolphinScheduler sign in form. Use the language switch in the top right corner to select en_US if you prefer English.
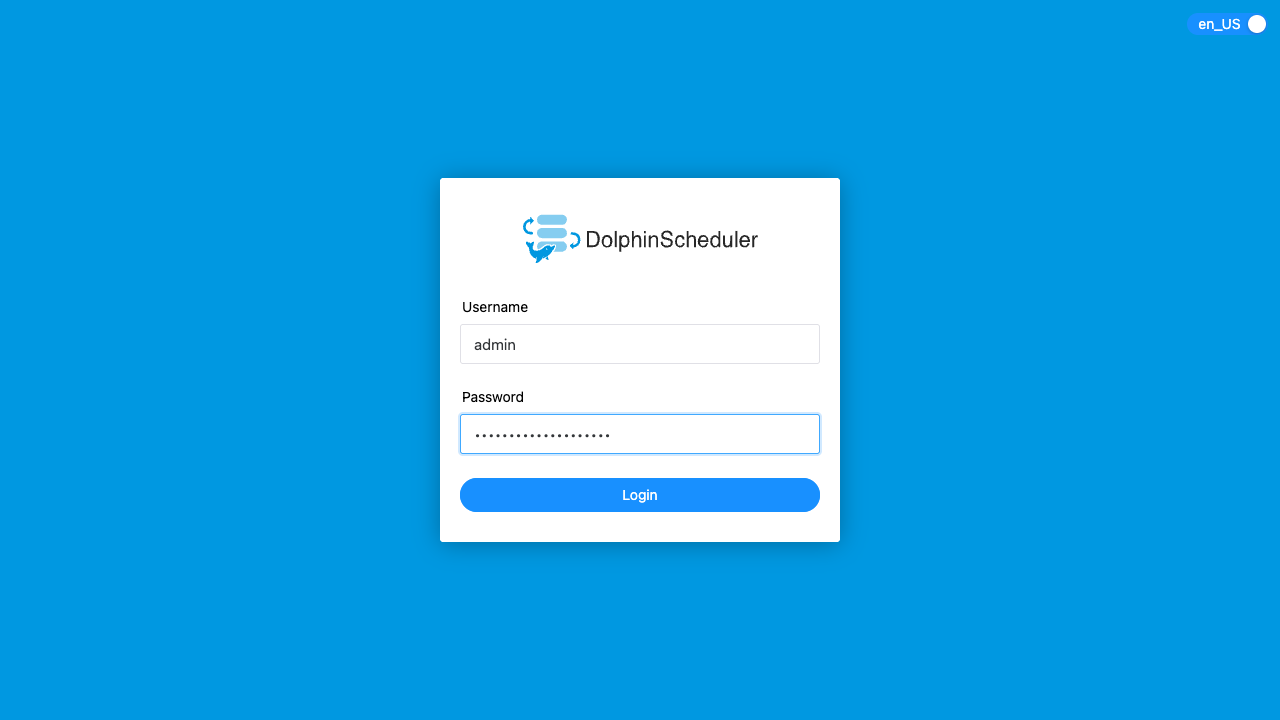
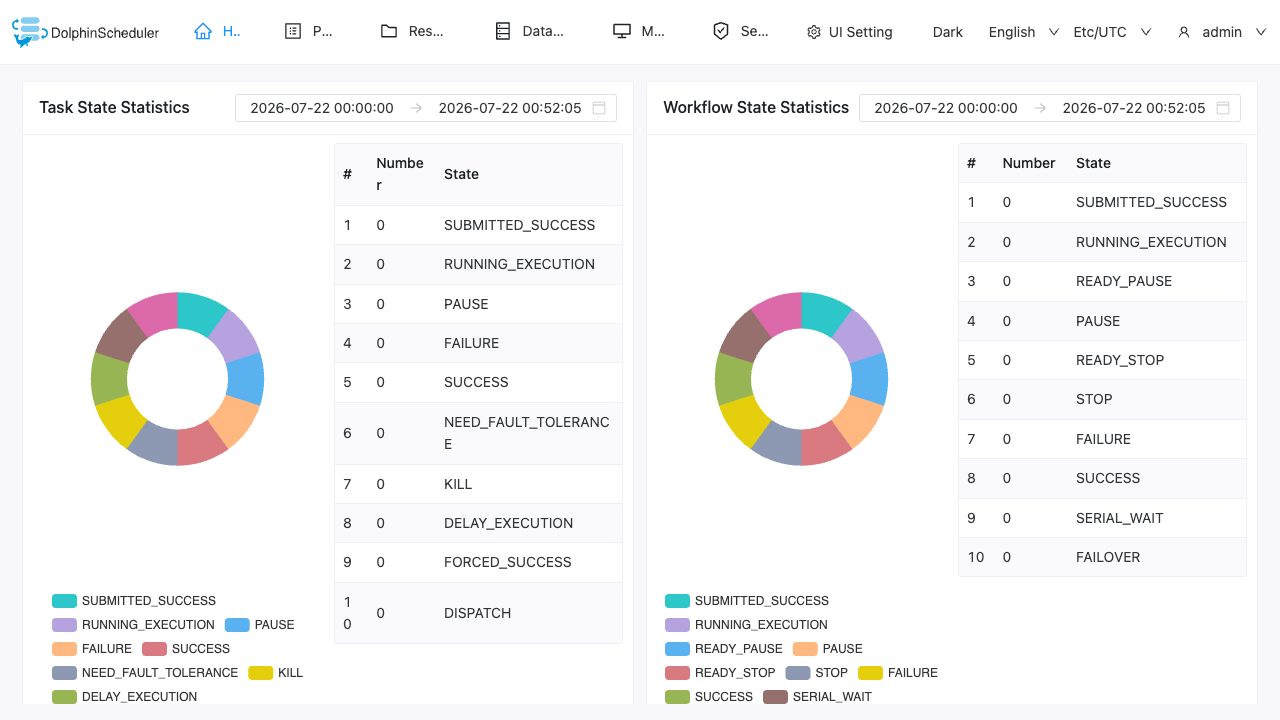
Enter the administrator username admin and the administrator password from /root/apache-dolphinscheduler-credentials.txt, then select Login. On the first successful sign in DolphinScheduler shows the home dashboard with task state and workflow state statistics.
Step 5: Create a Project
Workflows in DolphinScheduler live inside projects. Open the Project menu in the top navigation, then Project List, and select Create Project. Give the project a name and an optional description and save it. The new project appears in the list with its owner, workflow definition count and timestamps.
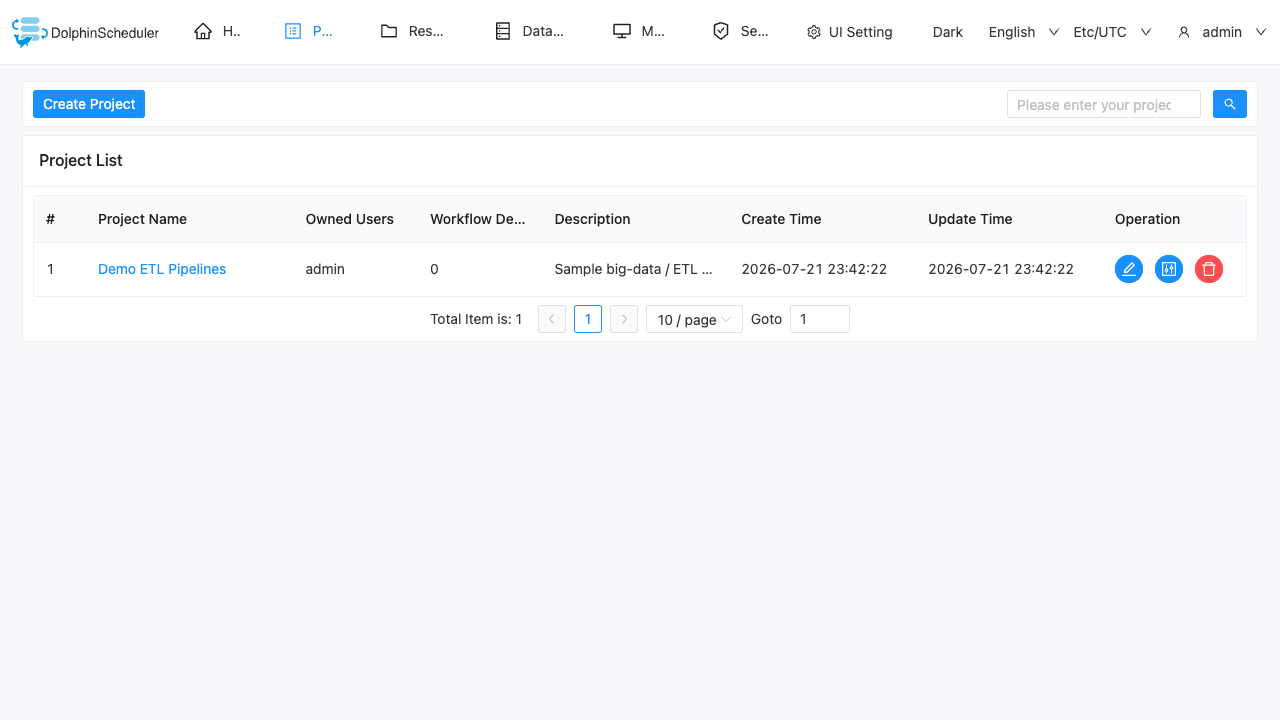
Click the project name to open it. Inside a project you manage workflow definitions, workflow instances, workflow timings and task instances from the left navigation.
Step 6: Author a Workflow Definition
Inside your project, open Workflow then Workflow Definition and select Create Workflow. The visual canvas opens with a palette of task types down the left, including SHELL, SQL, PYTHON, SPARK, FLINK, HTTP and more.
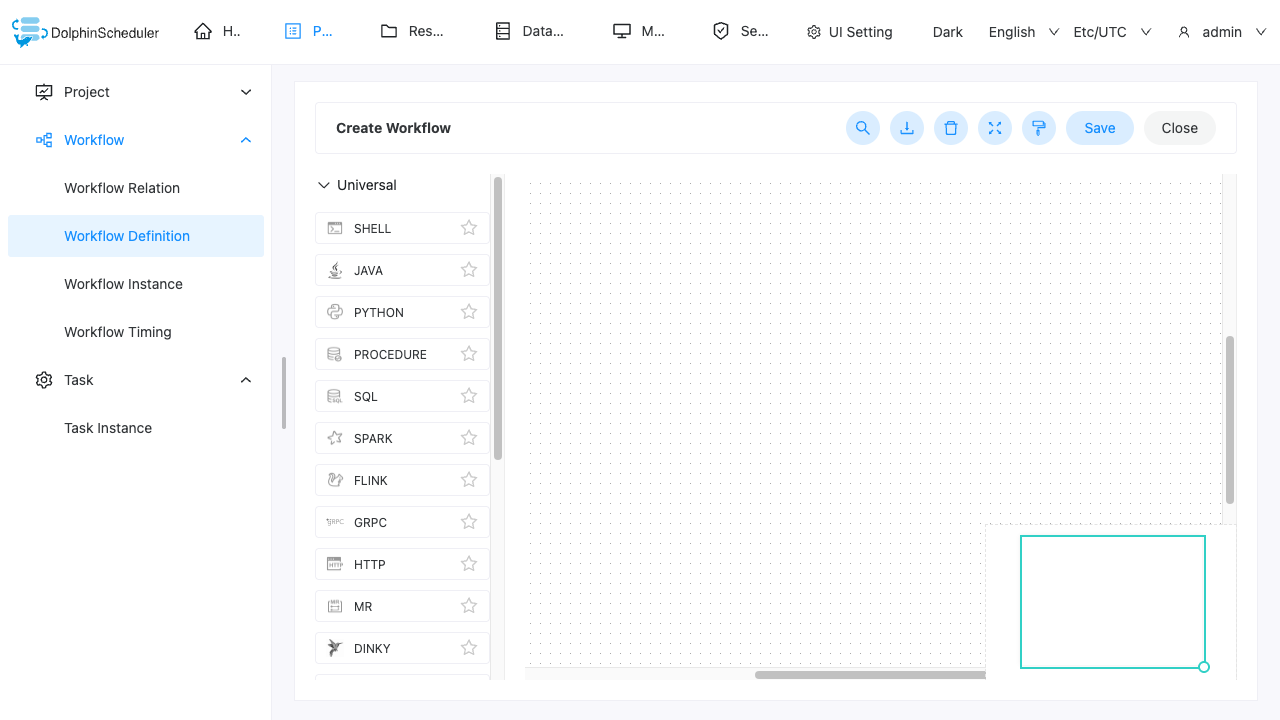
Drag a SHELL task onto the canvas, give it a name, and enter a simple command such as echo "hello from DolphinScheduler" in the script field. Save the task, then save the workflow with a name. To run it, set the workflow online using the release control, then select Run from the workflow definition list. Watch its progress under Workflow Instance and drill into Task Instance to read the task log and confirm the shell command executed.
Step 7: Monitor the Services
The Monitor menu shows the health of every bundled component. Under Service Manage the Master and Worker pages report a Normal status with a recent heartbeat time, together with CPU, memory, disk and thread pool gauges. The Alert Server and DB pages report on the alerting service and the metadata database.
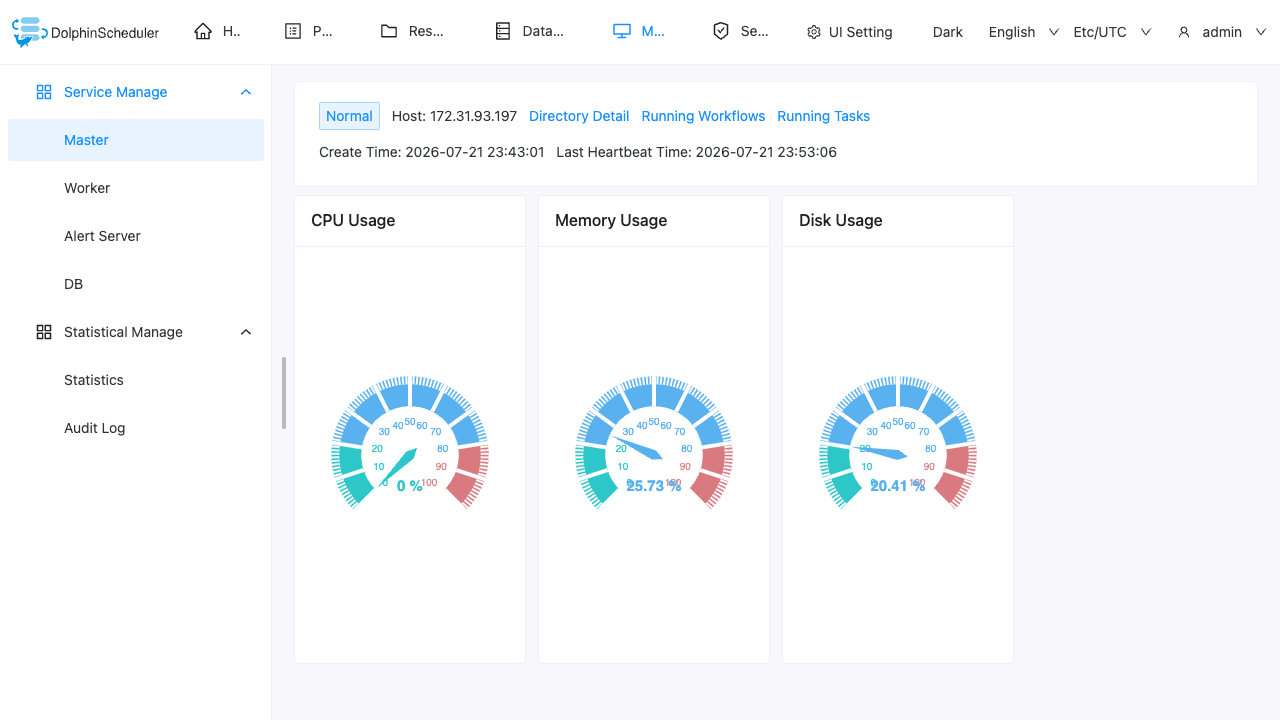
You can confirm the same health from the command line at any time:
sudo systemctl status dolphinscheduler.service nginx.service --no-pager
Both units report active (running). The standalone server registers its master and worker into the embedded registry, which is what the Monitor pages read.
Step 8: Server Components
The deployed image contains the following components:
| Component | Purpose |
|---|---|
| Apache DolphinScheduler 3.4.2 | Distributed visual workflow and DAG scheduler (standalone server) |
| Master service | Schedules workflows and dispatches tasks to workers |
| Worker service | Executes task instances |
| API server | Serves the web interface and the REST API |
| Alert server | Delivers workflow and task alerts |
| Embedded H2 database | Metadata store on the dedicated data volume |
| Java 17 runtime | The JVM the standalone server runs on |
| nginx | Reverse proxy on port 80 in front of the loopback listener, with an unauthenticated health endpoint |
The DolphinScheduler process runs under a dedicated unprivileged dolphinscheduler system user. The standalone server binds to 127.0.0.1:12345 and is reached only through nginx.
Step 9: Filesystem Layout
| Path | Purpose |
|---|---|
/opt/dolphinscheduler/ |
Application home: the standalone server distribution and its configuration |
/opt/dolphinscheduler/standalone-server/conf/ |
application.yaml and common.properties for the standalone server |
/var/lib/dolphinscheduler/ |
Data volume: the H2 metadata database, the workflow repository and execution logs |
/var/lib/dolphinscheduler/h2/ |
The embedded H2 database file |
/var/lib/dolphinscheduler/work/ |
The task working and resource upload directory |
/etc/systemd/system/dolphinscheduler.service |
systemd unit for the standalone server |
/root/apache-dolphinscheduler-credentials.txt |
Per instance administrator password, generated on first boot, root only |
The image lays the scheduler state on a dedicated EBS volume mounted at /var/lib/dolphinscheduler, so it can be resized or snapshotted independently of the operating system disk.
Step 10: Managing the Service
The standalone server and nginx are started by systemd at boot. Manage them as follows:
sudo systemctl status dolphinscheduler.service nginx.service --no-pager
To restart the standalone server, for example after editing application.yaml:
sudo systemctl restart dolphinscheduler.service
To follow the live logs of the standalone server:
sudo journalctl -u dolphinscheduler.service -n 50 --no-pager
The JVM takes a short time to become healthy after a restart. Poll the actuator health endpoint until it reports UP before signing in again.
Step 11: Using the REST API
The DolphinScheduler REST API is served under the same /dolphinscheduler path as the web interface. Authenticate by posting the administrator credentials to the login endpoint, which returns a session cookie and a token, then call the API with that session. The following block signs in and reads the actuator health through the API path:
PW=$(sudo grep '^DOLPHINSCHEDULER_ADMIN_PASSWORD=' /root/apache-dolphinscheduler-credentials.txt | cut -d= -f2-)
curl -s -c /tmp/ds_cookies http://127.0.0.1/dolphinscheduler/login \
  --data-urlencode 'userName=admin' \
  --data-urlencode "userPassword=${PW}" | head -c 200
echo ""
curl -s http://127.0.0.1/dolphinscheduler/actuator/health
The login response contains "code":0 together with a sessionId and token, and the health call reports every component UP. The full REST API reference is published in the Apache DolphinScheduler documentation at https://dolphinscheduler.apache.org/.
Step 12: Change the Administrator Password
The per instance administrator password generated on first boot is strong and unique, but you may wish to set your own. Sign in to the web interface, open the admin menu in the top right corner, choose User Information, and update the password there. Alternatively create additional named users under Security so team members do not share the administrator account, and assign each an appropriate tenant and role.
Step 13: Enable HTTPS with a Reverse Proxy
nginx already fronts DolphinScheduler on plain HTTP on port 80. For any deployment beyond a trusted management network, terminate TLS at nginx so session cookies and tokens cannot be intercepted:
sudo apt-get update && sudo apt-get install -y certbot python3-certbot-nginx
sudo certbot --nginx -d dolphinscheduler.your-domain.example \
  --non-interactive --agree-tos -m you@your-domain.example --redirect
certbot edits the existing nginx server block to add the certificate and an HTTP to HTTPS redirect. After enabling TLS, restrict the instance security group so port 80 and port 443 are reachable only from your network or an upstream load balancer.
Step 14: Backups and Maintenance
DolphinScheduler keeps its state on the data volume at /var/lib/dolphinscheduler, so a backup of that directory captures the metadata database, the workflow repository and run history together. Stop the service briefly for a consistent copy of the H2 file, or take an EBS snapshot of the data volume for point in time recovery:
sudo systemctl stop dolphinscheduler.service
sudo tar -czf /var/backups/dolphinscheduler-$(date +%F).tgz -C /var/lib dolphinscheduler
sudo systemctl start dolphinscheduler.service
Ship the archive to an Amazon S3 bucket or another object store. Because the scheduler state is on its own EBS volume, aws ec2 create-snapshot against that volume is the simplest point in time backup.
For kernel and package updates, Ubuntu's unattended-upgrades applies security patches automatically. To move to a newer DolphinScheduler release, follow the upstream upgrade notes; because the metadata lives on the data volume, a new image can be attached to the same data volume to preserve history.
Step 15: Scaling Beyond a Single Instance
The standalone server is ideal for a single node deployment. For larger, highly available deployments, move to the DolphinScheduler cluster mode:
- Replace the embedded H2 database with an external Amazon RDS for MySQL or PostgreSQL metadata database
- Run ZooKeeper (or another supported registry) so multiple masters and workers can coordinate
- Run the master, worker, API and alert services as separate processes across a fleet of instances
- Put the API servers behind an Application Load Balancer for high availability of the web interface and REST API
Each of these is documented in the official Apache DolphinScheduler documentation at https://dolphinscheduler.apache.org/ under the deployment and cluster sections.
Support
cloudimg provides 24/7/365 expert technical support for this image. Guaranteed response within 24 hours, one hour average for critical issues. Contact support@cloudimg.co.uk.
For general Apache DolphinScheduler questions consult the community resources and the documentation at https://dolphinscheduler.apache.org/.