Apache Druid on Ubuntu 24.04 on Azure User Guide
Overview
Apache Druid is the open-source real-time analytics database built for fast slice-and-dice queries on event and time-series data at scale. It powers sub-second OLAP queries over streaming and batch ingestion through a column-oriented store, a built-in indexing service and a rich web console. This cloudimg image installs Apache Druid 37.0.0 on OpenJDK 17 as a single-server deployment, brings up the full coordinator, overlord, broker, historical, middle-manager and router stack under systemd, fronts the no-auth web console with an nginx reverse proxy and HTTP basic auth on port 80, persists all segments and metadata on a dedicated Azure data disk, and generates a unique console login on the first boot of every VM. Backed by 24/7 cloudimg support.
What is included:
- Apache Druid 37.0.0 running on OpenJDK 17, installed at
/opt/druid - A complete single-server deployment via
bin/start-druid(auto memory-sizing) with the bundledmicro-quickstartprofile — embedded Apache ZooKeeper, an embedded Derby metadata store and local-disk deep storage - The Druid web console served behind an nginx reverse proxy with HTTP basic auth on port 80 (every Druid service binds loopback
127.0.0.1) - A per-VM console password for user
admin, generated at first boot and stored in a root-only file - A dedicated Azure data disk at
/var/lib/druidholding deep-storage segments, the Derby metadata store, ZooKeeper data and indexing task logs — separate from the OS disk and re-provisioned with every VM druid.service+nginx.serviceas systemd units, enabled and active- 24/7 cloudimg support
Prerequisites
An active Azure subscription, an SSH key pair, and a VNet + subnet in the target region. Standard_B4ms (4 vCPU / 16 GiB RAM) is the recommended minimum — Druid runs several JVM services on one VM and needs the memory; scale up for heavier ingestion and query loads. NSG inbound: allow 22/tcp from your management network and 80/tcp from the networks that need the Druid console (front the proxy with TLS for public exposure — see Enabling a trusted certificate).
Step 1 — Deploy from the Azure Marketplace
Sign in to the Azure Portal, choose Create a resource, search the Marketplace for Apache Druid by cloudimg, and select Create. On Basics pick your subscription, resource group, region and size (Standard_B4ms or larger); under Administrator account choose SSH public key and paste your key; under Inbound port rules allow SSH (22) and HTTP (80). Review the dedicated data disk on the Disks tab, then Review + create then Create.
Step 2 — Deploy from the Azure CLI
az vm create \
  --resource-group <your-rg> \
  --name druid \
  --image <marketplace-image-urn> \
  --size Standard_B4ms \
  --admin-username azureuser \
  --ssh-key-values ~/.ssh/id_ed25519.pub \
  --vnet-name <your-vnet> --subnet <your-subnet> \
  --public-ip-sku Standard

az vm open-port --resource-group <your-rg> --name druid --port 80 --priority 1010
Step 3 — Connect to your VM
ssh azureuser@<vm-public-ip>
Step 4 — Confirm the services are running
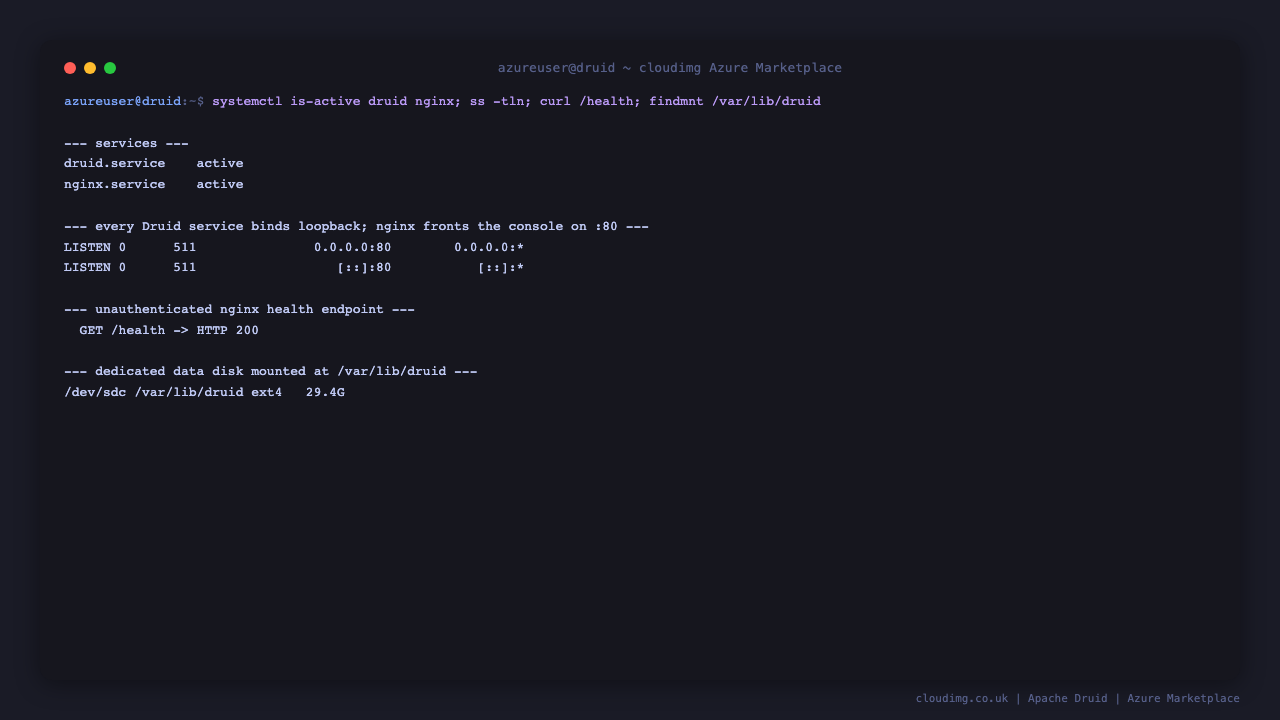
Druid runs several JVM services and takes one to three minutes to fully start on first boot. Once it is up, both systemd units report active, the unauthenticated nginx health endpoint answers 200, and Druid's own health endpoint answers 200:
systemctl is-active druid.service nginx.service
curl -s -o /dev/null -w 'nginx health: %{http_code}\n' http://127.0.0.1/health
Both services report active, and GET /health returns 200.
Step 5 — Retrieve your console login
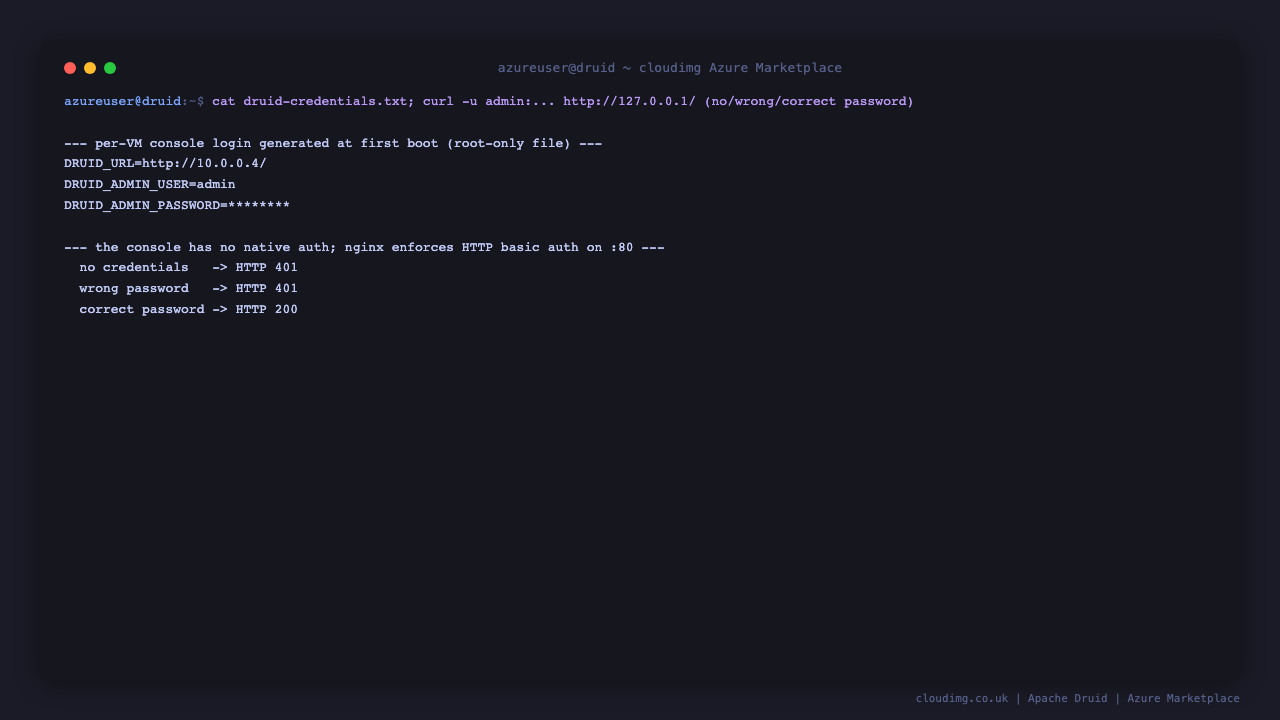
The console username is admin; the password is generated uniquely on the first boot of your VM and written to a root-only file:
sudo cat /root/druid-credentials.txt
The username is admin; the password is the DRUID_ADMIN_PASSWORD value, and DRUID_URL is the address to open in your browser.
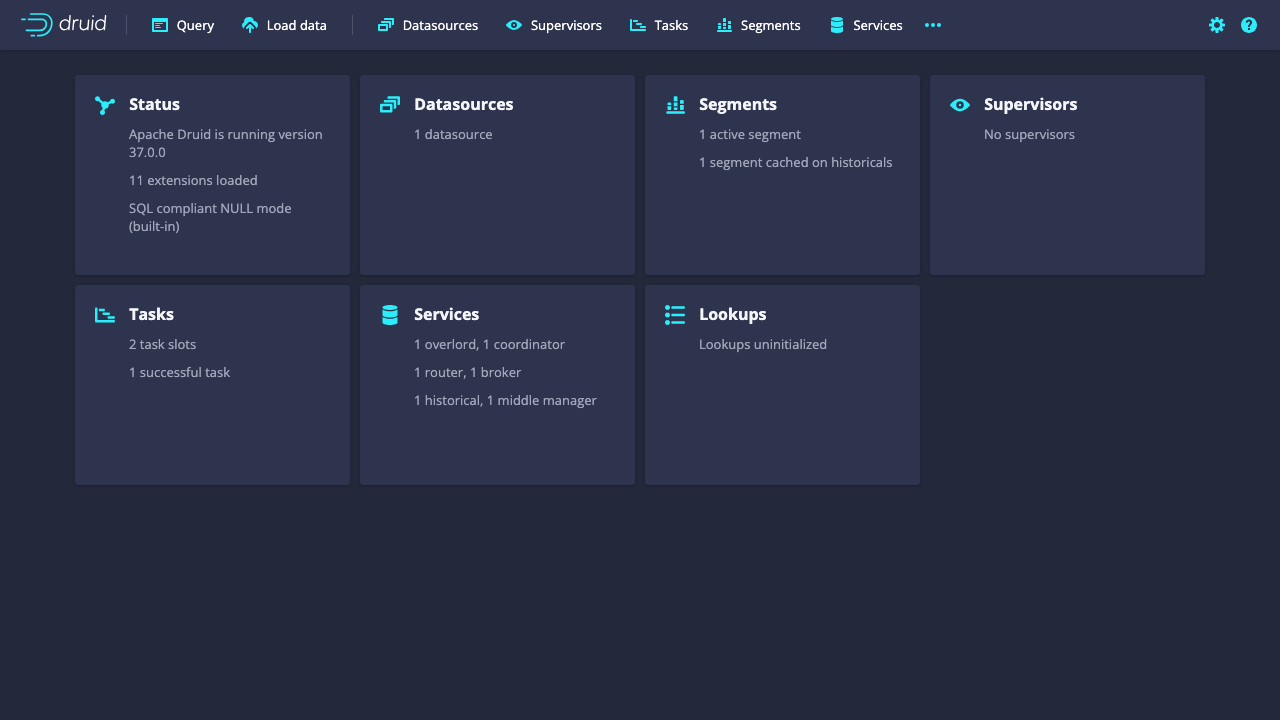
Step 6 — Sign in to the Druid web console
Browse to http://<vm-public-ip>/ and sign in with admin and the password from Step 5 when the browser prompts for HTTP basic authentication. Once authenticated you land on the Druid unified console, where you can run SQL queries, manage ingestion, browse datasources and inspect the services.
You can confirm authentication from the shell. The console has no native authentication, so nginx enforces it: a request with no credentials and a request with the wrong password are both rejected with 401, while the per-VM password is accepted:
PASS=$(sudo grep '^DRUID_ADMIN_PASSWORD=' /root/druid-credentials.txt | cut -d= -f2-)
echo "no credentials -> $(curl -s -o /dev/null -w '%{http_code}' http://127.0.0.1/)"
echo "wrong password -> $(curl -s -o /dev/null -w '%{http_code}' -u 'admin:wrong' http://127.0.0.1/)"
echo "correct password -> $(curl -sL -o /dev/null -w '%{http_code}' -u "admin:$PASS" http://127.0.0.1/)"
The first two print 401 and the correct password prints 200.
Step 7 — Query the Druid status and cluster APIs
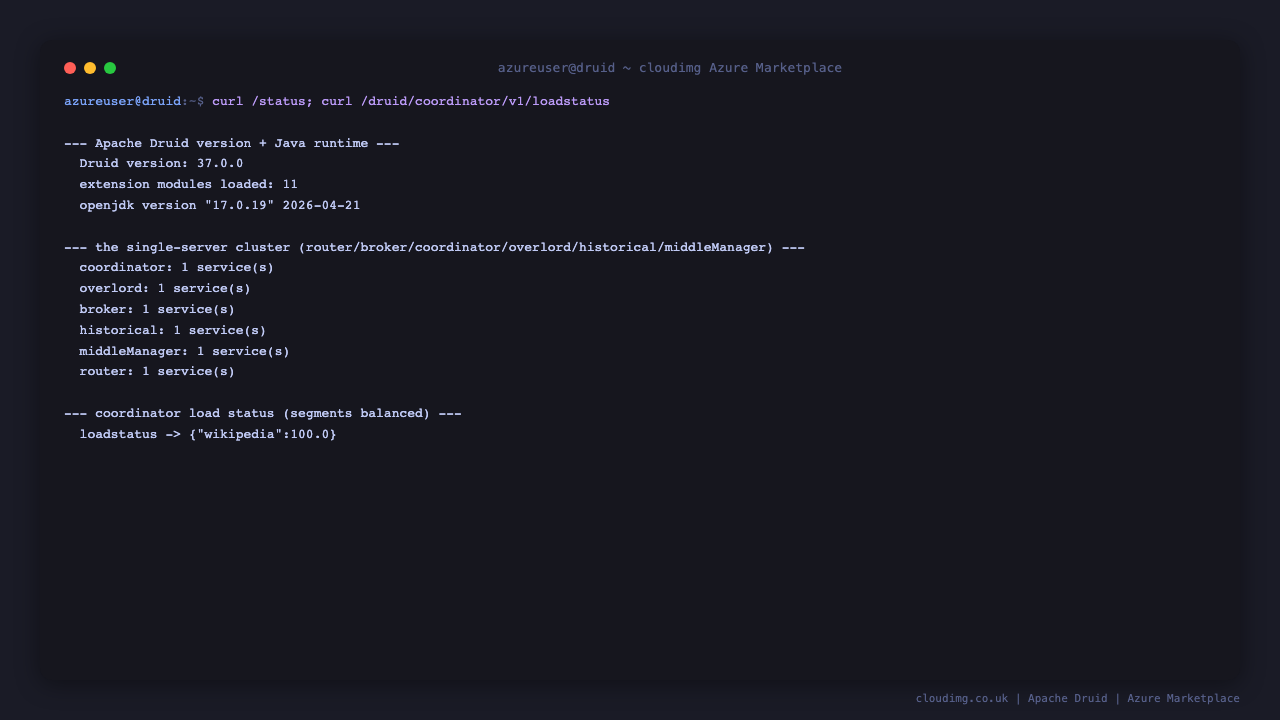
Druid exposes a rich REST API through the same authenticated proxy. Read the build version and the live cluster topology:
PASS=$(sudo grep '^DRUID_ADMIN_PASSWORD=' /root/druid-credentials.txt | cut -d= -f2-)
curl -s -u "admin:$PASS" http://127.0.0.1/status | python3 -c 'import sys,json; d=json.load(sys.stdin); print("Druid version:", d["version"]); print("modules loaded:", len(d["modules"]))'
curl -s -u "admin:$PASS" http://127.0.0.1/druid/coordinator/v1/loadstatus
The status endpoint reports Druid version: 37.0.0 with its loaded extension modules, and the coordinator loadstatus returns a JSON object ({} on a fresh cluster with no segments yet to load).
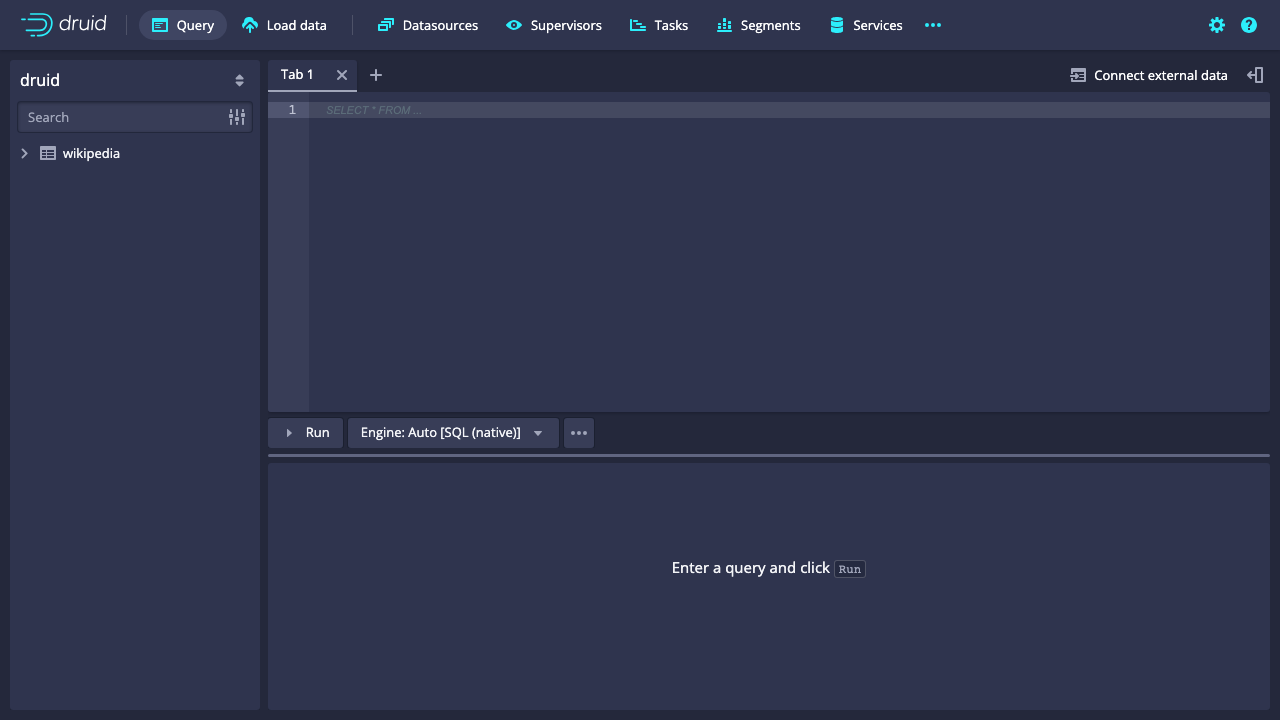
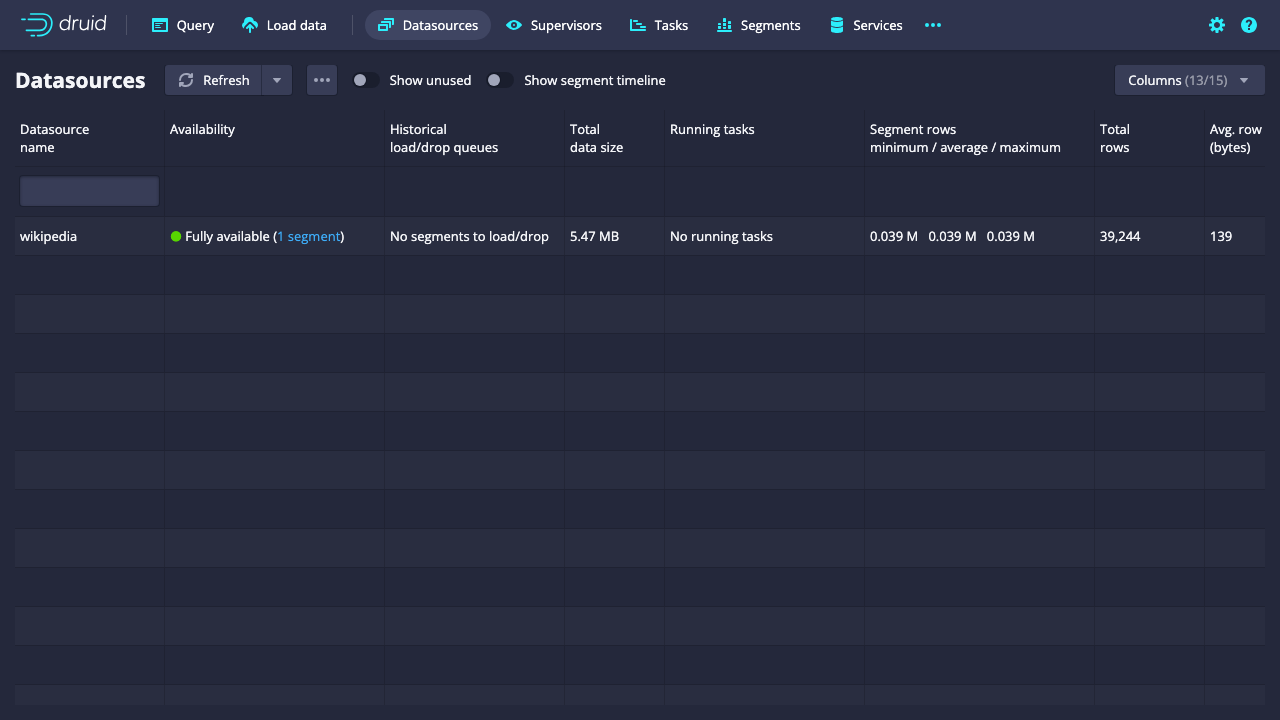
Step 8 — Ingest your first data
From the console choose Load data then Start a new spec, and select a sample input (for example the bundled Wikipedia edits example) or point Druid at your own batch file or streaming source. Walk through parse, transform, partition and tune, then Submit the ingestion spec. Once the task completes, the new datasource appears under Datasources and is immediately queryable from the Query view with Druid SQL.
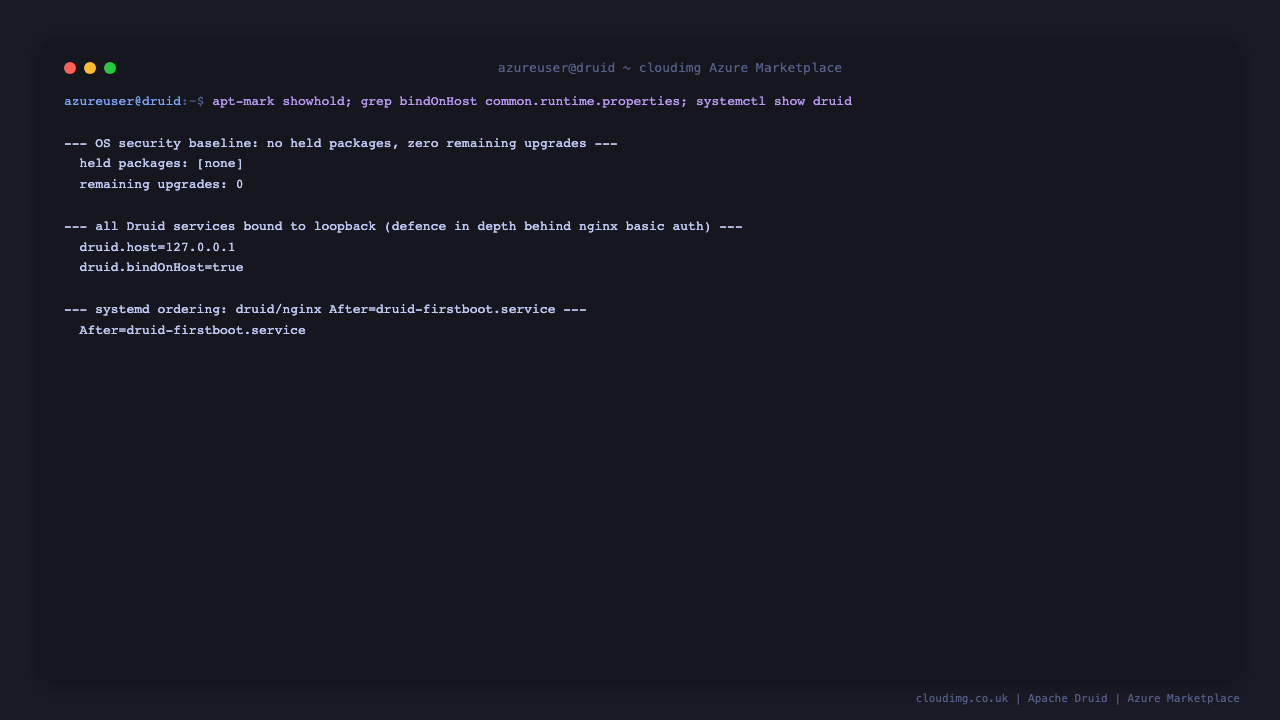
Step 9 — Confirm persistence on the data disk
All of Druid's persistent state lives on the dedicated Azure data disk at /var/lib/druid, so your segments, metadata, ZooKeeper data and task logs survive reboots and ride into any image you capture:
findmnt /var/lib/druid
ls /var/lib/druid/var
findmnt shows /var/lib/druid mounted from the data disk, and var holds the druid (deep storage and the Derby metadata store), zk (ZooKeeper data), sv (supervised service state) and tmp subdirectories.
Enabling a trusted certificate
The image serves the console over plain HTTP behind nginx basic auth. For production, terminate TLS at the nginx proxy with a real domain pointed at the VM's public IP. Install certbot and request a certificate (replace the domain), which configures nginx to serve HTTPS on port 443:
sudo apt-get update && sudo apt-get install -y certbot python3-certbot-nginx
sudo certbot --nginx -d your-domain.example.com
After certbot completes, the Druid console is reachable at https://your-domain.example.com/ with a browser-trusted certificate; the basic-auth prompt is unchanged.
Backup and maintenance
Your Druid segments, metadata, ZooKeeper data and task logs live on the data disk at /var/lib/druid; snapshot that disk to back up your cluster state and ingested data. The Druid binaries and single-server configuration are at /opt/druid/current. Keep the OS patched with sudo apt update && sudo apt upgrade. The service restarts cleanly with sudo systemctl restart druid — allow one to three minutes for the cluster to come back up. To change the console password, regenerate the nginx basic-auth entry with sudo htpasswd -B /etc/nginx/druid.htpasswd admin and reload nginx. The image already applies all available Ubuntu security updates at build time.
Support
This image is backed by 24/7 cloudimg support. Contact us by email and chat for help with ingestion specs, datasources, Druid SQL, scaling out to a clustered deployment and TLS.
All product and company names are trademarks or registered trademarks of their respective holders. Use of them does not imply any affiliation with or endorsement by them.