Apache Flink 2 on Ubuntu 24.04 on Azure User Guide
Overview
Apache Flink is the leading open-source stream-processing engine for stateful computations over unbounded and bounded data streams — exactly-once semantics, low-latency event-time processing, ANSI SQL via the Flink SQL Gateway, and a full Web Dashboard for cluster and job management. The cloudimg image installs Apache Flink 2.2.0 (Scala 2.12 binaries) from the official Apache CDN with SHA-512 verification, alongside OpenJDK 17. The Web Dashboard binds to loopback only and is published through an nginx reverse proxy on TCP 80 with HTTP basic authentication. The cloudimg operator password is generated uniquely per VM at first boot.
What is included:
- Apache Flink 2.2.0 (Scala 2.12) at
/opt/flink(symlinked to/opt/flink-2.2.0) - OpenJDK 17 JRE headless from Ubuntu 24.04 noble main
- Single-VM standalone cluster:
flink-jobmanager.service+flink-taskmanager.service - nginx reverse proxy on
:80with HTTP basic auth (/etc/nginx/flink.htpasswd) - Web Dashboard bound to
127.0.0.1:8081(loopback only) - Per-VM
cloudimgpassword rotated at first boot, written to/stage/scripts/flink-credentials.log - Job submission and cancellation enabled behind the auth wall
- 24/7 cloudimg support
Prerequisites
Active Azure subscription, SSH key, VNet + subnet. Standard_B2s (4 GB RAM) is suitable for dev, test, single-tenant production streaming, and proof-of-concept workloads. For larger throughput, switch to D4s/D8s and tune taskmanager.memory.process.size in /opt/flink/conf/config.yaml. NSG inbound: allow 22/tcp from your management CIDR and 80/tcp from any client CIDR that needs the Web Dashboard.
Step 1-3: Deploy + SSH (standard pattern)
ssh azureuser@<vm-ip>
Step 4: Service Status + Version
sudo systemctl is-active flink-jobmanager.service flink-taskmanager.service nginx.service
/opt/flink/bin/flink --version
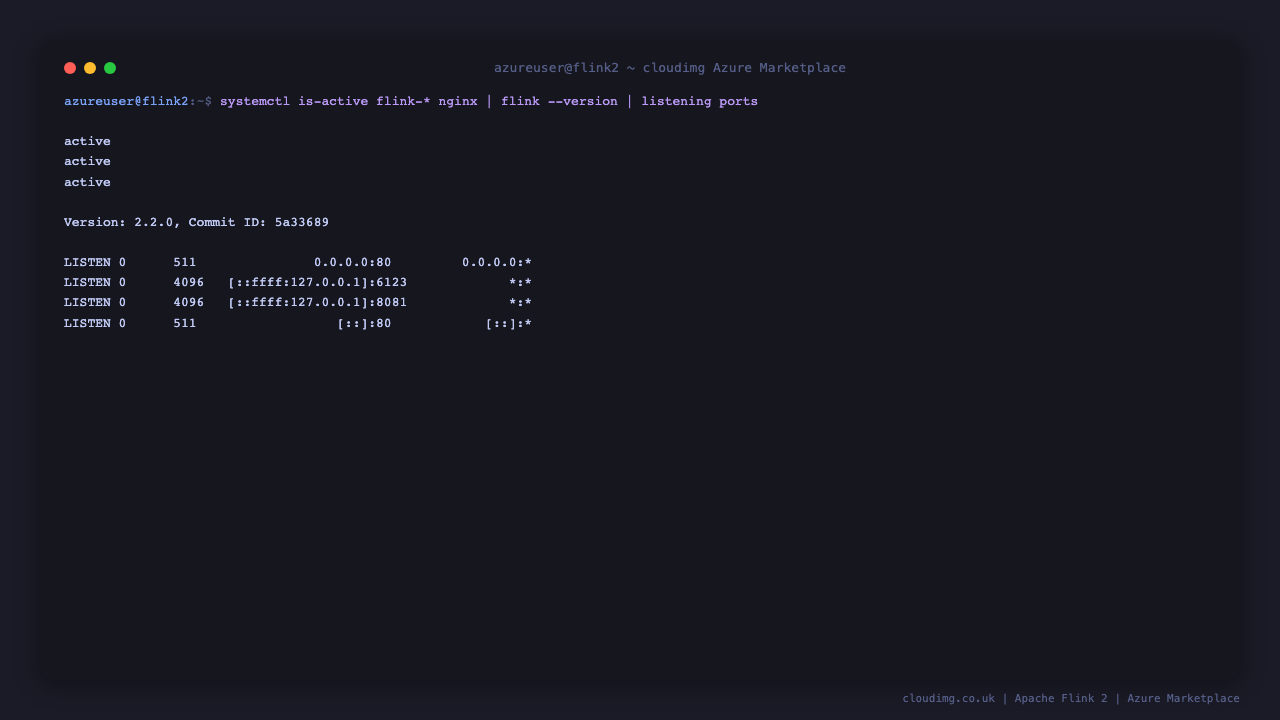
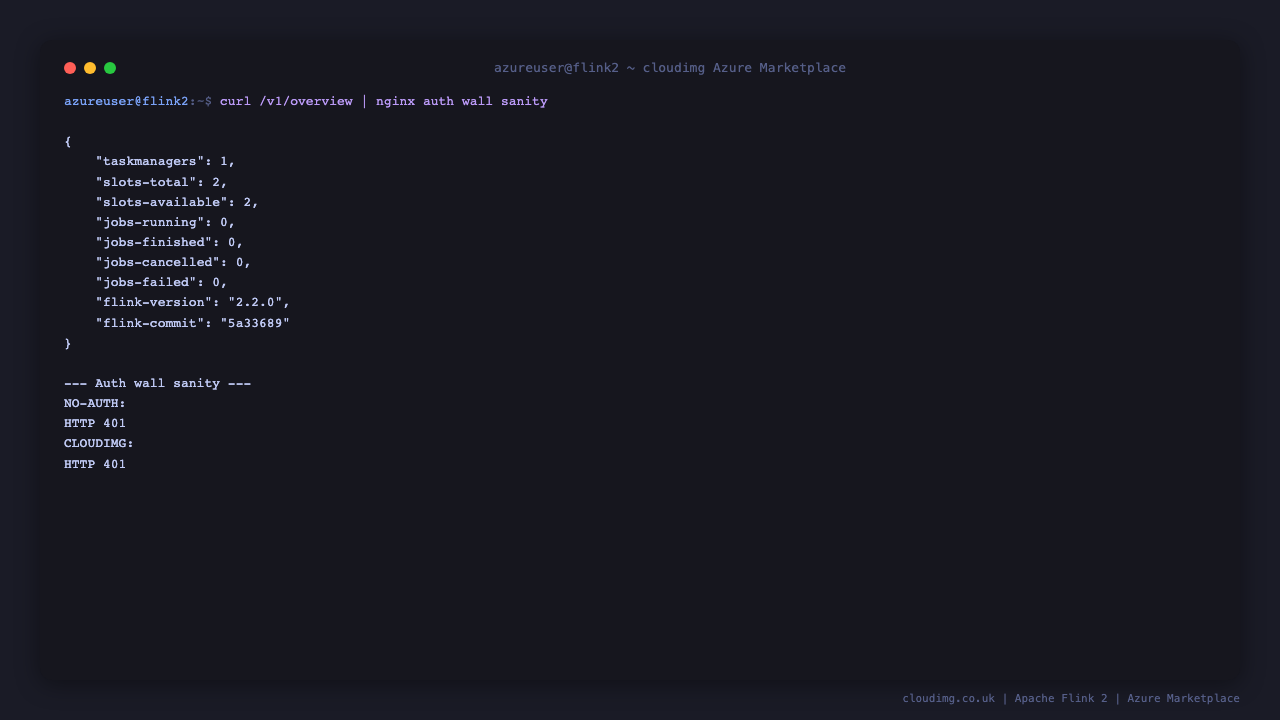
Step 5: REST API Health
curl -sf http://127.0.0.1:8081/v1/overview | head -c 400
The cluster overview returns flink-version, the count of registered TaskManagers, total task slots, and counters for running, finished, cancelled, and failed jobs.
Step 6: Read Per-VM Credentials
sudo cat /stage/scripts/flink-credentials.log
Pick up FLINK_WEB_URL, FLINK_WEB_USER, and FLINK_WEB_PASSWORD. The password is a fresh 32-character hex string generated at first boot — no two VMs share credentials.
Step 7: Web Dashboard — Cluster Overview
Browse to http://<vm-ip>/ and authenticate as cloudimg with the password from Step 6. The Cluster Overview tile shows the current task slot occupancy, the number of running jobs, and quick links to Jobs, Task Managers, Job Manager, and Submit New Job.

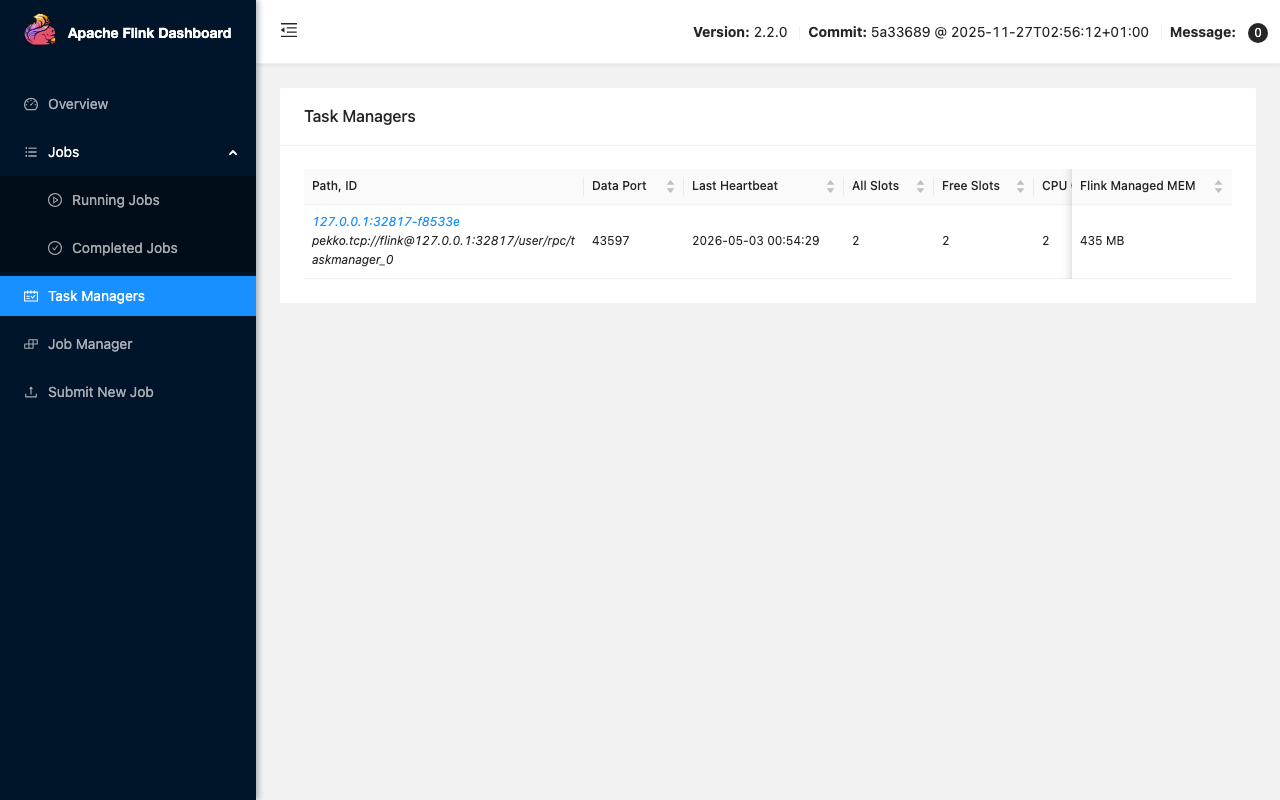
Step 8: Task Managers
The Task Managers page lists every registered TaskManager with its data port, JVM heap, network buffers, and last heartbeat. On the cloudimg image you start with one TaskManager exposing two slots; scale horizontally by adding more flink-taskmanager instances on additional VMs and pointing them at this JobManager.
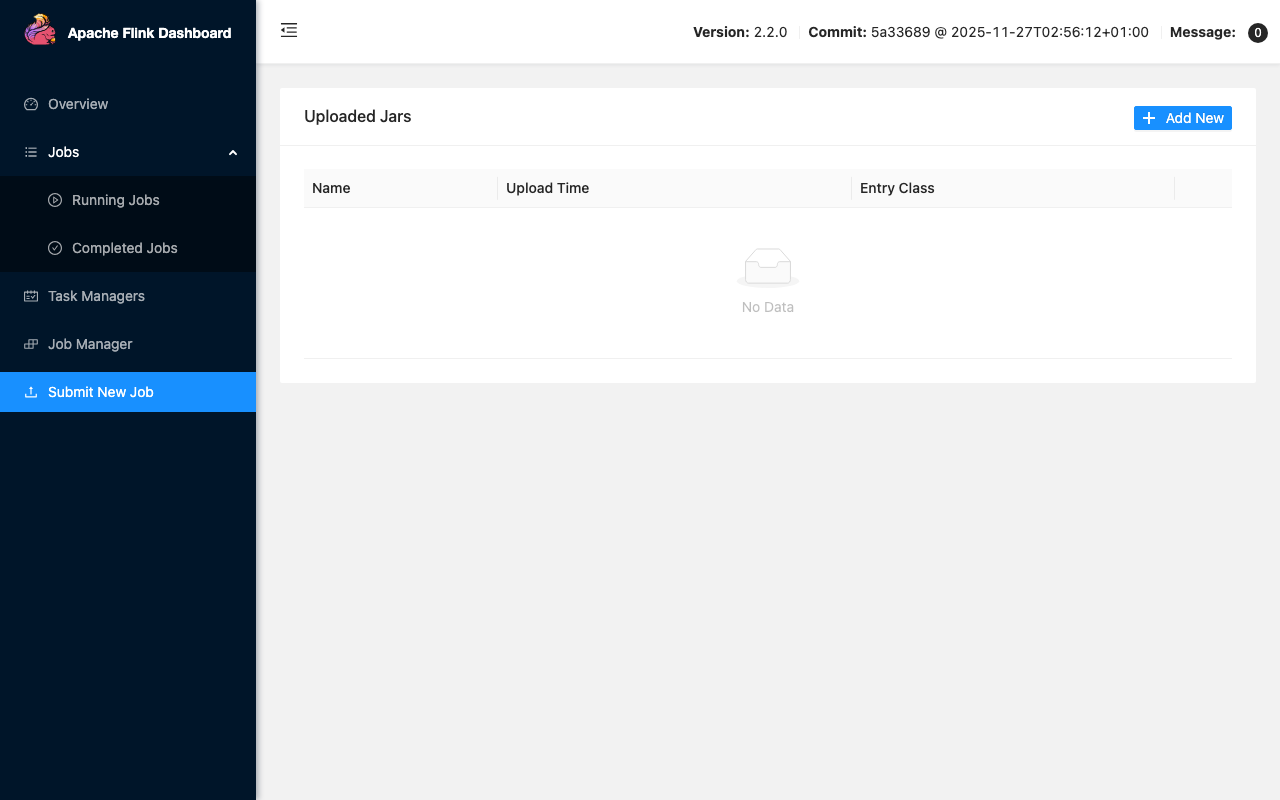
Step 9: Submit New Job
Click Submit New Job to upload a JAR (flink run-equivalent) directly through the Web Dashboard. Drag a JAR file in, supply the entry class and any program arguments, set parallelism, and click Submit. Job submission is enabled behind the auth wall (web.submit.enable: true) so any operator with the basic-auth credential can deploy jobs.
Step 10: Submit a Sample Job from the CLI
The Flink CLI ships at /opt/flink/bin/flink. The bundled WordCount example is a quick smoke test:
sudo -u flink /opt/flink/bin/flink run /opt/flink/examples/streaming/WordCount.jar
The job runs to completion against an embedded sample text stream and prints word counts. Re-open the Web Dashboard's Completed Jobs list to see the run.
Step 11: Tune Memory and Parallelism
Edit /opt/flink/conf/config.yaml and restart the services:
sudo systemctl restart flink-jobmanager.service flink-taskmanager.service
Defaults on Standard_B2s:
jobmanager.memory.process.size:1024mtaskmanager.memory.process.size:1536mtaskmanager.numberOfTaskSlots:2parallelism.default:1
For production, raise the TaskManager process size and slot count to match your VM SKU (e.g., 6 slots and 6144m on a D4s_v5).
Step 12: Rotate the Web Dashboard Password
Replace <new-password> with your chosen password. htpasswd -bB writes a bcrypt hash non-interactively:
sudo htpasswd -bB /etc/nginx/flink.htpasswd cloudimg <new-password>
sudo systemctl reload nginx
Update FLINK_WEB_PASSWORD in /stage/scripts/flink-credentials.log if you keep that file as an operator reference.
Step 13: Add a Second Operator
Replace <new-password> with the operator's chosen password:
sudo htpasswd -bB /etc/nginx/flink.htpasswd alice <new-password>
sudo systemctl reload nginx
Each operator authenticates with their own basic-auth credential against the same nginx vhost.
Step 14: SQL Gateway (optional)
The SQL Gateway is bundled but not started by default. Launch it on demand for ANSI SQL streaming:
sudo -u flink /opt/flink/bin/sql-gateway.sh start
The gateway listens on localhost:8083. Front it with an additional nginx location /sql/ block (auth-walled the same way) if you need network exposure.
Step 15: Backups
Flink savepoints (durable snapshots of running job state) live under /var/lib/flink/savepoints. The example below picks the first running job ID from the REST API and triggers a savepoint, or prints a friendly message when nothing is running:
JOB_ID=$(curl -sf -m 5 http://127.0.0.1:8081/v1/jobs/overview | grep -oE '"jid":"[^"]+"' | head -1 | cut -d\" -f4)
if [ -n "$JOB_ID" ]; then sudo -u flink /opt/flink/bin/flink savepoint "$JOB_ID"; else echo "no running jobs to snapshot"; fi
Periodically copy the savepoints directory to Azure Blob Storage (az storage blob upload-batch) for off-VM retention.
Step 16: Logs and Troubleshooting
sudo journalctl -u flink-jobmanager.service --no-pager -n 100
sudo journalctl -u flink-taskmanager.service --no-pager -n 100
sudo journalctl -u nginx.service --no-pager -n 50
sudo ls -1 /var/log/flink/ 2>/dev/null || sudo ls -1 /opt/flink/log/ 2>/dev/null
JobManager and TaskManager log files also land under /opt/flink/log/. The nginx access log is at /var/log/nginx/access.log and the error log at /var/log/nginx/error.log.
Security
- Web Dashboard binds to
127.0.0.1:8081only — direct port access from the internet is impossible - nginx auth wall on
:80enforces HTTP basic authentication /etc/nginx/flink.htpasswdis0640 root:www-dataand bcrypt-hashed- Per-VM credentials at first boot — no shared secrets between deployments
- Restrict NSG inbound on
:80to the IP ranges that need the Web Dashboard - Terminate TLS at an upstream load balancer (Azure Application Gateway, Front Door) for production HTTPS
Support
cloudimg provides 24/7/365 expert technical support. Guaranteed response within 24 hours, one hour average for critical issues. Contact support@cloudimg.co.uk.