Apache Guacamole on Ubuntu 24.04 on Azure User Guide
Overview
Apache Guacamole is a clientless HTML5 remote-desktop gateway. It lets you reach RDP, VNC and SSH machines from a web browser with nothing to install on the client. The cloudimg image installs Guacamole 1.6.0 as a Java web application (guacamole.war) under Tomcat 9, runs the native guacd proxy daemon that speaks the remote-desktop protocols, stores users and connection definitions in PostgreSQL on a dedicated Azure data disk, and fronts everything with an nginx reverse proxy on TCP 80. A unique administrator password is generated on the first boot of every VM. Backed by 24/7 cloudimg support.
What is included:
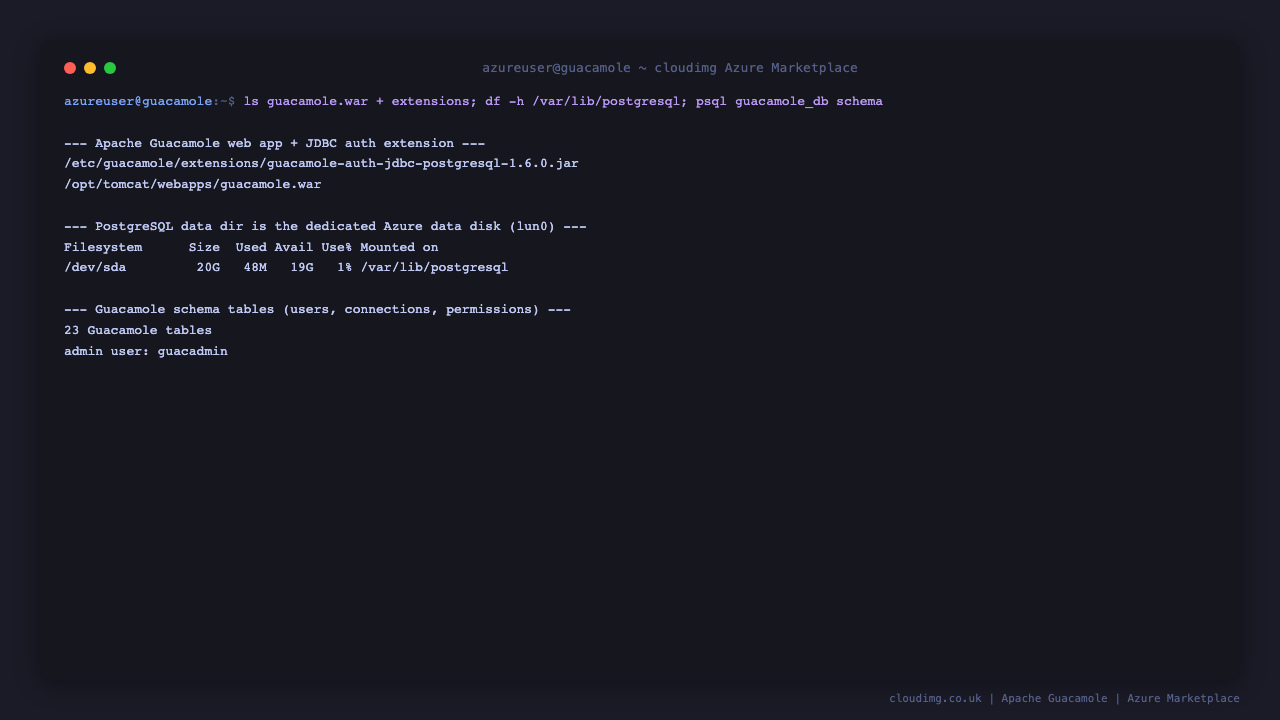
- Apache Guacamole 1.6.0 web application (
guacamole.war) under Tomcat 9 - The native
guacdproxy daemon with the RDP, VNC and SSH protocol clients - PostgreSQL authentication and connection storage via the JDBC auth extension
- A dedicated Azure data disk at
/var/lib/postgresqlholding all users and connections — separate from the OS disk and re-provisioned with every VM - nginx reverse proxy on
:80with the WebSocket headers the Guacamole tunnel requires - Per-VM
guacadminpassword generated at first boot, in a root-only file guacd.service,tomcat9.service,postgresql.serviceandnginx.serviceas systemd units, enabled and active- 24/7 cloudimg support
Prerequisites
An active Azure subscription, an SSH key pair, and a VNet + subnet in the target region. Standard_B2ms (2 vCPU / 8 GiB RAM) is a good starting point — Tomcat's JVM, PostgreSQL and guacd run together. NSG inbound: allow 22/tcp from your management network and 80/tcp from the users who connect to the gateway (front port 80 with TLS for public exposure — see Enabling HTTPS).
Step 1 — Deploy from the Azure Marketplace
Sign in to the Azure Portal, choose Create a resource, search the Marketplace for Apache Guacamole by cloudimg, and select Create. On Basics pick your subscription, resource group, region and size; under Administrator account choose SSH public key and paste your key; under Inbound port rules allow SSH (22) and HTTP (80). Review the dedicated data disk on the Disks tab, then Review + create → Create.
Step 2 — Deploy from the Azure CLI
az vm create \
  --resource-group <your-rg> \
  --name guacamole \
  --image <marketplace-image-urn> \
  --size Standard_B2ms \
  --admin-username azureuser \
  --ssh-key-values ~/.ssh/id_ed25519.pub \
  --vnet-name <your-vnet> --subnet <your-subnet> \
  --public-ip-sku Standard

az vm open-port --resource-group <your-rg> --name guacamole --port 80 --priority 1010
Step 3 — Connect to your VM
ssh azureuser@<vm-public-ip>
Step 4 — Confirm the services are running
systemctl is-active guacd.service tomcat9.service postgresql.service nginx.service
All four services report active.

Step 5 — Confirm the web gateway answers
curl -s -o /dev/null -w 'guacamole web UI -> HTTP %{http_code}\n' http://127.0.0.1/
The nginx reverse proxy fronts the Tomcat web application and returns HTTP 200 (the login page).
Step 6 — Retrieve your admin password
The administrator password is generated uniquely on the first boot of your VM and written to a root-only file:
sudo grep -E '^GUACAMOLE_' /root/guacamole-credentials.txt
GUACAMOLE_ADMIN_USER is guacadmin and GUACAMOLE_ADMIN_PASSWORD is the password.
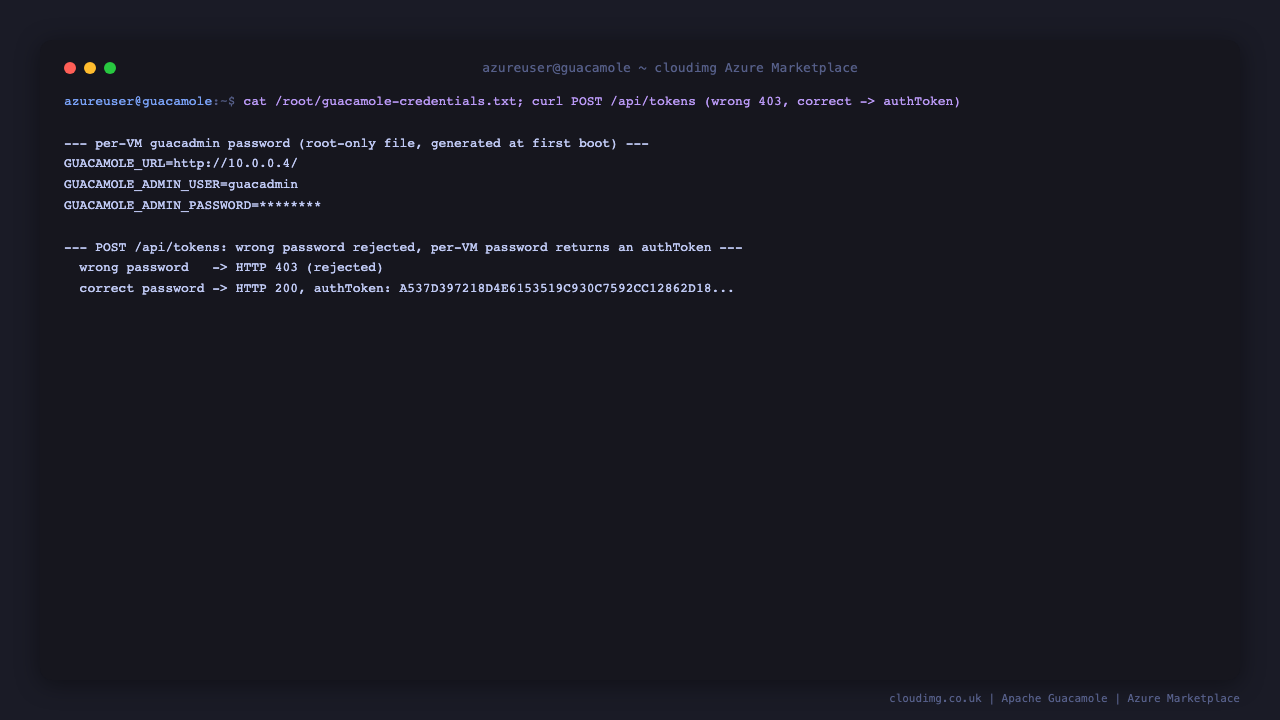
Step 7 — Verify the login REST API
Guacamole issues an auth token from POST /api/tokens. The following reads the per-VM password and proves a wrong password is rejected while the real one returns a token:
PW=$(sudo grep '^GUACAMOLE_ADMIN_PASSWORD=' /root/guacamole-credentials.txt | cut -d= -f2-)
echo "wrong password  -> HTTP $(curl -s -o /dev/null -w '%{http_code}' --data-urlencode 'username=guacadmin' --data-urlencode 'password=wrong' http://127.0.0.1/api/tokens)"
curl -s --data-urlencode 'username=guacadmin' --data-urlencode "password=$PW" http://127.0.0.1/api/tokens | head -c 80; echo
The wrong password returns HTTP 403; the correct one returns a JSON document containing an authToken.
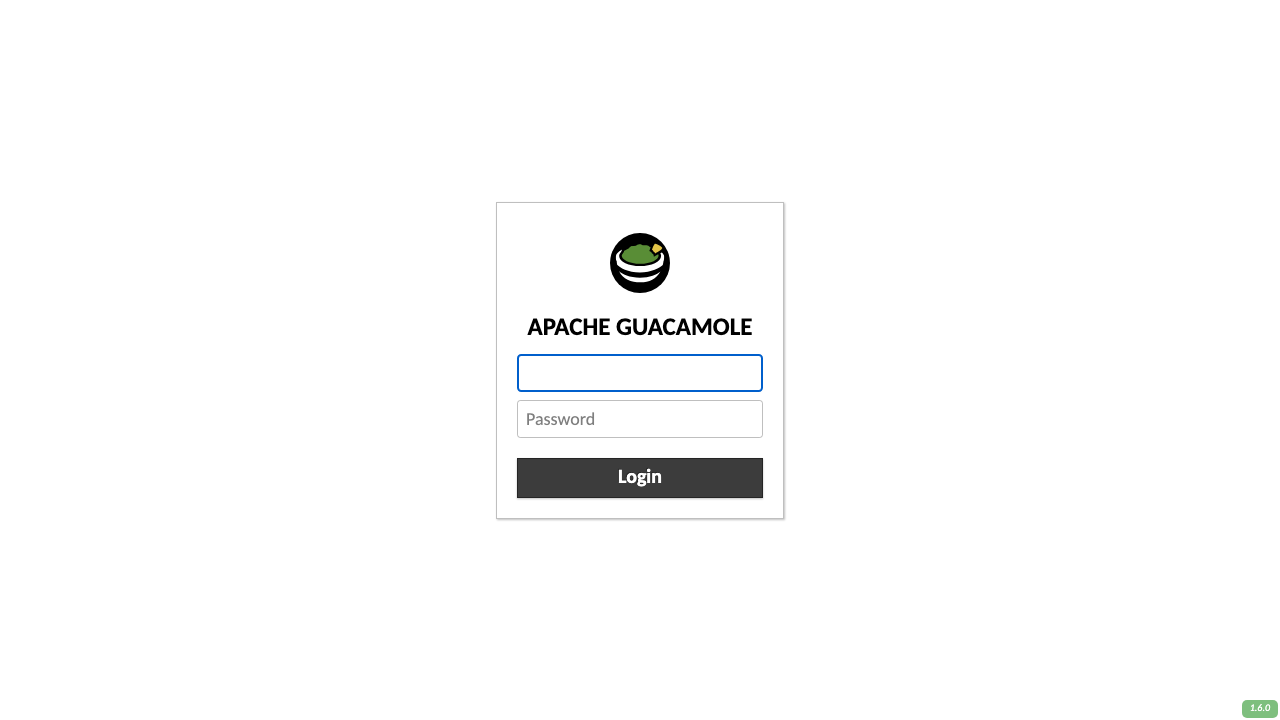
Step 8 — Sign in to the web UI
Open http://<vm-public-ip>/ in a browser and sign in as guacadmin with the password from Step 6.
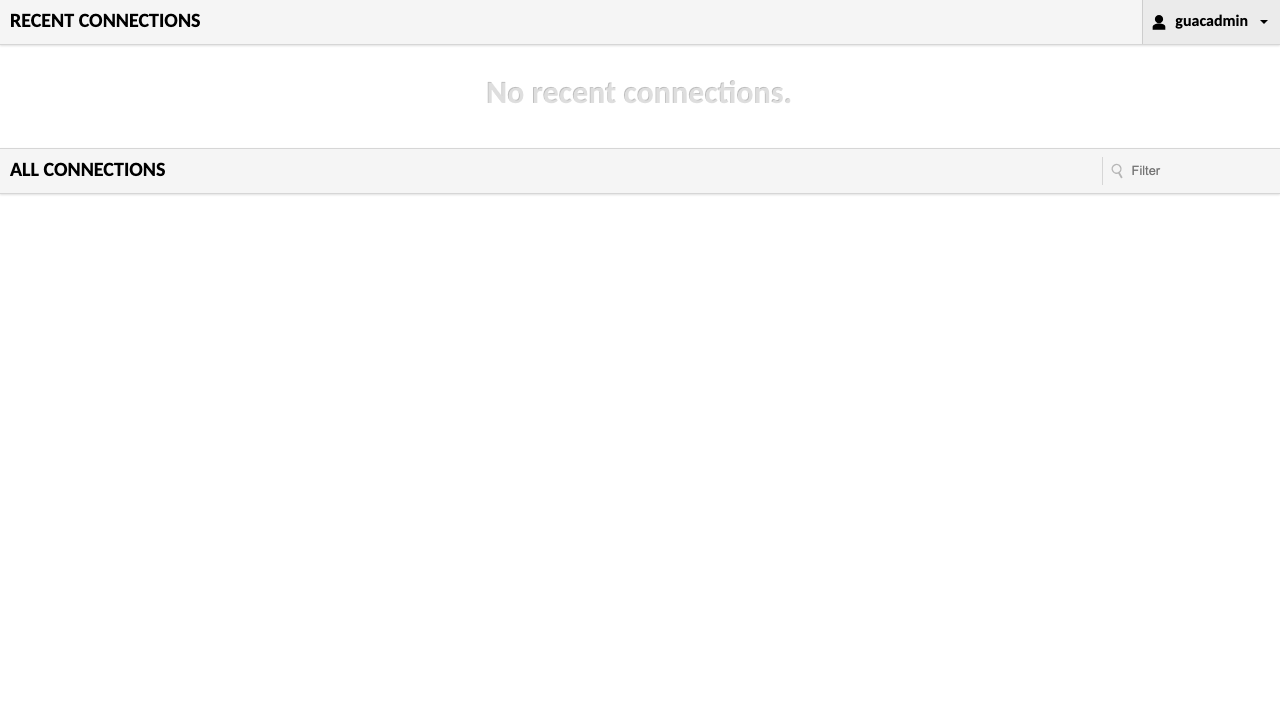
After signing in you land on the home screen, which lists your recent and available connections.
Step 9 — Add a remote-desktop connection
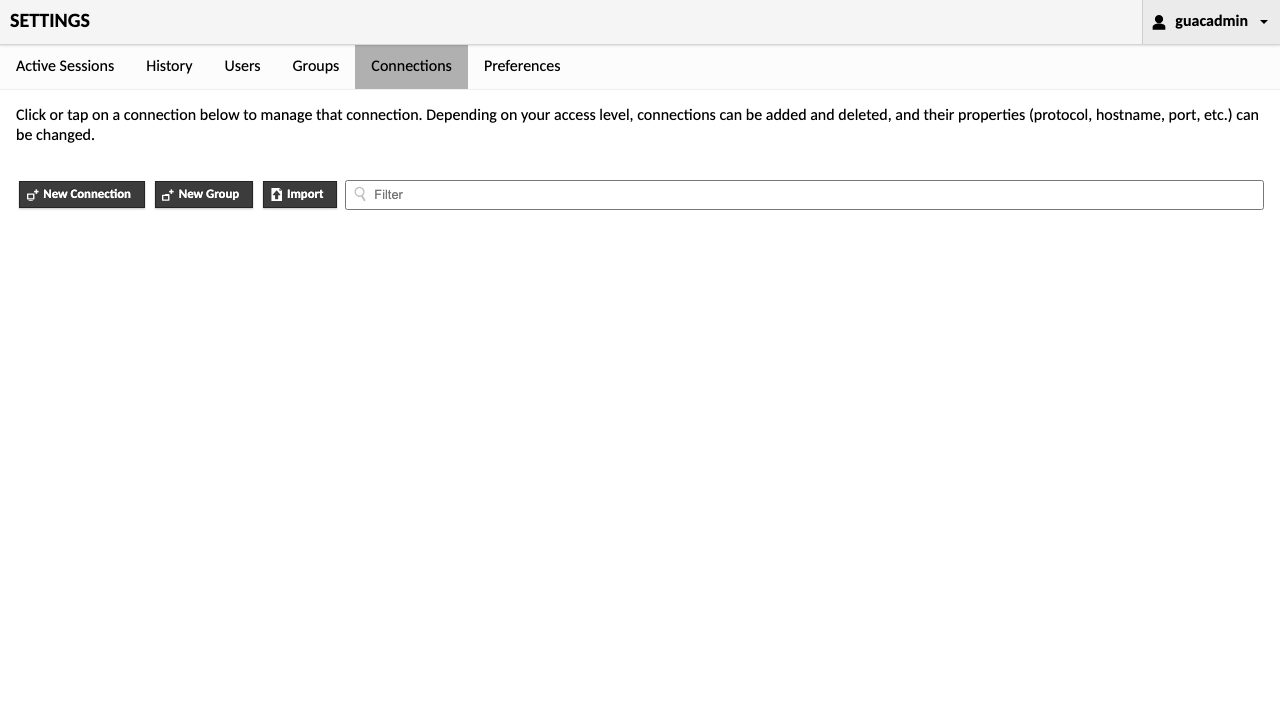
Open the user menu (top right) → Settings → Connections → New Connection. Choose the protocol (RDP, VNC or SSH), give it a name, fill in the target host, port and credentials, then Save. The connection appears on the home screen for any authorised user to launch in their browser.
Confirm the Guacamole version
ls /opt/tomcat/webapps/guacamole.war && echo "Apache Guacamole 1.6.0 deployed"
Enabling HTTPS
For production, terminate TLS at nginx with a real domain pointed at the VM's public IP. Install certbot and request a certificate (replace the domain):
sudo apt-get update && sudo apt-get install -y certbot python3-certbot-nginx
sudo certbot --nginx -d your-domain.example.com
Backup and maintenance
All Guacamole data — users, connection definitions and permissions — lives in PostgreSQL on the dedicated data disk at /var/lib/postgresql. Snapshot that disk in Azure to back up your configuration, and keep the OS patched with sudo apt update && sudo apt upgrade. The gateway restarts cleanly with sudo systemctl restart guacd tomcat9 nginx.
Support
This image is backed by 24/7 cloudimg support. Contact us by email and chat for help with RDP/VNC/SSH connection setup, user and permission management, scaling, TLS and backups.
All product and company names are trademarks or registered trademarks of their respective holders. Use of them does not imply any affiliation with or endorsement by them.