Apache Jena Fuseki on Ubuntu 24.04 on Azure User Guide
Overview
Apache Jena Fuseki is the SPARQL server from the Apache Jena project — a standards-compliant RDF triple store that serves the SPARQL 1.1 Query and Update protocols and the SPARQL Graph Store HTTP Protocol over an embedded Jetty web server, with a bundled browser UI for running queries, loading data, and managing datasets. The cloudimg image installs Fuseki 5.6.0 from the Apache archive with SHA-512 verification, alongside OpenJDK 17. A TDB2 persistent dataset named /ds is pre-configured and its database files live on a dedicated Azure data disk mounted at /var/lib/fuseki, so your RDF data survives reboots and is independently resizable. An nginx reverse proxy fronts Fuseki on port 80; the admin UI and dataset-management endpoints are protected by Apache Shiro with a per-VM admin password that is generated and written to a root-only file at first boot.
What is included:
- Apache Jena Fuseki 5.6.0 at
/opt/fuseki(FUSEKI_HOME), bundled SPARQL UI - OpenJDK 17 JRE headless from Ubuntu 24.04 noble main
- A TDB2 persistent dataset
/ds, database files on a dedicated 30 GiB Azure data disk mounted at/var/lib/fuseki(FUSEKI_BASE) fuseki.servicerunning as the unprivilegedfusekiservice user, bound to127.0.0.1:3030- An nginx reverse proxy on port 80 with an unauthenticated
/healthendpoint - Apache Shiro admin auth (
shiro.ini); the/$/pingserver-liveness endpoint stays anonymous - A per-VM admin password generated at first boot, plain copy in
/root/fuseki-credentials.txt(mode 0600) - 24/7 cloudimg support
Prerequisites
Active Azure subscription, SSH key, VNet + subnet. Standard_B2ms (8 GB RAM, 1024m heap default) is suitable for dev, test, and single-tenant production graphs. For larger graphs raise the VM size and tune JVM_ARGS in /etc/fuseki.env. NSG inbound: allow 22/tcp from your management CIDR and 80/tcp from any client CIDR that needs the Fuseki UI or SPARQL endpoints. Fuseki serves plain HTTP on port 80 — front it with TLS (for example an Azure Application Gateway, Front Door, or a reverse proxy with a certificate) and your own domain before production.
Step 1-3: Deploy + SSH (standard pattern)
Deploy the VM from the Azure Marketplace offer, then connect over SSH as azureuser:
ssh azureuser@<vm-ip>
Step 4: Service Status + Health
Confirm the services are active and the unauthenticated health and ping endpoints respond:
sudo systemctl is-active fuseki.service nginx.service
curl -s -o /dev/null -w 'health: HTTP %{http_code}\n' http://127.0.0.1/health
printf 'ping:   '; curl -s 'http://127.0.0.1/$/ping'; echo
fuseki.service and nginx.service report active, /health returns HTTP 200 (the nginx-served liveness check), and /$/ping returns a timestamp (Fuseki's own anonymous liveness endpoint).

Step 5: Read the Per-VM Admin Credentials
The admin password is unique to this VM and is written to a root-only file at first boot:
sudo cat /root/fuseki-credentials.txt
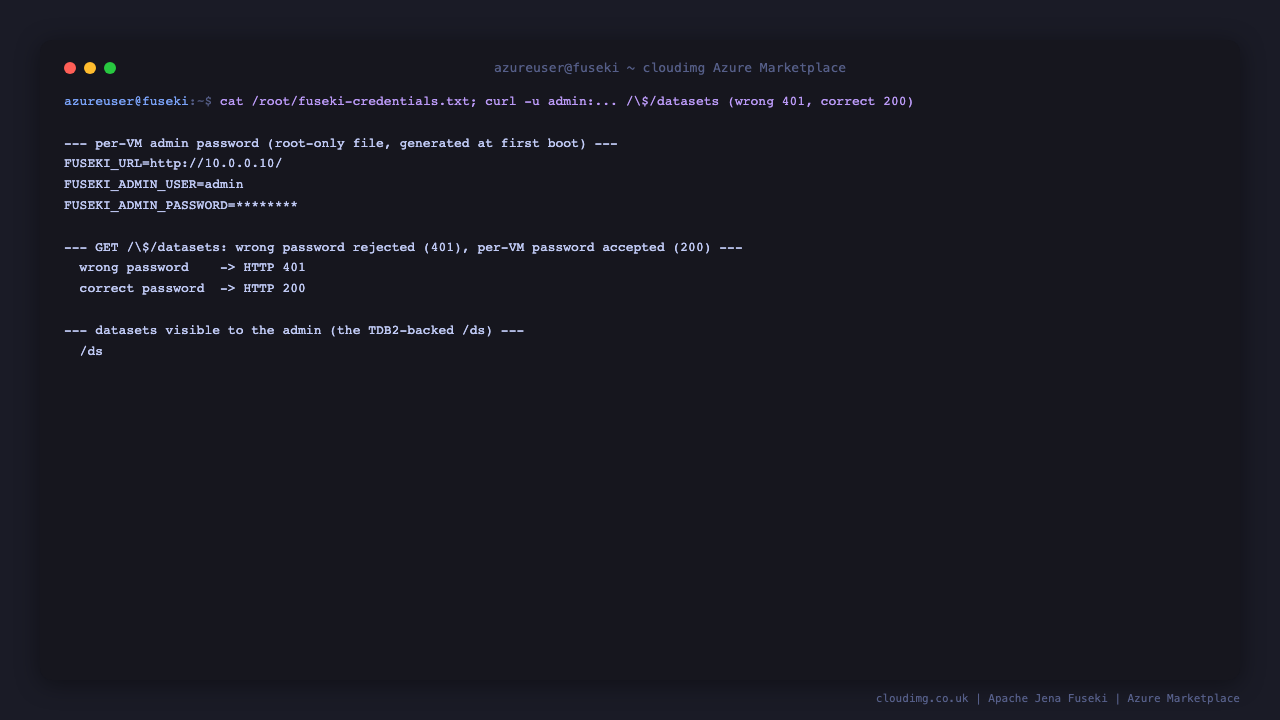
This prints FUSEKI_ADMIN_USER (admin), FUSEKI_ADMIN_PASSWORD (the per-VM password), and the FUSEKI_URL. Keep this password safe — it unlocks the admin UI and dataset management.
Step 6: Admin Auth Round-Trip
The server-management endpoints under /$/ are protected by Apache Shiro. Read the password into a shell variable first, then prove the auth wall. Run these from your SSH session (replace <FUSEKI_ADMIN_PASSWORD> with the value from Step 5 if you copy a single line):
- Without auth or with a wrong password, the datasets endpoint is rejected:
curl -s -o /dev/null -w '%{http_code}\n' -u admin:wrong 'http://127.0.0.1/$/datasets'returns401. - With the per-VM password it returns the datasets JSON:
curl -s -u admin:<FUSEKI_ADMIN_PASSWORD> 'http://127.0.0.1/$/datasets'returns200and lists the TDB2-backed/dsdataset.
Step 7: Version, Data Disk, and a SPARQL Round-Trip
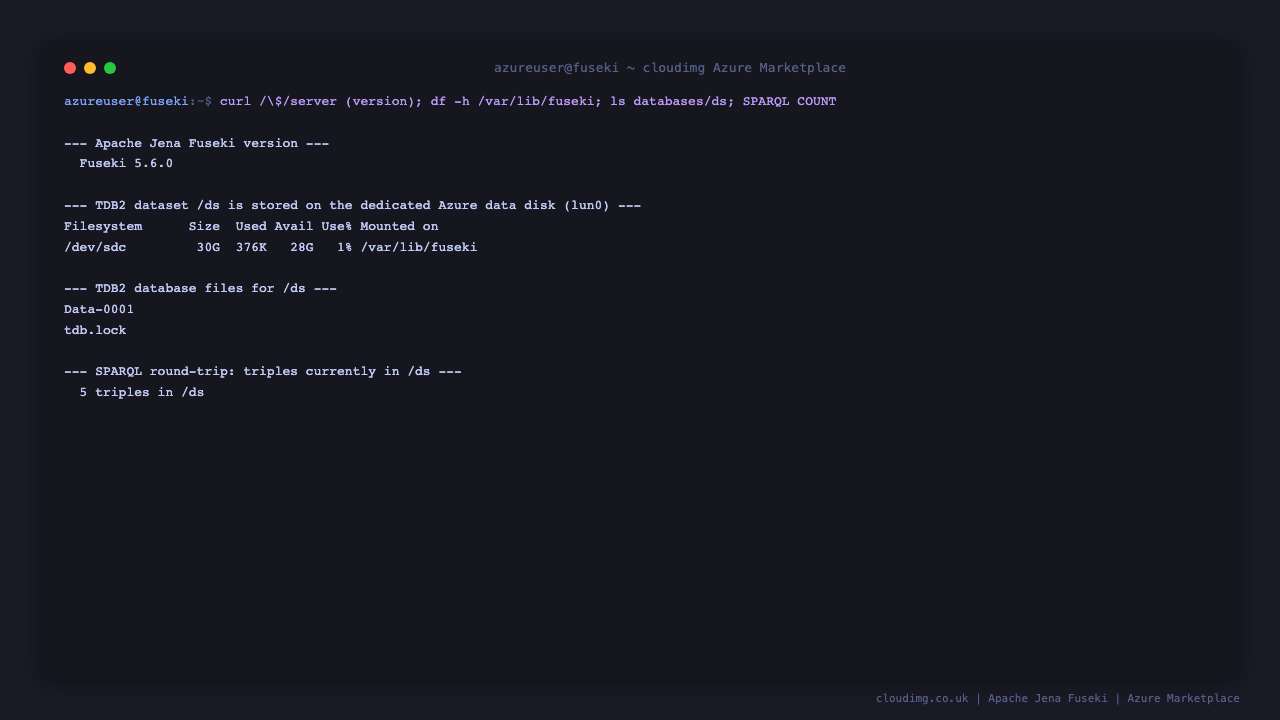
Confirm the Fuseki version, that the /ds TDB2 dataset lives on the dedicated Azure data disk, and run an anonymous SPARQL SELECT that counts the triples in /ds:
df -h /var/lib/fuseki | awk 'NR==1 || /fuseki/'
sudo ls -1 /var/lib/fuseki/databases/ds/ | head
curl -s -G 'http://127.0.0.1/ds/query' \
  --data-urlencode 'query=SELECT (COUNT(*) AS ?n) WHERE { ?s ?p ?o }' \
  -H 'Accept: application/sparql-results+json'
The data disk is mounted at /var/lib/fuseki, the TDB2 database files (Data-0001, tdb.lock) back the /ds dataset, and the SPARQL query returns the current triple count.
Step 8: Fuseki UI — Dashboard and Datasets
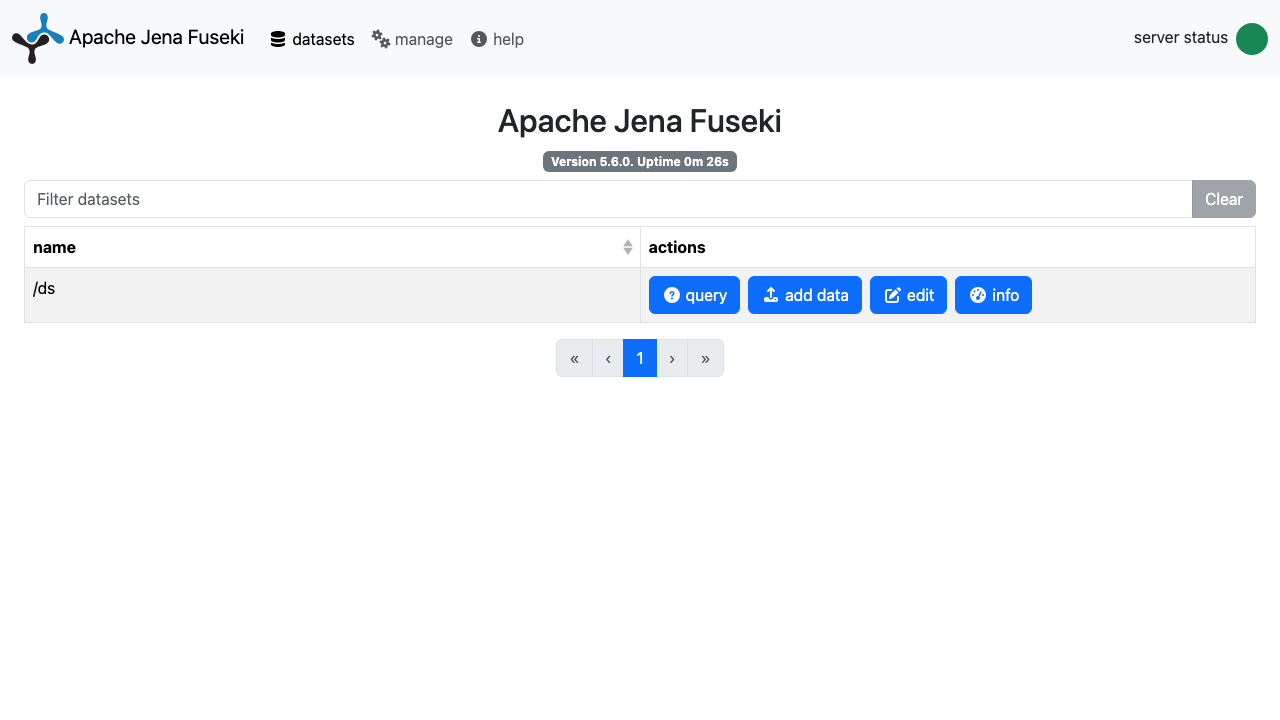
Open http://<vm-ip>/ in a browser. The Fuseki dashboard lists your datasets. The bundled /ds dataset is shown with query, add data, edit, and info actions. When prompted, sign in as admin with the per-VM password from Step 5.
Step 9: Run a SPARQL Query in the UI
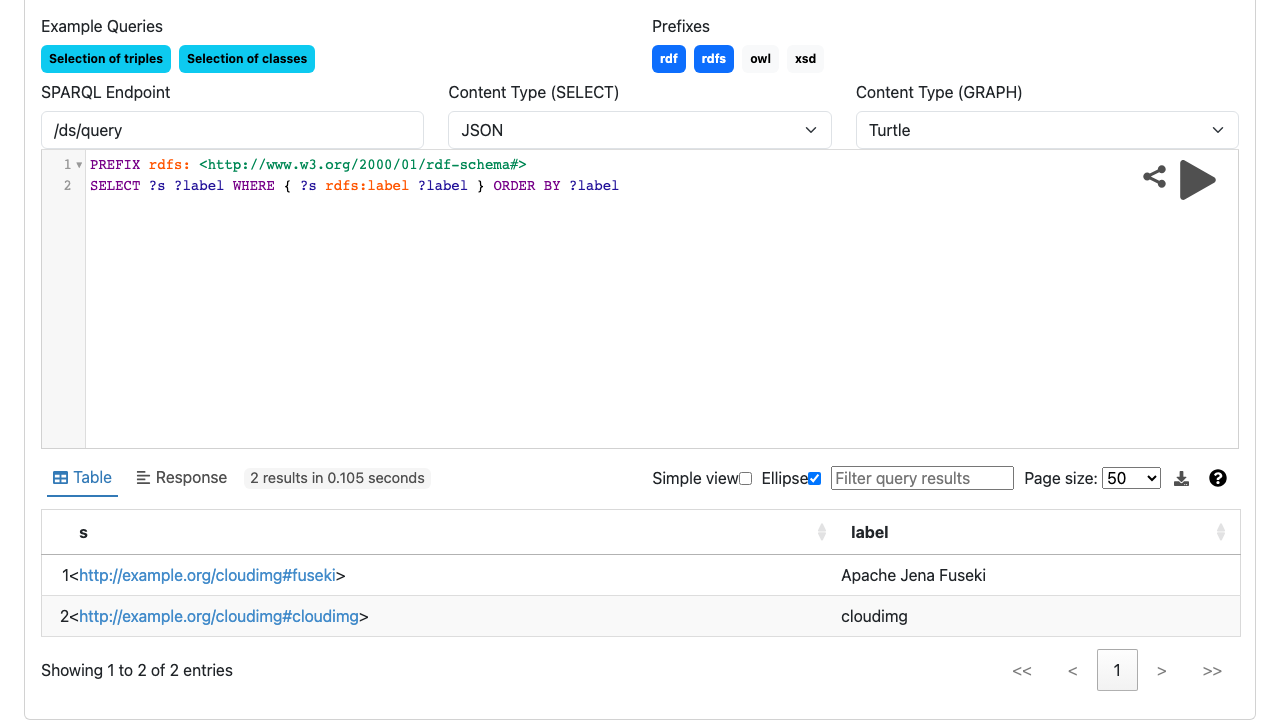
Click query on the /ds dataset to open the SPARQL query editor (YASGUI). Paste a SELECT and run it with the play button. The example below lists every resource that has an rdfs:label:
PREFIX rdfs: <http://www.w3.org/2000/01/rdf-schema#>
SELECT ?s ?label WHERE { ?s rdfs:label ?label } ORDER BY ?label
The results table renders below the editor with the matching rows and the query timing.
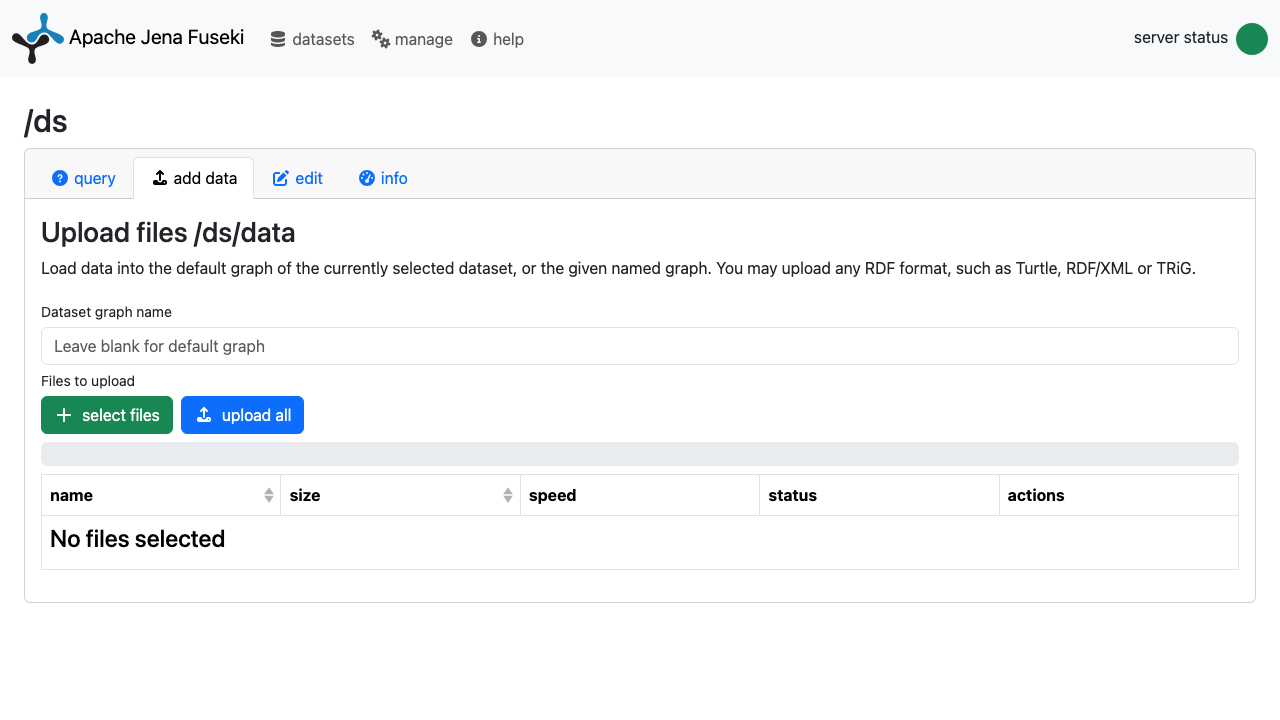
Step 10: Load Data via the UI
Click add data on the /ds dataset to open the upload page. Choose one or more RDF files (Turtle, RDF/XML, TriG, N-Triples, JSON-LD), optionally name a target graph, and click upload all to load them into the dataset. You can also load data over HTTP with the SPARQL Graph Store Protocol at http://<vm-ip>/ds/data.
Step 11: Server Info and Statistics
Click info on the /ds dataset to see the available services (the SPARQL Query, Update, and Graph Store Protocol endpoints), per-endpoint request statistics, and the dataset size (use count triples in all graphs to tally the graphs).

Step 12: Load Triples over SPARQL Update
You can insert data programmatically with SPARQL Update against http://<vm-ip>/ds/update. The update endpoint is part of the dataset service. Send an INSERT DATA request with Content-Type: application/sparql-update, then read it back with a SELECT against http://<vm-ip>/ds/query. For example, posting INSERT DATA { <http://example.org/a> <http://www.w3.org/2000/01/rdf-schema#label> "Example" } adds one triple, and a SELECT * WHERE { ?s ?p ?o } returns it.
Step 13: Configure a New Dataset
Create additional datasets from the dashboard's manage tab, then new dataset — choose a name and a dataset type (Persistent (TDB2) for durable storage on the data disk, or In-memory for scratch). Persistent datasets are written under /var/lib/fuseki/databases/. You can also drop a .ttl assembler file into /var/lib/fuseki/configuration/ and restart the service:
sudo systemctl restart fuseki.service
Step 14: Tune the JVM Heap
Fuseki's heap is set in /etc/fuseki.env (JVM_ARGS=-Xms512m -Xmx1024m by default). For larger graphs increase the maximum heap and restart:
sudo sed -i 's/-Xmx1024m/-Xmx2048m/' /etc/fuseki.env
sudo systemctl restart fuseki.service
Step 15: Logs and Troubleshooting
Fuseki logs to the systemd journal. Tail the service logs and check the listening socket:
sudo journalctl -u fuseki.service --no-pager | tail -30
sudo ss -tln | grep -E ':80 |:3030 '
The Shiro auth configuration is at /var/lib/fuseki/shiro.ini; the dataset assembler files are in /var/lib/fuseki/configuration/. If a query fails with a 500, check the journal for the underlying SPARQL parse or TDB2 error.
Security
The admin UI and all /$/ server-management endpoints require the per-VM admin password (Apache Shiro, authcBasic). The /$/ping liveness endpoint and the nginx /health endpoint are intentionally anonymous so load balancers can probe them. The read query path on /ds is open by default for convenience — if your deployment requires authenticated reads, tighten the [urls] section of /var/lib/fuseki/shiro.ini to require admin on /ds/** and restart the service. Fuseki serves plain HTTP on port 80; terminate TLS upstream (Application Gateway, Front Door, or a TLS-terminating reverse proxy) and restrict the NSG to known client CIDRs before exposing it to the internet. The per-VM password is rotated automatically on the first boot of every VM, so no two deployments share a credential.
Support
cloudimg provides 24/7 support for this image. Email support@cloudimg.co.uk. The $0.04 per vCPU hour cloudimg charge covers packaging, security patching, image maintenance, and expert support. Apache Jena Fuseki is licensed under the Apache License 2.0 and is free; the cloudimg charge is for the managed, patched, support-backed image.