Apache Zeppelin on Ubuntu 24.04 on Azure User Guide
Overview
Apache Zeppelin is the open-source, web-based notebook that brings interactive data analytics and collaborative documents to your browser. It runs paragraphs of code against pluggable interpreters and renders the results as tables and charts inline, so data engineers and analysts can explore data, build visualisations and share reproducible notebooks. The cloudimg image installs Apache Zeppelin 0.12.1 on OpenJDK 11 at /opt/zeppelin, runs it as a dedicated zeppelin system user, fronts the notebook UI with an nginx reverse proxy on TCP 80, enables Apache Shiro authentication, keeps notebooks and configuration on a dedicated Azure data disk, and generates a unique admin password on the first boot of every VM. Backed by 24/7 cloudimg support.
What is included:
- Apache Zeppelin 0.12.1 notebook server on OpenJDK 11 at
/opt/zeppelin - nginx reverse proxy on
:80in front of the notebook UI (bound to loopback:8080) - Apache Shiro authentication enabled, anonymous access disabled
- Bundled Spark, JDBC, Python, shell, markdown and many more interpreters
- A dedicated Azure data disk at
/var/lib/zeppelinholding notebooks and configuration, separate from the OS disk and re-provisioned with every VM - Per-VM admin password (
ZEPPELIN_ADMIN_PASSWORD) generated at first boot, in a root-only file zeppelin.service+nginx.serviceas systemd units, enabled and active- 24/7 cloudimg support
Prerequisites
An active Azure subscription, an SSH key pair, and a VNet + subnet in the target region. Standard_B4ms (4 vCPU / 16 GiB RAM) is a good starting point because the bundled Spark interpreter wants memory; scale up for larger datasets. NSG inbound: allow 22/tcp from your management network and 80/tcp for the notebook UI (front with TLS for public exposure, see Enabling HTTPS).
Step 1 - Deploy from the Azure Marketplace
Sign in to the Azure Portal, choose Create a resource, search the Marketplace for Apache Zeppelin by cloudimg, and select Create. On Basics pick your subscription, resource group, region and size; under Administrator account choose SSH public key and paste your key; under Inbound port rules allow SSH (22) and HTTP (80). Review the dedicated data disk on the Disks tab, then Review + create then Create.
Step 2 - Deploy from the Azure CLI
az vm create \
  --resource-group <your-rg> \
  --name zeppelin \
  --image <marketplace-image-urn> \
  --size Standard_B4ms \
  --admin-username azureuser \
  --ssh-key-values ~/.ssh/id_ed25519.pub \
  --vnet-name <your-vnet> --subnet <your-subnet> \
  --public-ip-sku Standard

az vm open-port --resource-group <your-rg> --name zeppelin --port 80 --priority 1010
Step 3 - Connect to your VM
ssh azureuser@<vm-public-ip>
Step 4 - Confirm the services are running
systemctl is-active zeppelin.service nginx.service
Both services report active. The notebook server runs on a JVM and can take up to a minute to finish warming up on first boot.

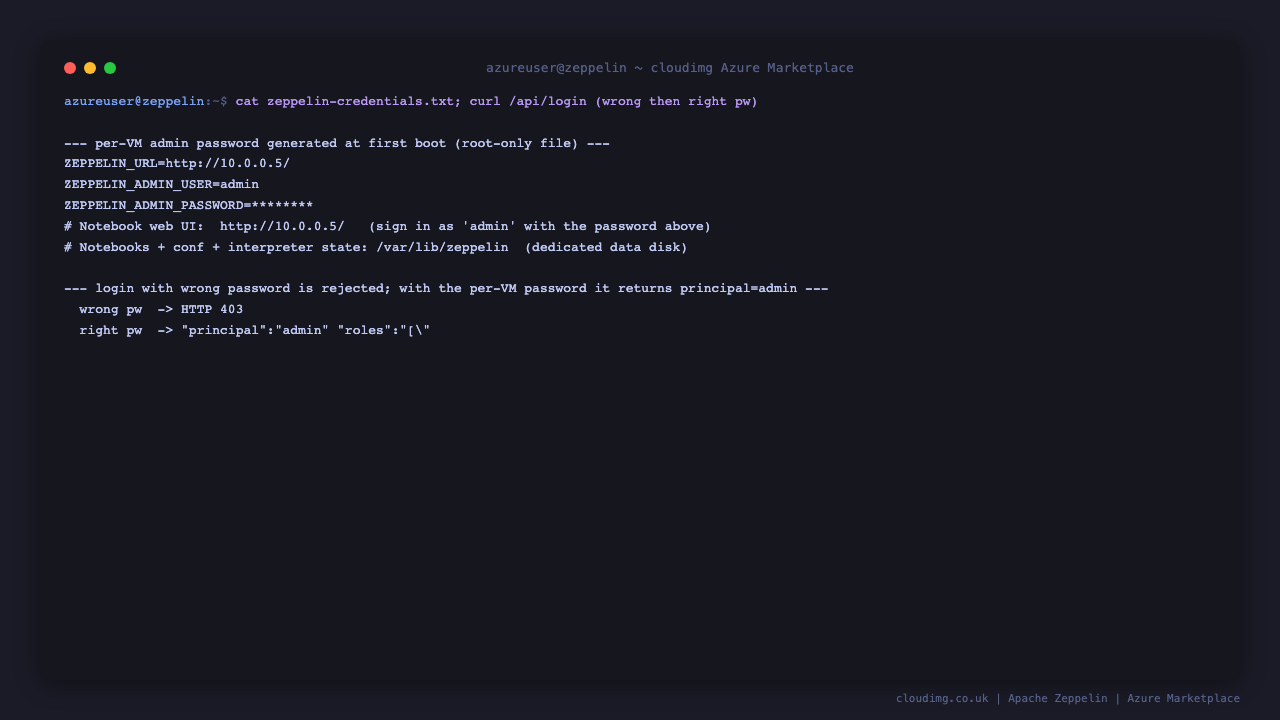
Step 5 - Retrieve your admin password
The admin password is generated uniquely on the first boot of your VM and written to a root-only file:
sudo cat /root/zeppelin-credentials.txt
The ZEPPELIN_ADMIN_PASSWORD value is the password; sign in to the notebook UI as admin with it.
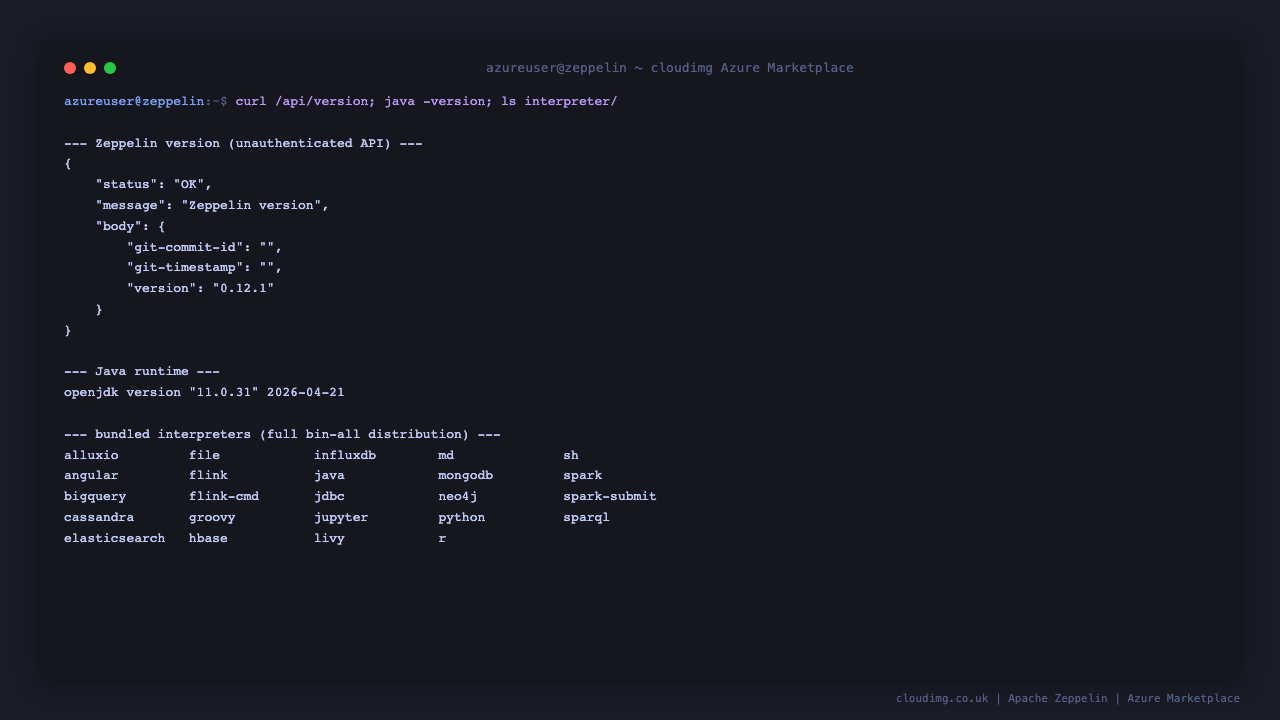
Step 6 - Confirm the Zeppelin version
The notebook server exposes an unauthenticated version endpoint. Confirm it reports 0.12.1:
curl -s http://127.0.0.1/api/version
The response is JSON with "status":"OK" and the running version in body.version.
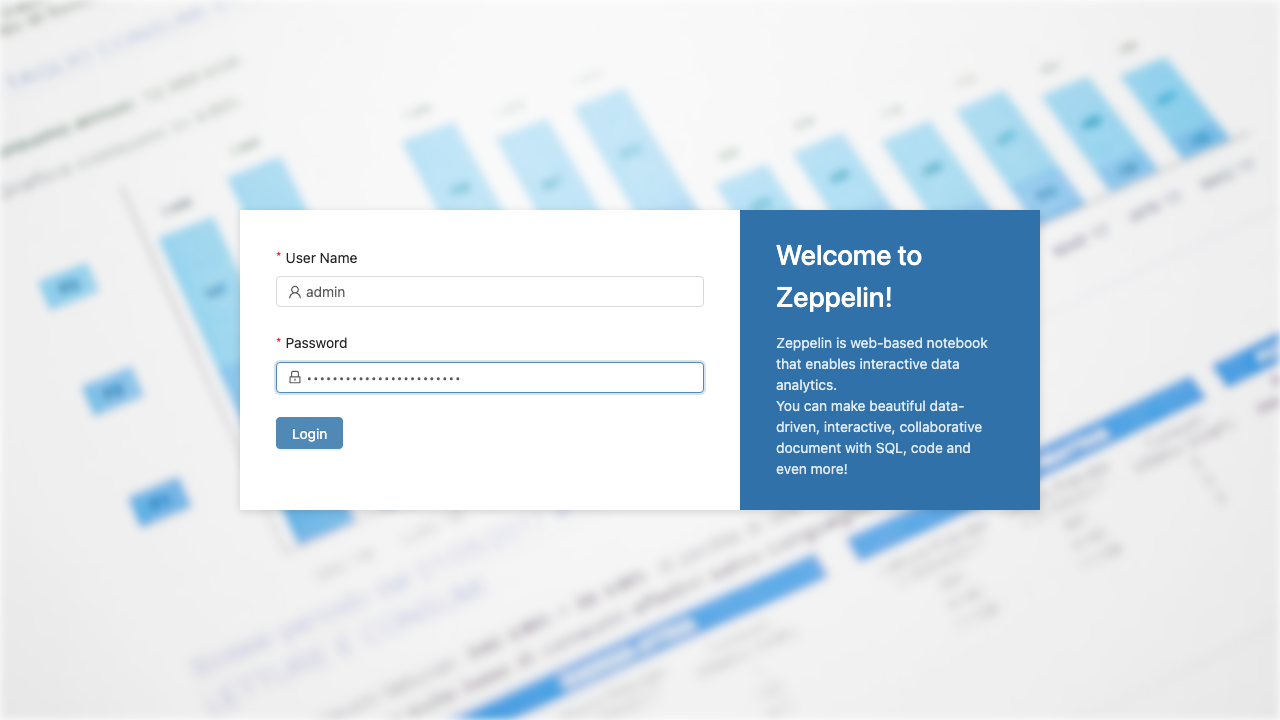
Step 7 - Open the notebook UI
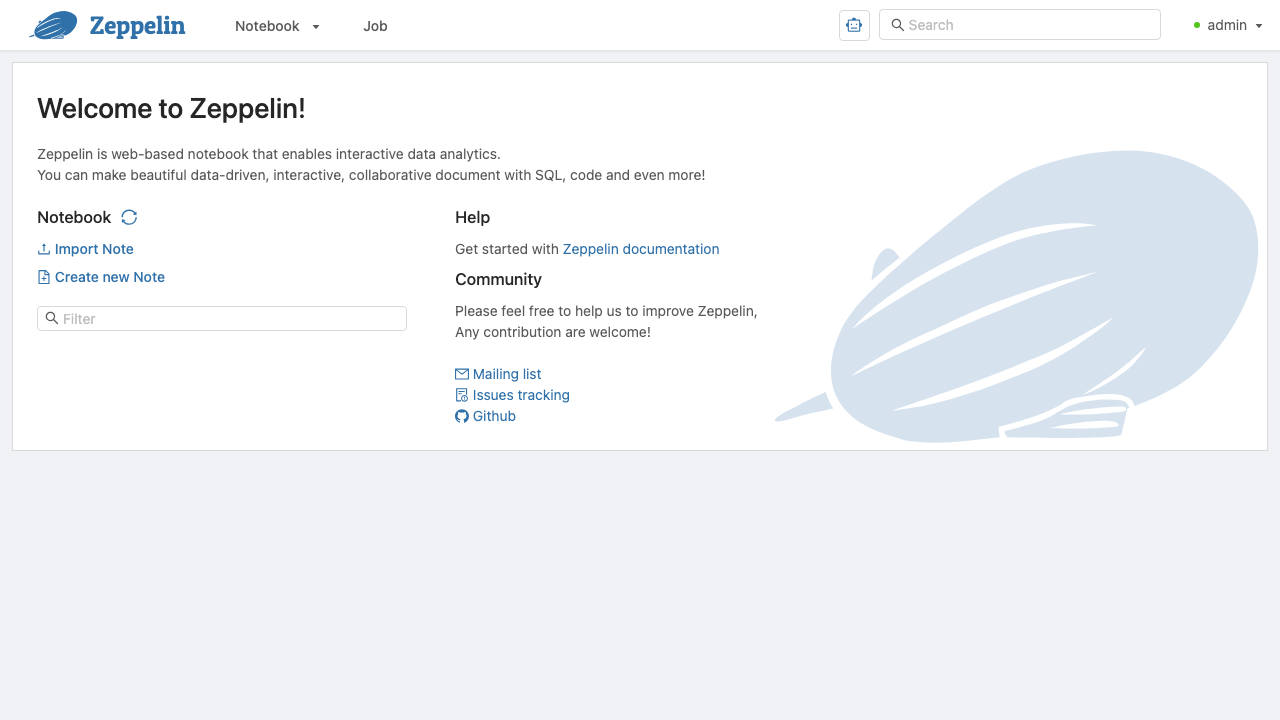
Browse to http://<vm-public-ip>/ and sign in as admin with the password from Step 5. Apache Shiro authentication is enabled, so anonymous access is disabled and you must log in. After signing in you land on the Zeppelin home page, where you can create notebooks, browse the bundled interpreters and open the built-in tutorials.
Step 8 - Create your first notebook
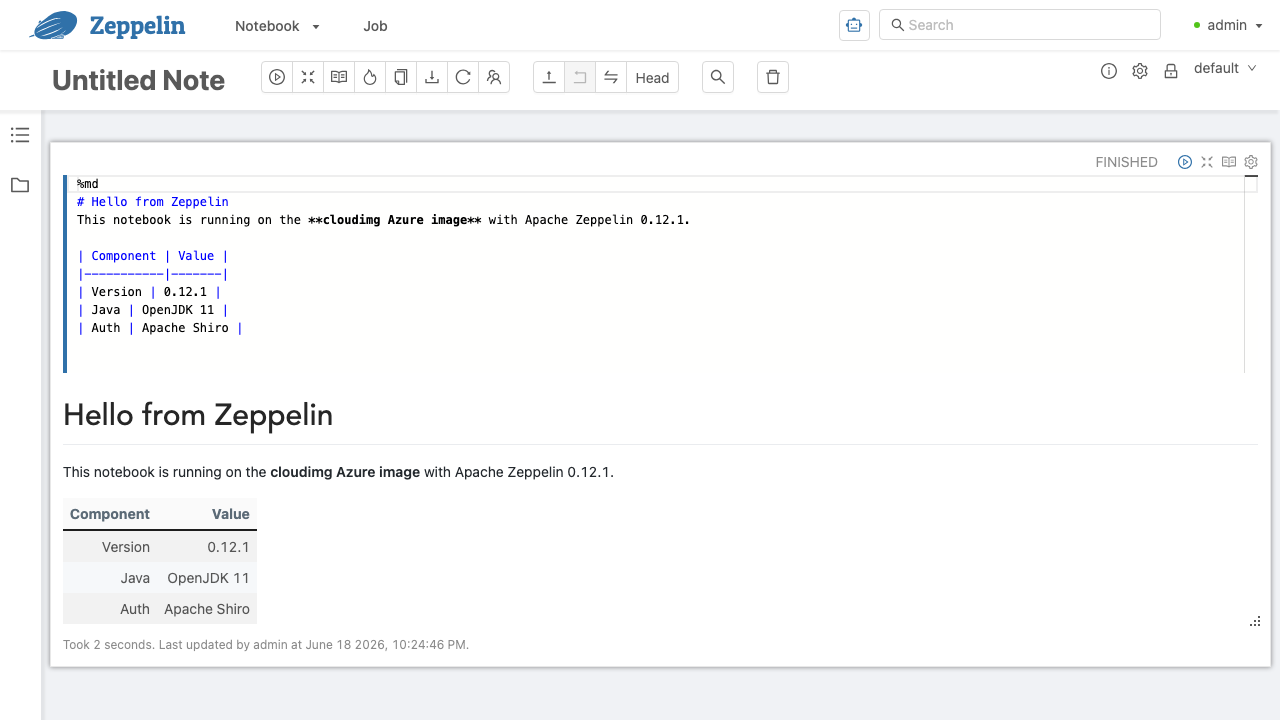
Click Create new note, give it a name, and accept the default interpreter. Type a paragraph and press Shift+Enter to run it. For example the markdown interpreter renders rich text inline:
%md
# Hello from Zeppelin
This notebook is running on the cloudimg Azure image.
The notebook and its output are saved to the dedicated data disk at /var/lib/zeppelin/notebook, so they survive reboots and snapshots.
Step 9 - Use the bundled interpreters
The full bin-all distribution ships a wide set of interpreters out of the box. List them on the VM:
ls /opt/zeppelin/current/interpreter/
You will see spark, jdbc, python, sh, md, flink, cassandra, mongodb, neo4j and many more. Bind the interpreter you want in the notebook's interpreter settings, then run paragraphs such as %python, %sh or %spark against it.
Enabling HTTPS
For production, terminate TLS at nginx with a real domain pointed at the VM's public IP. Install certbot and request a certificate (replace the domain):
sudo apt-get update && sudo apt-get install -y certbot python3-certbot-nginx
sudo certbot --nginx -d your-domain.example.com
Backup and maintenance
Notebooks, interpreter state and configuration live on the dedicated data disk at /var/lib/zeppelin. Snapshot that disk in Azure to back up your saved notebooks, and keep the OS patched with sudo apt update && sudo apt upgrade. The notebook server restarts cleanly with sudo systemctl restart zeppelin.
Support
This image is backed by 24/7 cloudimg support. Contact us by email and chat for help with notebook configuration, interpreters, Spark tuning, authentication, TLS and backups.
All product and company names are trademarks or registered trademarks of their respective holders. Use of them does not imply any affiliation with or endorsement by them.