Appsmith Community Edition on Ubuntu 24.04 on Azure User Guide
Overview
Appsmith is the leading open-source low-code platform for building internal tools — admin dashboards, CRUD UIs, customer-support panels, ops consoles. Drag-and-drop UI builder, JavaScript expression engine, 40+ database integrations, REST API integration, role-based access control, and Git-versioned application code. The cloudimg image installs Appsmith Community Edition v1.99 from the official Docker Hub image with all components bundled in a single container (MongoDB 7, Redis 7, Spring Boot backend, React frontend, Caddy, supervisord).
What is included:
- Appsmith CE v1.99 (Apache 2.0) from
appsmith/appsmith-ce:v1.99 - All-in-one container with embedded MongoDB, Redis, Spring Boot, React, Caddy
- Single systemd unit
appsmith.servicerunningdocker run --rm - Stack data bind-mounted at
/opt/appsmith/stacks(configuration, MongoDB data, Redis state, logs) - Listens on TCP
:80(HTTP) and:443(HTTPS, self-signed at first boot) - Telemetry disabled by default (
APPSMITH_DISABLE_TELEMETRY=true) - Image pre-pulled at build time so customer first boot is seconds, not minutes
- 24/7 cloudimg support
Prerequisites
Active Azure subscription, SSH key, VNet + subnet. Standard_D2s_v5 (2 vCPU, 8 GB RAM) is the recommended size — Appsmith CE all-in-one needs ~3 GB just for MongoDB + Redis + JVM. Standard_B2s (4 GB) works for dev/test but is borderline. NSG inbound: allow 22/tcp from your management CIDR, 80/tcp and 443/tcp from any client CIDR that needs the Appsmith UI.
Authentication model: Appsmith manages its own user accounts. On first browser visit you'll see a signup form — the FIRST account becomes the super-admin for this VM. Subsequent users are invited via Settings → Users. cloudimg does NOT pre-create an admin account because Appsmith does not expose a non-interactive admin-create env var.
Step 1-3: Deploy + SSH (standard pattern)
ssh azureuser@<vm-ip>
Step 4: Service Status + Container Health
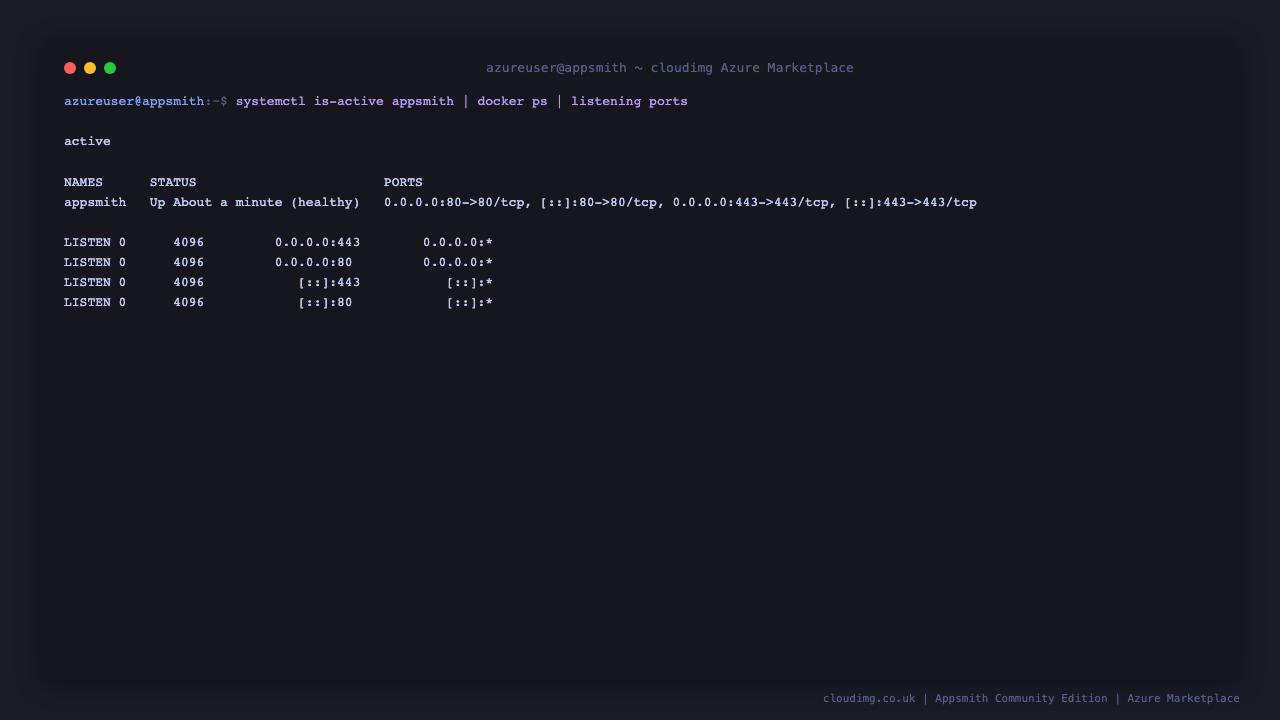
sudo systemctl is-active appsmith.service
sudo docker ps --filter name=appsmith --format '{{.Names}} {{.Status}}'
Step 5: Read the Per-VM Access URL
sudo cat /stage/scripts/appsmith-credentials.log
Pick up APPSMITH_URL and APPSMITH_HTTPS_URL.
Step 6: REST API Health
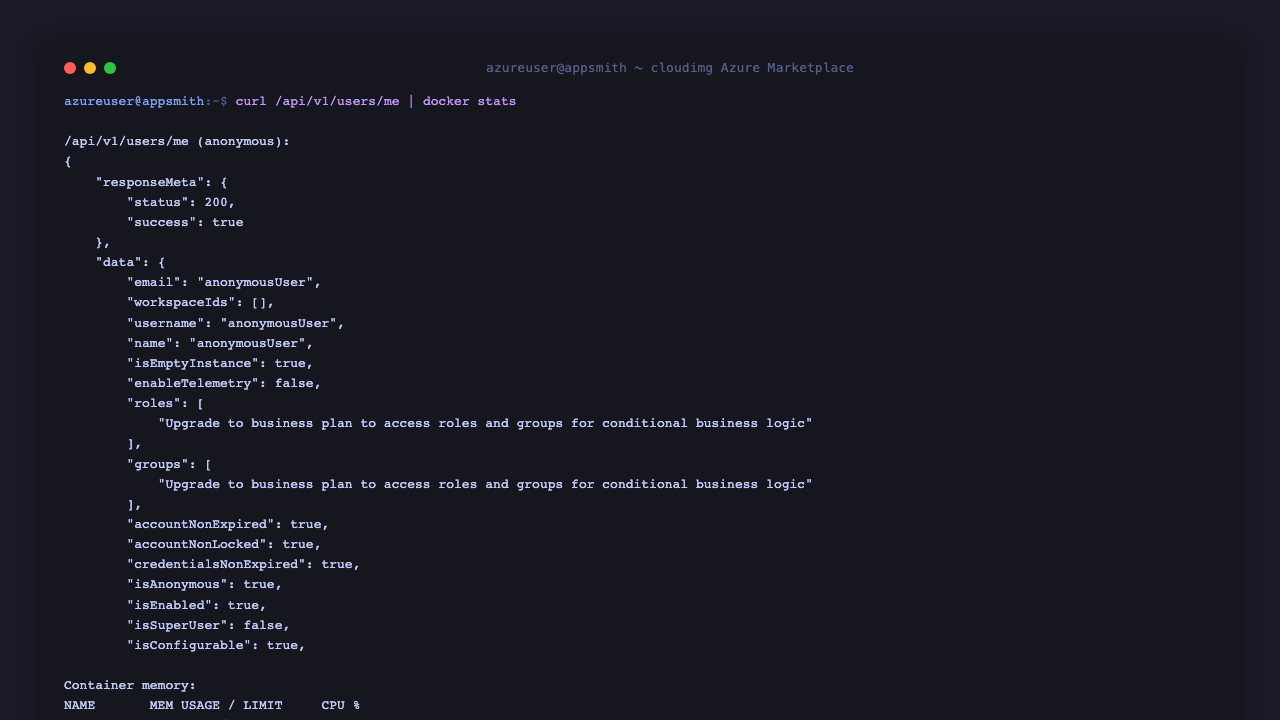
curl -sf http://127.0.0.1/api/v1/users/me | head -c 400
The response shows "isEmptyInstance":true until you complete the super-admin signup, after which it becomes false.
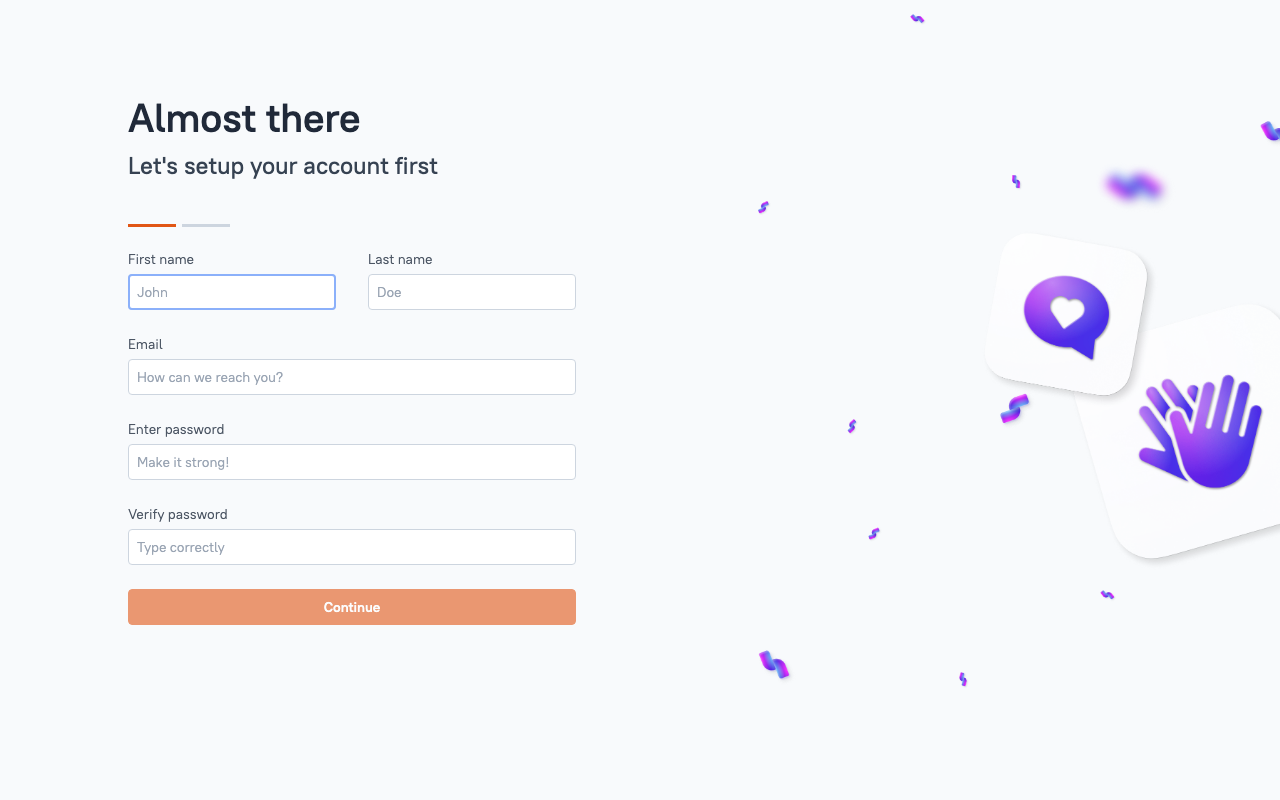
Step 7: Complete Super-Admin Signup
Browse to http://<vm-ip>/. The signup form prompts for First name, Last name, Email, and Password. Submit it — the first account becomes the super-admin for this Appsmith instance.
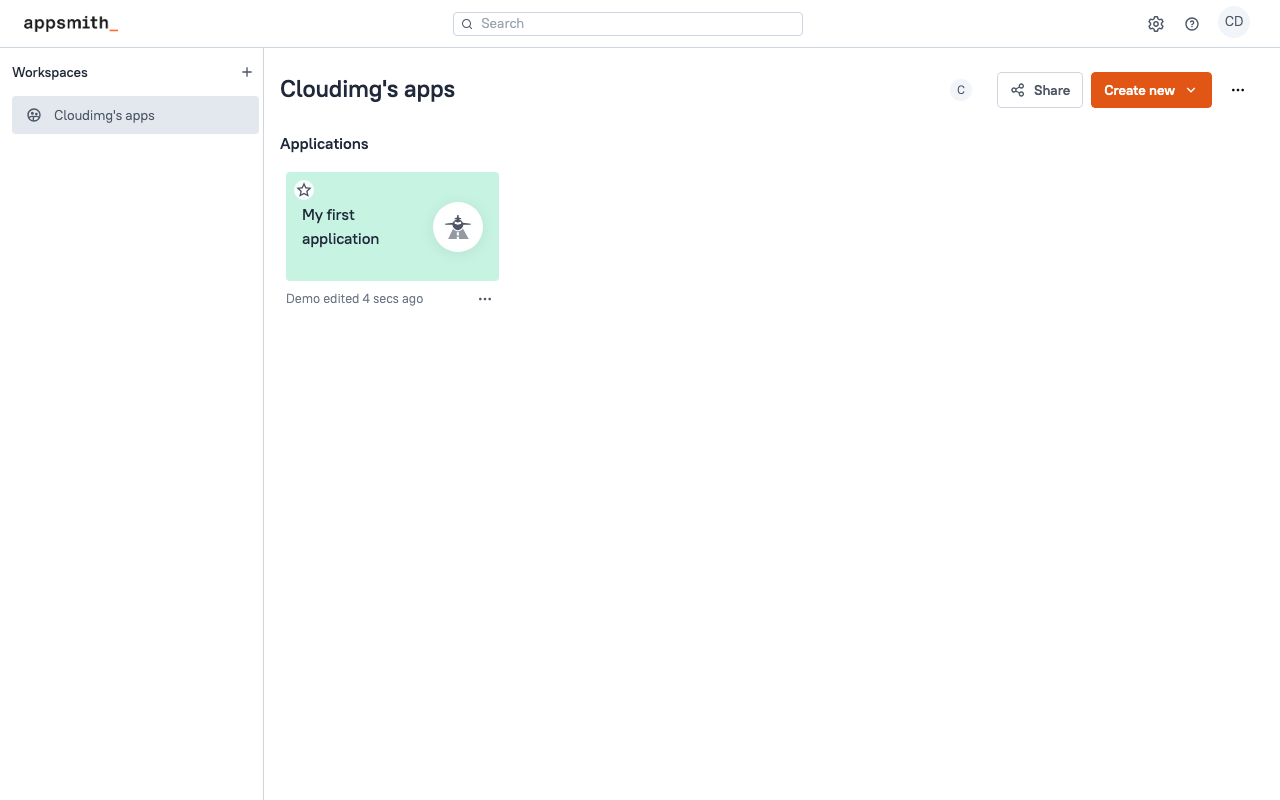
Step 8: First Workspace + Application
After signup, Appsmith lands on the workspaces dashboard. Create your first application: click + New → App from scratch. The app builder opens.
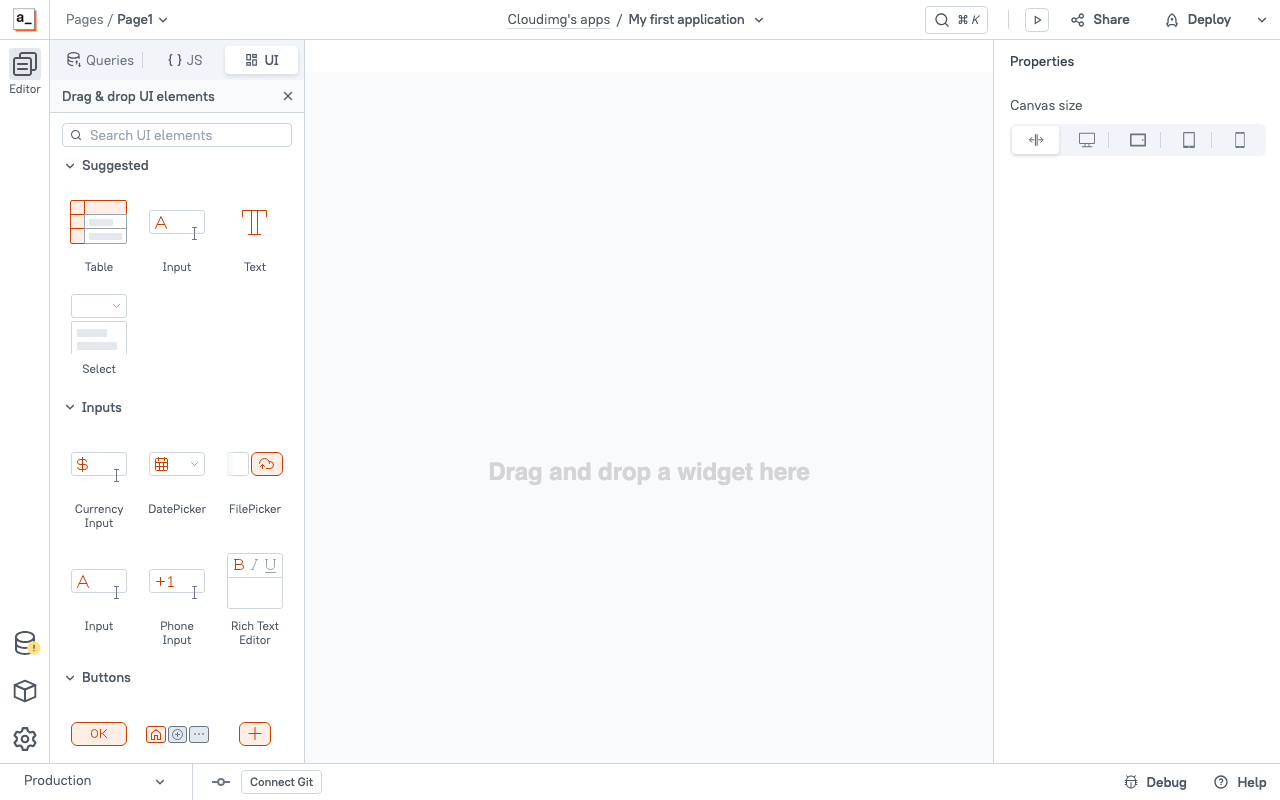
Step 9: App Builder
The Appsmith app builder is split into the canvas (centre), the widget panel (left), and the property pane (right). Drag a Table widget onto the canvas, bind it to a sample query, and Save.
Step 10: Tail Container Logs
sudo docker logs --tail 50 appsmith
Useful for diagnosing slow startup or backend errors. Appsmith uses supervisord to manage the components — you'll see lines for supervisor, mongo, redis, backend, and caddy.
Step 11: Tune Container Memory
Edit /etc/default/appsmith and restart:
sudo systemctl restart appsmith.service
Defaults:
APPSMITH_DISABLE_TELEMETRY:trueAPPSMITH_CONTAINER_MEMORY:4gAPPSMITH_ALLOWED_FRAME_ANCESTORS:*(lock to your domain in production)
For larger Appsmith deployments (many concurrent users), raise APPSMITH_CONTAINER_MEMORY to 6g on a D2s_v5 or 12g on a D4s_v5.
Step 12: Install Let's Encrypt SSL
Point your domain DNS A record at this VM's public IP, then run:
sudo docker exec -it appsmith appsmithctl install-ssl <your-domain> <your-email>
Replace <your-domain> with e.g. apps.example.com and <your-email> with your Let's Encrypt contact email. Appsmith handles the cert request, Caddy reload, and auto-renewal.
Step 13: Backups
The complete Appsmith stack — application code, MongoDB documents, Redis state, configuration — lives at /opt/appsmith/stacks. Take a consistent backup with the container running:
sudo tar czf /var/backups/appsmith-$(date +%F).tgz -C /opt appsmith
For zero-downtime backups against the live MongoDB, use appsmithctl export-db instead:
sudo docker exec appsmith appsmithctl export-db
sudo cp /opt/appsmith/stacks/data/backup/* /var/backups/
Periodically copy /var/backups to Azure Blob Storage (az storage blob upload-batch) for off-VM retention.
Step 14: Restore from Backup
Stop Appsmith, replace the stacks dir, restart:
sudo systemctl stop appsmith.service
sudo rm -rf /opt/appsmith/stacks
sudo tar xzf /var/backups/appsmith-<date>.tgz -C /opt
sudo systemctl start appsmith.service
Step 15: Logs and Troubleshooting
sudo journalctl -u appsmith.service --no-pager -n 50
sudo docker logs --tail 80 appsmith
sudo ls /opt/appsmith/stacks/logs/
/opt/appsmith/stacks/logs/ contains backend.log, mongo.log, redis.log, caddy.log — supervisord redirects each component there. Application logs (your apps' query history) are in MongoDB.
Security
- Telemetry off by default — Appsmith does not phone home about your apps or queries
- Stack data lives at
/opt/appsmith/stackson the host — backup target is unambiguous - Self-signed TLS on
:443at first boot; swap to Let's Encrypt with one command (Step 12) - Restrict NSG inbound on
:80and:443to the IP ranges that need Appsmith - Appsmith RBAC: workspaces, applications, page-level permissions configured via Settings → Users
- For SSO (SAML, OAuth, Keycloak federation), upgrade to Appsmith Business; CE supports email/password only
Support
cloudimg provides 24/7/365 expert technical support. Guaranteed response within 24 hours, one hour average for critical issues. Contact support@cloudimg.co.uk.