Audiobookshelf on AWS User Guide
Audiobookshelf on AWS
This image delivers Audiobookshelf 2.35, the popular open source self-hosted audiobook and podcast media server, fully installed and reverse-proxied with nginx. Audiobookshelf streams your own audiobook and podcast collection from anywhere through a fast web player or the native iOS and Android apps, with listening-progress sync across every device.
The Audiobookshelf server is a single self-contained binary with an embedded SQLite datastore and a bundled web player. It runs under systemd, listening on the loopback interface, with nginx in front on port 80 (and 443 once you add TLS). nginx also proxies the WebSocket traffic the player relies on. Transcoding and audio tagging use ffmpeg. The config, metadata and media library live on a dedicated, independently-resizable EBS data volume mounted at /usr/share/audiobookshelf, separate from the operating system disk.
Secure by default - you create the admin account
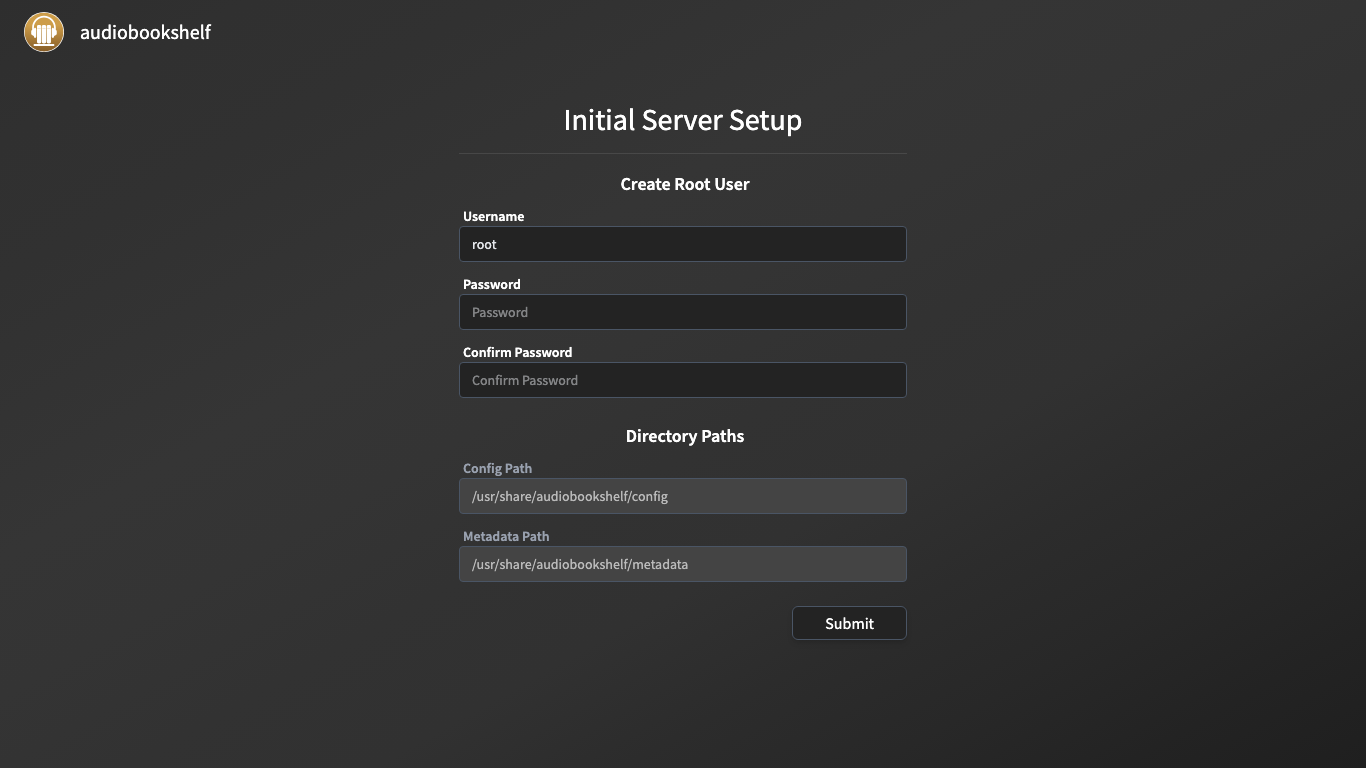
Audiobookshelf has no default administrator, and this image does not bake one in. The AMI ships at Audiobookshelf's built-in first-visit Initial Server Setup / Create Root User screen. The very first time you browse to your instance you create your own admin account with your own username and password. No shared credentials, no database rows and no media files ship in the image - every instance starts as a clean slate that only you secure.
Connecting to your instance
Connect over SSH on port 22 using the default login user for your operating system variant and the EC2 key pair you launched with.
| OS variant | SSH login user | Example |
|---|---|---|
| Ubuntu 24.04 | ubuntu |
ssh -i your-key.pem ubuntu@<instance-public-ip> |
Replace <instance-public-ip> with your instance's public IPv4 address (or its private address if you reach it over a VPN or Direct Connect).
First visit - create your admin account
Open Audiobookshelf in your browser:
http://<instance-public-ip>/
You are taken to the Initial Server Setup screen. Enter a username (the default is root), choose a strong password and confirm it. The config and metadata paths are pre-filled to the dedicated data volume (/usr/share/audiobookshelf/config and /usr/share/audiobookshelf/metadata) - leave them as they are. Click Submit.
Because the database is empty, this first account is the administrator (the "root" user). That single step secures your instance; you are then taken to the sign-in page to log in, and the setup screen will never appear again for this instance.
Enable HTTPS before exposing the instance to the public internet (see the TLS section below). Until then, treat the password you set here as you would any credential sent over plain HTTP.
Adding your library
After you log in, Audiobookshelf prompts you to add your first library. Copy your audiobooks or podcasts onto the dedicated data volume first, then point a library folder at them.
Copy your collection in over SSH from your workstation - for example with rsync (replace the placeholders with your own paths and address):
rsync -av -e "ssh -i your-key.pem" /path/to/your/audiobooks/ ubuntu@<instance-public-ip>:/tmp/abs-upload/
Then move it into the library area and hand ownership to the service account:
sudo rsync -a --chown=audiobookshelf:audiobookshelf /tmp/abs-upload/ /usr/share/audiobookshelf/audiobooks/ && rm -rf /tmp/abs-upload
In the web UI, go to Settings -> Libraries -> Add Library, give it a name, choose the Books (or Podcasts) media type, and add the folder /usr/share/audiobookshelf/audiobooks. Organise audiobooks as Author/Title/files... for the cleanest results - Audiobookshelf reads embedded tags and folder structure for author, title, series, cover art and chapters. It scans the folder automatically when you create the library and watches for new files thereafter; you can also trigger a re-scan from the library's overflow menu.
The web player
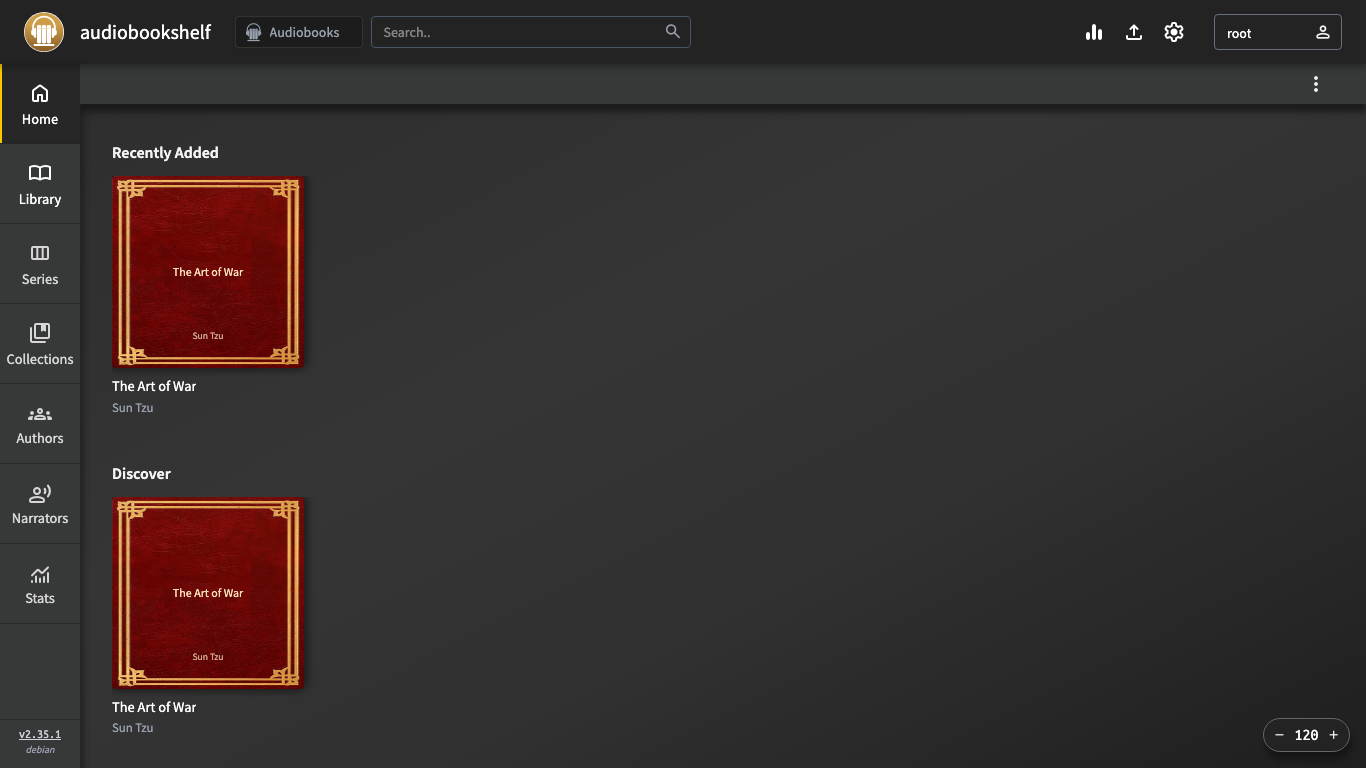
Once a library is scanned, the home view shows your collection with cover art, organised into shelves such as Recently Added and Discover, with a sidebar for Library, Series, Collections, Authors, Narrators and listening Stats.
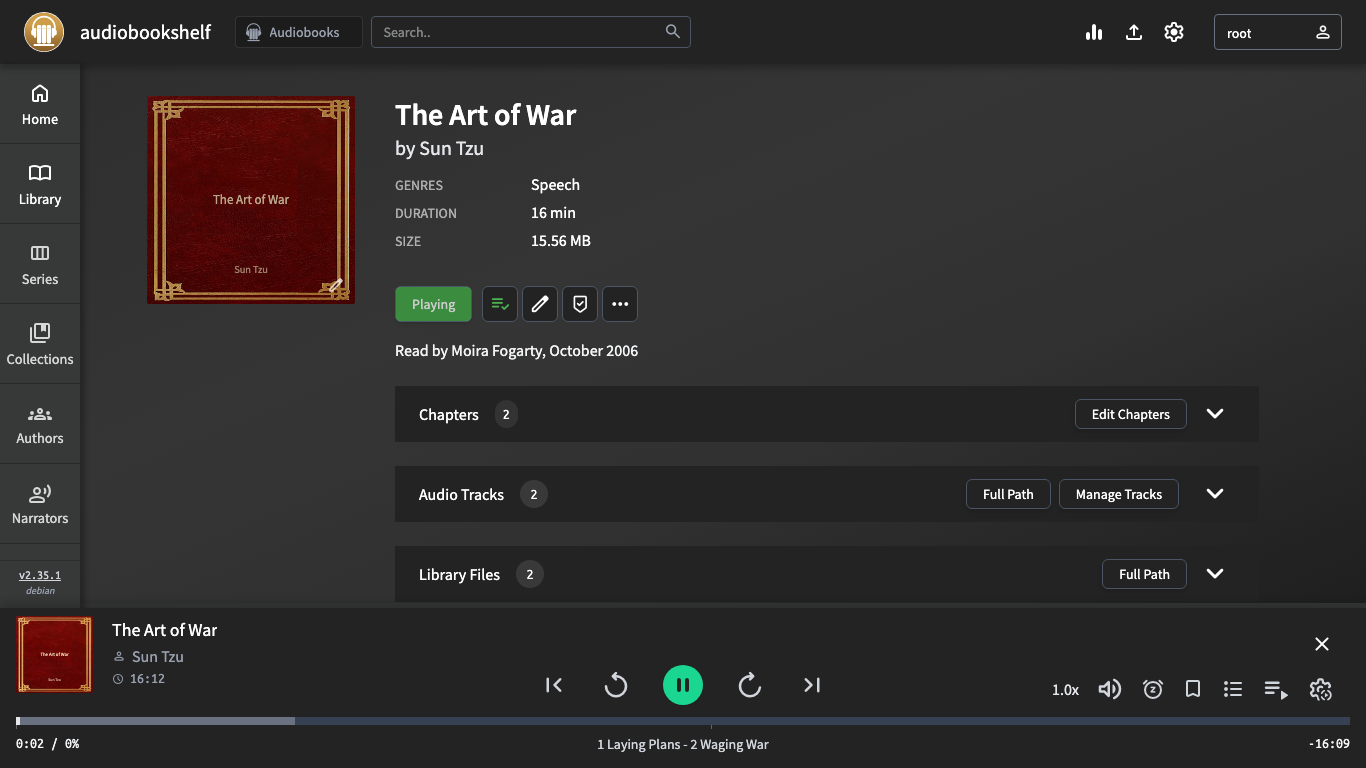
Open any title to see its detail page - cover, author, narrator, duration, chapters, audio tracks and library files - and press Play to start listening. The persistent player bar gives you play/pause, chapter and track navigation, a seek bar, variable playback speed, a sleep timer and bookmarks. Your listening position syncs automatically, so you can pick up on another device or in the mobile apps exactly where you left off.
The same server backs the native iOS and Android apps - sign in with your instance URL and the admin credentials you created, and your libraries, progress and bookmarks are all there.
Multiple users
Audiobookshelf is multi-user. As the admin, go to Settings -> Users -> Add User to create accounts for family members or a team, each with their own login, independent listening progress and per-library access. An OPDS feed is also available for compatible reader and player apps.
Verifying the deployment
The commands below confirm the server is healthy and shipped in the secure, no-admin state. Run them over SSH on the instance.
Confirm both services are active:
systemctl is-active audiobookshelf nginx
Confirm the health endpoint returns HTTP 200 through nginx:
curl -s -o /dev/null -w 'healthcheck HTTP %{http_code}\n' http://127.0.0.1/healthcheck
Confirm the server reports it has not been initialised yet (no admin user exists until you create one on first visit):
curl -s http://127.0.0.1/status | grep -o '"isInit":[a-z]*'
Confirm the server is bound to the loopback interface only (nginx fronts it on port 80):
ss -tlnp 2>/dev/null | grep -q '127.0.0.1:13378' && echo 'server bound to loopback OK'
Confirm the dedicated data volume is mounted and the installed version:
df -h /usr/share/audiobookshelf | tail -1
dpkg-query -W -f='${Package} ${Version}\n' audiobookshelf
Managing the services
Audiobookshelf and nginx are managed with systemd:
sudo systemctl status audiobookshelf
sudo systemctl restart audiobookshelf
sudo systemctl status nginx
sudo journalctl -u audiobookshelf -f
The service environment lives in /etc/default/audiobookshelf (port, host binding, config/metadata paths and the ffmpeg/ffprobe locations). The server binds to 127.0.0.1:13378; nginx terminates client connections on port 80.
Enabling HTTPS
Before exposing the instance to the public internet, terminate TLS at nginx. Point a DNS A record at your instance, open port 443 in the security group, and use Certbot to obtain and install a Let's Encrypt certificate (replace the host with your own domain):
sudo apt-get update && sudo apt-get install -y certbot python3-certbot-nginx
sudo certbot --nginx -d audiobooks.your-domain.example
Certbot edits the nginx site to serve HTTPS and sets up automatic renewal. After it completes, browse to https://audiobooks.your-domain.example/.
Backups
Audiobookshelf has a built-in backup feature under Settings -> Backups that snapshots the database and server settings into the metadata folder on the data volume. For disaster recovery, also take periodic EBS snapshots of the /usr/share/audiobookshelf volume - that single disk holds the database, cached metadata and your media library.
Support
This image is commercially supported by cloudimg. We provide 24/7 technical support by email and chat for deployment, upgrades, library migration, transcoding configuration and TLS termination.
Audiobookshelf is a trademark of its respective owner. All product and company names are trademarks or registered trademarks of their respective holders. Use of them does not imply any affiliation with or endorsement by them.