Chatwoot on Ubuntu 24.04 on Azure User Guide
Overview
Chatwoot is an open source customer engagement and support platform - a self-hosted alternative to Intercom, Zendesk and Freshdesk. It gives your team a shared inbox for live chat, email and social channels, contact management, conversation routing and assignment, canned responses, reporting and a polished agent dashboard, so you can run customer support on your own infrastructure without a per-seat SaaS subscription. The cloudimg image installs Chatwoot 4.15.1 as the official production Docker Compose stack and runs it behind nginx as a systemd service, so a complete support desk is online within minutes of launch.
What is included:
- Chatwoot 4.15.1 (MIT) deployed from the official production Docker Compose stack, pinned so the image never silently upgrades at build time
- Docker Engine (Docker CE) + the Docker Compose plugin, installed from the official Docker package repository
- The Chatwoot Compose stack: the
railsweb application (Puma on container port 3000), thesidekiqbackground workers,postgres(PostgreSQL 16 with the pgvector extension) andredis(password protected) - A system
nginxreverse proxy on port 80 forwarding to the Rails app on127.0.0.1:3000, with the WebSocket upgrade headers Chatwoot ActionCable realtime needs, plus an unauthenticated static/healthendpoint - All stateful data - the PostgreSQL database, the Redis data and every uploaded file - on a dedicated 40 GiB data disk mounted at
/var/lib/chatwoot(Docker's data-root is relocated there), independently resizable and re-provisioned on every VM - A per-VM super admin account (email + a generated password) created at first boot, with a fresh Rails secret key base and fresh database and Redis passwords rotated per instance
- Three systemd units:
nginx.service,chatwoot.service(a oneshot wrapper arounddocker compose up -d) andchatwoot-firstboot.service - 24/7 cloudimg support
Prerequisites
An active Azure subscription, an SSH key, and a VNet plus subnet. Standard_B4ms (4 vCPU / 16 GB RAM) is the recommended size - the Rails stack needs the memory. NSG inbound rules: allow 22/tcp from your management CIDR for SSH and 80/tcp from the CIDR that needs the Chatwoot web app (add 443/tcp if you enable HTTPS).
Step 1: Connect over SSH
Replace <vm-ip> with the public IP of your VM. The default login user is azureuser.
ssh azureuser@<vm-ip>
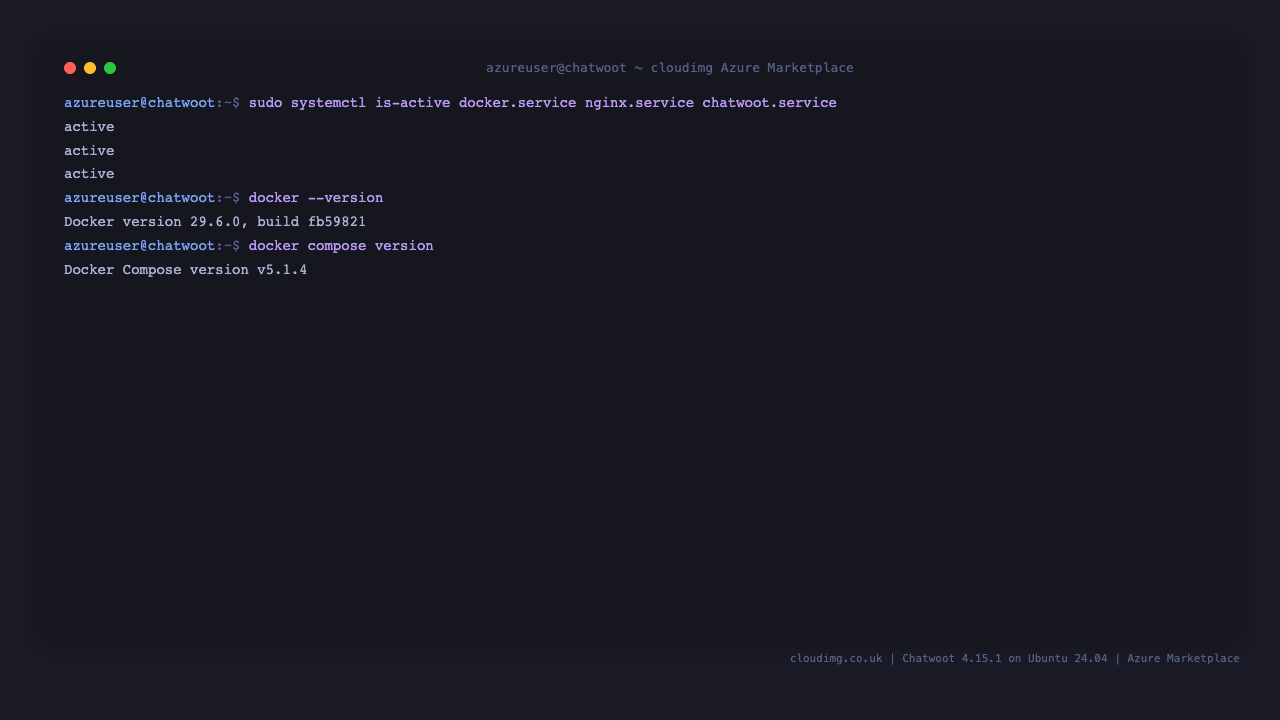
Step 2: Confirm the services are active
sudo systemctl is-active docker.service nginx.service chatwoot.service
docker --version
docker compose version
You should see active printed three times, the Docker Engine version, and the Docker Compose v2 plugin version.
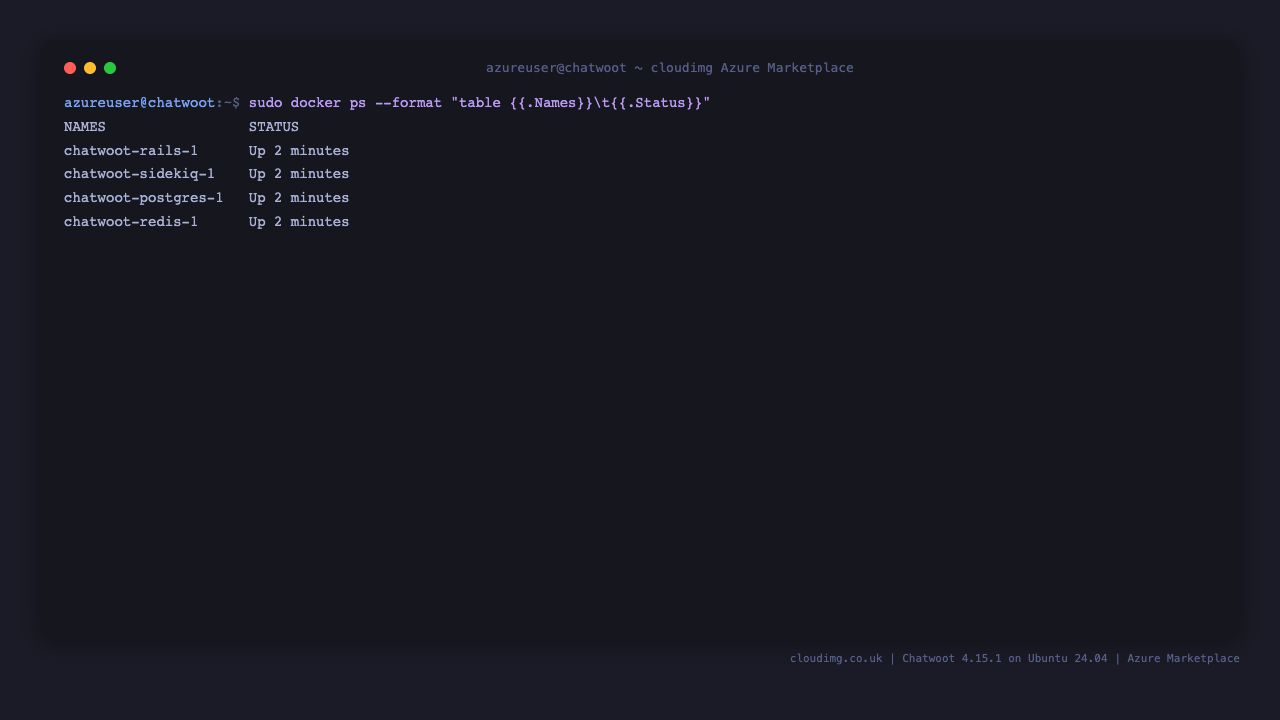
Step 3: Confirm the Chatwoot containers are running
sudo docker ps --format "table {{.Names}}\t{{.Status}}"
You should see the four containers - chatwoot-rails-1, chatwoot-sidekiq-1, chatwoot-postgres-1 and chatwoot-redis-1 - all in the Up state.
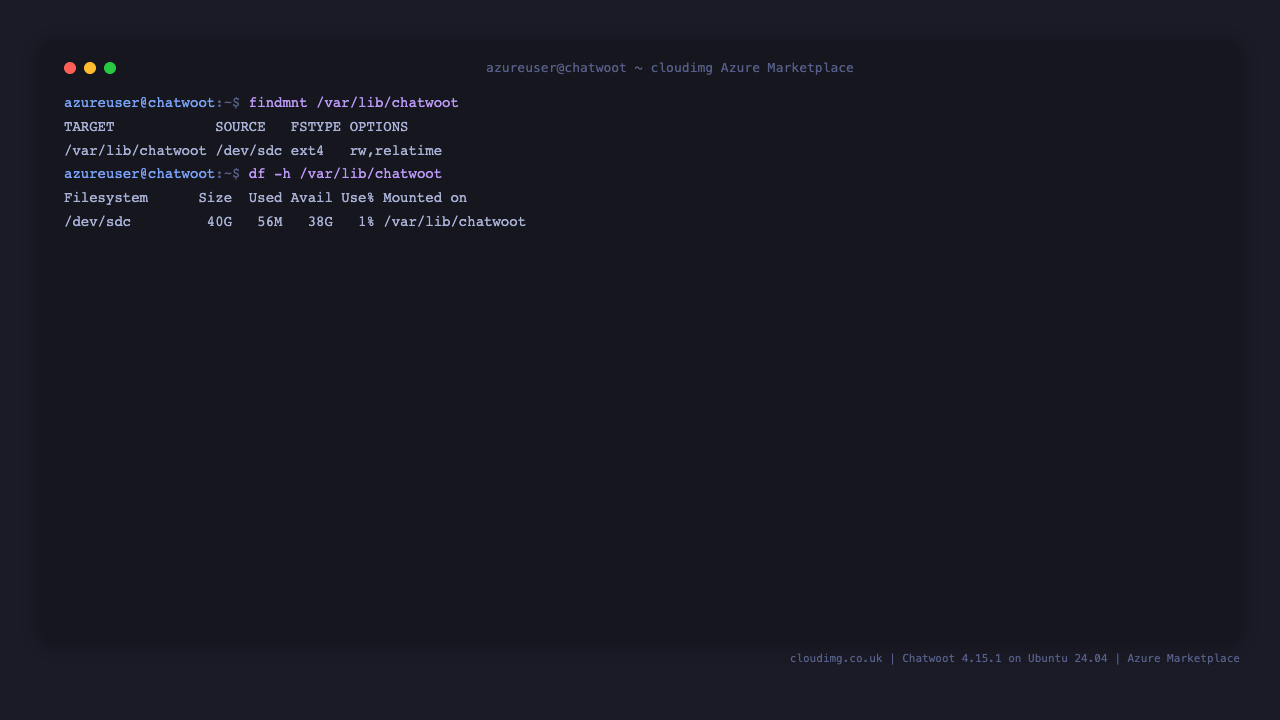
Step 4: Confirm the data disk is mounted
All stateful Chatwoot data lives on a dedicated data disk mounted at /var/lib/chatwoot.
findmnt /var/lib/chatwoot
df -h /var/lib/chatwoot
findmnt shows the device backing /var/lib/chatwoot and df confirms the 40 GiB volume.
Step 5: Check the health endpoint
The nginx reverse proxy serves an unauthenticated static /health endpoint on port 80, and the Chatwoot API answers on /api.
curl -s http://localhost/health
curl -s -o /dev/null -w "%{http_code}\n" http://localhost/api
/health returns OK and /api returns 200, confirming nginx and the Rails app are both up.
Step 6: Read the per-VM admin credentials
A unique super admin email and password are generated for your instance on its first boot and written to a root-only file.
sudo cat /root/chatwoot-credentials.txt
This file lists CHATWOOT_URL (where to sign in), CHATWOOT_ADMIN_EMAIL and CHATWOOT_ADMIN_PASSWORD. Store the password somewhere safe.
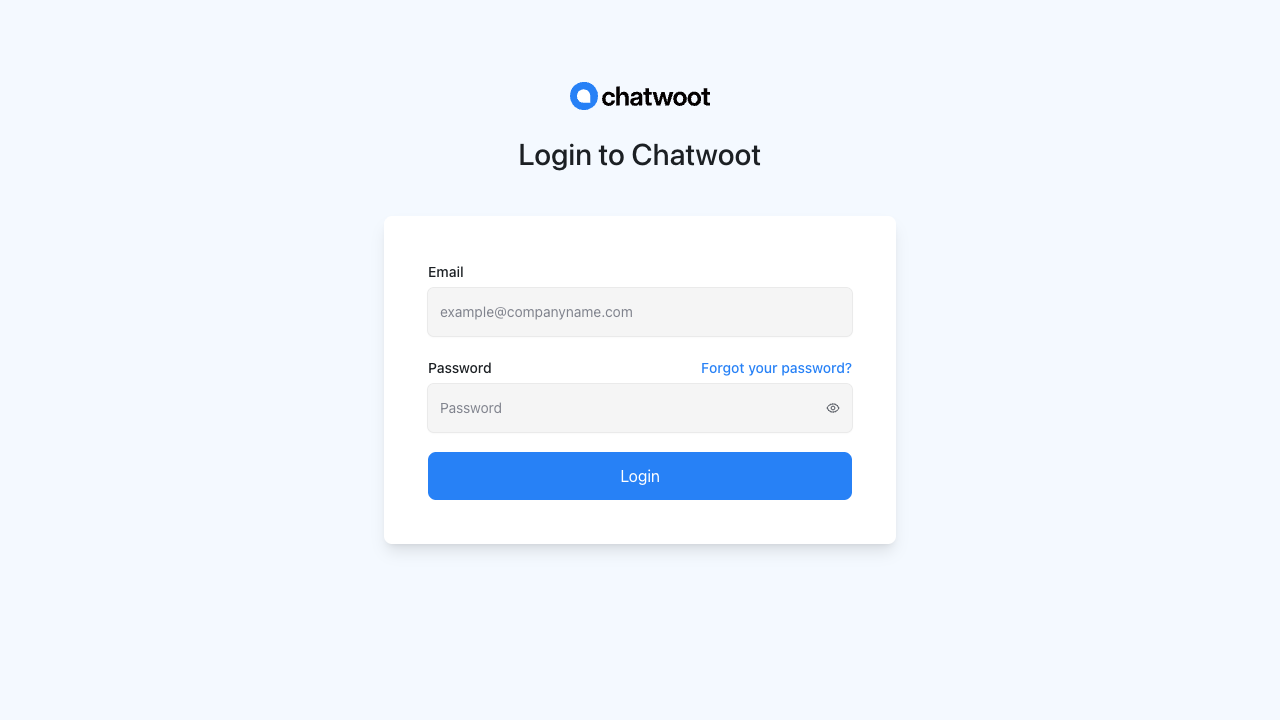
Step 7: Sign in to Chatwoot
Open http://<vm-ip>/ in your browser. You are redirected to the agent sign-in page. Enter the CHATWOOT_ADMIN_EMAIL and CHATWOOT_ADMIN_PASSWORD from Step 6 and sign in.
You can also verify the login from the command line with the Devise Token Auth endpoint - a correct password returns 200:
EMAIL=$(sudo grep '^CHATWOOT_ADMIN_EMAIL=' /root/chatwoot-credentials.txt | cut -d= -f2-)
PASS=$(sudo grep '^CHATWOOT_ADMIN_PASSWORD=' /root/chatwoot-credentials.txt | cut -d= -f2-)
curl -s -o /dev/null -w "%{http_code}\n" -X POST http://localhost/auth/sign_in \
  -H 'Content-Type: application/json' \
  -d "{\"email\":\"$EMAIL\",\"password\":\"$PASS\"}"
A 200 confirms the per-VM super admin authenticates end to end.
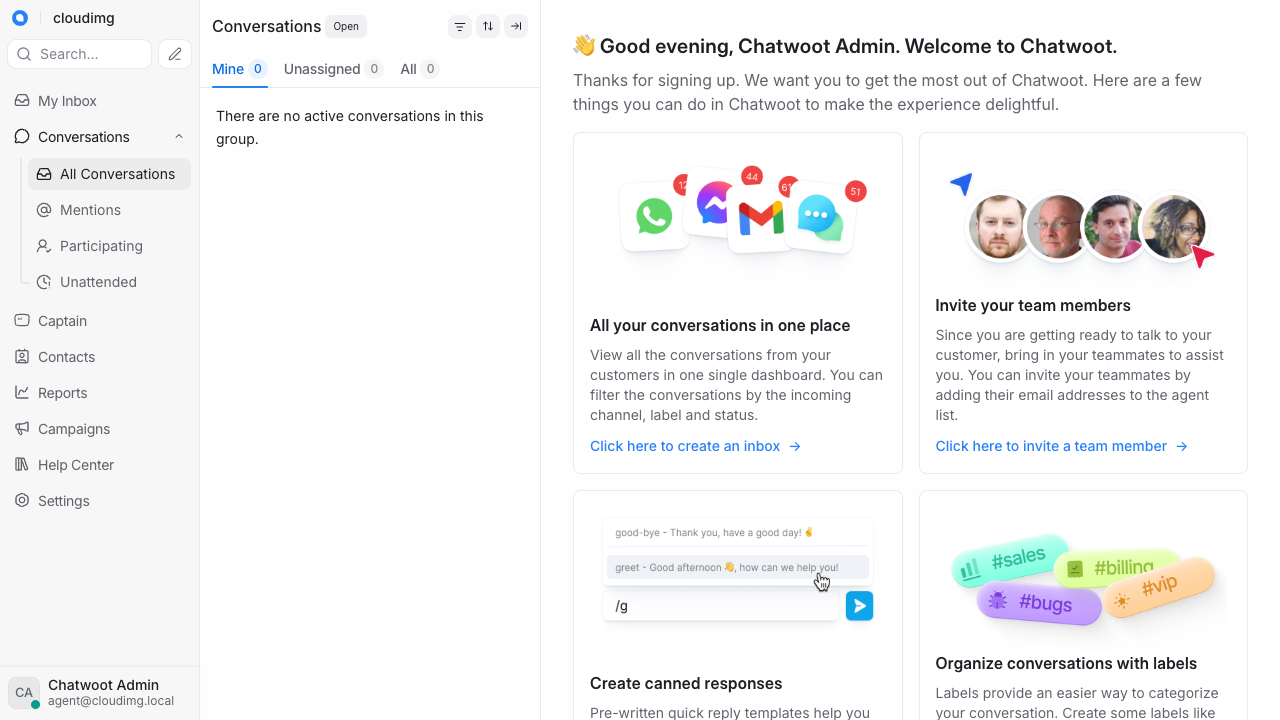
Step 8: Explore the dashboard
After signing in you land on the conversations dashboard - the shared team inbox where live chat, email and social conversations arrive and are assigned to agents.
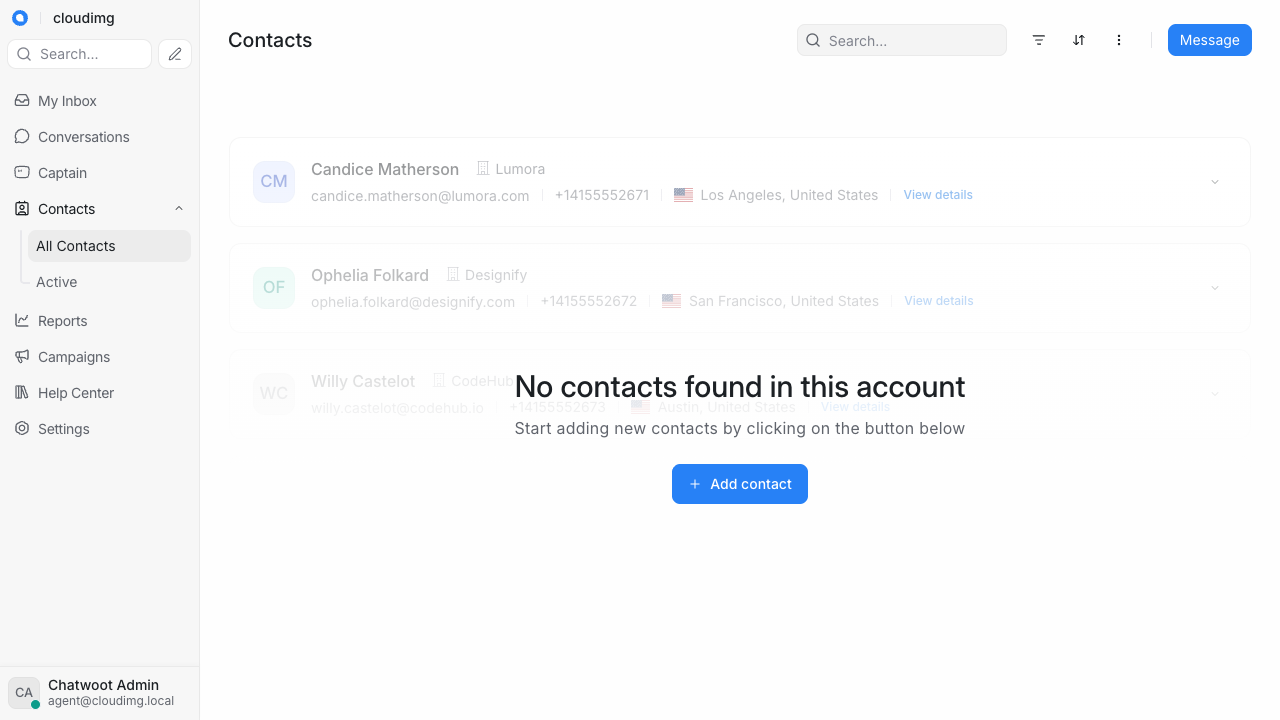
From the dashboard you can manage your contacts directory:
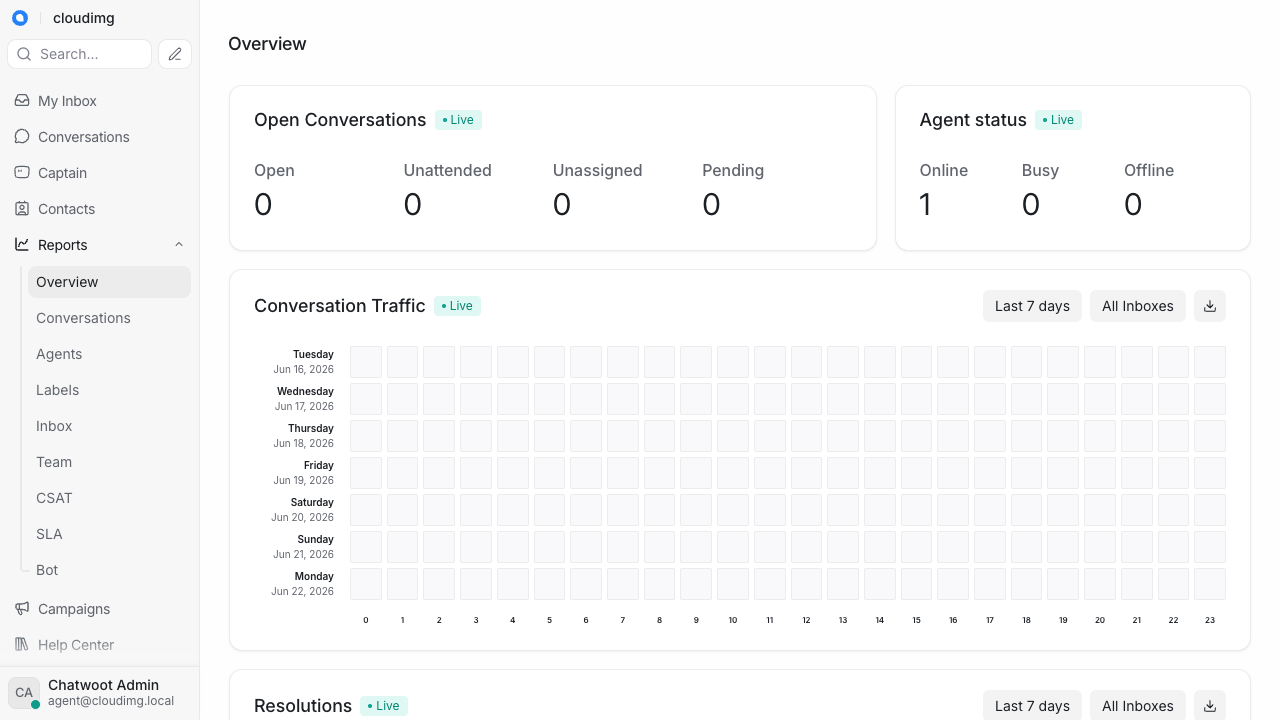
And review conversation analytics and configure your account from the reports and settings area:
Step 9: Create your first inbox
Chatwoot organises incoming conversations into inboxes. From the agent dashboard, open Settings -> Inboxes -> Add Inbox and choose a channel (for example a Website live-chat widget, an email channel, or an API channel). Follow the wizard to name the inbox, then embed the generated widget script in your website or connect your channel. New conversations from that channel then appear in the dashboard for your agents.
Managing the stack
The Chatwoot stack is wrapped by the chatwoot.service systemd unit, which runs docker compose up -d from /opt/chatwoot.
sudo systemctl restart chatwoot.service
sudo systemctl status chatwoot.service --no-pager
To inspect the application logs, tail the Rails container:
cd /opt/chatwoot
sudo docker compose logs --tail 50 rails
Enabling HTTPS
The image serves plain HTTP on port 80. For any public deployment, put TLS in front with your own domain. Point a DNS A record at the VM public IP, then install a certificate with certbot's nginx plugin and update FRONTEND_URL in /opt/chatwoot/.env to your https:// domain (then sudo systemctl restart chatwoot.service). Outline:
- Install certbot and the nginx plugin from the Ubuntu repositories.
- Run certbot against your domain to obtain and install a certificate into the nginx site.
- Set
FRONTEND_URL=https://your-domain/in/opt/chatwoot/.envand restartchatwoot.service.
Use your own registered domain in place of any example placeholder.
Maintenance
The OS receives unattended security updates. To update Chatwoot itself, edit the pinned image tag in /opt/chatwoot/docker-compose.yml, then from /opt/chatwoot run sudo docker compose pull followed by sudo docker compose run --rm rails bundle exec rails db:chatwoot_prepare and sudo systemctl restart chatwoot.service. Always snapshot the /var/lib/chatwoot data disk before a major version upgrade.
Support
Backed by 24/7 cloudimg support. Chatwoot is a trademark of Chatwoot Inc. This image is provided by cloudimg and is not affiliated with or endorsed by Chatwoot Inc.