CockroachDB on AWS User Guide
Overview
This image runs CockroachDB, the open source distributed SQL database from Cockroach Labs, as a single node on Ubuntu 24.04 LTS. CockroachDB is wire compatible with PostgreSQL, strongly consistent, horizontally scalable, and survives node failures without manual failover. The cockroach binary is a single statically compiled Go executable, so the image carries no JVM, no Erlang virtual machine, and no separate Python interpreter.
CockroachDB serves two ports. The SQL endpoint on 26257 speaks the PostgreSQL wire protocol, so the psql command line client, every JDBC and ODBC driver, every PostgreSQL ORM, and the pgAdmin web user interface all connect to that port unchanged. The DB Console web administrator interface on 8080 presents the cluster overview, the node list, SQL activity, jobs, the metrics dashboard and the schedules. Both ports are TLS only.
The image ships in secure mode with a per instance self signed certificate authority generated on the first boot of every deployed instance. The certificate authority private key, the node certificate, the node key, and a root client certificate are all written to /var/lib/cockroach/certs (with the certificate authority key kept root only under /var/lib/cockroach/ca-key). Two instances launched from the same Amazon Machine Image never share certificates, never share passwords, and do not trust each other's certificate authorities. A SQL user named cloudimg is provisioned with a randomly generated per instance password and granted the built in admin role; the plain text password is written to /root/cockroachdb-credentials.txt with mode 0600 so only the root user can read it.
CockroachDB's store, write ahead log, and the per instance certificate directory all live on a dedicated EBS data volume mounted at /var/lib/cockroach, separate from the operating system root volume, so the data tier can be resized independently of the root disk.
This image is intended for teams that want a production posture single node SQL database on day one for development, testing, and small production workloads, with a clear upgrade path to multi node by joining additional cockroach nodes to the cluster later. The per instance self signed certificate authority is not trusted by browsers or operating system certificate stores, and the section on swapping the certificate authority covers replacing the self signed chain with a properly signed certificate for production deployments.
Prerequisites
Before you deploy this image you need:
- An Amazon Web Services account where you can launch EC2 instances
- IAM permissions to launch instances, create security groups, and subscribe to AWS Marketplace products
- An EC2 key pair in the target region
- A VPC with a subnet that can reach the public internet for package updates
- The AWS Command Line Interface (
awsversion 2.0 or later) installed locally if you intend to use the CLI deployment path - Subscribed to the cloudimg CockroachDB AWS Marketplace listing
Step 1: Launch the Instance from the AWS Marketplace
Sign in to the AWS Management Console, open the EC2 service, and select Launch instance. Under Application and OS Images choose AWS Marketplace AMIs and search for CockroachDB. Select the cloudimg listing and choose Select, then Continue on the subscription summary.
Pick an instance type of m5.large or larger. CockroachDB keeps its block cache and write ahead buffer in memory and benefits from at least 8 GiB of RAM on a single node deployment. Choose your EC2 key pair under Key pair (login). Under Network settings select your VPC and subnet, and either create or select a security group that allows inbound TCP 22 from your management network, inbound TCP 26257 from the application networks that will run SQL, and inbound TCP 8080 from the management network that will open the DB Console. Do not open TCP 26257 or TCP 8080 to the public internet, because the DB Console is an administrator surface and the SQL endpoint exposes the entire data tier. Leave the root volume at the default size or larger.
Select Launch instance. First boot initialisation takes approximately one minute after the instance state becomes Running and the status checks pass; in that window the per instance certificate authority is generated, the node certificate is issued, the cloudimg administrator user is created, and the password is written to the credentials file.
Step 2: Launch the Instance from the AWS CLI
The following block launches an instance from the cloudimg CockroachDB Marketplace AMI into an existing subnet and security group. Replace <ami-id> with the AMI ID shown on the Marketplace listing, <key-name> with your EC2 key pair name, <subnet-id> with your subnet ID, and <security-group-id> with a security group that opens TCP 22, 8080, and 26257 as described above.
aws ec2 run-instances \
  --image-id <ami-id> \
  --instance-type m5.large \
  --key-name <key-name> \
  --subnet-id <subnet-id> \
  --security-group-ids <security-group-id> \
  --block-device-mappings '[{"DeviceName":"/dev/sda1","Ebs":{"VolumeSize":30,"VolumeType":"gp3"}}]' \
  --tag-specifications 'ResourceType=instance,Tags=[{Key=Name,Value=cockroachdb-01}]'
The command prints a JSON document on success. Note the instance ID, then retrieve its public address once it is running with aws ec2 describe-instances --instance-ids <instance-id> --query "Reservations[].Instances[].PublicIpAddress" --output text.
Step 3: Connect and Retrieve the Administrator Password
Connect over SSH with the key pair you selected and the public IP address from step 2. The SSH login user depends on the operating system of the AMI variant you launched:
| AMI variant | SSH login user |
|---|---|
| CockroachDB 25.4 on Ubuntu 24.04 | ubuntu |
The first boot service runs after the SSH daemon becomes ready, so wait approximately one minute after the status checks pass before reading the credentials file.
sudo cat /root/cockroachdb-credentials.txt
You will see a plain text file containing the SQL connection URL, the DB Console URL, the administrator username (cloudimg), the administrator password, and the path to the per instance certificate authority certificate. Copy these values somewhere secure such as a password manager or an encrypted vault, and do not commit them to source control.
Each command block in this guide that needs the administrator password reads it from the credentials file into a PASSWORD shell variable so every block is self contained:
PASSWORD="$(sudo awk -F= '/^cockroachdb.admin.pass=/ {print $2}' /root/cockroachdb-credentials.txt)"
echo "admin password length: ${#PASSWORD}"
Step 4: Verify the Server is Healthy
The DB Console exposes a dedicated health endpoint at /health that returns HTTP 200 once the node is ready. The image uses a per instance self signed certificate authority, so curl needs -k to accept the self signed certificate when probing over HTTPS:
curl -ks -o /dev/null -w "%{http_code}\n" https://127.0.0.1:8080/health
curl -ks -o /dev/null -w "%{http_code}\n" https://127.0.0.1:8080/health?ready=1
Both probes return 200. The first reports the HTTP server is up. The second reports the node is ready to serve SQL traffic.
You can also confirm the SQL endpoint with the bundled cockroach command line tool. The image installs a root client certificate at /var/lib/cockroach/certs/client.root.crt so commands run with --certs-dir authenticate as the root SQL user without needing a password:
sudo /usr/local/bin/cockroach node ls \
  --certs-dir=/var/lib/cockroach/certs \
  --host=127.0.0.1:26257
The command lists the cluster nodes. A single node deployment reports node id 1:
  id
------
   1
Step 5: Server Components
| Component | Version | Source |
|---|---|---|
| Operating system | Ubuntu 24.04 LTS (noble) |
Canonical AMI base, fully patched at image build |
| Kernel | 6.17 (aws variant) | Ubuntu noble updates |
| CockroachDB | 25.4 | Cockroach Labs official binary tarball at binaries.cockroachdb.com |
psql PostgreSQL client |
16.x | Ubuntu noble postgresql-client-16 package |
The cockroach binary lives at /usr/local/bin/cockroach. The systemd service unit is /etc/systemd/system/cockroach.service. The per instance first boot service is /etc/systemd/system/cockroachdb-firstboot.service. The first boot helper script that generates the certificate authority and the cloudimg user is /usr/local/sbin/cockroachdb-firstboot.sh.
Step 6: Filesystem Layout
The image keeps the CockroachDB store, the write ahead log, the per instance certificates, and the cluster logs on a dedicated EBS volume mounted at /var/lib/cockroach. The operating system root disk holds only the cockroach binary and the systemd unit files. You can resize the data volume independently of the root volume.
df -h /var/lib/cockroach /
Expected layout on a fresh launch:
Filesystem      Size  Used Avail Use% Mounted on
/dev/nvme1n1     30G  794M   28G   3% /var/lib/cockroach
/dev/root        19G  3.7G   15G  21% /
Key paths inside /var/lib/cockroach:
| Path | Purpose |
|---|---|
/var/lib/cockroach/cockroach-data |
CockroachDB store (RocksDB based Pebble engine, write ahead log, snapshots) |
/var/lib/cockroach/certs |
Per instance node certificate, root client certificate, and the certificate authority certificate |
/var/lib/cockroach/ca-key |
Per instance certificate authority private key (root only, mode 0700) |
/var/log/cockroach |
CockroachDB structured logs |
Step 7: Start, Stop, and Check Status
CockroachDB runs as a systemd service named cockroach.service. The first boot service cockroachdb-firstboot.service runs once on the first launch of an instance, generates the per instance certificate authority and the cloudimg user, then leaves the sentinel /var/lib/cloudimg/cockroachdb-firstboot.done so subsequent boots skip the initialisation.
sudo systemctl status cockroach.service
sudo systemctl restart cockroach.service
sudo systemctl stop cockroach.service
sudo systemctl start cockroach.service
Confirm both units are active after a restart:
sudo systemctl is-active cockroach.service cockroachdb-firstboot.service
The output is active on two lines.
Step 8: Open the DB Console
Browse to the DB Console URL printed in the credentials file:
https://<instance-public-ip>:8080/
The browser will warn that the certificate is not trusted. This is expected because the image generates a per instance self signed certificate authority that is not in any browser's trust store. Step 17 covers replacing the certificate authority with a CA signed chain. Accept the warning to proceed.
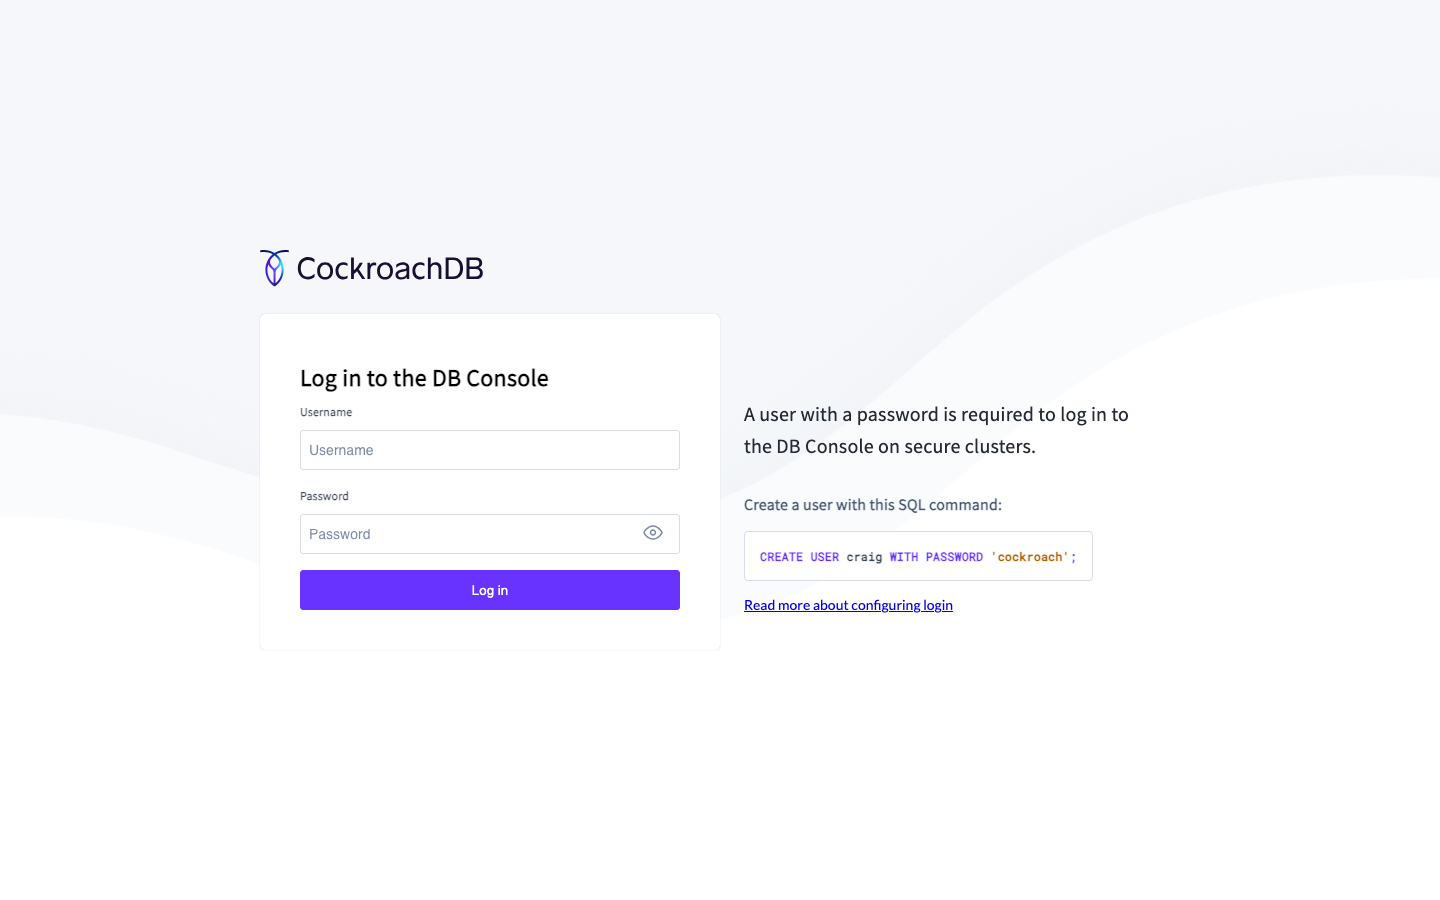
Sign in as the cloudimg user with the password from the credentials file. The DB Console opens on the cluster overview:
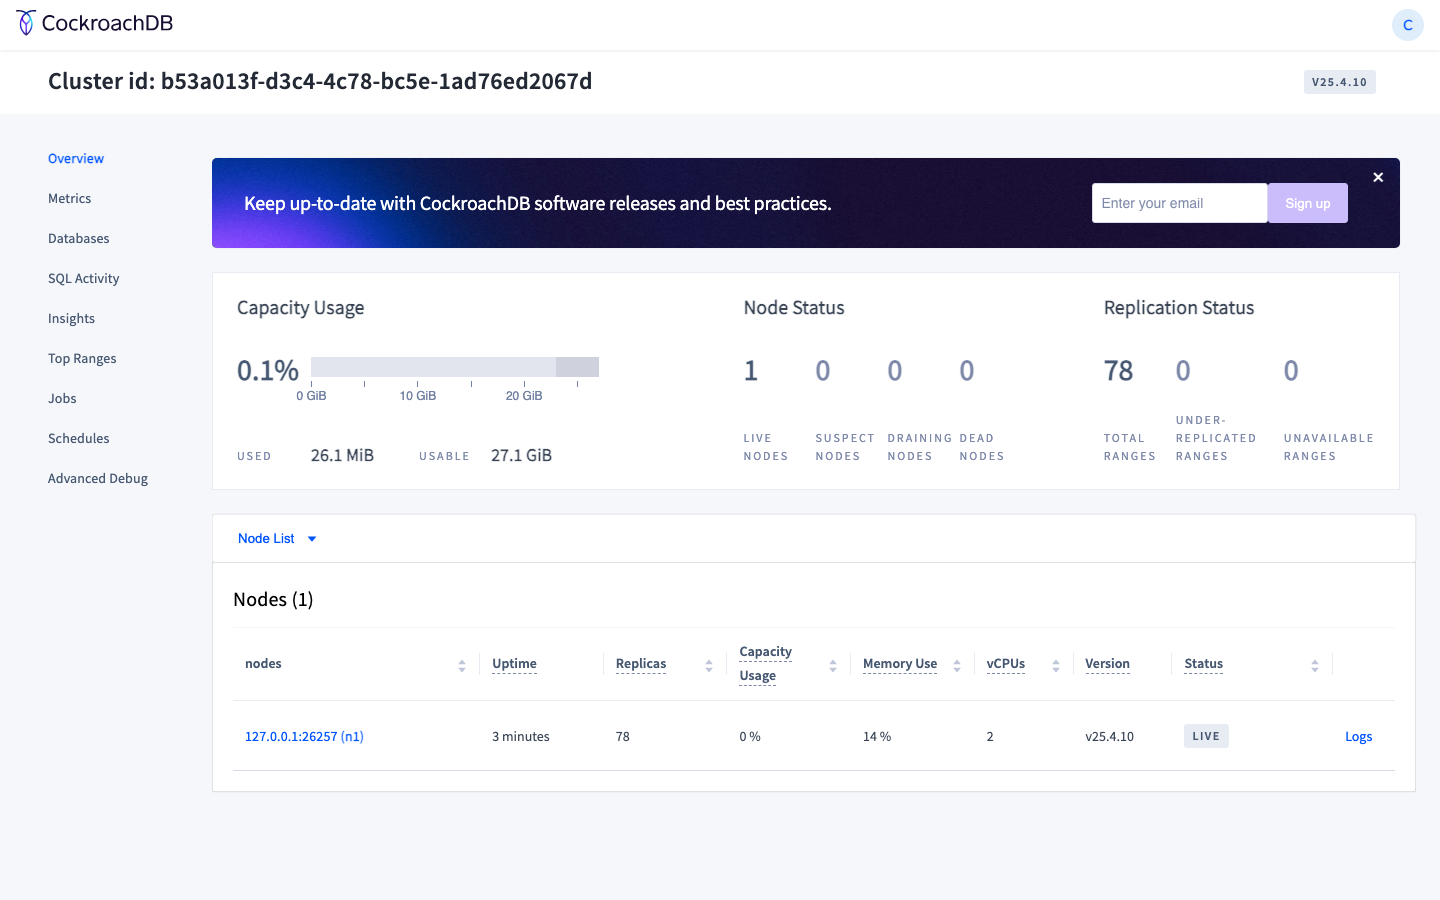
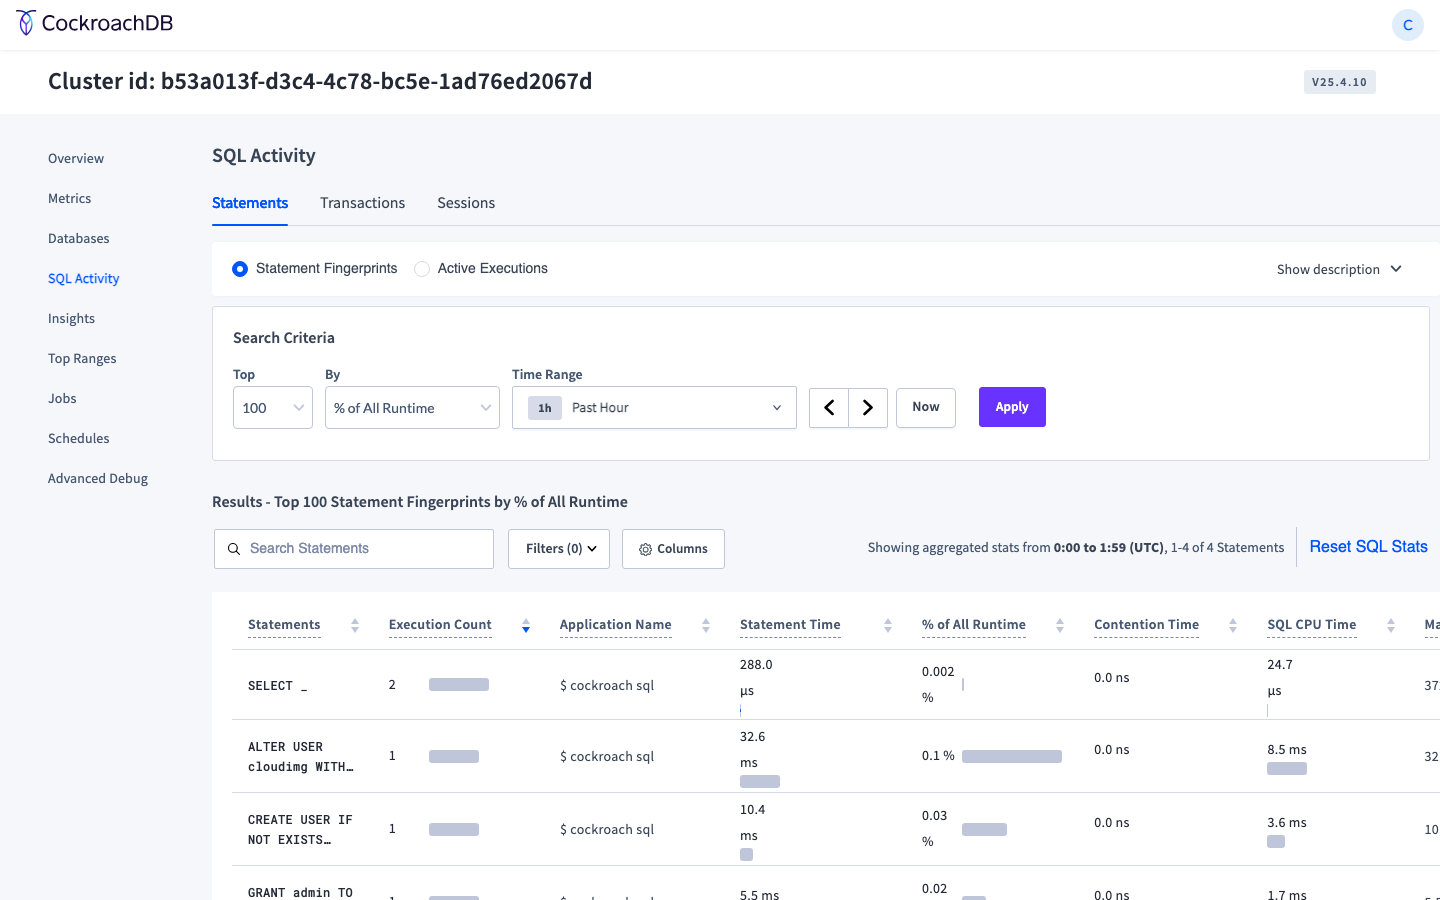
The left navigation gives you the Overview, Metrics, Databases, SQL Activity, Insights, Top Ranges, Jobs, Schedules, and Advanced Debug pages. The SQL Activity page lists every statement the cluster has executed, with statement fingerprints, execution counts, latencies, and the percentage of total runtime:
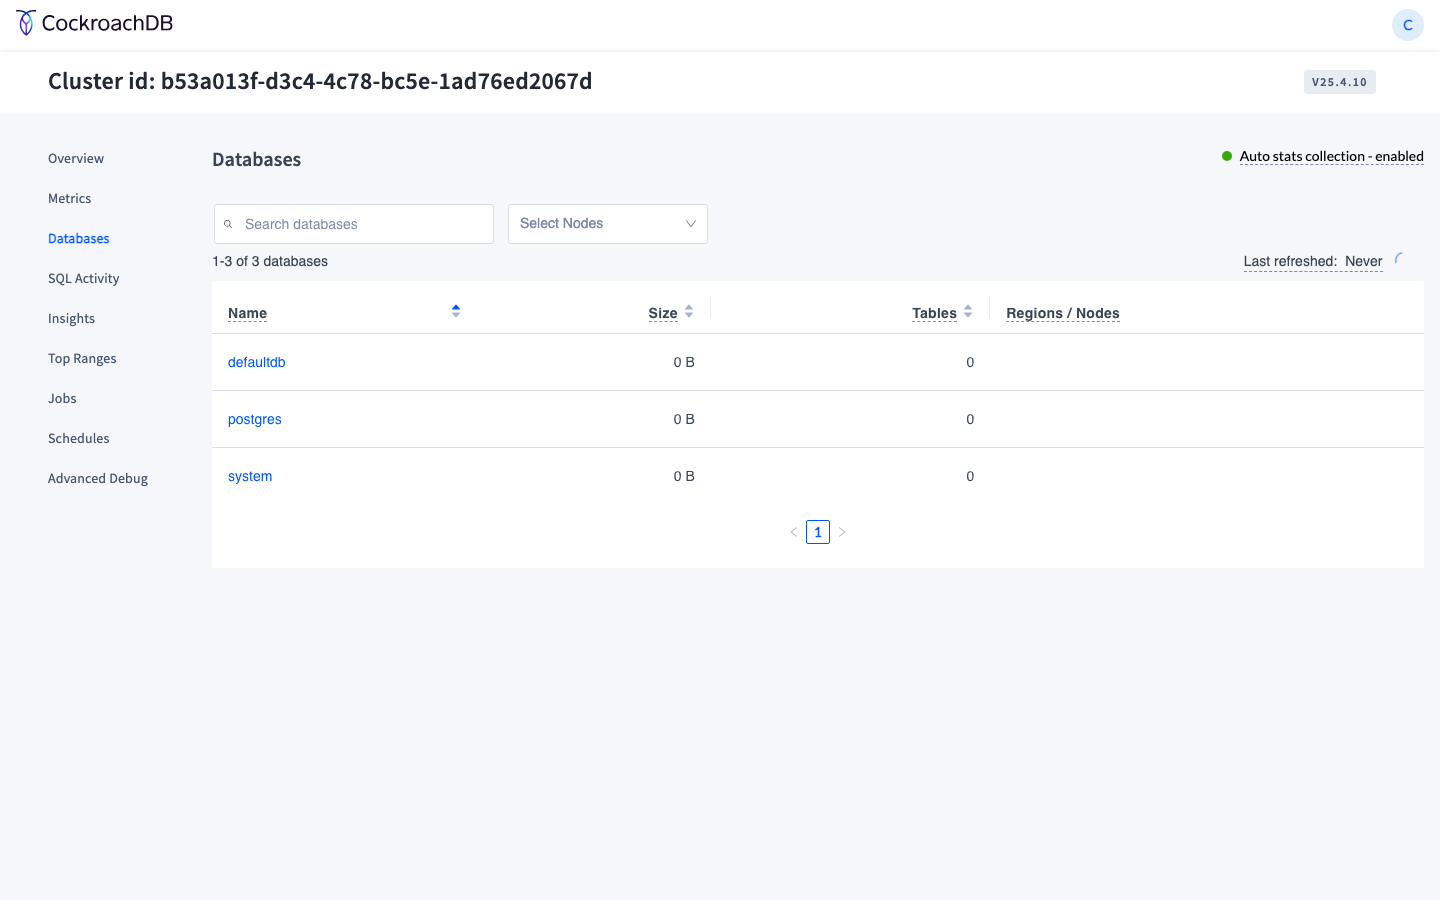
The Databases page lists every database on the cluster:
Step 9: Create a Database and Run SQL from the Command Line
The image installs the PostgreSQL command line client psql. Because CockroachDB speaks the PostgreSQL wire protocol, psql connects to the SQL endpoint unchanged. The connection string in the credentials file uses sslmode=verify-full and points at the per instance certificate authority certificate so the client verifies the server is the one the image generated certificates for.
PASSWORD="$(sudo awk -F= '/^cockroachdb.admin.pass=/ {print $2}' /root/cockroachdb-credentials.txt)"
sudo cp /var/lib/cockroach/certs/ca.crt /tmp/ca.crt && sudo chmod 0644 /tmp/ca.crt
PGPASSWORD="$PASSWORD" psql "postgresql://cloudimg@127.0.0.1:26257/defaultdb?sslmode=verify-full&sslrootcert=/tmp/ca.crt" -c "SELECT version();"
The reported version is:
                                                  version
-----------------------------------------------------------------------------------------------------------
 CockroachDB CCL v25.4.10 (x86_64-pc-linux-gnu, built 2026/04/29 11:09:08, go1.23.12 X:nocoverageredesign)
(1 row)
Create a database, a table, insert a few rows, and select them back:
PASSWORD="$(sudo awk -F= '/^cockroachdb.admin.pass=/ {print $2}' /root/cockroachdb-credentials.txt)"
PGPASSWORD="$PASSWORD" psql "postgresql://cloudimg@127.0.0.1:26257/defaultdb?sslmode=require" <<'SQL'
CREATE DATABASE inventory;
USE inventory;
CREATE TABLE widgets (id UUID PRIMARY KEY DEFAULT gen_random_uuid(), name STRING NOT NULL, qty INT NOT NULL);
INSERT INTO widgets (name, qty) VALUES ('sprocket', 12), ('gizmo', 4), ('thingamajig', 7);
SELECT name, qty FROM widgets ORDER BY qty DESC;
SQL
The select prints three rows ordered by quantity. CockroachDB uses standard SQL grammar and natively supports UUID, JSONB, ARRAY, TIMESTAMPTZ, and geospatial types.
Step 10: Create Per Application SQL Users
Production applications should connect with a per application SQL user that has narrow privileges, not the cloudimg administrator. Create a user, grant it access to a specific database, and use that user from the application:
PASSWORD="$(sudo awk -F= '/^cockroachdb.admin.pass=/ {print $2}' /root/cockroachdb-credentials.txt)"
APP_PASSWORD="$(openssl rand -base64 24)"
PGPASSWORD="$PASSWORD" psql "postgresql://cloudimg@127.0.0.1:26257/defaultdb?sslmode=require" <<SQL
CREATE USER inventory_app WITH PASSWORD '${APP_PASSWORD}';
GRANT CONNECT ON DATABASE inventory TO inventory_app;
GRANT SELECT, INSERT, UPDATE, DELETE ON ALL TABLES IN SCHEMA inventory.public TO inventory_app;
SQL
echo "inventory_app password: ${APP_PASSWORD}"
Store the application password in your secrets manager. The cloudimg administrator does not appear in application configuration files.
Step 11: Rotate the Administrator Password
If the credentials file leaks, rotate the cloudimg user's password in SQL. The change takes effect on the next connection:
OLD_PASSWORD="$(sudo awk -F= '/^cockroachdb.admin.pass=/ {print $2}' /root/cockroachdb-credentials.txt)"
NEW_PASSWORD="$(openssl rand -base64 24)"
PGPASSWORD="$OLD_PASSWORD" psql "postgresql://cloudimg@127.0.0.1:26257/defaultdb?sslmode=require" -c "ALTER USER cloudimg WITH PASSWORD '${NEW_PASSWORD}';"
sudo sed -i "s|^cockroachdb.admin.pass=.*|cockroachdb.admin.pass=${NEW_PASSWORD}|" /root/cockroachdb-credentials.txt
echo "New cloudimg password length: ${#NEW_PASSWORD}"
The credentials file is updated in place so future logins use the new password.
Step 12: Join Additional Nodes for a Multi Node Cluster
CockroachDB scales horizontally by adding nodes. The single node image is the entry point; you can grow a cluster by launching additional instances and pointing each at the first one with --join. The first node continues to serve traffic while new nodes catch up.
Launch a second instance from the same Marketplace AMI in a private subnet that can reach the first instance on TCP 26257. SSH into the new instance, then stop the cockroach service and edit /etc/systemd/system/cockroach.service to add --join=<first-node-private-ip>:26257. On the first node and every new node the cockroach process must trust the same certificate authority, so copy /var/lib/cockroach/ca-key/ca.key from the first node to the new node before it starts. The new node then regenerates its node certificate against the shared certificate authority and joins the cluster.
This is a brief sketch. The Cockroach Labs documentation at https://www.cockroachlabs.com/docs/stable/manual-deployment covers the production deployment topology in depth.
Step 13: Backups
CockroachDB has a built in backup command that writes a consistent backup to S3, Google Cloud Storage, or Azure Blob Storage. The backup runs online and does not block reads or writes. To back up the whole cluster to an S3 bucket the instance role has access to:
PASSWORD="$(sudo awk -F= '/^cockroachdb.admin.pass=/ {print $2}' /root/cockroachdb-credentials.txt)"
PGPASSWORD="$PASSWORD" psql "postgresql://cloudimg@127.0.0.1:26257/defaultdb?sslmode=require" -c "BACKUP INTO 's3://<your-bucket>/cockroachdb-backups?AUTH=implicit';"
CockroachDB also supports incremental backups, scheduled backups via CREATE SCHEDULE FOR BACKUP, and point in time restore. The full reference is at https://www.cockroachlabs.com/docs/stable/backup.
Step 14: Connect from a Python Application
CockroachDB is wire compatible with PostgreSQL so any Python PostgreSQL driver works. With the psycopg driver:
pip install 'psycopg[binary]'
Connection code:
import os
import psycopg

PASSWORD = open("/root/cockroachdb-credentials.txt").read()
# Parse cockroachdb.admin.pass=... line yourself, or use any secret store.

with psycopg.connect(
    "host=127.0.0.1 port=26257 dbname=defaultdb user=cloudimg sslmode=require",
    password=PASSWORD,
) as conn:
    with conn.cursor() as cur:
        cur.execute("SELECT now();")
        print(cur.fetchone())
The connection uses sslmode=require, which enforces TLS but does not verify the certificate chain. For production use sslmode=verify-full and supply sslrootcert=/path/to/ca.crt so the client checks the certificate authority.
Step 15: Network Exposure and Security Recommendations
The DB Console on port 8080 is an administrator surface. Even with TLS and password authentication it should not face the public internet. Restrict the security group to the management network that operators reach the DB Console from. The SQL endpoint on port 26257 carries data plane traffic and authenticates with passwords or client certificates; restrict it to the application subnets that need it.
The image's per instance self signed certificate authority is fine for development and small production deployments where you control the clients. For larger deployments, see step 17 for swapping the certificate authority for a CA signed chain.
Other recommendations:
- Keep the cockroach process patched. New point releases of CockroachDB 25.4 ship with the upstream tarball; reinstall with
curl -fsSL https://binaries.cockroachdb.com/cockroach-v25.4.<patch>.linux-amd64.tgz | sudo tar -C /usr/local/bin --strip-components=1 -xzv cockroach-v25.4.<patch>.linux-amd64/cockroach, thensudo systemctl restart cockroach.service. - Do not store the cloudimg administrator credentials in application configuration. Create per application SQL users (step 10).
- Consider enabling encryption at rest on the EBS data volume for compliance workloads.
- Rotate the cloudimg user password if the credentials file leaks (step 11).
Step 16: Resize the Data Volume
The data tier lives on a dedicated EBS volume mounted at /var/lib/cockroach. To resize the volume:
- In the EC2 console, modify the volume and increase its size.
- On the instance, run
sudo growpart /dev/nvme1n1 1 || true, thensudo resize2fs /dev/nvme1n1.
CockroachDB sees the larger volume immediately. There is no need to restart the cockroach service.
Step 17: Swap the Per Instance Certificate Authority for a CA Signed Chain
The image generates a per instance self signed certificate authority on first boot. Browsers and operating system trust stores do not trust it. For production deployments where end users open the DB Console, replace the per instance certificate authority with a chain signed by a certificate authority your clients already trust (Let's Encrypt, an internal public key infrastructure, or AWS Private Certificate Authority).
The high level workflow is:
- Issue a new node certificate, signed by your trusted certificate authority, with the DNS names and IP addresses that clients will reach this instance on. Place the certificate and its private key in
/var/lib/cockroach/certsasnode.crtandnode.key. - Replace
/var/lib/cockroach/certs/ca.crtwith the trusted certificate authority certificate. - Restart the cockroach service:
sudo systemctl restart cockroach.service.
The Cockroach Labs documentation at https://www.cockroachlabs.com/docs/stable/create-security-certificates-custom-ca covers the certificate format requirements and the rolling restart procedure for a multi node cluster.
Step 18: Upgrade to a Newer CockroachDB Point Release
CockroachDB 25.4 patch releases are drop in replacements. To upgrade in place:
TARGET=v25.4.<new-patch>
cd /tmp
curl -fsSL "https://binaries.cockroachdb.com/cockroach-${TARGET}.linux-amd64.tgz" -o cockroach.tgz
tar -xzf cockroach.tgz
sudo install -o root -g root -m 0755 cockroach-${TARGET}.linux-amd64/cockroach /usr/local/bin/cockroach
sudo systemctl restart cockroach.service
sudo /usr/local/bin/cockroach version --build-tag
CockroachDB allows the cluster to run a mixed point release for the duration of a rolling upgrade. Major version upgrades (25.4 to 26.x) require additional finalisation steps; see https://www.cockroachlabs.com/docs/stable/upgrade-cockroach-version.
Screenshots
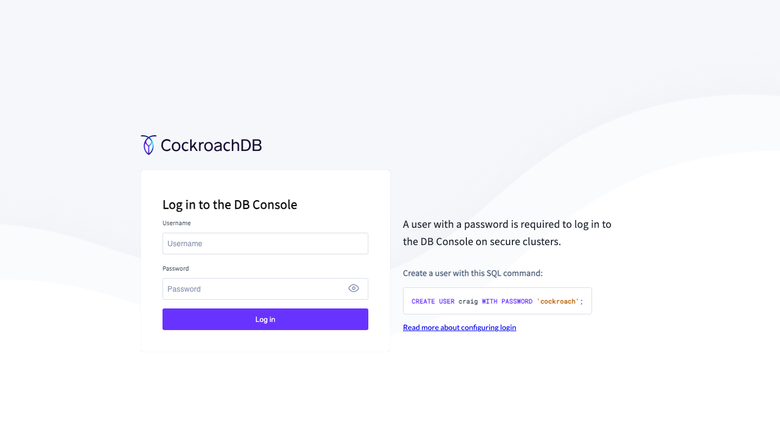
The CockroachDB DB Console sign-in page, served on first boot with no manual setup.
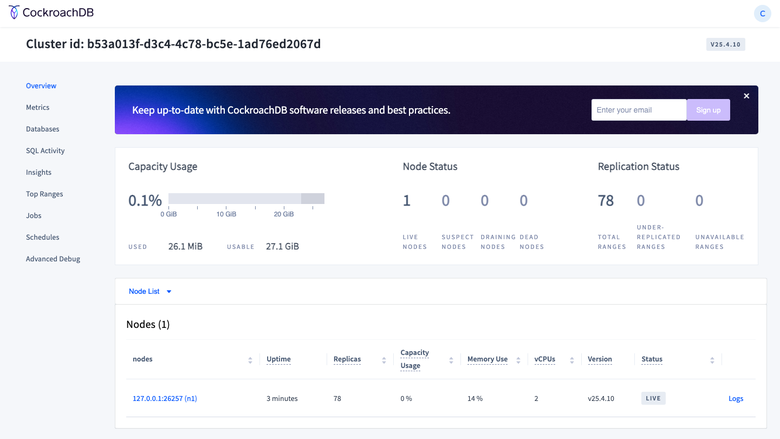
The DB Console cluster overview showing node health, replication and SQL throughput.
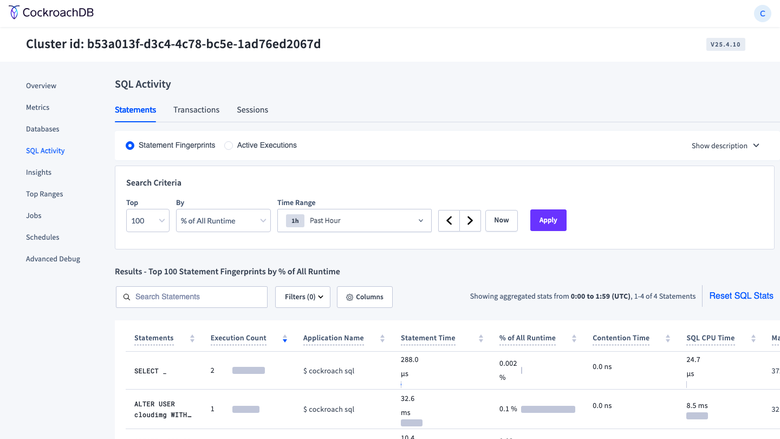
The DB Console SQL activity view listing statement executions and query plans.
Support
cloudimg provides 24/7 technical support for this image. Email support@cloudimg.co.uk with your AWS account ID, the AMI ID, the instance ID, and a description of the issue.