Django 5 LTS on Ubuntu 24.04 on Azure User Guide
Overview
Django is the leading open-source Python web framework — batteries included, ORM, admin UI, auth, forms, migrations, REST integrations. The cloudimg image installs Django 5.2.13 (the current LTS, supported through April 2028) into a Python 3.12 virtualenv, fronted by gunicorn 23 (WSGI app server) and nginx (reverse proxy + static-file server), backed by PostgreSQL 16. A cloudimg starter project lives at /opt/django/cloudimg with a core app and a Django superuser pre-created at first boot — the admin UI is reachable as soon as the VM finishes booting.
What is included:
- Django 5.2.13 LTS (BSD 3-Clause) in a Python 3.12 virtualenv at
/opt/django/venv - gunicorn 23 binding to
/run/gunicorn/cloudimg.sock(3 workers by default) - nginx reverse proxy on TCP
:80(proxy_pass to the gunicorn socket, serves static at/static/) - PostgreSQL 16 from Ubuntu noble main, with a per-VM
cloudimgrole +cloudimgdatabase - psycopg 3.2 (pool + binary)
- cloudimg starter project at
/opt/django/cloudimgwith acoreapp - Per-VM
SECRET_KEY(50 chars), DB password (32 hex), Django superuser password (32 hex) all rotated at first boot - Three systemd units:
gunicorn.service,django-firstboot.service, plus the standardnginx.serviceandpostgresql.service - 24/7 cloudimg support
Prerequisites
Active Azure subscription, SSH key, VNet + subnet. Standard_B2s (4 GB RAM) is comfortable for a 3-worker gunicorn + Postgres. NSG inbound: allow 22/tcp from your management CIDR and 80/tcp from any client CIDR that needs the Django UI.
Step 1-3: Deploy + SSH (standard pattern)
ssh azureuser@<vm-ip>
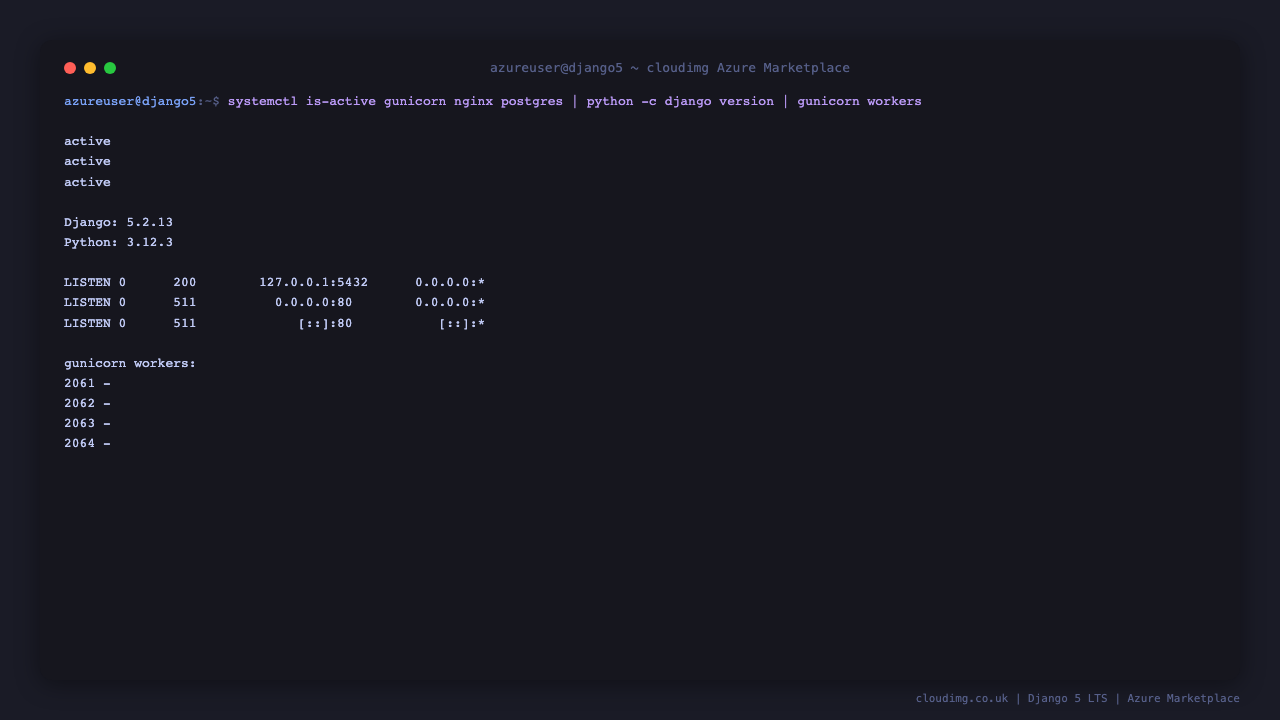
Step 4: Service Status + Versions
sudo systemctl is-active gunicorn.service nginx.service postgresql.service
/opt/django/venv/bin/python -c "import django; print('Django', django.get_version())"
Step 5: Read Per-VM Credentials
sudo cat /stage/scripts/django-credentials.log
Pick up DJANGO_URL, DJANGO_ADMIN_URL, DJANGO_ADMIN_USER, DJANGO_ADMIN_PASSWORD. Also includes the database password and per-VM SECRET_KEY.
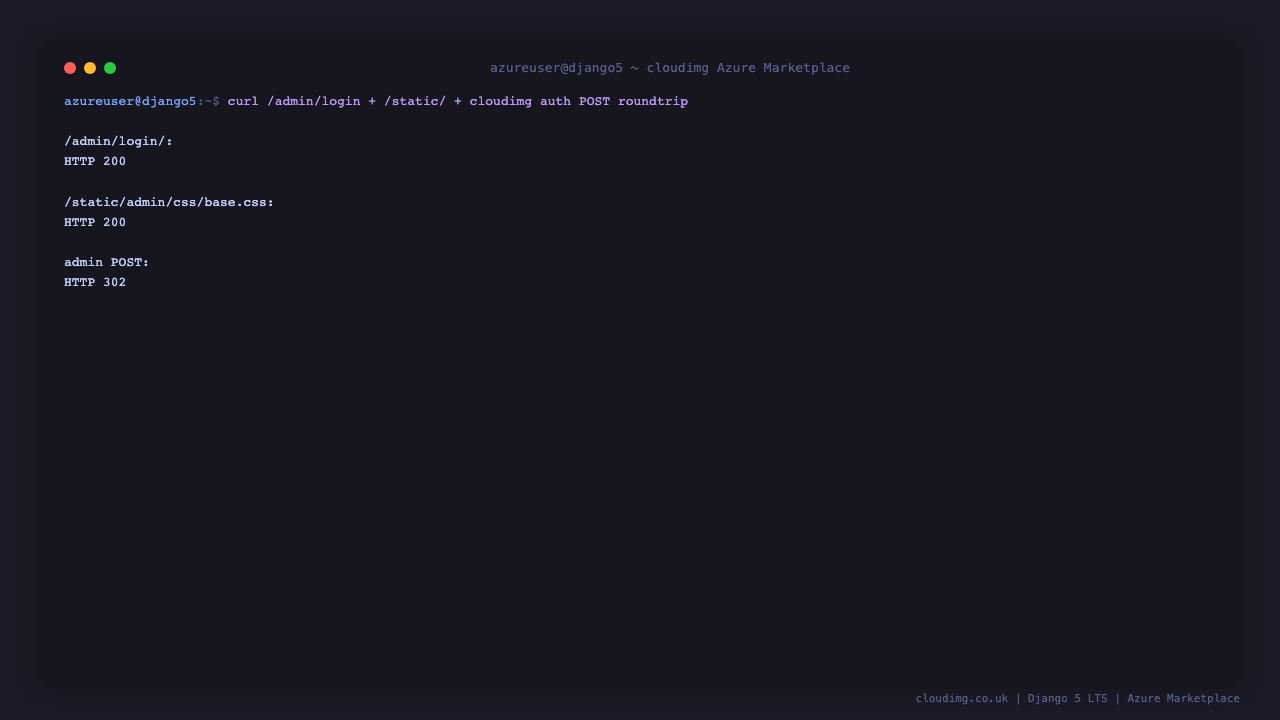
Step 6: HTTP Health + Static Files
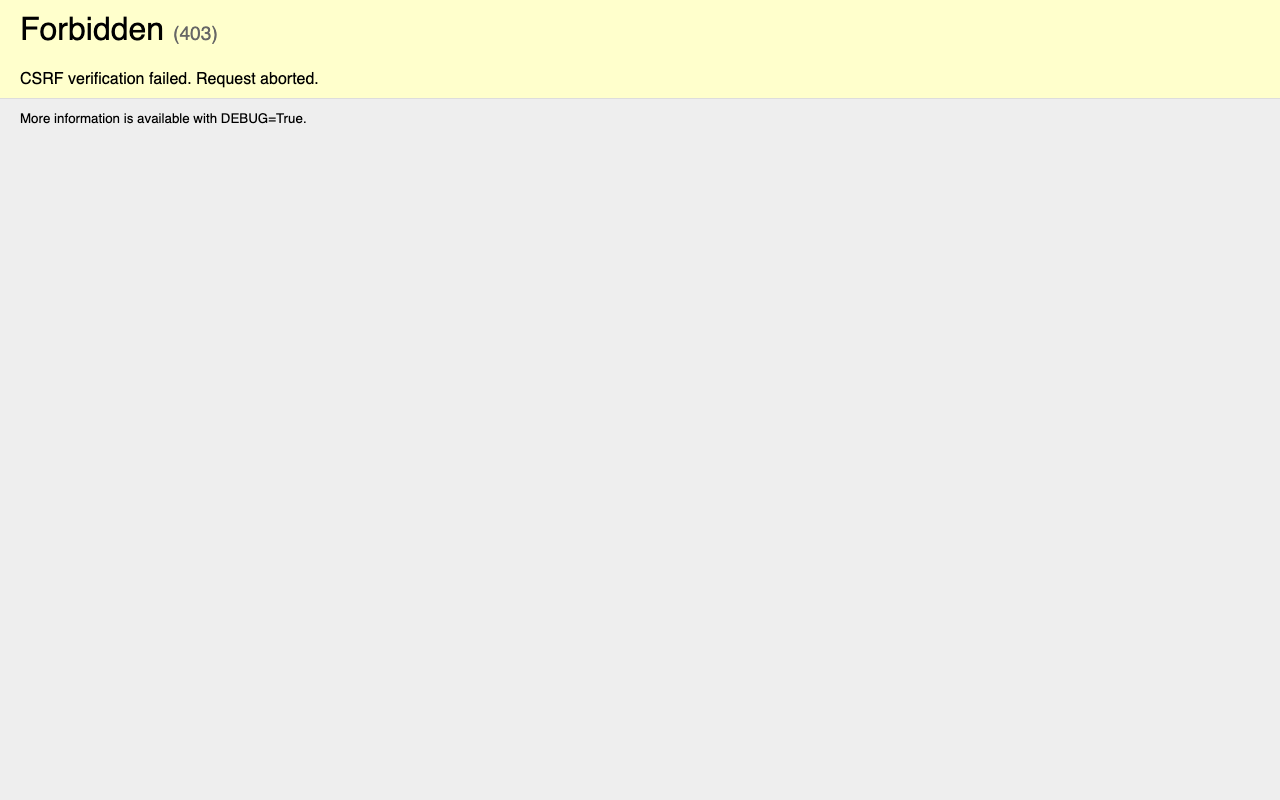
curl -sf -o /dev/null -w 'admin login: HTTP %{http_code}\n' http://127.0.0.1/admin/login/
curl -sf -o /dev/null -w 'static base.css: HTTP %{http_code}\n' http://127.0.0.1/static/admin/css/base.css
The first call hits gunicorn through nginx. The second proves nginx is serving collected static files directly (faster than going through Django).
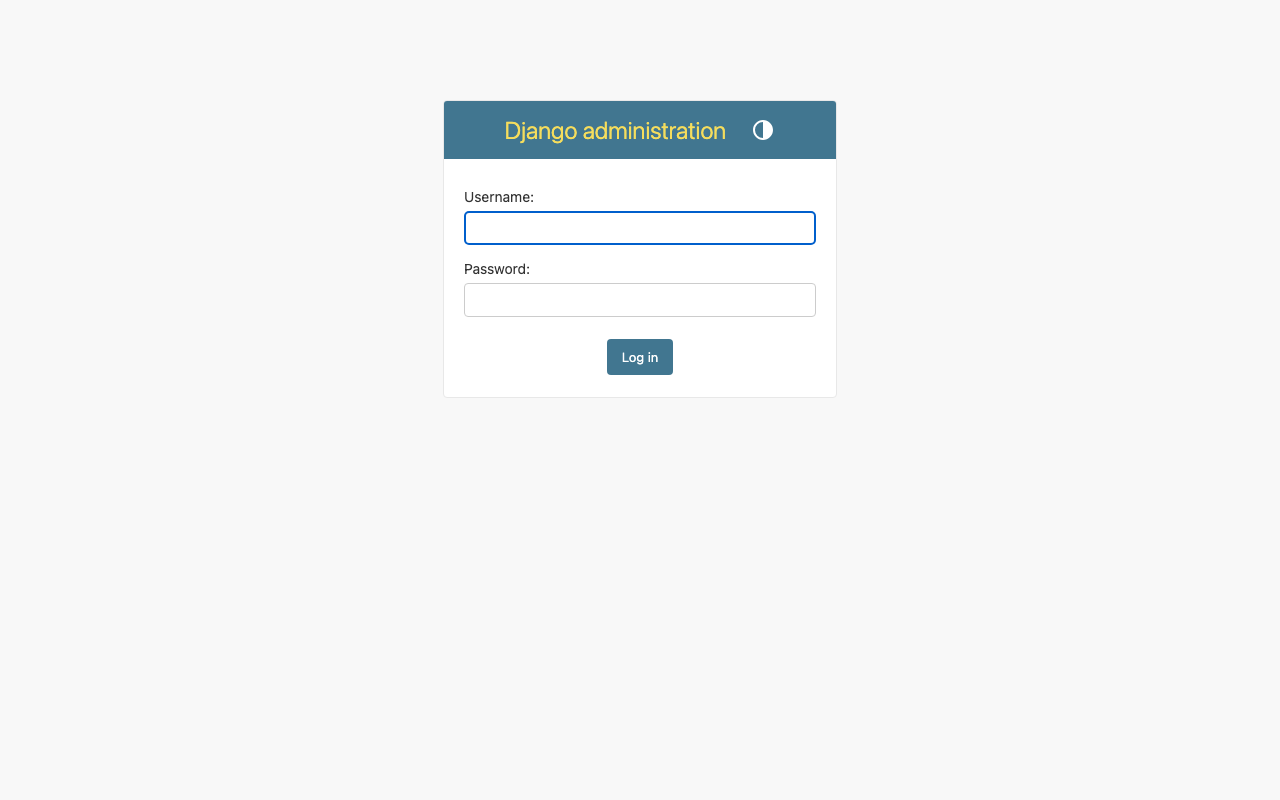
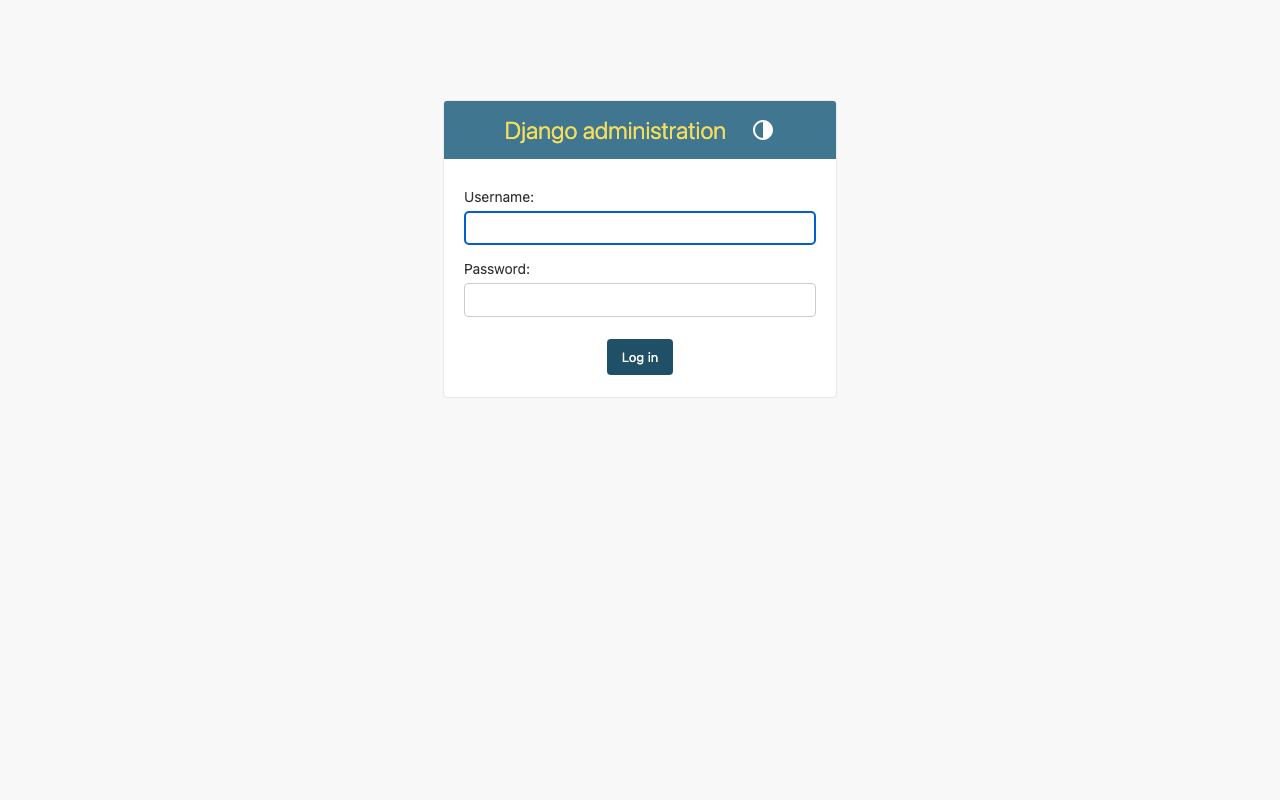
Step 7: Django Admin — Login
Browse to http://<vm-ip>/admin/ and log in as cloudimg with the password from Step 5.
Step 8: Django Admin — Site Administration
After login, the Site Administration page shows the auto-discovered admin models — Authentication and Authorization (Users, Groups) and any apps you add to INSTALLED_APPS.
Step 9: Django Admin — Users List
Click Users to see the cloudimg superuser. Add more users from this page or via manage.py createsuperuser.
Step 10: Run Django Management Commands
set -a; . /etc/django/cloudimg.env; export DJANGO_SETTINGS_MODULE=cloudimg.settings; set +a
cd /opt/django/cloudimg
sudo -E -u django /opt/django/venv/bin/python manage.py migrate --noinput | tail -3
sudo -E -u django /opt/django/venv/bin/python manage.py showmigrations --plan | tail -10
The first command is idempotent — already-applied migrations are no-ops. The second prints the migration plan ordering.
Step 11: Add a Django App
Replace <app-name> with your app:
cd /opt/django/cloudimg
sudo -u django /opt/django/venv/bin/python manage.py startapp <app-name>
Edit cloudimg/settings.py to add '<app-name>' to INSTALLED_APPS, define your models in <app-name>/models.py, then makemigrations <app-name> && migrate.
Step 12: Tune Gunicorn Workers
Edit /etc/django/cloudimg.env to raise GUNICORN_WORKERS, then restart:
sudo systemctl restart gunicorn.service
Defaults on Standard_B2s:
GUNICORN_WORKERS:3DJANGO_DEBUG:FalseDJANGO_ALLOWED_HOSTS:localhost,127.0.0.1,<public-ip>- DB: PostgreSQL 16, role
cloudimg, dbcloudimg
For production raise workers to 2 × CPU + 1 (e.g. 9 on a D4s_v5).
Step 13: Add Your Domain to ALLOWED_HOSTS
Edit /etc/django/cloudimg.env and add your domain to the comma-separated list:
DJANGO_ALLOWED_HOSTS=localhost,127.0.0.1,<vm-ip>,apps.example.com
Then restart:
sudo systemctl restart gunicorn.service
Step 14: Install Let's Encrypt SSL
Point your domain DNS A record at this VM, then:
sudo apt-get install -y python3-certbot-nginx
sudo certbot --nginx -d apps.example.com -m you@example.com --agree-tos --non-interactive --redirect
Certbot edits /etc/nginx/sites-available/django-cloudimg to add the SSL server block and a :80 → :443 redirect, then reloads nginx. Renewal is via the certbot.timer systemd unit (runs twice daily).
Step 15: Backups
Take a consistent backup with the broker running by pg_dump-ing the database, plus the media/ upload directory:
PASS=$(sudo grep '^DJANGO_DB_PASSWORD=' /stage/scripts/django-credentials.log | cut -d= -f2-)
PGPASSWORD="$PASS" pg_dump -h 127.0.0.1 -U cloudimg cloudimg | gzip > /var/backups/cloudimg-db-$(date +%F).sql.gz
sudo tar czf /var/backups/cloudimg-media-$(date +%F).tgz -C /opt/django/cloudimg media
Periodically copy /var/backups to Azure Blob Storage (az storage blob upload-batch) for off-VM retention.
Step 16: Logs and Troubleshooting
sudo journalctl -u gunicorn.service --no-pager -n 80
sudo journalctl -u nginx.service --no-pager -n 30
sudo journalctl -u postgresql.service --no-pager -n 30
sudo tail -50 /var/log/nginx/access.log
sudo tail -50 /var/log/nginx/error.log
Django app errors are surfaced via gunicorn's --access-logfile - and --error-logfile - (which both go to the systemd journal). For more verbose logs, set DJANGO_DEBUG=true in /etc/django/cloudimg.env (development only).
Security
DEBUG=Falseby default — production-safe out of the boxALLOWED_HOSTSauto-populated with the public IP at first bootCSRF_TRUSTED_ORIGINSderived fromALLOWED_HOSTS- Per-VM
SECRET_KEY(50 chars fromopenssl rand) - gunicorn binds to a Unix socket (not exposed to the network)
- PostgreSQL listens on
127.0.0.1:5432(loopback only) - Per-VM DB password (32 hex chars)
- Per-VM Django superuser (32 hex char password)
- Restrict NSG inbound on
:80to the IP ranges that need the Django app - Install
python3-certbot-nginxfor Let's Encrypt automation (Step 14)
Support
cloudimg provides 24/7/365 expert technical support. Guaranteed response within 24 hours, one hour average for critical issues. Contact support@cloudimg.co.uk.