
elFinder Web File Manager on AWS User Guide
Overview
This image runs elFinder, the open source web file manager - a browser based, desktop style file browser for uploading, downloading, organising, previewing and archiving files. elFinder presents a familiar two pane interface: a folder tree on the left, the current folder's contents on the right, and a toolbar for every common file operation.
elFinder runs as a PHP application. nginx answers on port 80 (and 443 once you add TLS) and passes requests to php-fpm over a local socket. There is no database - elFinder is a filesystem client, and the managed file tree itself is the state. That managed tree lives on a dedicated Amazon EBS data volume mounted at /data (the managed root is /data/elfinder/files), independently resizable and kept separate from the operating system disk. The elFinder program code lives at /var/www/elfinder.
Security is the defining feature of this image. A file manager exposed without authentication is an open door to a filesystem, so on this image every request - the UI page, every static asset, and, critically, the PHP connector that performs the actual filesystem operations - is protected by HTTP Basic authentication enforced at nginx. There is no unauthenticated path to the connector. On the first boot of every deployed instance, a one-shot service generates an administrator password unique to that instance and writes it to /root/elfinder-credentials.txt with mode 0600. No shared or default credentials ship in the image. Files uploaded through the manager are stored outside the web document root and served back as inert downloads, so an uploaded script can never be executed by the web server.
Prerequisites
Before you deploy this image you need:
- An Amazon Web Services account where you can launch EC2 instances
- IAM permissions to launch instances, create security groups, and subscribe to AWS Marketplace products
- An EC2 key pair in the target Region for SSH access to the instance
- A VPC and subnet in the target Region, with a security group allowing inbound port 22 from your management network and inbound ports 80 and 443 from the networks your file manager users will reach elFinder on
- The AWS CLI (version 2) installed locally if you plan to deploy from the command line
Step 1: Launch the Instance from the AWS Marketplace
Sign in to the AWS Management Console, open the EC2 service, and select Launch instance. Under Application and OS Images choose AWS Marketplace AMIs and search for elFinder. Select the cloudimg listing and choose Select, then Continue on the subscription summary.
Pick an instance type of m5.large or larger. Choose your EC2 key pair under Key pair (login). Under Network settings select your VPC and subnet, and either create or select a security group that allows inbound port 22 from your management network and inbound ports 80 and 443 from the networks your users use. Leave the root volume at the default size or larger; the image adds a separate 32 GiB data volume for your managed files automatically.
Select Launch instance. First boot initialisation takes only a few seconds after the instance state becomes Running and the status checks pass.
Step 2: Launch the Instance from the AWS CLI
The following block launches an instance from the cloudimg elFinder Marketplace AMI into an existing subnet and security group. Replace <ami-id> with the AMI ID shown on the Marketplace listing, <key-name> with your EC2 key pair name, <subnet-id> with your subnet ID, and <security-group-id> with a security group that opens ports 22, 80, and 443 as described above.
aws ec2 run-instances \
  --image-id <ami-id> \
  --instance-type m5.large \
  --key-name <key-name> \
  --subnet-id <subnet-id> \
  --security-group-ids <security-group-id> \
  --block-device-mappings '[{"DeviceName":"/dev/sda1","Ebs":{"VolumeSize":30,"VolumeType":"gp3"}}]' \
  --tag-specifications 'ResourceType=instance,Tags=[{Key=Name,Value=elfinder-01}]'
The command prints a JSON document on success. Note the instance ID, then retrieve its public address once it is running with aws ec2 describe-instances --instance-ids <instance-id> --query "Reservations[].Instances[].PublicIpAddress" --output text.
Step 3: Connect and Retrieve the Administrator Login
Connect over SSH with the key pair you selected and the public IP address from step 2. The SSH login user depends on the operating system of the AMI variant you launched:
| AMI variant | SSH login user |
|---|---|
| elFinder 2.1 on Ubuntu 24.04 | ubuntu |
ssh -i /path/to/your-key.pem ubuntu@<public-ip>
The per-instance administrator password is written on first boot to a root-only file. Read it with:
sudo cat /root/elfinder-credentials.txt
The file contains the elFinder URL, the admin username (admin) and the generated ELFINDER_ADMIN_PASSWORD, plus the managed root path:
ELFINDER_URL=http://<public-ip>/
ELFINDER_ADMIN_USER=admin
ELFINDER_ADMIN_PASSWORD=<generated-per-instance>
ELFINDER_MANAGED_ROOT=/data/elfinder/files
These credentials are unique to this instance. You can confirm the services are running and the app is answering locally:
systemctl is-active nginx php8.3-fpm
curl -s -o /dev/null -w 'healthz    %{http_code}\n' http://127.0.0.1/healthz
curl -s -o /dev/null -w 'unauth UI  %{http_code}\n' http://127.0.0.1/
nginx and php8.3-fpm report active. The /healthz endpoint is unauthenticated and returns 200 - it is ideal for a load balancer or uptime monitor. The UI itself returns 401 without credentials, which is the whole point: nothing on this instance answers a file operation to an anonymous request. Signing in with the generated credentials returns 200:
sudo bash -c 'U=$(grep "^ELFINDER_ADMIN_USER=" /root/elfinder-credentials.txt | cut -d= -f2-); P=$(grep "^ELFINDER_ADMIN_PASSWORD=" /root/elfinder-credentials.txt | cut -d= -f2-); curl -s -o /dev/null -w "authenticated UI: %{http_code}\n" -u "$U:$P" http://127.0.0.1/'
Step 4: First Sign-in
Open the file manager in your browser at http://<instance-public-ip>/. Your browser prompts for a username and password (HTTP Basic authentication) - enter admin and the password from /root/elfinder-credentials.txt. The elFinder desktop style file manager then loads immediately, with a Places and Files tree on the left and the managed folder on the right.
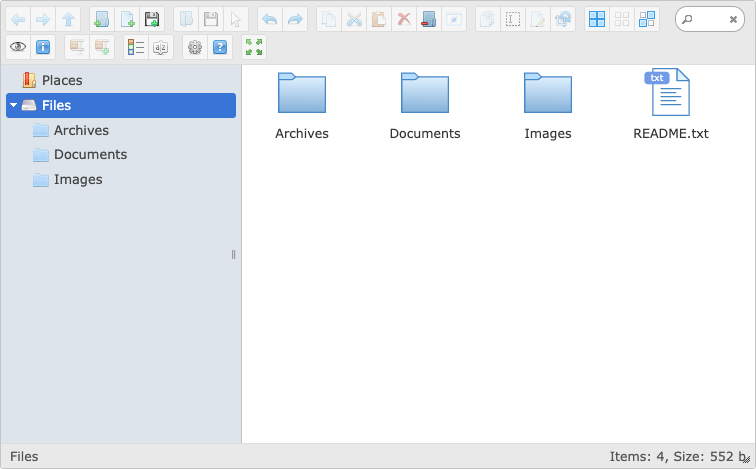
The image ships with a small set of sample folders (Documents, Images, Archives) and a README.txt so the interface is not empty on first login. You can delete all of them.
Step 5: Managing Files
Use the toolbar to work with files and folders: New folder and New file, Upload files, Copy / Cut / Paste, Rename, Duplicate, Delete, and Create archive / Extract. Drag and drop from your desktop into the browser to upload. Switch between the icon view and a detailed list view (with permissions, modification time and size columns) from the view toggle on the toolbar.
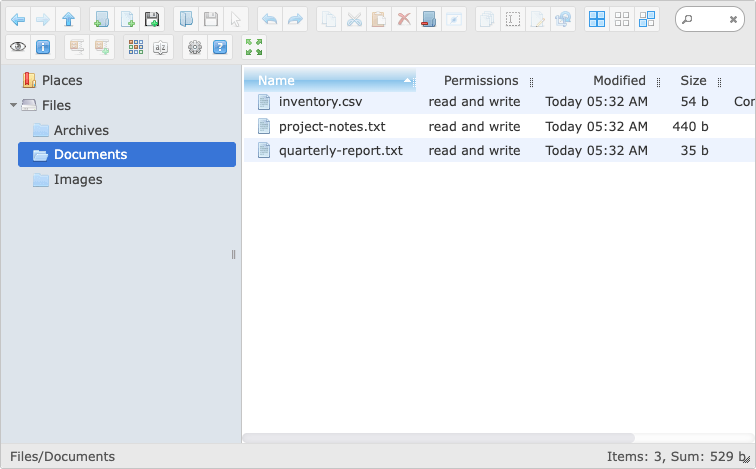
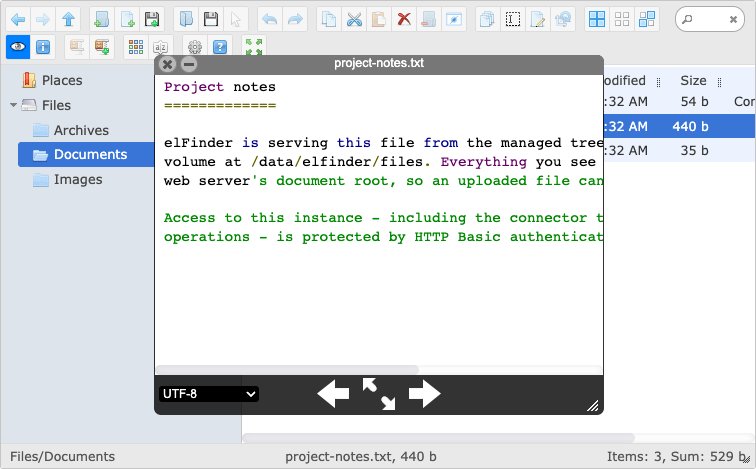
Select a file and choose Preview to view images and text directly in the browser without downloading. Use the search box (top left) to find files in the current tree, and Get info to see a file's full details.
Step 6: Where Your Files Live
All managed content is on the dedicated EBS data volume mounted at /data; the managed root is /data/elfinder/files. You can confirm the mount and see the managed tree:
findmnt /data
sudo ls -la /data/elfinder/files
findmnt shows /data backed by its own ext4 volume, separate from the OS root. Because the data volume is independent, you can resize it in the AWS Console, snapshot it with AWS Backup, or take EBS snapshots for point-in-time recovery, without touching the operating system disk. The managed root is deliberately outside the nginx document root (/var/www/elfinder), so nothing under it is reachable except through the authenticated connector.
Step 7: The Security Model
This image is authentication-first, because a file manager is the highest-consequence class of unauthenticated exposure. Three properties are enforced and are worth understanding:
- The connector is never anonymous. nginx applies HTTP Basic authentication at the server level, so it is inherited by every location - including
php/connector.php, the endpoint that reads, writes, uploads, renames and deletes files. The only unauthenticated path is the static/healthzendpoint, which touches nothing. - Uploads can never execute. The managed tree is served through a dedicated
location ^~ /files/alias whose prefix modifier stops nginx ever handing a file in that tree to php-fpm. A.phpfile uploaded through elFinder is returned as an inert download, never executed. Uploaded content is also served withX-Content-Type-Options: nosniffandContent-Disposition: attachment. - One confined root. The connector mounts exactly one local volume, rooted at
/data/elfinder/files, with thenetmountandnetunmountcommands disabled, so there is no in-UI path out of the managed root to the rest of the filesystem. Executable and script MIME types are refused on upload, and elFinder's CSRF protection guards every write command.
Because HTTP Basic authentication sends the password in an easily decoded header, it must not be used over plain HTTP on an untrusted network. Enable TLS before exposing this instance to the public internet - see the next step.
Step 8: Enable HTTPS with Let's Encrypt
Point a DNS A record at your instance's public IP, then install a certificate with Certbot. Replace <your-domain> with your fully qualified domain name.
sudo apt-get update
sudo apt-get install -y certbot python3-certbot-nginx
sudo certbot --nginx -d <your-domain>
Certbot obtains and installs the certificate, updates the nginx server block to listen on 443, and sets up automatic renewal. Once TLS is in place, restrict the security group so port 80 is only used for the HTTP-to-HTTPS redirect, and browse to https://<your-domain>/.
Step 9: Changing the Administrator Password
The credential is an nginx HTTP Basic entry. To set a new password, write a fresh bcrypt entry and reload nginx (replace <new-password>):
sudo htpasswd -bB /etc/nginx/.htpasswd-elfinder admin '<new-password>'
sudo systemctl reload nginx
To add a second user, run the same command with a different username. Removing -b makes htpasswd prompt for the password interactively instead of taking it on the command line.
Version and Licence
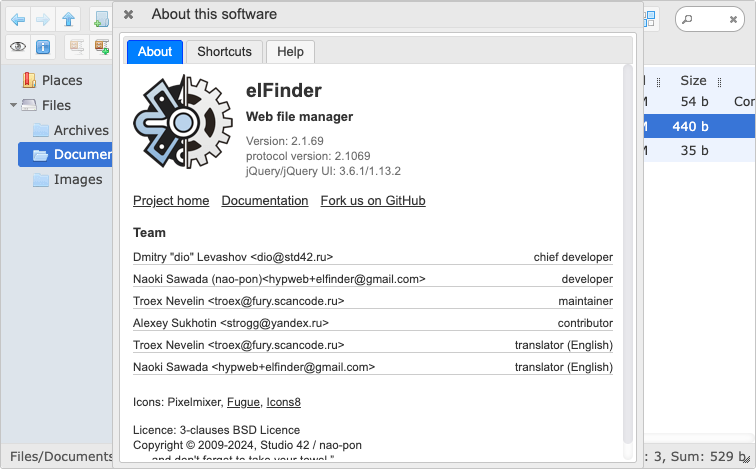
This image ships elFinder 2.1.69 under the 3-clause BSD licence. You can confirm the version and licence from the About this software dialog in the toolbar.
Support
cloudimg provides 24/7 technical support for this elFinder image by email (support@cloudimg.co.uk) and live chat. We help with deployment and initial configuration, storage sizing and EBS data volume expansion, authentication and TLS setup, connector customisation guidance, version upgrades, and troubleshooting nginx, php-fpm and elFinder. Contact us at support@cloudimg.co.uk for any questions, deployment assistance, or refund requests.