ERPNext on Ubuntu 24.04 on Azure User Guide
Overview
ERPNext is the leading open-source Enterprise Resource Planning (ERP) suite, built on the Frappe framework. It brings accounting, inventory and stock, sales and purchasing, CRM, manufacturing, projects, HR and payroll together in one self-hosted web application with 100 percent data ownership. The cloudimg image installs ERPNext (Frappe version-15) as a full production deployment - MariaDB, Redis, a Python gunicorn web tier and background workers managed by supervisor, and nginx on port 80 - runs the entire headless install at build time so there is no command-line bootstrap on first use, stores the MariaDB database and the Frappe bench on a dedicated Azure data disk, and rotates the Administrator password and the Frappe encryption key on the first boot of every VM. Backed by 24/7 cloudimg support.
What is included:
- ERPNext on Frappe version-15 served on port 80 by nginx in front of gunicorn web workers
- MariaDB on loopback (Barracuda / utf8mb4 / large packets per Frappe) with its data directory on a dedicated Azure data disk
- Redis for cache, queue and socketio; supervisor managing the Frappe web, worker, schedule and socketio processes
- A dedicated Azure data disk at
/var/lib/erpnextfor the MariaDB database and the entire Frappe bench - A unique Administrator password and a fresh Frappe encryption key generated on first boot
nginx.service,supervisor.service,mariadb.serviceandredis-server.serviceas systemd units, enabled and active- 24/7 cloudimg support
Prerequisites
An active Azure subscription, an SSH key pair, and a VNet plus subnet in the target region. Standard_B4ms (4 vCPU / 16 GiB RAM) is a good starting point for ERPNext. NSG inbound: allow 22/tcp from your management network and 80/tcp for the ERPNext web interface (front with TLS for public exposure - see Enabling HTTPS).
Step 1 - Deploy from the Azure Marketplace
Sign in to the Azure Portal, choose Create a resource, search the Marketplace for ERPNext by cloudimg, and select Create. On Basics pick your subscription, resource group, region and size; under Administrator account choose SSH public key and paste your key; under Inbound port rules allow SSH (22) and HTTP (80). Review the dedicated data disk on the Disks tab, then Review + create -> Create.
Step 2 - Deploy from the Azure CLI
az vm create \
  --resource-group <your-rg> \
  --name erpnext \
  --image <marketplace-image-urn> \
  --size Standard_B4ms \
  --admin-username azureuser \
  --ssh-key-values ~/.ssh/id_ed25519.pub \
  --vnet-name <your-vnet> --subnet <your-subnet> \
  --public-ip-sku Standard

az vm open-port --resource-group <your-rg> --name erpnext --port 80 --priority 1010
Step 3 - Connect to your VM
ssh azureuser@<vm-public-ip>
Step 4 - Confirm the ERPNext stack is running
On first boot ERPNext regenerates its Frappe encryption key, sets a unique Administrator password, points the site at this VM's public IP and starts the production stack.
systemctl is-active mariadb redis-server supervisor nginx
All four services report active.

Confirm the Frappe web tier answers its health endpoint:
curl -s http://127.0.0.1/api/method/ping
Frappe returns {"message":"pong"}.
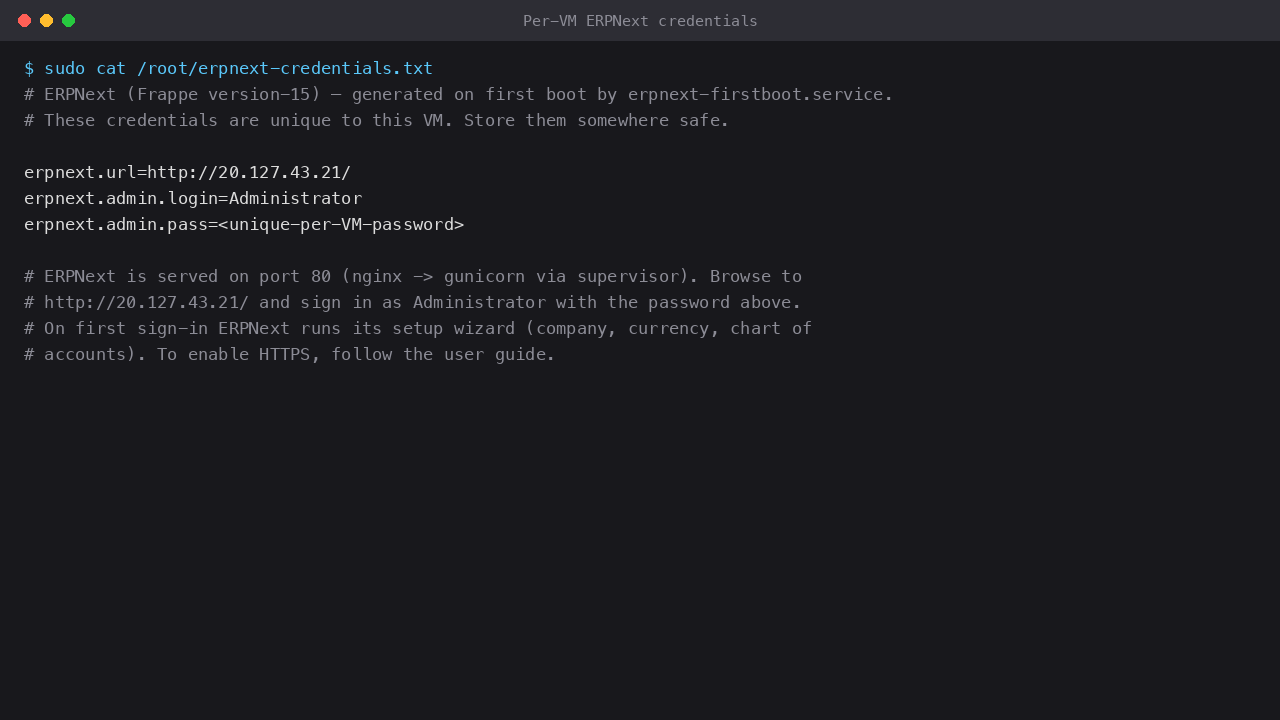
Step 5 - Retrieve the Administrator password
The per-VM Administrator password is generated on first boot and written to a root-only credentials file.
sudo cat /root/erpnext-credentials.txt
The file contains the site URL, the Administrator login and the unique password for this VM.
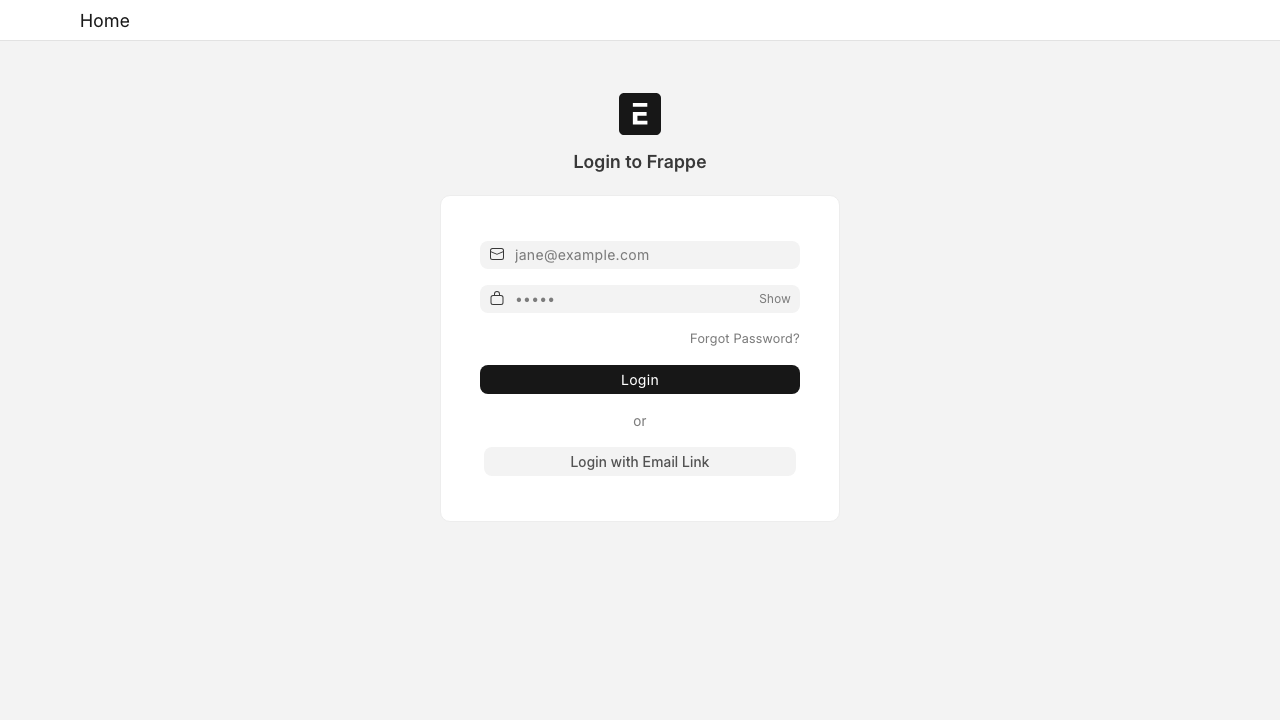
Step 6 - Sign in to ERPNext
Browse to http://<vm-public-ip>/ and sign in as Administrator with the password from Step 5.
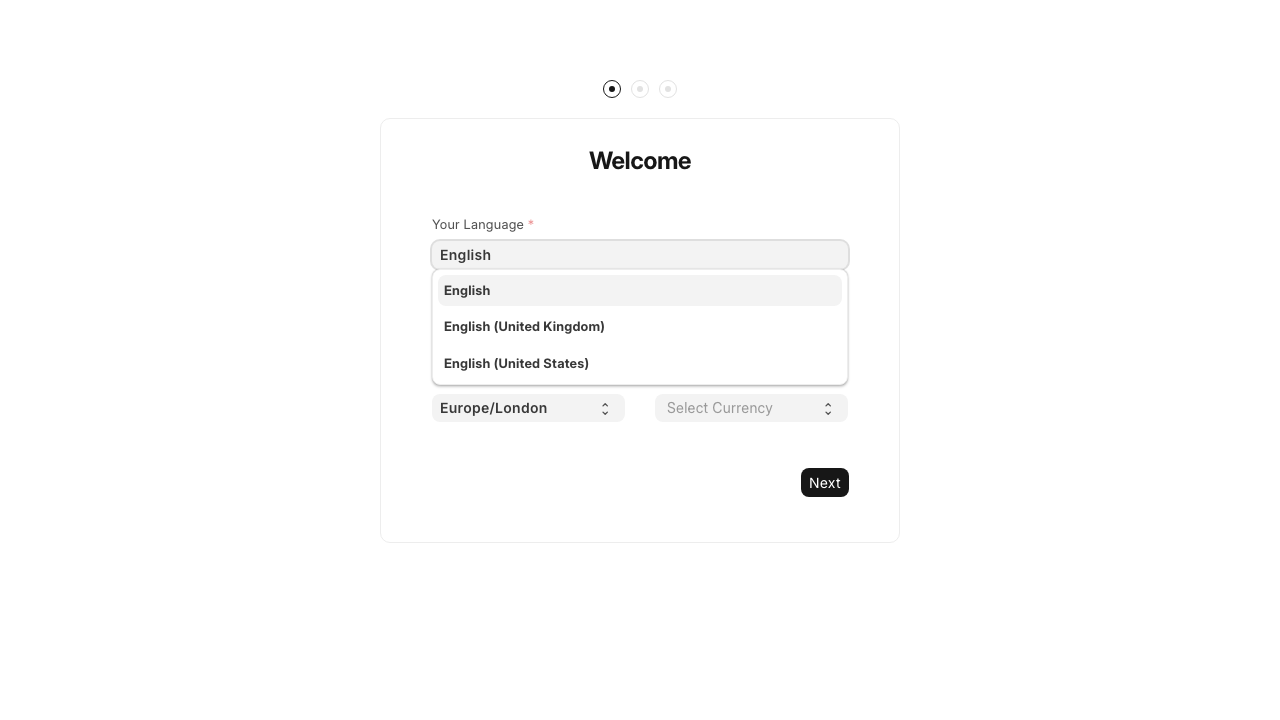
Step 7 - Complete the setup wizard
On first sign-in ERPNext runs a short setup wizard - choose your language and region, then enter your company name, default currency and fiscal year. ERPNext provisions the chart of accounts and default settings for you.
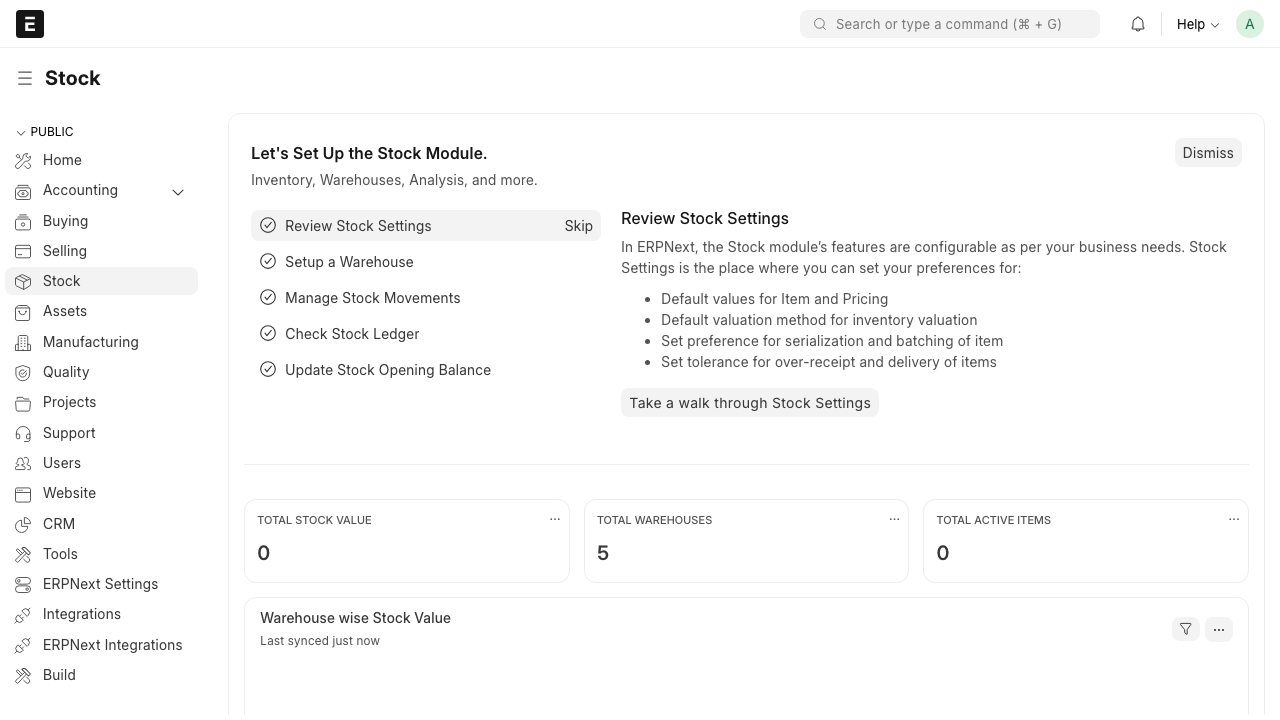
Step 8 - Explore the workspace desk
After setup you land on the ERPNext desk - the workspace home with modules for Accounting, Selling, Buying, Stock, CRM, HR and more down the left rail.
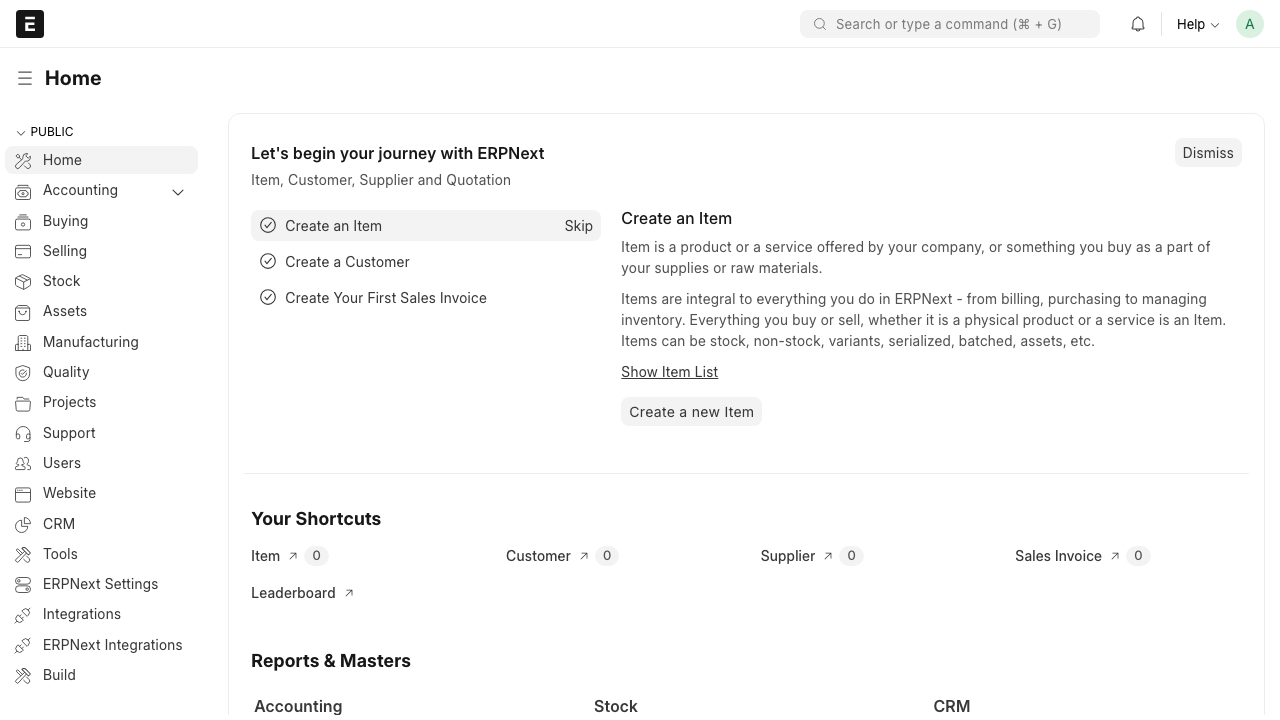
Step 9 - Open a module
Open a module such as Stock or Accounting to reach its list views, reports and shortcuts. From here you can create items, customers, suppliers, invoices and stock entries.
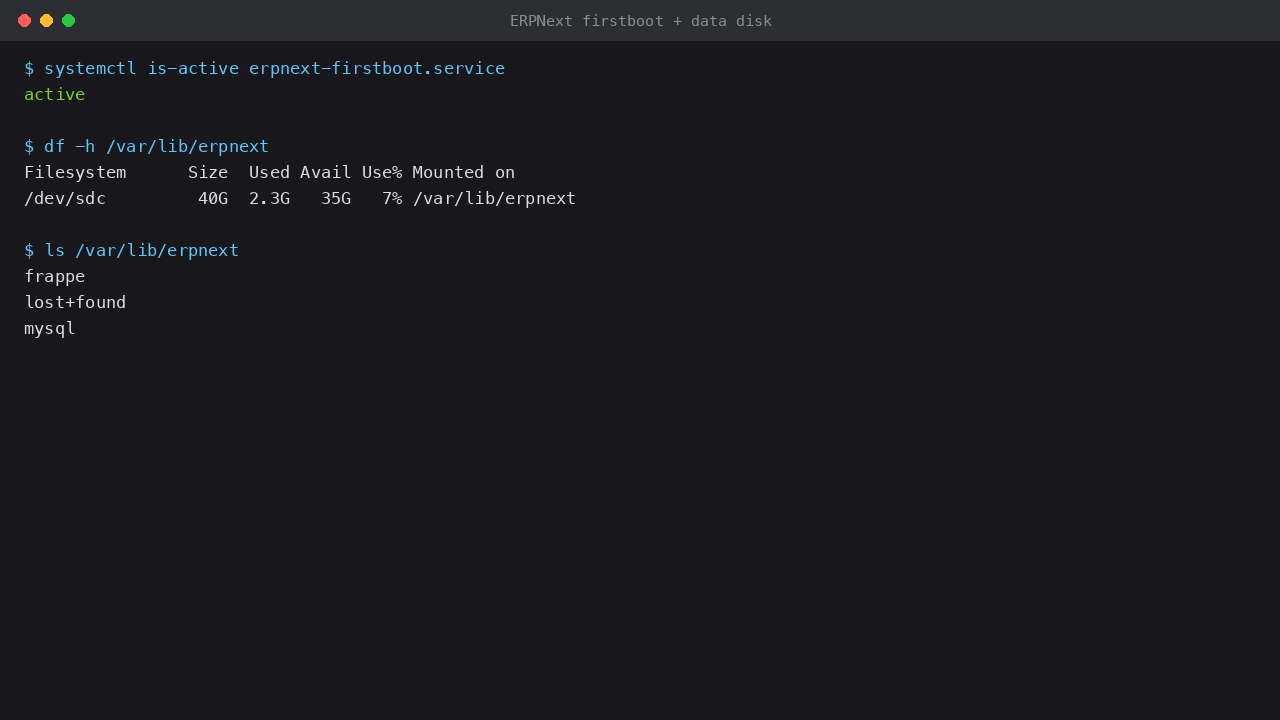
Data on the dedicated data disk
The MariaDB data directory and the entire Frappe bench (the sites/ directory with the site database config, the encryption key and uploaded files) live on a dedicated Azure data disk mounted at /var/lib/erpnext, so all of your ERP data is on a separate, independently snapshottable volume.
df -h /var/lib/erpnext; ls /var/lib/erpnext
Enabling HTTPS
For public exposure, front ERPNext with TLS. Point a DNS A record at the VM's public IP, then issue a certificate with Certbot and the nginx plugin (run interactively):
sudo apt-get update && sudo apt-get install -y certbot python3-certbot-nginx
sudo certbot --nginx -d your-domain.example.com
Certbot edits the Frappe nginx site in place and sets up automatic renewal. Allow 443/tcp in your NSG.
Maintenance
The OS keeps receiving security updates through unattended-upgrades. ERPNext, Frappe and the installed apps can be updated with bench as the frappe user (sudo -u frappe -H bash -lc 'cd /var/lib/erpnext/frappe/frappe-bench && bench update'); review the ERPNext release notes before applying a major version upgrade. Take a snapshot of the data disk before any upgrade.
Support
This image is published and supported by cloudimg. ERPNext and Frappe are trademarks of their respective owners; cloudimg is not affiliated with or endorsed by the ERPNext or Frappe projects. For assistance, contact cloudimg support.