frp Server on Ubuntu 24.04 on Azure User Guide
Overview
frp (fast reverse proxy) lets you expose a local server that sits behind NAT or a firewall to the public internet through a relay. The cloudimg image ships the server side, frps 0.69.1, a single Go binary. It runs as a systemd service, listens on the tunnel control port 7000 where frpc clients connect, and exposes a web dashboard on loopback behind an nginx reverse proxy on port 80. A unique dashboard password and a unique client authentication token are generated on the first boot of every VM. Backed by 24/7 cloudimg support.
What is included:
- frps 0.69.1 (binary
/usr/local/bin/frps) run as the dedicatedfrpsystem user - The tunnel control port
7000/tcpwhere frpc clients connect - nginx on
:80as a reverse proxy to the loopback frps web dashboard (127.0.0.1:7500) - A per-VM dashboard password and a per-VM client
auth.token, generated on first boot and recorded in a root-only file frps.service+nginx.serviceas systemd units, enabled and active- 24/7 cloudimg support
Prerequisites
An active Azure subscription, an SSH key pair, and a VNet + subnet in the target region. Standard_B2s (2 vCPU / 4 GiB RAM) is a good starting point - frps is lightweight. NSG inbound: allow 22/tcp from your management network, 80/tcp for the dashboard, and 7000/tcp for the tunnel control port so frpc clients can reach the server. The dashboard serves plain HTTP on port 80; for production, terminate TLS in front of it with your own domain.
Step 1 - Deploy from the Azure Marketplace
Sign in to the Azure Portal, choose Create a resource, search the Marketplace for frp Server by cloudimg, and select Create. On Basics pick your subscription, resource group, region and size; under Administrator account choose SSH public key and paste your key; under Inbound port rules allow SSH (22) and HTTP (80). After creation, add an inbound rule for 7000/tcp (the tunnel control port) - see Step 5. Then Review + create -> Create.
Step 2 - Deploy from the Azure CLI
az vm create \
  --resource-group <your-rg> \
  --name frps \
  --image <marketplace-image-urn> \
  --size Standard_B2s \
  --admin-username azureuser \
  --ssh-key-values ~/.ssh/id_ed25519.pub \
  --vnet-name <your-vnet> --subnet <your-subnet> \
  --public-ip-sku Standard

az vm open-port --resource-group <your-rg> --name frps --port 80   --priority 1010
az vm open-port --resource-group <your-rg> --name frps --port 7000 --priority 1020
Step 3 - Connect to your VM
ssh azureuser@<vm-public-ip>
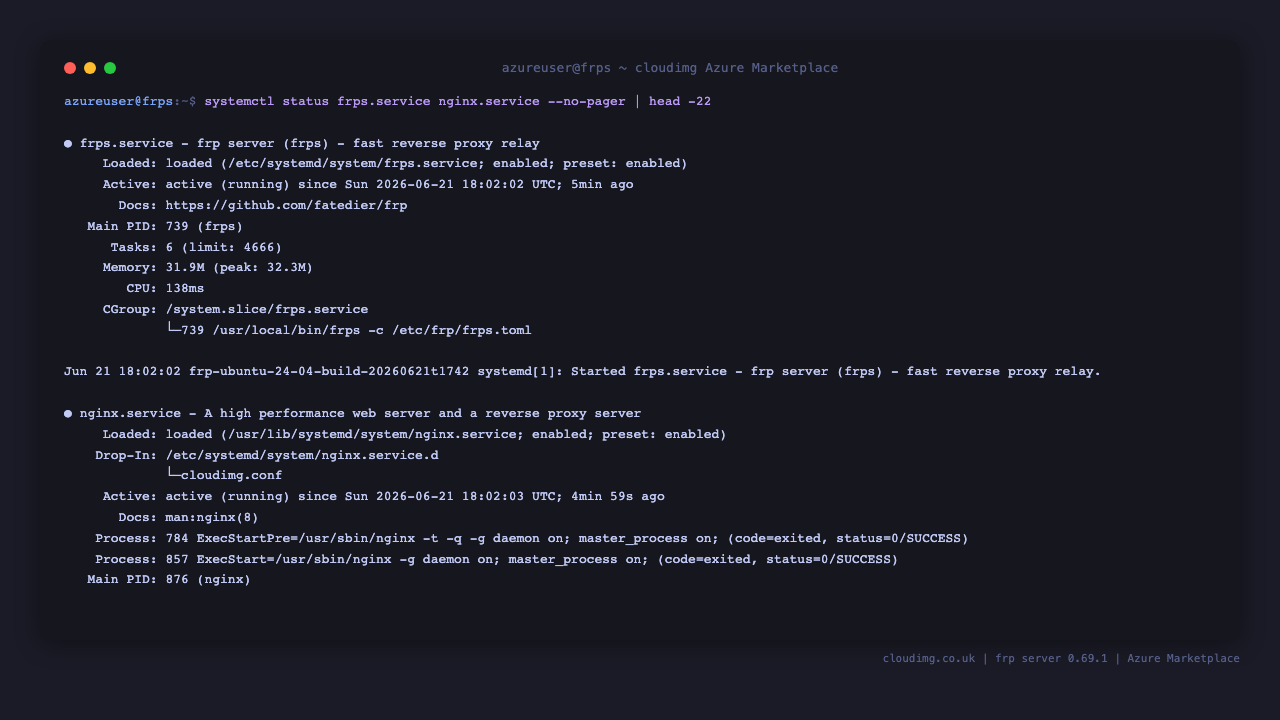
Step 4 - Confirm the services are running
systemctl is-active frps.service nginx.service
Both report active. On first boot frps is configured with a per-VM dashboard password and a per-VM client authentication token.
active
active
Step 5 - Open the tunnel control port (7000)
frpc clients connect to the server on 7000/tcp. The cloudimg image opens 22 and 80 by default; you must open 7000 in the VM's Network Security Group. From your workstation (Azure CLI):
az vm open-port --resource-group <your-rg> --name frps --port 7000 --priority 1020
Or in the Azure Portal: Virtual machine -> Networking -> Add inbound port rule, Destination port 7000, Protocol TCP, Action Allow.
Step 6 - Retrieve the per-VM dashboard password and client token
The dashboard password and the client auth.token are unique to each VM and stored in a root-only credentials file:
sudo cat /root/frp-credentials.txt
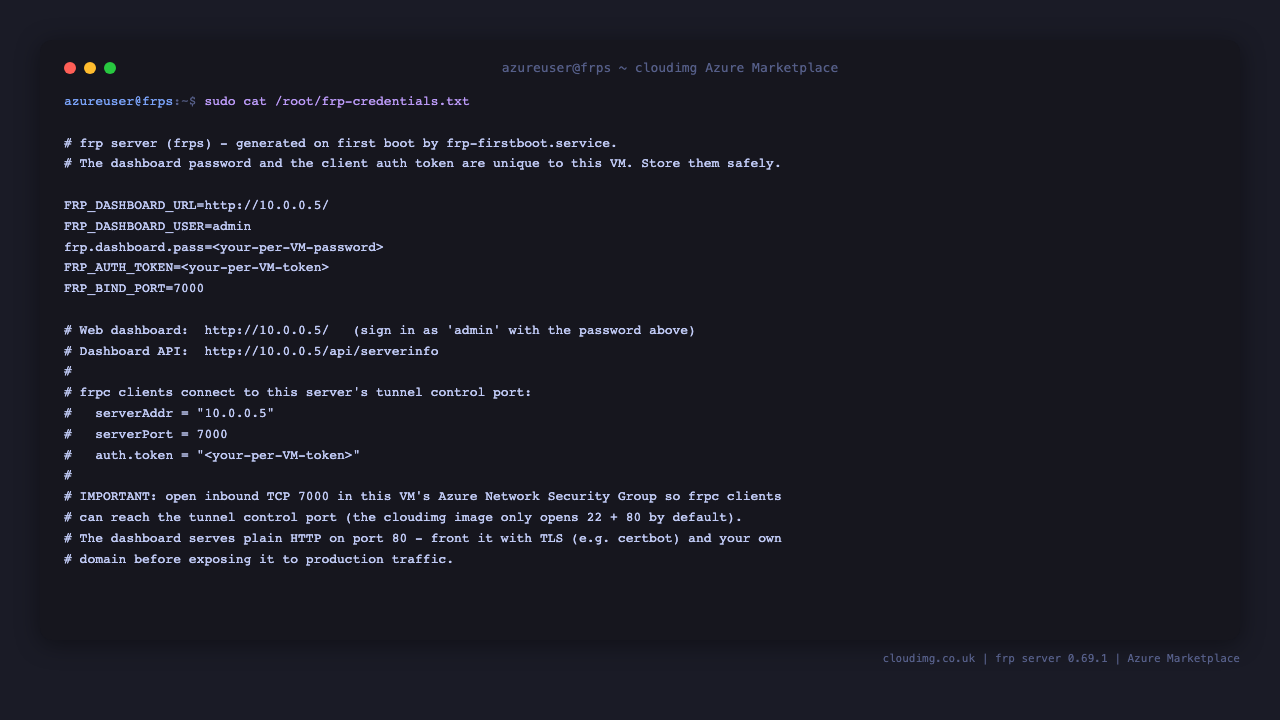
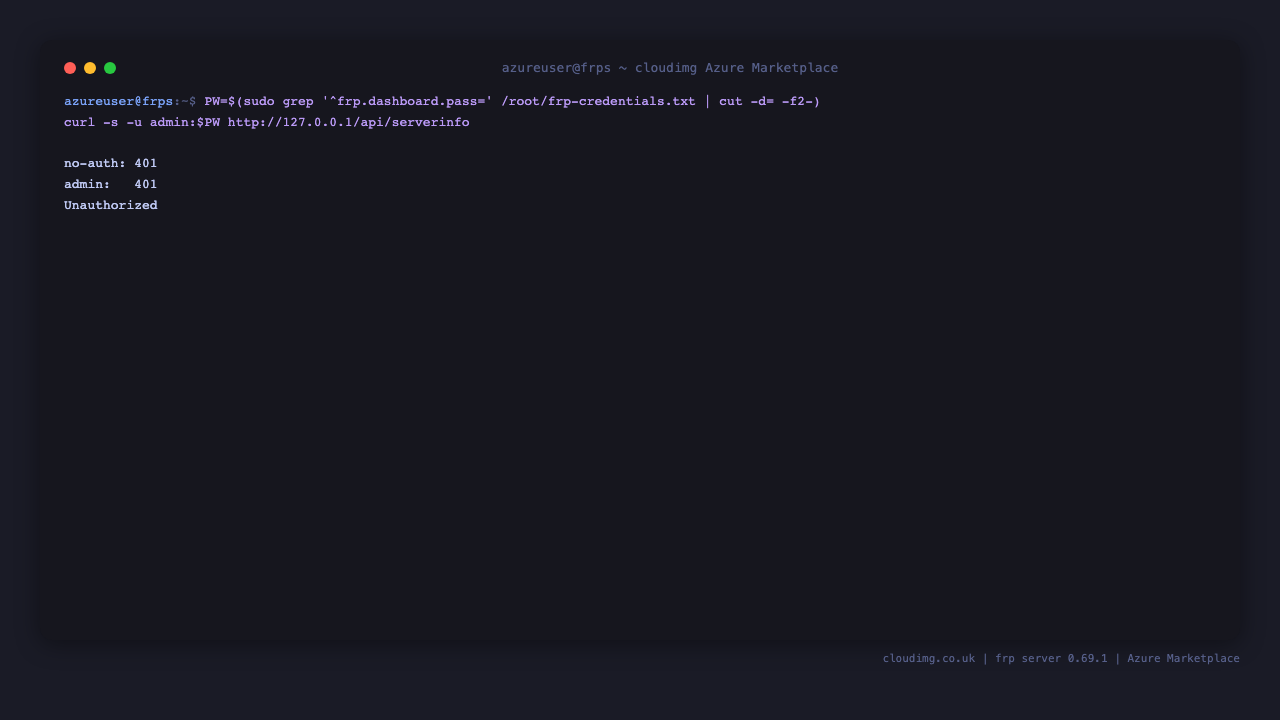
The file contains the dashboard URL and user, the dashboard password (frp.dashboard.pass), the client FRP_AUTH_TOKEN, and the tunnel port. Verify the dashboard responds locally - an unauthenticated request is rejected and the admin credentials succeed:
PW=$(sudo grep '^frp.dashboard.pass=' /root/frp-credentials.txt | cut -d= -f2-)
curl -s -o /dev/null -w 'no-auth: %{http_code}\n' http://127.0.0.1/api/serverinfo
curl -s -o /dev/null -w 'admin:   %{http_code}\n' -u "admin:$PW" http://127.0.0.1/api/serverinfo
no-auth: 401
admin:   200
Step 7 - Open the web dashboard
Browse to http://<vm-public-ip>/ and sign in as admin with the dashboard password from Step 6. The Overview page shows connected clients, active proxies, current connections and total traffic, plus the server configuration (bind port, max pool count, version).
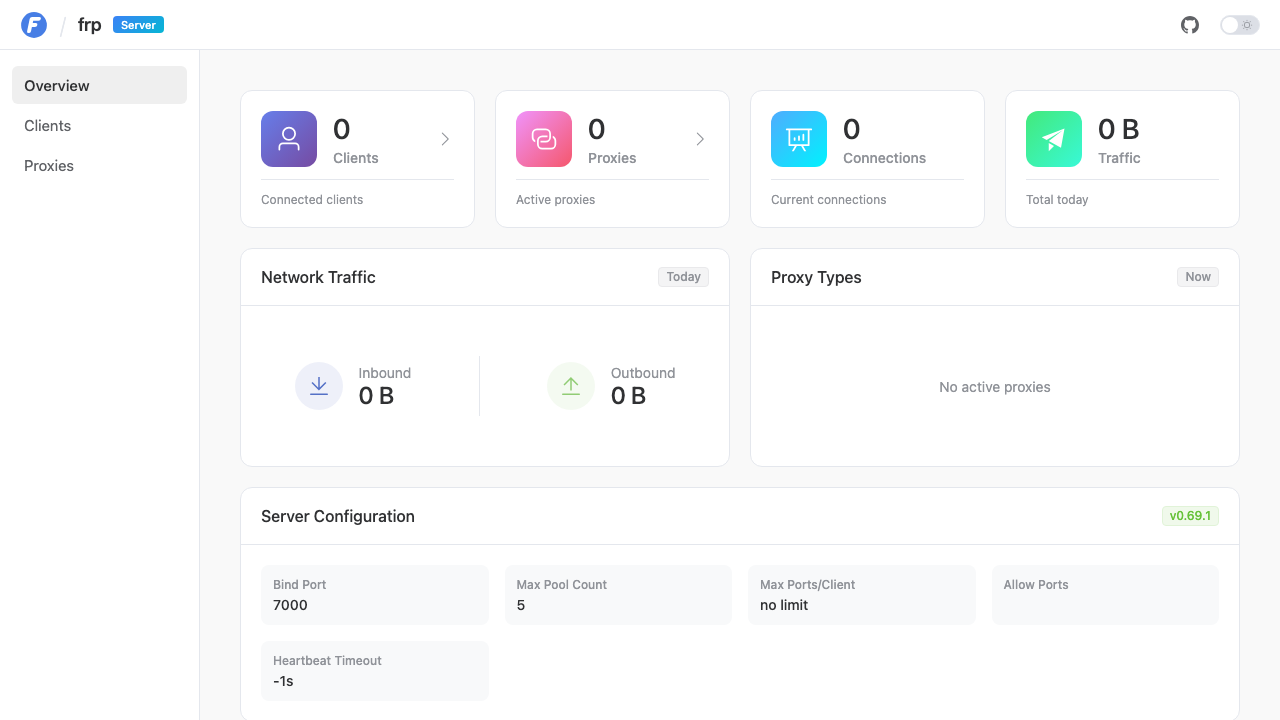
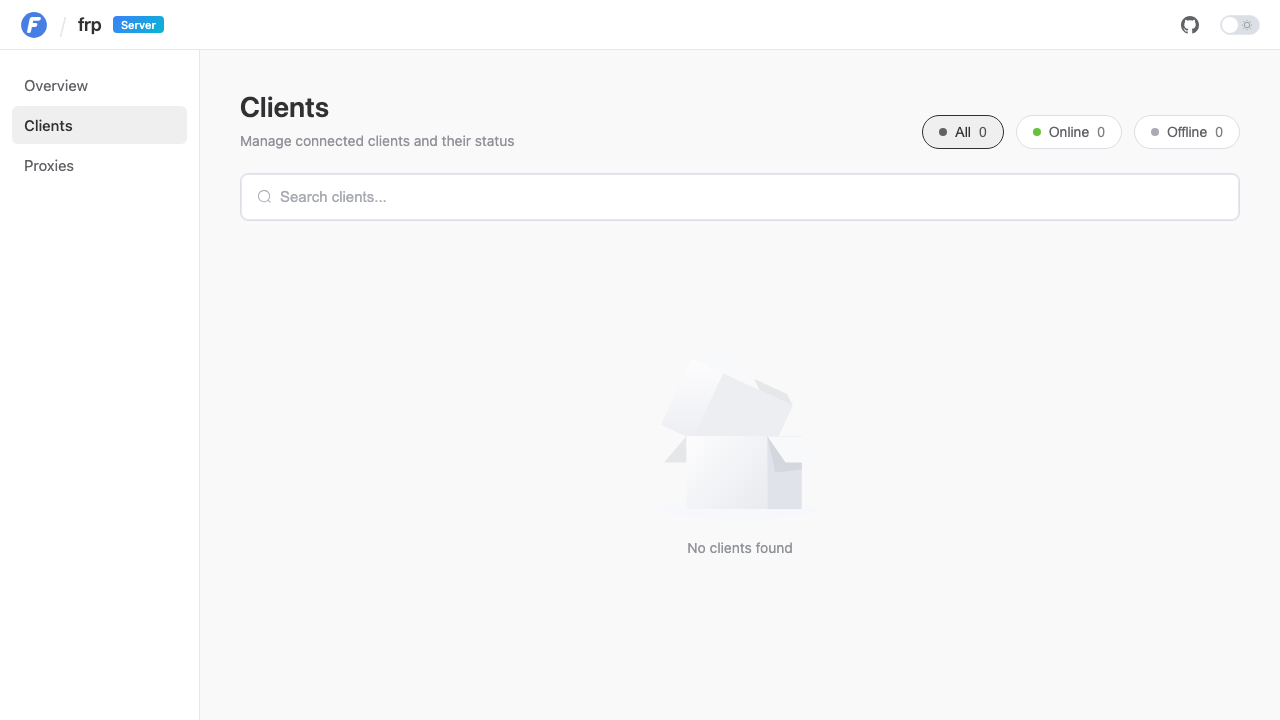
The Clients page lists every frpc client currently connected to the server and its online/offline status.
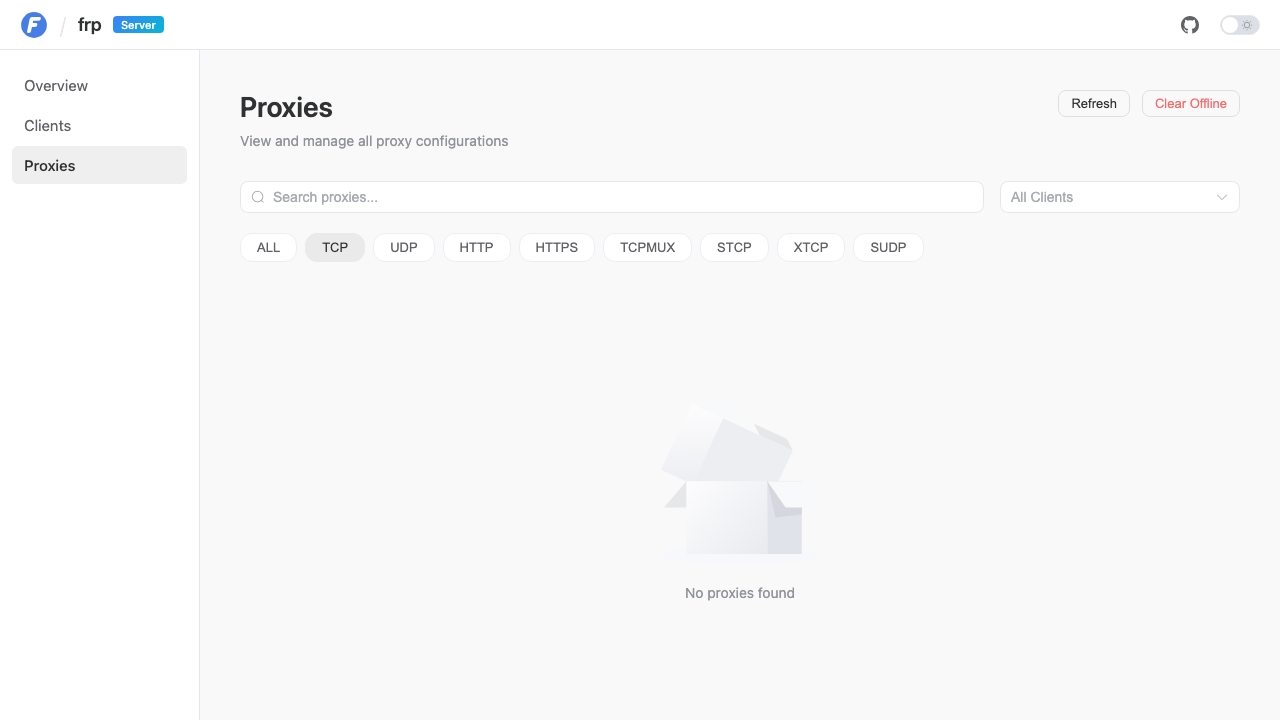
The Proxies page lists every tunnel the connected clients have registered, grouped by type (TCP, UDP, HTTP, HTTPS, and more).

Step 8 - Connect an frpc client
On the machine whose local service you want to expose (for example a web app on 127.0.0.1:8080), install the frpc client from the frp releases and create an frpc.toml. Use this server's public IP, port 7000, and the auth.token from /root/frp-credentials.txt:
# frpc.toml on the CLIENT machine
serverAddr = "<vm-public-ip>"
serverPort = 7000
auth.method = "token"
auth.token  = "<FRP_AUTH_TOKEN from /root/frp-credentials.txt>"

# Expose a local web app on 127.0.0.1:8080 as a public TCP tunnel on the server's :6000
[[proxies]]
name       = "my-web"
type       = "tcp"
localIP    = "127.0.0.1"
localPort  = 8080
remotePort = 6000
Start the client with frpc -c ./frpc.toml. The client appears on the dashboard Clients page and its tunnel on the Proxies page. Reach the exposed service at <vm-public-ip>:6000 (open that port in the NSG too). The token must match or the server rejects the client.
Step 9 - Review the server configuration
The server reads /etc/frp/frps.toml. It pins the tunnel control port to 7000, binds the dashboard to loopback 127.0.0.1:7500, and enables token authentication:
sudo grep -E '^(bindPort|webServer\.(addr|port|user)|auth\.method)' /etc/frp/frps.toml
bindPort = 7000
webServer.addr = "127.0.0.1"
webServer.port = 7500
webServer.user = "admin"
auth.method = "token"
To change a setting (for example to add vhost HTTP routing), edit /etc/frp/frps.toml and restart:
sudo systemctl restart frps.service
Step 10 - Maintenance
The image keeps receiving OS security updates via unattended-upgrades. To update frps to a newer release, download the new frps binary from the frp releases, replace /usr/local/bin/frps, and sudo systemctl restart frps.service. Check the service logs with journalctl -u frps.service.
Support
frp is licensed under the Apache License 2.0. The cloudimg charge covers packaging, security patching, image maintenance and 24/7 support. Email support@cloudimg.co.uk.
frp and the frp logo are trademarks of their respective owners. cloudimg is not affiliated with or endorsed by the frp project. This image repackages the open-source frp software in accordance with its Apache-2.0 license.