Harbor 2 Container Registry on Ubuntu 24.04 on Azure User Guide
Overview
Harbor is the CNCF graduated open-source container and OCI artifact registry — the same project Pinterest, Trend Micro, Tencent and JD.com lean on for private, on-premise registry needs. The cloudimg image installs Harbor 2.15.0 from the official offline installer, fronted by Harbor's bundled nginx container, with a Docker Compose v2 stack of eight services orchestrated by the official docker-compose.yml. A per-VM admin password is generated at first boot — the Harbor portal is reachable as soon as the VM finishes booting, and docker login works immediately for image push/pull.
What is included:
- Harbor 2.15.0 (Apache 2.0, CNCF graduated) installed from the official offline installer
- Docker CE 29.4.2 + Docker Compose v2 plugin v5.1.3 from Docker's noble APT repository
- Eight Harbor containers:
harbor-core,harbor-portal(Angular UI),harbor-jobservice,harbor-db(PostgreSQL 13),redis,registry(CNCF distribution),registryctl,nginx(Harbor's bundled, NOT system nginx) - RBAC, project-level access control, robot accounts, replication rules, image signing (Cosign), webhooks, retention policies, garbage collection
- Per-VM Harbor admin password (32 hex chars) rotated at first boot
- Per-VM Postgres password (32 hex chars) rotated at first boot
- Hostname auto-detected from Azure IMDS public IP at first boot
- Two systemd units:
harbor.service(oneshot wrappingdocker compose up -d) andharbor-firstboot.service(Before=harbor.service) - Trivy vulnerability scanner is not installed by default to fit the Standard_B2s memory budget — opt in with
./install.sh --with-trivyon D2s_v5 or larger - 24/7 cloudimg support
Prerequisites
Active Azure subscription, SSH key, VNet + subnet. Standard_B2s (4 GB RAM) is the supported minimum — comfortable for the eight Harbor containers in the default no-Trivy layout. Choose Standard_D2s_v5 (8 GB) or larger if you intend to opt into Trivy (see Step 12). NSG inbound: allow 22/tcp from your management CIDR, 80/tcp from any client CIDR that needs the Harbor portal and Docker registry, and 443/tcp once you front Harbor with TLS in Step 13.
Step 1-3: Deploy + SSH (standard pattern)
ssh azureuser@<vm-ip>
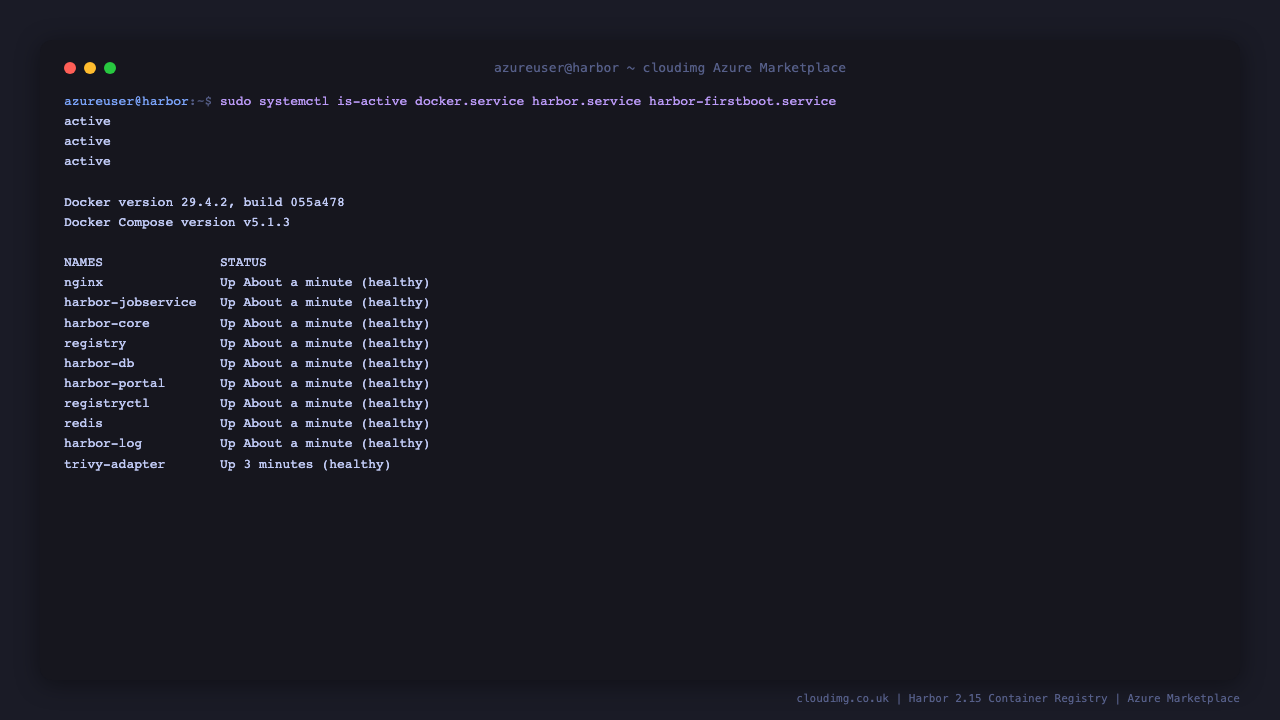
Step 4: Service Status + Versions
sudo systemctl is-active docker.service harbor.service harbor-firstboot.service
docker --version
docker compose version
sudo docker ps --format "table {{.Names}}\t{{.Status}}"
You should see active three times, Docker CE 29.x, Compose v2.x, and all eight Harbor containers in the Up state.
Step 5: Read Per-VM Credentials
sudo cat /stage/scripts/harbor-credentials.log
Pick up HARBOR_URL, HARBOR_UI_USER (always admin), and HARBOR_ADMIN_PASSWORD. The same file also contains HARBOR_DB_PASSWORD (PostgreSQL inside the harbor-db container) and a ready-to-paste HARBOR_DOCKER_LOGIN line.
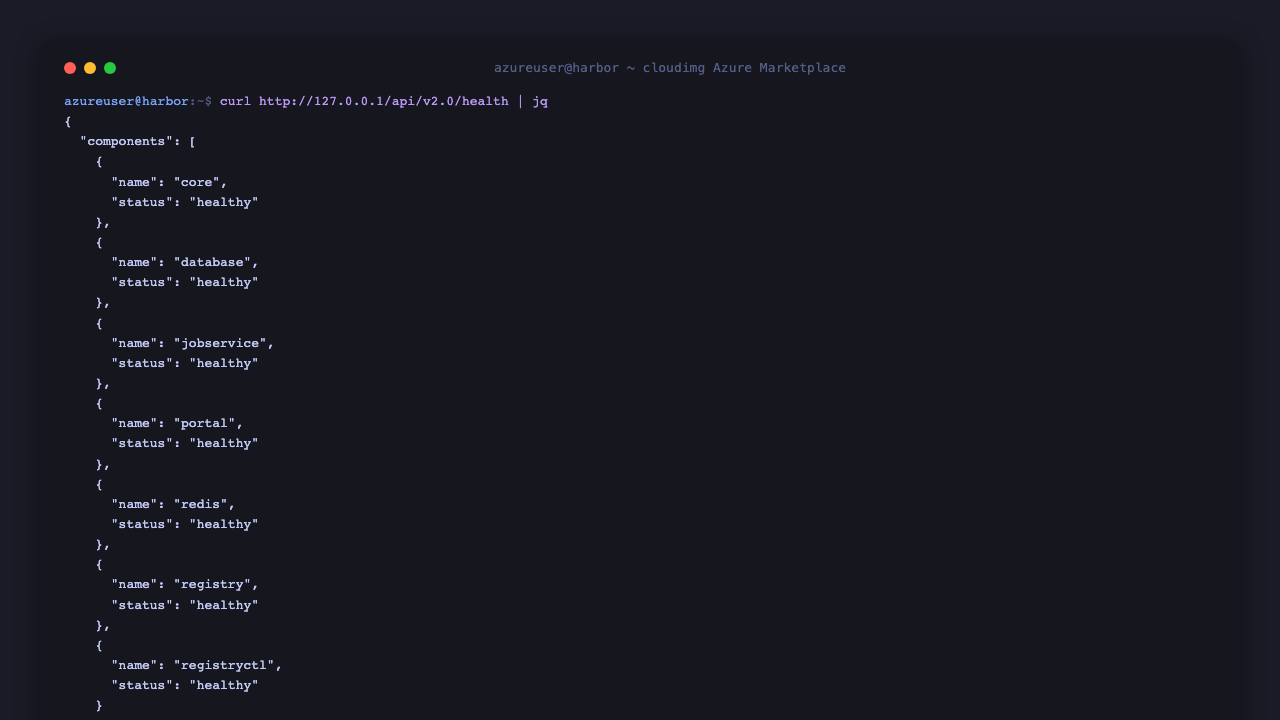
Step 6: API Health + Version
curl -sf http://127.0.0.1/api/v2.0/health | jq
curl -sf http://127.0.0.1/api/v2.0/systeminfo | jq '{harbor_version, registry_url, auth_mode}'
The first call hits Harbor's anonymous health endpoint and should return "status":"healthy" along with the per-component status for core, portal, database, redis, registry, registryctl, jobservice. The second prints the Harbor version (v2.15.0) and the registry URL.
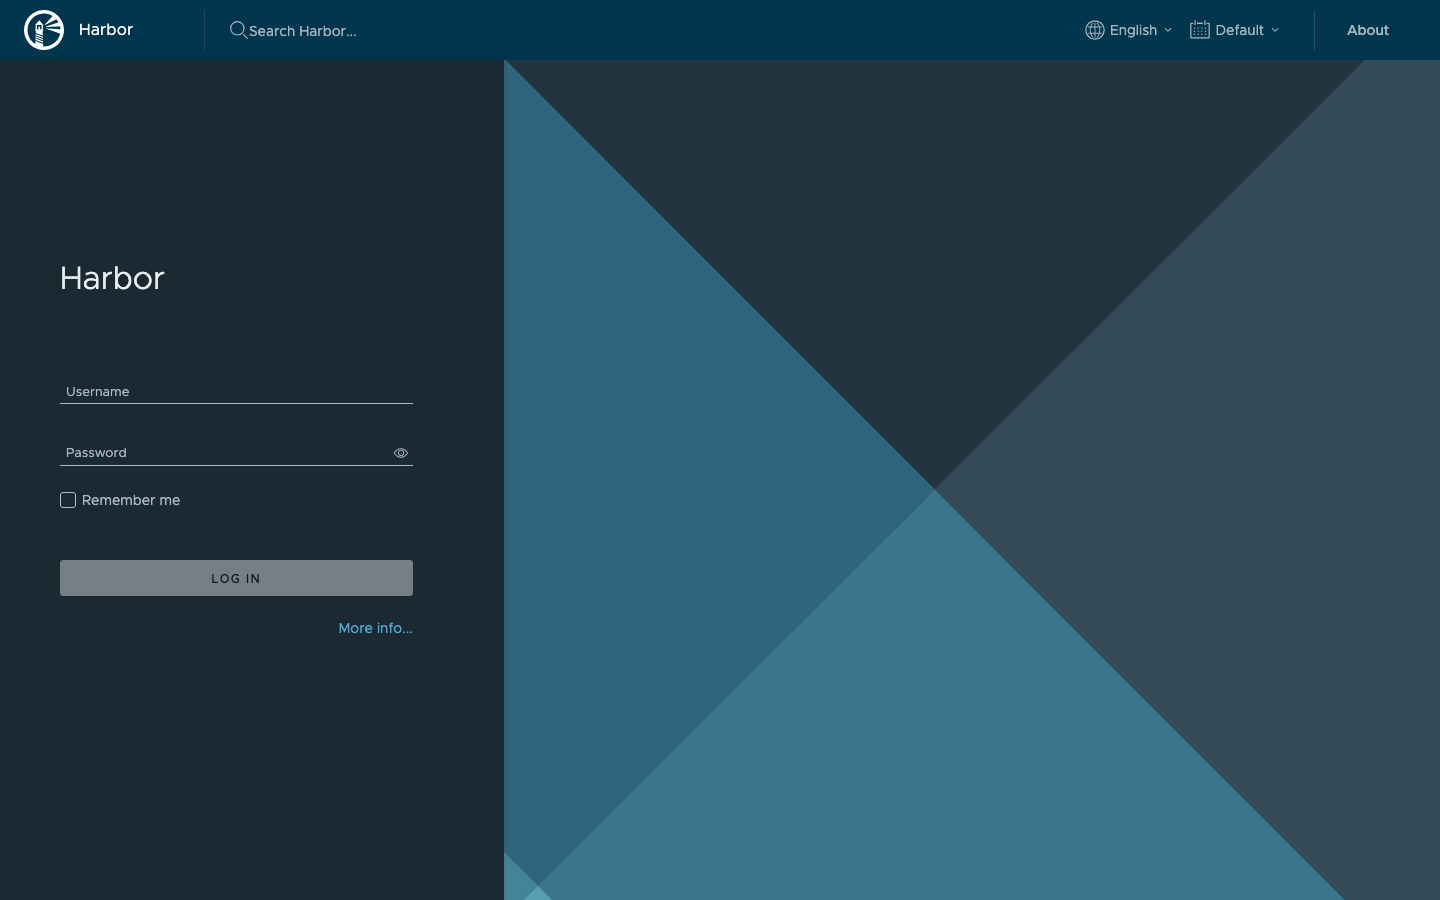
Step 7: Login to Harbor Web UI
Browse to http://<vm-ip>/ and log in with admin and the password from Step 5.
Step 8: Harbor Projects Dashboard
After login, the Projects page is the default view. The pre-created library project is public by default — push images here without creating a new project, or click NEW PROJECT to add a private one.
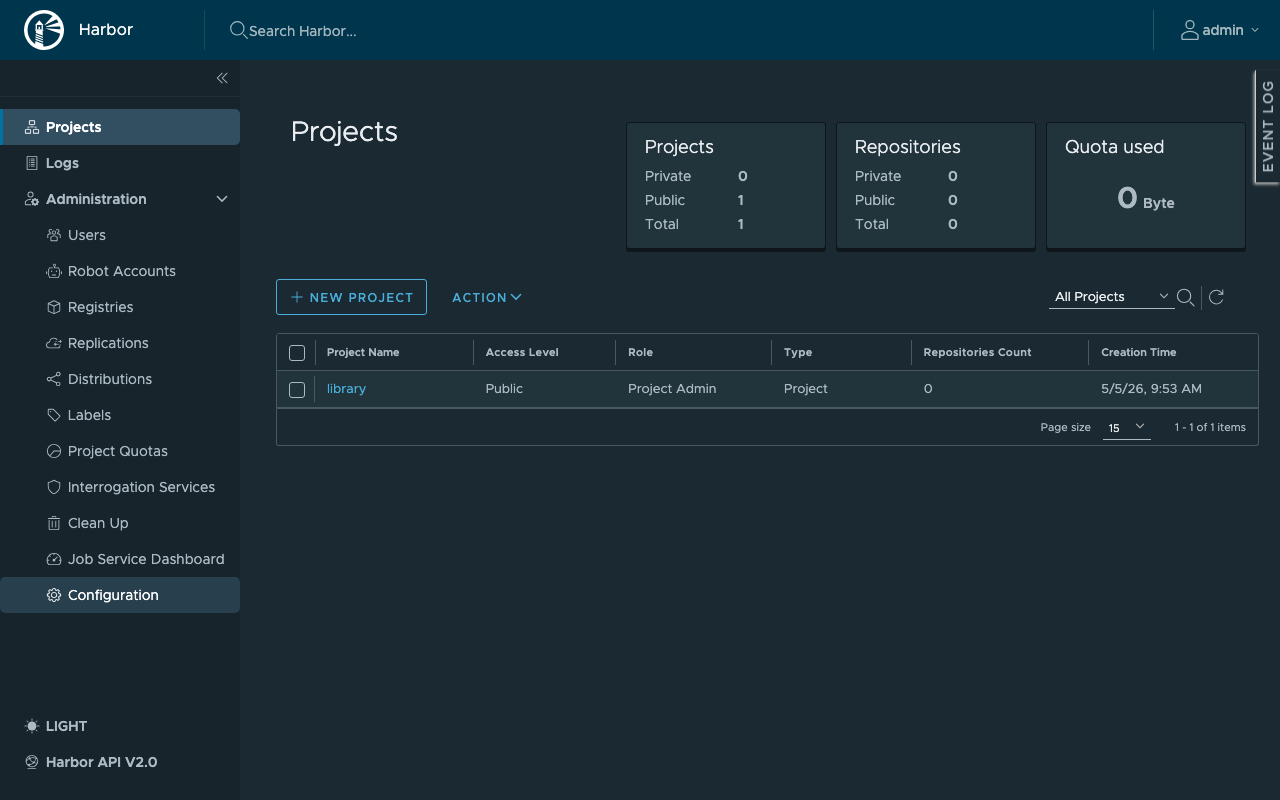
Step 9: System Administration
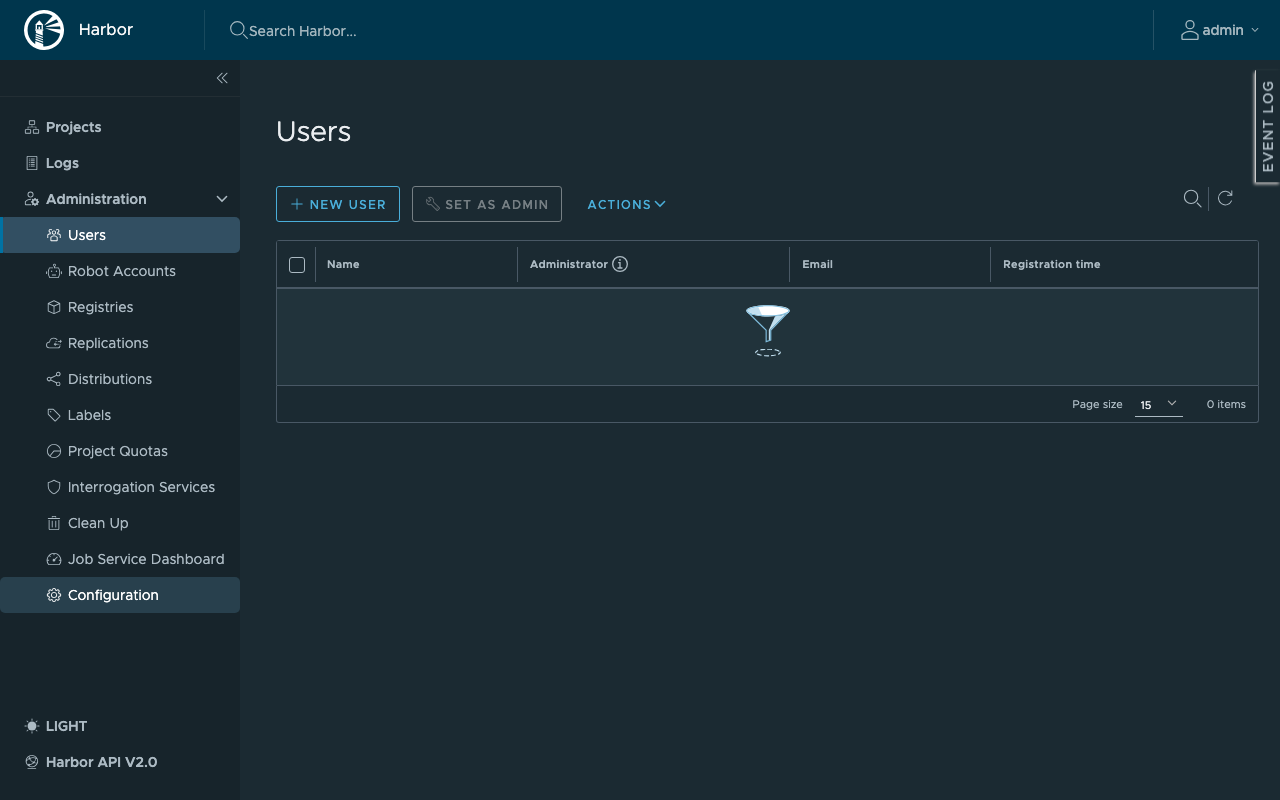
Click Administration in the left-hand sidebar to access Users, Robot Accounts, Registries (replication targets), Replications, Labels, Project Quotas, Interrogation Services and Configuration.
Step 10: Push a Container Image
From any machine that has Docker installed, log in to your Harbor instance, tag a sample image, and push it to the library project. Replace <vm-ip> and <password> with the values from Step 5.
docker login <vm-ip> -u admin -p '<password>'
docker pull busybox:latest
docker tag busybox:latest <vm-ip>/library/busybox:latest
docker push <vm-ip>/library/busybox:latest
Refresh the library project in the Harbor UI — the busybox repository now appears with a manifest and one tag.
Step 11: Pull from Harbor
From a second machine (or the same machine after docker rmi <vm-ip>/library/busybox:latest):
docker login <vm-ip> -u admin -p '<password>'
docker pull <vm-ip>/library/busybox:latest
docker run --rm <vm-ip>/library/busybox:latest echo "pulled from cloudimg harbor"
For unauthenticated pulls of public projects, omit the docker login step.
Step 12: Add Trivy Vulnerability Scanner
Trivy is the CNCF reference vulnerability scanner for OCI images. It is omitted from the default install to fit the Standard_B2s RAM budget; enabling it adds approximately 500 MB of resident memory for the Trivy adapter container plus its CVE database cache. Resize the VM to Standard_D2s_v5 (8 GB) or larger before opting in.
cd /opt/harbor
sudo ./install.sh --with-trivy
The installer brings the stack down, recreates docker-compose.yml with the Trivy service, and brings the stack back up. After it returns, navigate to Administration → Interrogation Services in the Harbor UI to confirm Trivy is registered, then Projects → library → Configuration → Vulnerability scanning to enable automatic scans on push.
Step 13: Add Your Domain (TLS via certbot)
Two production-ready options for adding HTTPS to Harbor:
Option A — Reconfigure Harbor's bundled nginx for TLS. Edit /opt/harbor/harbor.yml, uncomment the https: block, set certificate: and private_key: paths to your PEM files, set hostname: to your FQDN, then re-run the installer:
sudo nano /opt/harbor/harbor.yml
cd /opt/harbor
sudo ./install.sh
Option B — Front Harbor with system nginx and certbot (recommended). Point your DNS A record at this VM, then:
sudo apt-get update
sudo apt-get install -y nginx python3-certbot-nginx
Add a server block at /etc/nginx/sites-available/harbor-cloudimg that proxies to http://127.0.0.1:80 (Harbor's bundled nginx), enable it, then run certbot:
sudo ln -s /etc/nginx/sites-available/harbor-cloudimg /etc/nginx/sites-enabled/
sudo nginx -t && sudo systemctl reload nginx
sudo certbot --nginx -d harbor.example.com -m you@example.com --agree-tos --non-interactive --redirect
Update /opt/harbor/harbor.yml to set hostname: harbor.example.com and re-run sudo ./install.sh so Harbor's metadata advertises the public FQDN.
Step 14: Configure Replication
Harbor can mirror images to and from Docker Hub, Amazon ECR, Azure ACR, GitHub GHCR, Quay, GitLab, and other Harbor instances. In the UI:
- Administration → Registries → NEW ENDPOINT — pick a provider, enter the URL and access credentials, click TEST CONNECTION then OK.
- Administration → Replications → NEW REPLICATION RULE — choose Push-based or Pull-based, set source / destination filters and a trigger (manual, scheduled, or event-based on push), click SAVE.
- Trigger the rule manually from the Replications list to validate, then leave the schedule running.
Step 15: Backups
Take a consistent backup with the registry running by pg_dump-ing Harbor's PostgreSQL inside the harbor-db container, plus a tarball of the /data/registry directory (image blobs):
sudo mkdir -p /var/backups/harbor
sudo docker exec harbor-db pg_dumpall -U postgres | sudo gzip > /var/backups/harbor/harbor-db-$(date +%F).sql.gz
sudo tar czf /var/backups/harbor/harbor-registry-$(date +%F).tgz -C /data registry
Periodically copy /var/backups/harbor to Azure Blob Storage (az storage blob upload-batch) for off-VM retention. To restore on a fresh VM, stop Harbor (sudo systemctl stop harbor), gunzip | docker exec -i harbor-db psql -U postgres, untar /data/registry, then sudo systemctl start harbor.
Step 16: Logs and Troubleshooting
sudo journalctl -u harbor.service --no-pager -n 80
sudo journalctl -u harbor-firstboot.service --no-pager -n 80
sudo docker compose -f /opt/harbor/docker-compose.yml logs --tail 50
sudo docker logs harbor-core --tail 50
sudo docker logs harbor-jobservice --tail 50
sudo docker logs harbor-db --tail 50
harbor.service is a oneshot wrapper around docker compose -f /opt/harbor/docker-compose.yml up -d / down — its journal entries describe stack-level lifecycle events. Application-level logs live inside each container and are surfaced via docker logs. The portal's web access logs are written by the bundled nginx container — sudo docker logs nginx --tail 100 for HTTP request lines.
Security
- Per-VM Harbor admin password (32 hex chars) rotated at first boot
- Per-VM Postgres password (32 hex chars) rotated at first boot
- RBAC enforced on every API call —
/api/v2.0/users/currentreturns 401 without credentials - Projects support public vs private visibility; default
libraryis public, new projects are private by default - Robot accounts for CI/CD with scoped permissions (no human admin password in pipelines)
- Optional Cosign content trust signing (enable per project under Configuration → Deployment security)
- NSG only opens 80/tcp (HTTP) and optionally 443/tcp (TLS via Step 13)
- Harbor's bundled nginx terminates HTTP on port 80; TLS is off by default — front with system nginx + certbot for production (Step 13)
- PostgreSQL and Redis listen only on the internal Docker bridge network — never exposed on the host
- Optional Trivy vulnerability scanning can be enabled per project to block image push when CVEs above a threshold are detected (Step 12)
Support
cloudimg provides 24/7/365 expert technical support. Guaranteed response within 24 hours, one hour average for critical issues. Contact support@cloudimg.co.uk.