KeyDB on AWS User Guide
Overview
This image runs KeyDB, a high performance, fully open source fork of Redis that adds multithreading so a single node can use all of the cores on your instance and serve far more operations per second than single threaded Redis on the same hardware. KeyDB speaks the Redis protocol and is a drop in replacement for Redis, so your existing Redis clients, libraries and tooling work unchanged.
KeyDB is installed from the official project package and runs under the bundled keydb-server systemd service. The database listens on port 6379 on all interfaces with password authentication enforced and append only file persistence enabled. The persistence directory lives at /var/lib/keydb, which is a dedicated, independently resizable EBS data volume holding the append only file and the RDB snapshots.
KeyDB ships with no password by default. A fresh strong password is generated on the first boot of every deployed instance, so two instances launched from the same Amazon Machine Image never share a password. It is set as the KeyDB requirepass and written to /root/keydb-credentials.txt with mode 0600 so that only the root user can read it. The database refuses unauthenticated connections.
Prerequisites
Before you deploy this image you need:
- An Amazon Web Services account where you can launch EC2 instances
- IAM permissions to launch instances, create security groups, and subscribe to AWS Marketplace products
- An EC2 key pair in the target Region for SSH access to the instance
- A VPC and subnet in the target Region, with a security group allowing inbound port 22 from your management network and port 6379 from the application hosts that need database access
- The AWS CLI (version 2) installed locally if you plan to deploy from the command line
Step 1: Launch the Instance from the AWS Marketplace
Sign in to the AWS Management Console, open the EC2 service, and select Launch instance. Under Application and OS Images choose AWS Marketplace AMIs and search for KeyDB. Select the cloudimg listing and choose Select, then Continue on the subscription summary.
Pick an instance type of m6i.large or larger so the multithreaded engine has cores to use. Choose your EC2 key pair under Key pair (login). Under Network settings select your VPC and subnet, and either create or select a security group that opens port 22 from your management network and port 6379 from your application hosts. Leave the root volume at the default size or larger.
Select Launch instance. First boot initialisation takes a few seconds after the instance state becomes Running and the status checks pass.
Step 2: Launch the Instance from the AWS CLI
The following block launches an instance from the cloudimg KeyDB Marketplace AMI into an existing subnet and security group. Replace <ami-id> with the AMI ID shown on the Marketplace listing, <key-name> with your EC2 key pair name, <subnet-id> with your subnet ID, and <security-group-id> with a security group that opens ports 22 and 6379 as described above.
aws ec2 run-instances \
  --image-id <ami-id> \
  --instance-type m6i.large \
  --key-name <key-name> \
  --subnet-id <subnet-id> \
  --security-group-ids <security-group-id> \
  --tag-specifications 'ResourceType=instance,Tags=[{Key=Name,Value=keydb}]'
When the instance reaches the Running state and its status checks pass, note its public IP address or DNS name from the EC2 console or with aws ec2 describe-instances.
Step 3: Connect to Your Instance
Connect over SSH using your key pair and the login user for your operating system variant.
| OS variant | SSH login user |
|---|---|
| Ubuntu 24.04 | ubuntu |
ssh -i <key-name>.pem ubuntu@<public-ip>
Step 4: Retrieve the Password
The KeyDB password is unique to your instance and was generated on first boot. Read it as root:
sudo cat /root/keydb-credentials.txt
The file lists the connection string, the host and port, and the generated password. Keep this password somewhere safe.
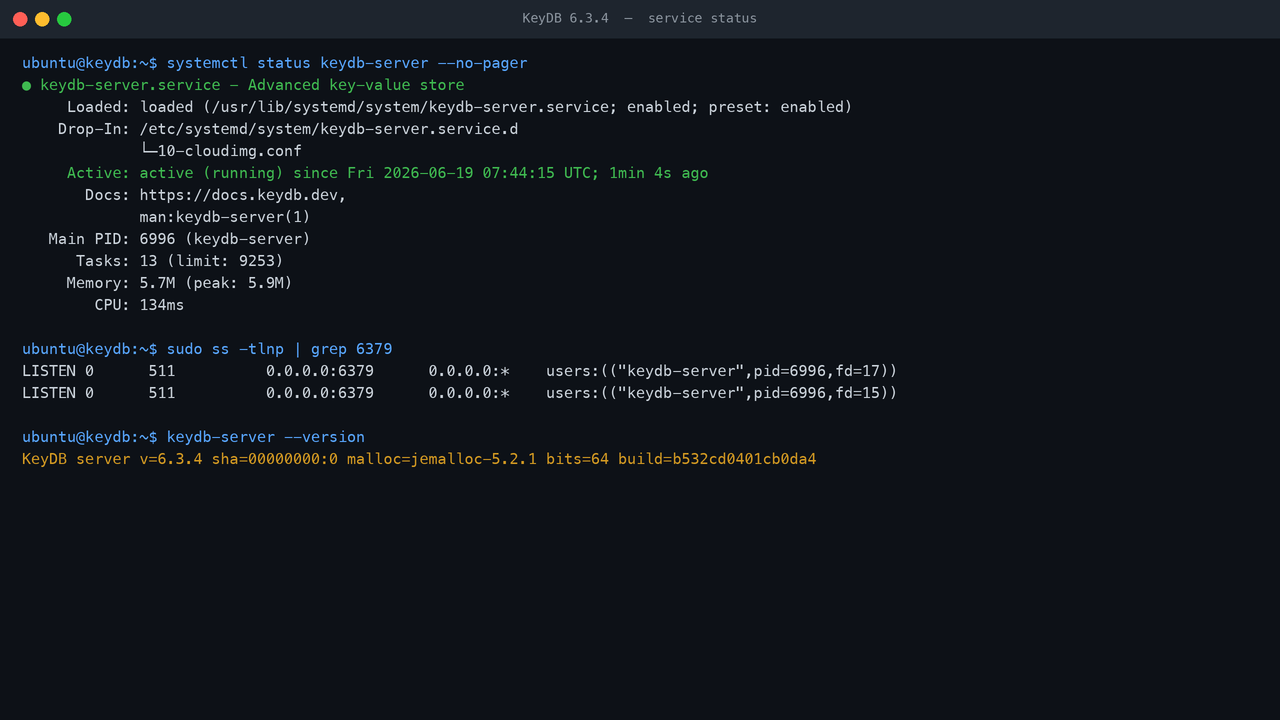
Step 5: Confirm KeyDB Is Running
Over SSH, confirm the database service is active and listening on port 6379:
sudo systemctl is-active keydb-server
sudo ss -tlnp | grep 6379
You should see the service reported as active and KeyDB listening on 0.0.0.0:6379.
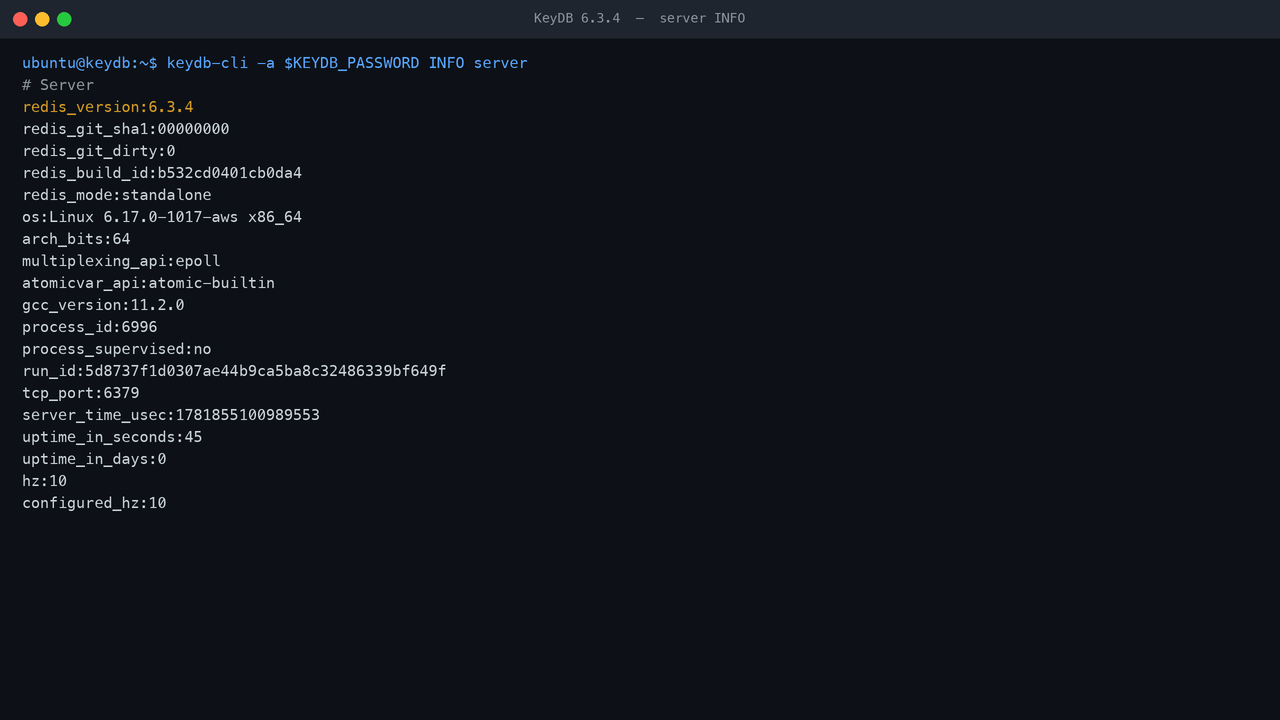
You can confirm the installed version and server details with the bundled CLI. Read the generated password and run an authenticated INFO server:
PASS=$(sudo grep '^keydb.admin.pass=' /root/keydb-credentials.txt | cut -d= -f2-)
keydb-cli -a "$PASS" --no-auth-warning INFO server | head -20
Step 6: Connect with the KeyDB CLI
KeyDB enforces password authentication, so an unauthenticated command is rejected. Confirm this, then connect with the generated password:
PASS=$(sudo grep '^keydb.admin.pass=' /root/keydb-credentials.txt | cut -d= -f2-)
keydb-cli -a "$PASS" --no-auth-warning PING
The authenticated PING returns PONG. The bundled keydb-cli is fully compatible with redis-cli, so all the usual flags and commands work.
Step 7: The Redis Data Model
KeyDB supports the full Redis data model. The following authenticated round trip exercises strings, counters, lists and hashes and confirms the data set is being stored:
PASS=$(sudo grep '^keydb.admin.pass=' /root/keydb-credentials.txt | cut -d= -f2-)
keydb-cli -a "$PASS" --no-auth-warning SET session:42 user-jordan
keydb-cli -a "$PASS" --no-auth-warning GET session:42
keydb-cli -a "$PASS" --no-auth-warning INCR page:views
keydb-cli -a "$PASS" --no-auth-warning LPUSH queue:jobs job-a job-b job-c
keydb-cli -a "$PASS" --no-auth-warning LRANGE queue:jobs 0 -1
keydb-cli -a "$PASS" --no-auth-warning DBSIZE
keydb-cli -a "$PASS" --no-auth-warning DEL session:42 page:views queue:jobs

Step 8: Connect from Your Application
KeyDB speaks the Redis protocol on port 6379, so any Redis client library works without code changes. Point your client at the instance public IP on port 6379 and authenticate with the generated password (the AUTH command, or the password field of your client configuration). For example, a Redis connection URL is redis://:<password>@<instance-public-ip>:6379/.
Because KeyDB is bound to all interfaces, restrict access at the network layer: open port 6379 in the security group only to the hosts and CIDRs that need database access, and keep it closed to the public internet.
Step 9: The Data Volume
The KeyDB persistence directory lives on a dedicated EBS volume mounted at /var/lib/keydb. This keeps the append only file and the RDB snapshots off the operating system disk and lets you resize or snapshot them independently. Confirm the mount:
df -h /var/lib/keydb
To grow the data store, expand the EBS volume in the AWS console, then grow the filesystem on the instance with sudo resize2fs on the underlying device. Append only file persistence is enabled by default (appendonly yes), so writes are durable across a restart; periodic RDB snapshots are also taken.
Step 10: Enable TLS
KeyDB serves the Redis protocol over plain TCP on port 6379 by default. For traffic that leaves your trusted network, enable TLS. KeyDB supports TLS natively: generate or obtain a certificate and key, set the tls-port, tls-cert-file, tls-key-file and tls-ca-cert-file directives in /etc/keydb/keydb.conf, and restart the service. Connect TLS aware clients to the TLS port. Restrict the security group so the database port is reachable only from the networks that need access.
Step 11: Backup and Maintenance
Back up the database by snapshotting the /var/lib/keydb EBS volume, which captures the append only file and the RDB snapshots. You can also trigger a synchronous save with an authenticated keydb-cli BGSAVE or keydb-cli BGREWRITEAOF. Apply operating system security updates with sudo apt-get update && sudo apt-get upgrade and reboot when a new kernel is installed; KeyDB starts automatically on boot.
Support
This image is published and supported by cloudimg. Support covers deployment, client configuration, persistence and durability tuning, memory and eviction policy, multithreading, replication and TLS. Contact cloudimg through the support channel listed on the AWS Marketplace listing.
All product and company names are trademarks or registered trademarks of their respective holders. Use of them does not imply any affiliation with or endorsement by them.