KrakenD API Gateway on Ubuntu 24.04 on Azure User Guide
Overview
KrakenD is a stateless, declarative, high-performance API Gateway. It sits in front of your services and turns many backend calls into a single client-facing endpoint - proxying, aggregating, filtering, transforming and rate-limiting traffic - all from a single declarative configuration file with no per-request database lookups. The cloudimg image installs KrakenD from the official KrakenD apt repository as /usr/bin/krakend, ships a clear ready-to-run sample gateway configuration, and enables the built-in health endpoint so the gateway is serving traffic from the moment the VM boots. Backed by 24/7 cloudimg support.
What is included:
- KrakenD 2.13.x (Apache-2.0) from the official KrakenD apt repository
- The package
krakend.servicesystemd unit, enabled and running on boot - A sample gateway configuration at
/etc/krakend/krakend.jsonlistening on0.0.0.0:8080 - Two sample endpoints:
/v1/posts/{id}proxies a public backend and/v1/users/{id}/profileaggregates two backend calls into one merged response - The built-in
/__healthendpoint and stdout request logging - 24/7 cloudimg support
KrakenD has no web admin UI. The gateway listens on port 8080, but the cloudimg image does not open 8080 in any network security group - you front the gateway with your own TLS and NSG rules, and configure whatever authentication (JWT, API keys, OAuth) your APIs require. The gateway ships no per-VM password.
Prerequisites
An active Azure subscription, an SSH key pair, and a VNet + subnet in the target region. Standard_B2s (2 vCPU / 4 GiB RAM) is a good starting point. NSG inbound: allow 22/tcp from your management network. Open 8080/tcp (or front it with your own load balancer / TLS termination) only when you are ready to expose the gateway to clients.
Step 1 - Deploy from the Azure Marketplace
Sign in to the Azure Portal, choose Create a resource, search the Marketplace for KrakenD by cloudimg, and select Create. On Basics pick your subscription, resource group, region and size; under Administrator account choose SSH public key and paste your key; under Inbound port rules allow SSH (22). Then Review + create -> Create.
Step 2 - Deploy from the Azure CLI
az vm create \
  --resource-group <your-rg> \
  --name krakend \
  --image <marketplace-image-urn> \
  --size Standard_B2s \
  --admin-username azureuser \
  --ssh-key-values ~/.ssh/id_ed25519.pub \
  --vnet-name <your-vnet> --subnet <your-subnet> \
  --public-ip-sku Standard
Step 3 - Connect to your VM
ssh azureuser@<vm-public-ip>
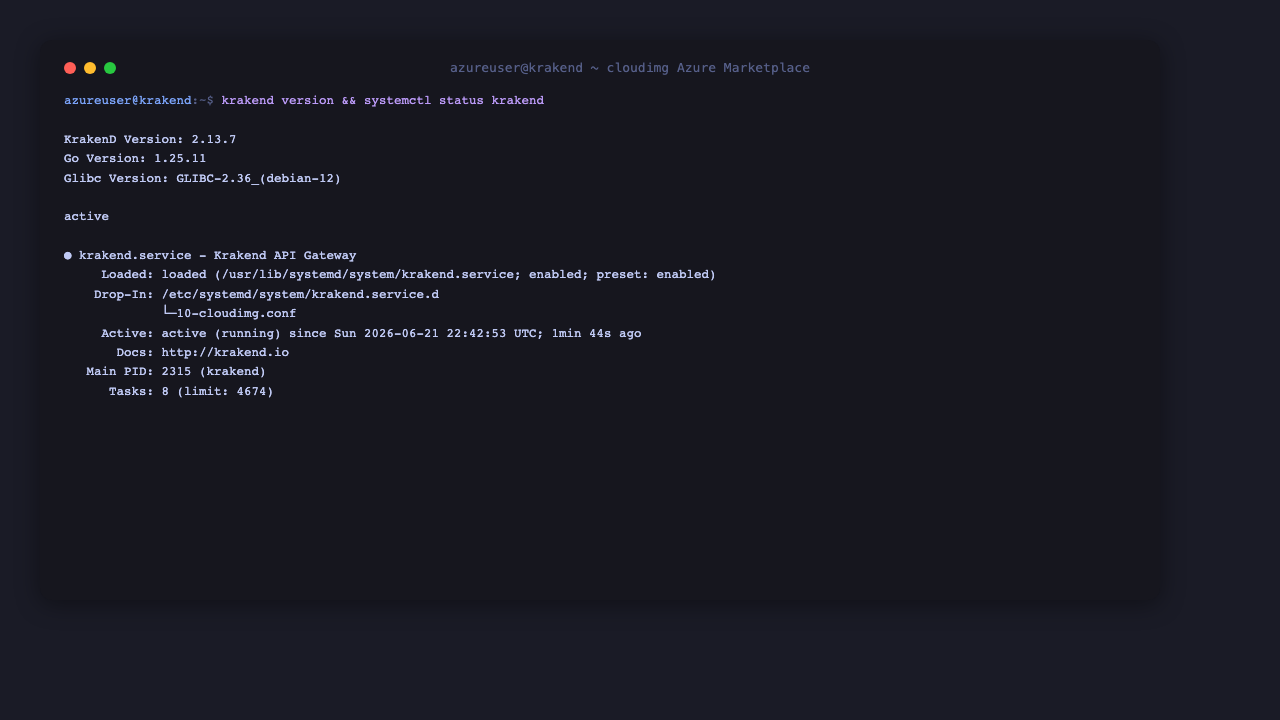
Step 4 - Confirm KrakenD is installed and running
Check the version and that the service is active:
krakend version
systemctl is-active krakend
krakend version reports KrakenD Version: 2.13.x, and systemctl is-active krakend prints active.
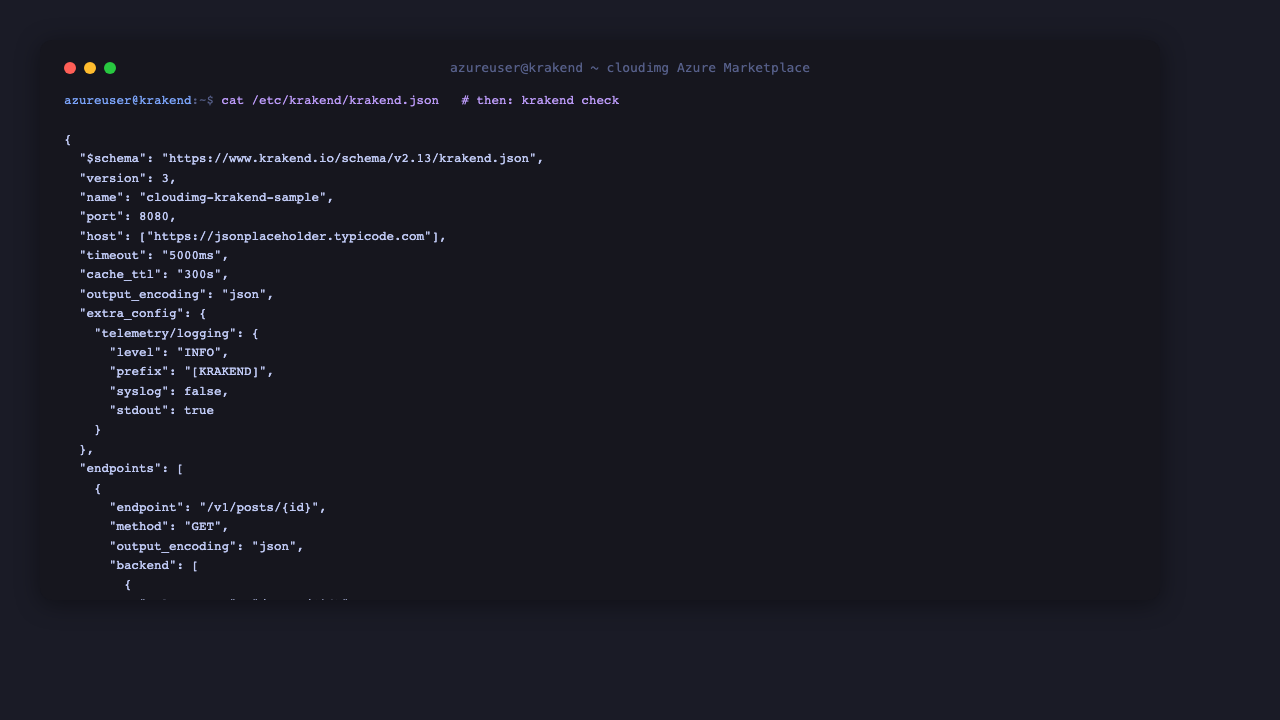
Step 5 - Review and validate the sample configuration
The ready-to-run gateway configuration lives at /etc/krakend/krakend.json. It declares the listen port, global timeouts and logging, and two sample endpoints. View it:
cat /etc/krakend/krakend.json
KrakenD configuration is declarative - you describe the endpoints you want to expose and the backends each one calls. Before the service loads a configuration, validate its syntax with the built-in checker:
krakend check -c /etc/krakend/krakend.json
A valid configuration prints Syntax OK!. Run this every time you edit krakend.json, then sudo systemctl restart krakend to apply your changes.
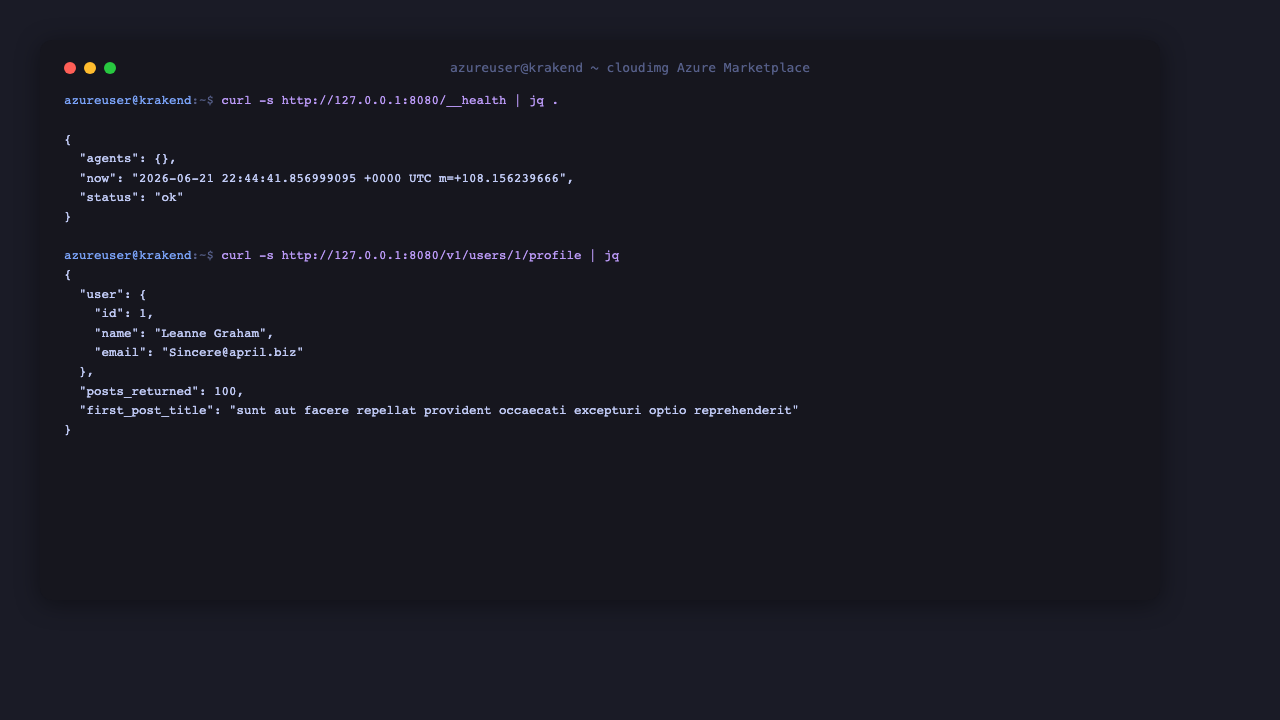
Step 6 - Check the gateway health endpoint
KrakenD exposes a built-in health endpoint that returns 200 with a small JSON body when the gateway is up:
curl 127.0.0.1:8080/__health
The response is {"agents":{},"now":"...","status":"ok"}. Use this endpoint for your Azure Load Balancer or Application Gateway health probe.
Step 7 - Make a request through the gateway
The first sample endpoint proxies a single public backend. A request to /v1/posts/1 is routed by KrakenD to the backend and the JSON response is returned to you:
curl -s 127.0.0.1:8080/v1/posts/1
The second sample endpoint demonstrates KrakenD's response aggregation: a single request to /v1/users/1/profile fans out to two backend calls - a user record and that user's posts - and KrakenD merges both into one response under user and posts keys:
curl -s 127.0.0.1:8080/v1/users/1/profile
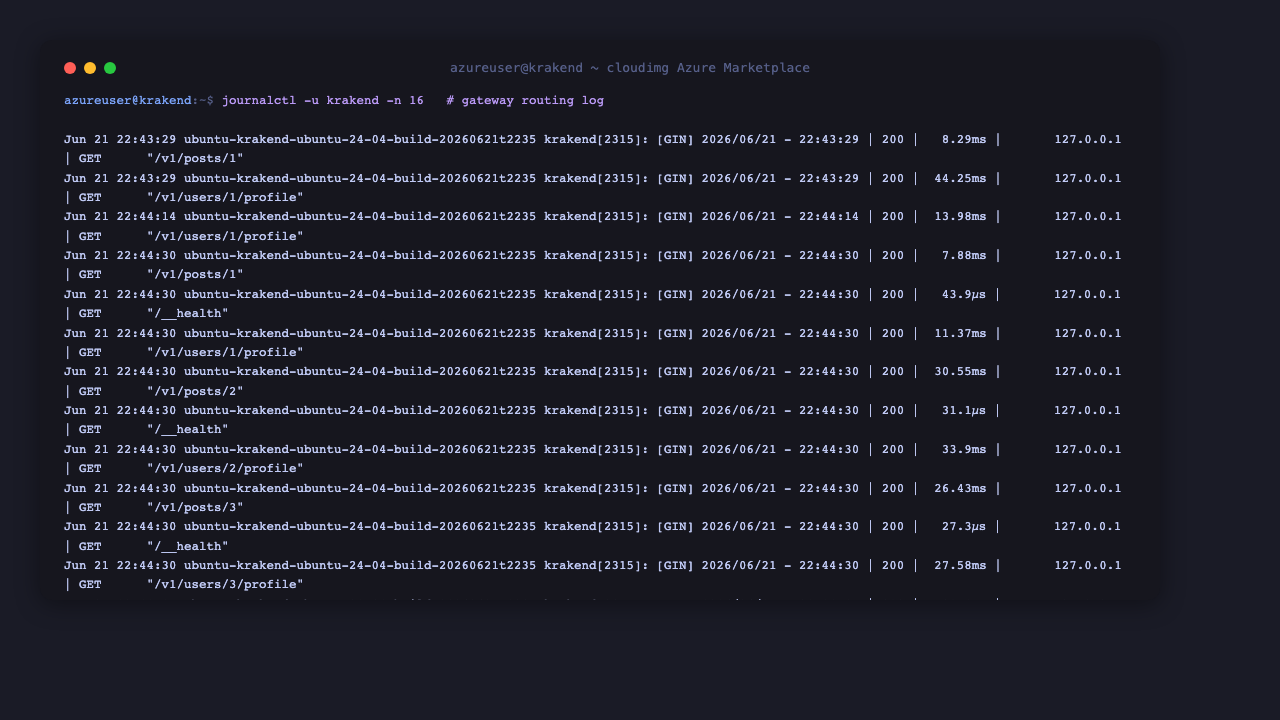
Step 8 - Inspect the gateway request log
KrakenD logs every request it routes to stdout, captured by journald. Watch the live access log to see status codes and latencies for the traffic flowing through the gateway:
sudo journalctl -u krakend -n 20 --no-pager
Each line shows the HTTP status, latency, client IP and the routed path, for example 200 | 27.9µs | 127.0.0.1 | GET "/__health".
Step 9 - Build your own gateway
Edit /etc/krakend/krakend.json to define your own endpoints and backends. The two patterns shown above - simple proxy and multi-backend aggregation - cover most API gateway use cases; add JWT validation, rate limiting, CORS, request transformation and circuit breakers from KrakenD's declarative configuration. Always run krakend check -c /etc/krakend/krakend.json before restarting the service. See the KrakenD documentation for the full configuration reference.
To expose the gateway to clients, open 8080/tcp in your NSG (ideally only from a load balancer subnet) or, recommended, place KrakenD behind an Azure Application Gateway or your own reverse proxy that terminates TLS.
Support
This image is maintained by cloudimg with 24/7 support. KrakenD is licensed under the Apache License 2.0. KrakenD is a trademark of its respective owner; cloudimg is an independent image publisher and is not affiliated with or endorsed by the KrakenD project. For help with the image or your deployment, contact support@cloudimg.co.uk.