
Logdy on AWS User Guide
Overview
This image runs Logdy, the open source, self hosted real time web log viewer and tailer. Logdy follows a log source - a file, a program's standard output, or a socket - and serves a clean browser interface that streams every line live, with sortable columns, faceted filters and full text search so you can slice a noisy log down to exactly the events you care about. Structured JSON logs are parsed into real columns automatically, so tailing a file in a terminal becomes a fast, visual, shareable experience. Logdy is a single Go binary that holds logs in an in memory buffer, so it stays lightweight, starts instantly and needs no database or external services.
The cloudimg image installs Logdy 0.17.1 and puts it behind an nginx reverse proxy that binds Logdy to loopback. The appliance is secure by default: the entire interface, including the WebSocket that streams the log data, is protected by HTTP Basic authentication, and only a static health endpoint is left open for liveness checks. There is no default login. On the first boot of every deployed instance, logdy-firstboot.service generates a per instance password, stores only its bcrypt hash for nginx, and writes the plaintext once to a root only file at /root/logdy-info.txt. Nothing is baked into the image.
To show the interface working the moment the instance boots, the image follows a small demo log: a generator appends structured JSON lines every couple of seconds so the columns, facets and search are populated on first sign-in. This is demo data only, and Step 8 shows you how to point Logdy at your own file, journald or socket.
What is included:
- Logdy 0.17.1 single Go binary (
/usr/local/bin/logdy) - In memory log buffer (no database to maintain)
- A column and facet layout (
/etc/logdy/logdy.config.json) that parses the structured demo JSON into sortable columns logdy.servicerunning as thelogdyuser, bound to loopback127.0.0.1:8080logdy-demo.servicegenerating a demo log so the UI is populated on first boot (demo data only)nginx.servicereverse proxy on TCP 80, TLS ready, with the whole UI behind HTTP Basic auth and WebSocket upgrade for the live streamlogdy-firstboot.servicegenerating a per instance UI password on first boot, stored only as a bcrypt hash- 24/7 cloudimg support
Prerequisites
Before you deploy this image you need:
- An Amazon Web Services account where you can launch EC2 instances
- IAM permissions to launch instances, create security groups, and subscribe to AWS Marketplace products
- An EC2 key pair in the target Region for SSH access to the instance
- A VPC and subnet in the target Region, with a security group allowing inbound port 22 from your management network and inbound ports 80 and 443 from the networks your users will reach Logdy on
- The AWS CLI (version 2) installed locally if you plan to deploy from the command line
Step 1: Launch the Instance from the AWS Marketplace
Sign in to the AWS Management Console, open the EC2 service, and select Launch instance. Under Application and OS Images choose AWS Marketplace AMIs and search for Logdy. Select the cloudimg listing and choose Select, then Continue on the subscription summary.
Pick an instance type of m5.large or larger (Logdy itself is very light; this is the recommended baseline). Choose your EC2 key pair under Key pair (login). Under Network settings select your VPC and subnet, and either create or select a security group that allows inbound port 22 from your management network and inbound ports 80 and 443 from the networks your users use. Leave the root volume at the default size or larger.
Select Launch instance. First boot initialisation takes under a minute after the instance state becomes Running and the status checks pass.
Step 2: Launch the Instance from the AWS CLI
The following block launches an instance from the cloudimg Logdy Marketplace AMI into an existing subnet and security group. Replace <ami-id> with the AMI ID shown on the Marketplace listing, <key-name> with your EC2 key pair name, <subnet-id> with your subnet ID, and <security-group-id> with a security group that opens ports 22, 80, and 443 as described above.
aws ec2 run-instances \
  --image-id <ami-id> \
  --instance-type m5.large \
  --key-name <key-name> \
  --subnet-id <subnet-id> \
  --security-group-ids <security-group-id> \
  --metadata-options 'HttpTokens=required,HttpEndpoint=enabled' \
  --block-device-mappings '[{"DeviceName":"/dev/sda1","Ebs":{"VolumeSize":30,"VolumeType":"gp3"}}]' \
  --tag-specifications 'ResourceType=instance,Tags=[{Key=Name,Value=logdy-01}]'

# The command prints a JSON document on success. Note the instance ID it returns,
# then retrieve its public address once the instance is running:
aws ec2 describe-instances --instance-ids <instance-id> \
  --query "Reservations[].Instances[].PublicIpAddress" --output text
Step 3: Connect over SSH
Connect over SSH with the key pair you selected and the public IP address from Step 2. The SSH login user depends on the operating system of the AMI variant you launched:
| AMI variant | SSH login user |
|---|---|
| Ubuntu 24.04 | ubuntu |
ssh -i /path/to/your-key.pem ubuntu@<public-ip>
The message of the day prints the web URL and where to find the login the moment you connect.
Step 4: Retrieve the Per Instance Login
Logdy's UI is protected by nginx HTTP Basic authentication. The username is admin and a unique password was generated on this instance's first boot. Read it from the root only credentials file:
sudo cat /root/logdy-info.txt
The file lists the username, the password, and the resolved public URL:
LOGDY_UI_USERNAME=admin
LOGDY_UI_PASSWORD=<LOGDY_UI_PASSWORD>
LOGDY_URL=http://<public-ip>/
Step 5: Confirm the Service Health
The three services that make up the appliance should all be active: logdy (the viewer, bound to loopback), logdy-demo (the demo log generator), and nginx (the reverse proxy and authentication gate).
systemctl is-active logdy logdy-demo nginx
Expected output:
active
active
active
Logdy binds only to the loopback interface; nginx is the only public listener. You can confirm this and that the health endpoint is public while the UI itself requires credentials:
PW=$(sudo grep '^LOGDY_UI_PASSWORD=' /root/logdy-info.txt | cut -d= -f2-)
sudo ss -tlnp | grep -E ':8080|:80 '
curl -s -o /dev/null -w 'health(public): %{http_code}\n' http://127.0.0.1/health
curl -s -o /dev/null -w 'ui(no creds): %{http_code}\n'   http://127.0.0.1/
curl -s -o /dev/null -w 'ui(with creds): %{http_code}\n' -u admin:"$PW" http://127.0.0.1/
Expected output (Logdy on 127.0.0.1:8080, nginx on 0.0.0.0:80; /health open, the UI 401 without credentials and 200 with them):
LISTEN 0 4096 127.0.0.1:8080 0.0.0.0:* users:(("logdy",pid=3041,fd=6))
LISTEN 0 511 0.0.0.0:80 0.0.0.0:* users:(("nginx",...))
health(public): 200
ui(no creds): 401
ui(with creds): 200
Step 6: Sign In to the Web UI
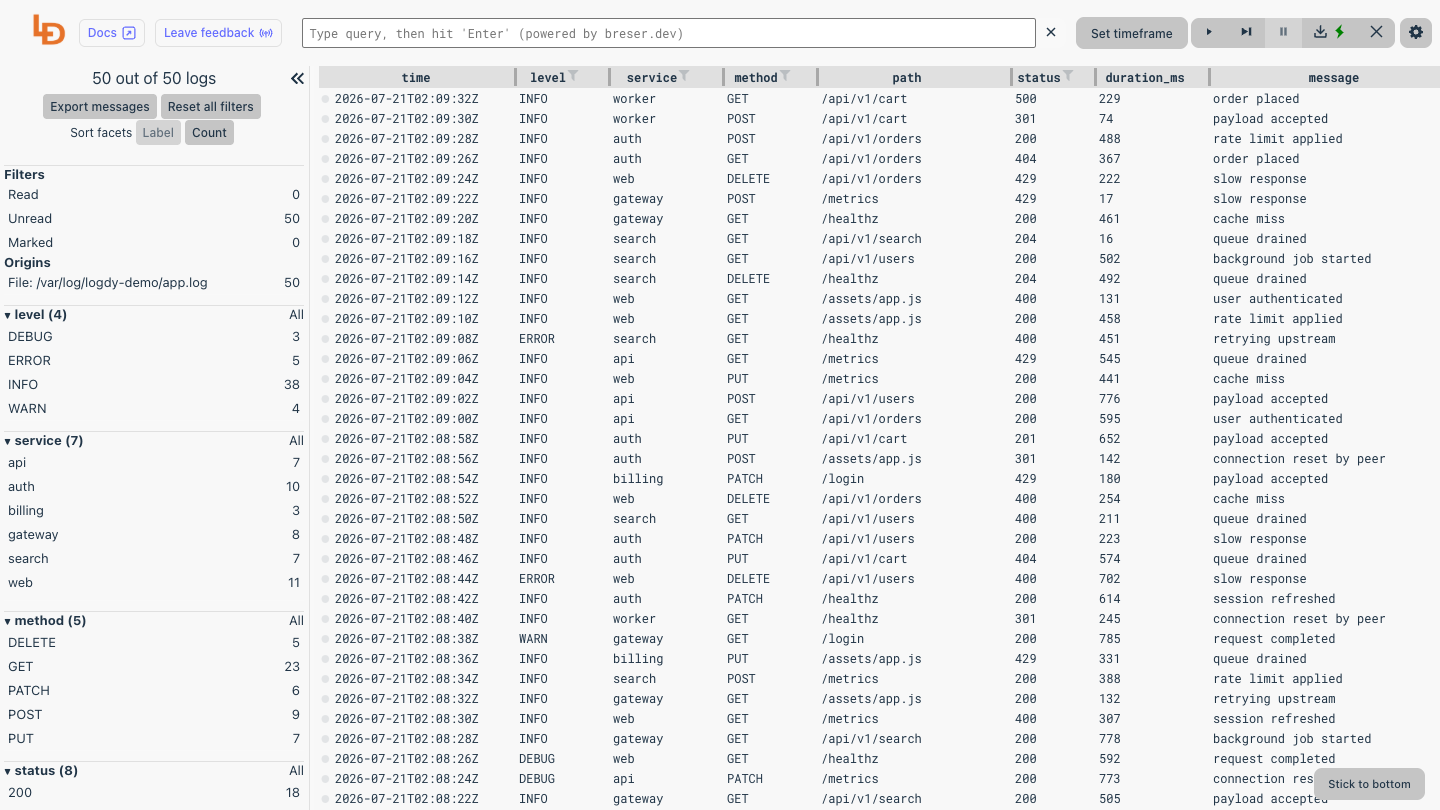
Open http://<public-ip>/ in your browser. The browser prompts for the Basic auth login; enter admin and the password from Step 4. Logdy loads and immediately begins streaming the demo log, with the structured JSON parsed into columns for time, level, service, method, path, status, duration and message. The left rail shows per column facets with live counts.
Step 7: Filter, Facet and Inspect
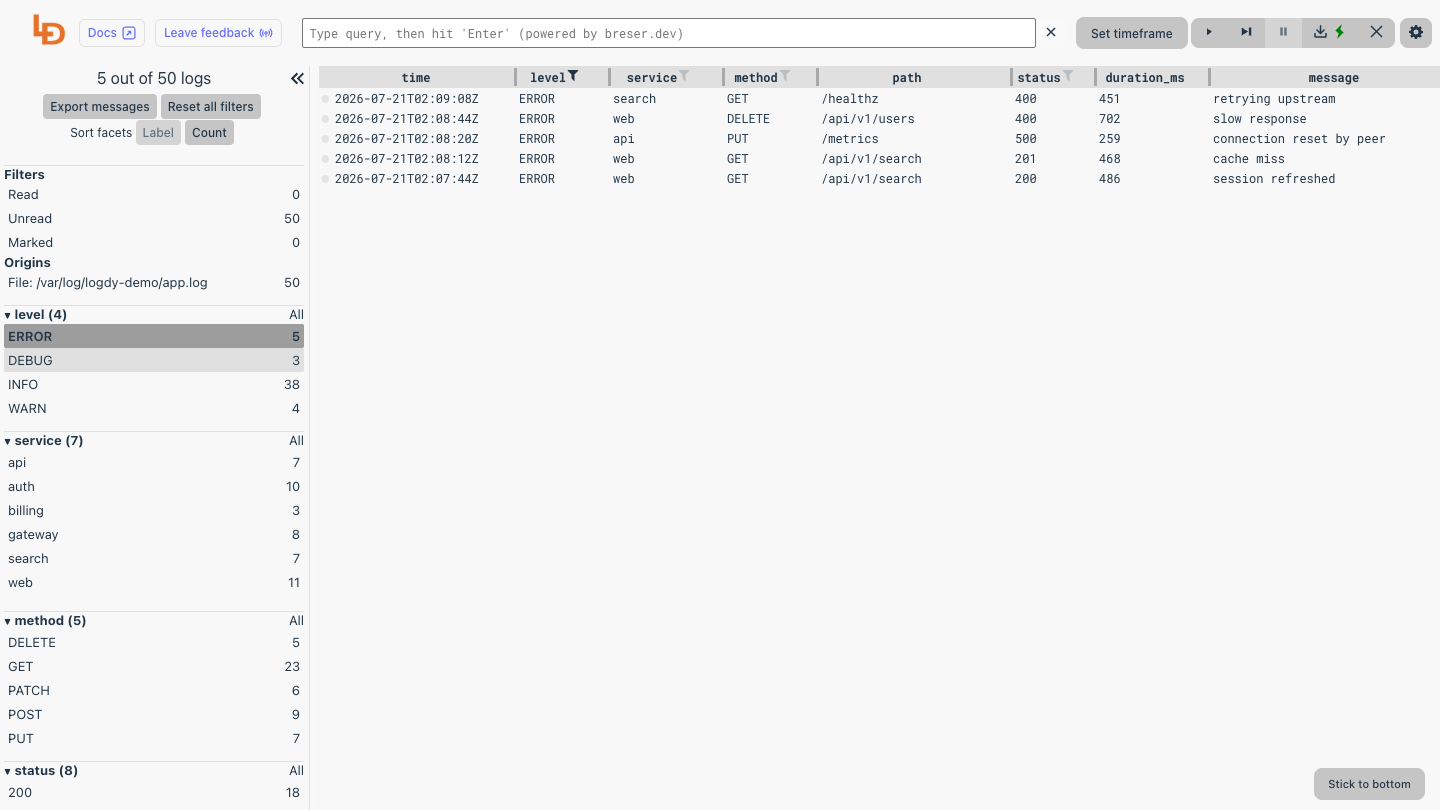
Click any value in the left rail facets to filter the stream to just those lines - for example clicking ERROR under the level facet narrows a busy stream down to the error lines only, with the counts updating instantly. Click Reset all filters to clear.
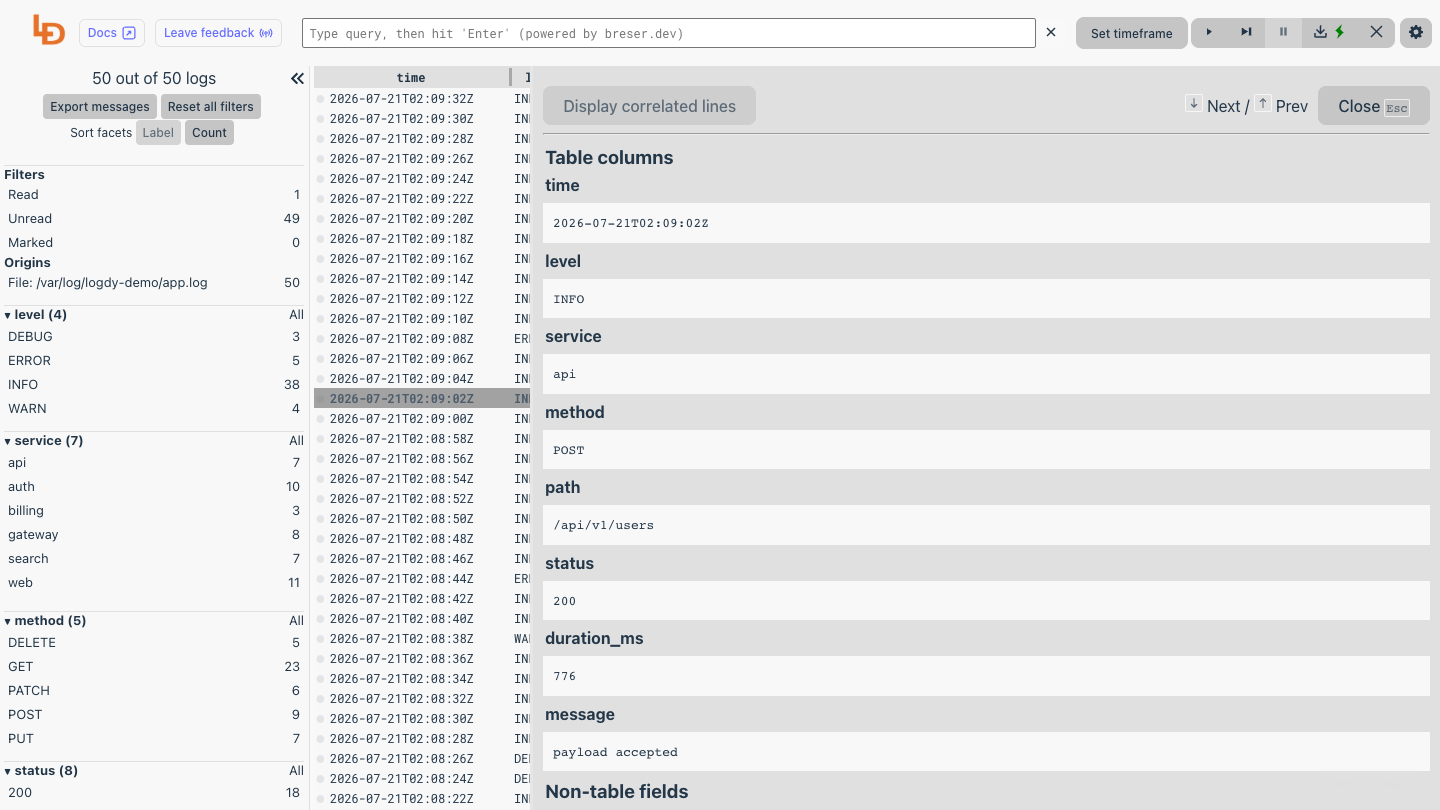
Click a single row to open the detail drawer, which lays out every parsed field of that log line and lets you step to the next or previous matching line. The search box at the top accepts free text and field queries so you can compose filters across any parsed column.
Step 8: Point Logdy at Your Own Logs
The demo generator exists only to populate the UI on first boot. When you are ready to view your own logs, disable the demo and repoint Logdy at your own source. First stop and disable the demo generator:
sudo systemctl disable --now logdy-demo.service
Then edit the ExecStart line in /etc/systemd/system/logdy.service to follow your own file, and reload. Logdy can follow a file, a program's standard output, or a socket - for example, to follow your own application log file:
# In /etc/systemd/system/logdy.service, set ExecStart to follow your file, e.g.:
#   ExecStart=/usr/local/bin/logdy follow /var/log/myapp/app.log --full-read --port 8080 --ui-ip 127.0.0.1 -n -u
sudo systemctl daemon-reload
sudo systemctl restart logdy.service
To follow the systemd journal instead, pipe journalctl -f into Logdy's standard input mode. See the Logdy documentation at https://logdy.dev/docs for the full range of sources, column definitions and low-code TypeScript parsers.
Step 9: Change the UI Password
The Basic auth credential is stored as a bcrypt hash in /etc/nginx/logdy.htpasswd. To set your own password, rewrite the entry with htpasswd and reload nginx:
sudo htpasswd -bB /etc/nginx/logdy.htpasswd admin '<new-password>'
sudo systemctl reload nginx
Step 10: Enable HTTPS
For production, terminate TLS at nginx. Point a DNS name at the instance, open port 443 in the security group, and use certbot to obtain and install a certificate:
sudo apt-get update && sudo apt-get install -y certbot python3-certbot-nginx
sudo certbot --nginx -d your-domain.example.com
certbot updates the nginx site to listen on 443 with your certificate and can redirect port 80 to 443. Your Logdy UI is then served over HTTPS, still behind the same Basic auth gate.
Step 11: Day-Two Operations
Manage the services with systemctl:
sudo systemctl status logdy
sudo systemctl restart logdy
sudo journalctl -u logdy -f
Logdy holds logs in an in memory ring buffer, so nothing is persisted to disk unless you opt in with --append-to-file. There is no database to back up. Keep the instance patched with the usual apt-get update && apt-get upgrade cycle; Logdy itself is a single binary that you can replace in place from the upstream release when you upgrade.
Support
cloudimg provides 24/7 technical support for this product via email and live chat. We help with deployment, upgrades, wiring Logdy to your own log sources, writing low-code parsers for custom formats, TLS termination and troubleshooting.
- Email: support@cloudimg.co.uk
- Live chat: available 24/7
Logdy is distributed under the Apache License 2.0. All product and company names are trademarks or registered trademarks of their respective holders. Use of them does not imply any affiliation with or endorsement by them.