Magento Open Source 2.4 on AWS User Guide
Overview
This image runs Magento Open Source 2.4 behind Apache, with PHP FPM 8.3 and OPcache enabled. Storefront content, catalog data and configuration are stored in MariaDB on the same instance, bound to the loopback interface only. Catalog and storefront search runs on OpenSearch, also bound to loopback. The Composer dependency manager is preinstalled, and Magento's lifecycle jobs run every minute through a system cron entry so indexers, reindexing, email and scheduled jobs fire automatically.
Magento administrator and MariaDB credentials are generated on the first boot of every deployed instance. Two instances launched from the same Amazon Machine Image never share passwords. The initial administrator password and the MariaDB password are written to /root/magento-credentials.txt with mode 0600 so that only the root user can read them. The Magento base URLs are set on first boot from the instance's public IP, so the storefront and administrator UI work on whatever public address the customer reaches them on.
Prerequisites
Before you deploy this image you need:
- An Amazon Web Services account where you can launch EC2 instances
- IAM permissions to launch instances, create security groups, and subscribe to AWS Marketplace products
- An EC2 key pair in the target Region for SSH access to the instance
- A VPC and subnet in the target Region, with a security group allowing inbound port 22 from your management network and inbound ports 80 and 443 from the networks your shoppers will use
- The AWS CLI (version 2) installed locally if you plan to deploy from the command line
Step 1: Launch the Instance from the AWS Marketplace
Sign in to the AWS Management Console, open the EC2 service, and select Launch instance. Under Application and OS Images choose AWS Marketplace AMIs and search for Magento Open Source. Select the cloudimg listing and choose Select, then Continue on the subscription summary.
Pick an instance type of m5.large or larger — Magento is a heavy stack with PHP, MariaDB and OpenSearch running side by side. Choose your EC2 key pair under Key pair (login). Under Network settings select your VPC and subnet, and either create or select a security group that allows inbound port 22 from your management network and inbound ports 80 and 443 from the networks your shoppers use. Leave the root volume at the default size or larger.
Select Launch instance. First boot initialisation takes approximately two minutes after the instance state becomes Running and the status checks pass — Magento runs cache:flush after rotating the database password on first boot, which is the longest step.
Step 2: Launch the Instance from the AWS CLI
The following block launches an instance from the cloudimg Magento Marketplace AMI into an existing subnet and security group. Replace <ami-id> with the AMI ID shown on the Marketplace listing, <key-name> with your EC2 key pair name, <subnet-id> with your subnet ID, and <security-group-id> with a security group that opens ports 22, 80, and 443 as described above.
aws ec2 run-instances \
  --image-id <ami-id> \
  --instance-type m5.large \
  --key-name <key-name> \
  --subnet-id <subnet-id> \
  --security-group-ids <security-group-id> \
  --block-device-mappings '[{"DeviceName":"/dev/sda1","Ebs":{"VolumeSize":30,"VolumeType":"gp3"}}]' \
  --tag-specifications 'ResourceType=instance,Tags=[{Key=Name,Value=magento-store-01}]'
The command prints a JSON document on success. Note the instance ID, then retrieve its public address once it is running with aws ec2 describe-instances --instance-ids <instance-id> --query "Reservations[].Instances[].PublicIpAddress" --output text.
Step 3: Connect and Retrieve Initial Credentials
Connect over SSH with the key pair you selected and the public IP address from step 2. The SSH login user depends on the operating system of the AMI variant you launched:
| AMI variant | SSH login user |
|---|---|
| Magento Open Source 2.4 on Ubuntu 24.04 | ubuntu |
The first boot service rotates credentials and reconfigures Magento before Apache accepts customer requests, so the credentials file is always in place when you log in for the first time.
ssh <login-user>@<public-ip>
sudo cat /root/magento-credentials.txt
You will see a plain text file containing the storefront URL, the administrator URL (which is /admin), the administrator username (admin), the administrator password, and the MariaDB database name, user, and password. Copy these values somewhere secure (a password manager or encrypted vault). Do not commit them to source control.
From the same SSH session you can confirm the deployment is healthy:
HOST=$(sudo awk -F/ '/^magento.storefront.url=/ {print $3; exit}' /root/magento-credentials.txt)
curl -fsS -o /dev/null -w 'storefront HTTP %{http_code}\n' -H "Host: ${HOST}" http://127.0.0.1/
A storefront HTTP 200 response confirms the full stack — Apache, PHP, MariaDB and OpenSearch — is serving Magento.
Step 4: First Sign In to the Magento Administrator
Open a web browser and navigate to the storefront URL from the credentials file. Magento presents the Luma demo theme home page to anonymous visitors.

Navigate to /admin (the administrator URL is also in the credentials file). Magento renders the administrator sign in form.

Enter the administrator username admin and the administrator password from /root/magento-credentials.txt. Select Sign in. On a fresh deployment Adobe shows a one time usage data collection prompt — select Don't Allow unless your organisation has opted in.
Step 5: The Administrator Dashboard
Once signed in, the Magento administrator opens at the Dashboard. The dark left rail gives you every management area: Dashboard for the home overview, Sales for orders and invoices, Catalog for products and categories, Customers for shoppers, Marketing for promotions and email, Content for storefront pages and blocks, Reports for analytics and lifecycle reports, Stores for store configuration, multi store setup and tax, and System for permissions, integrations and import/export.

The Magento version number is shown in the footer of every admin page. The yellow banner at the top of the dashboard on a fresh install reminds you to refresh the Configuration cache; navigate to System then Cache Management, tick Configuration, choose Refresh from the action dropdown, and select Submit.
Step 6: Change the Administrator Password
For a production deployment rotate the administrator password that was generated on first boot. Choose your account in the top right corner, choose Account Setting, enter your current password, set a new password in the Password and Password Confirmation fields, and select Save Account.
Step 7: Create Your First Product
Select Catalog then Products in the left rail. Magento opens the Products grid, which is empty on a fresh install.

Choose Add Product then select a product type (Simple, Configurable, Grouped, Virtual, Bundle, or Downloadable). Magento renders the product editor with sections for the product name, SKU, price, quantity, attributes, images, related products, search engine optimisation, and storefront visibility.
Enter the basic fields, set Enable Product to Yes, set the Stock Status to In Stock, and select Save. Magento reindexes the product into the OpenSearch catalog automatically — your product appears on the storefront within a minute.
Step 8: Configure Tax, Shipping and Payment
Magento ships unconfigured for payment and shipping. Configure them under Stores then Configuration:
- Sales then Tax — set the merchant origin country and add tax rules and rates for the jurisdictions you sell into.
- Sales then Shipping Methods — enable a flat rate or table rate shipping method, or integrate with a carrier provider such as UPS or FedEx.
- Sales then Payment Methods — enable a built in payment method such as Check / Money Order for testing, or install a payment integration extension for a card processor such as Stripe, Braintree or PayPal.
After every Configuration change Magento prompts you to refresh the Configuration cache. Use System then Cache Management.
Step 9: Storefront Theme and Content
The image ships with the Luma sample theme so the storefront has a real layout and example category pages out of the box. Replace it for production:
- Install a third party theme via Composer —
cd /var/www/magento && sudo -u www-data composer require <vendor>/<theme-package>— then enable it under Content then Design then Configuration. - Or build a custom theme by creating
app/design/frontend/<Vendor>/<theme>and registering it.
CMS content (the home page, About Us, the static blocks down the homepage) is managed under Content then Pages and Content then Blocks. Replace the default placeholders before launch.
Step 10: Enable HTTPS with Let's Encrypt
For any production Magento deployment serve the storefront and admin over HTTPS — admin sessions, customer login cookies and payment form data cannot be exposed to interception. The image ships with Apache, which certbot can configure automatically.
The following assumes you have a DNS record pointing your fully qualified domain name at the instance's public IP address.
sudo apt-get update && sudo apt-get install -y certbot python3-certbot-apache
sudo certbot --apache -d shop.your-domain.example \
  --non-interactive --agree-tos -m you@your-domain.example \
  --redirect
After certbot finishes, update Magento's secure base URL to the new HTTPS endpoint:
sudo -u www-data /var/www/magento/bin/magento config:set web/secure/base_url 'https://shop.your-domain.example/'
sudo -u www-data /var/www/magento/bin/magento config:set web/secure/use_in_frontend 1
sudo -u www-data /var/www/magento/bin/magento config:set web/secure/use_in_adminhtml 1
sudo -u www-data /var/www/magento/bin/magento cache:flush
Step 11: Backups and Maintenance
Magento has three data sources that must be backed up together: the MariaDB database, the Magento code tree (/var/www/magento — including Composer dependencies, app/etc/env.php, and uploaded media under pub/media), and the OpenSearch indices (regenerated by bin/magento indexer:reindex if lost).
sudo mysqldump --single-transaction magento > /var/backups/magento-db-$(date +%F).sql
sudo tar --acls --xattrs -czf /var/backups/magento-files-$(date +%F).tgz -C /var/www magento
Ship both artifacts to an Amazon S3 bucket or another object store. Magento's cron entry installed with the image runs every minute and dispatches indexer reindexing, mail dispatch, order lifecycle hooks and other scheduled jobs.
For kernel and package updates, Ubuntu's unattended-upgrades is enabled by default — security patches apply automatically. To update Magento itself, use Composer: cd /var/www/magento && sudo -u www-data composer update --no-dev, followed by sudo -u www-data bin/magento setup:upgrade && sudo -u www-data bin/magento setup:di:compile && sudo -u www-data bin/magento setup:static-content:deploy -f && sudo -u www-data bin/magento cache:flush.
Step 12: Scaling Beyond a Single Instance
For larger deployments decouple Magento from the single instance pattern:
- Move MariaDB to Amazon RDS for MariaDB and update
db.connection.defaultin/var/www/magento/app/etc/env.php - Put the Magento web tier behind an Application Load Balancer and scale horizontally with an Auto Scaling group, with
pub/mediaon Amazon EFS shared storage - Move OpenSearch to Amazon OpenSearch Service and update the search engine configuration under Stores then Configuration then Catalog then Catalog then Catalog Search
- Offload session and full page cache to Amazon ElastiCache for Redis by setting the
cache.frontend.default.backendandsession.savekeys inenv.php - Push static assets to Amazon CloudFront in front of
pub/staticandpub/media
Each of these is documented in the Adobe Commerce Operations guide at https://experienceleague.adobe.com/docs/commerce-operations/.
Screenshots
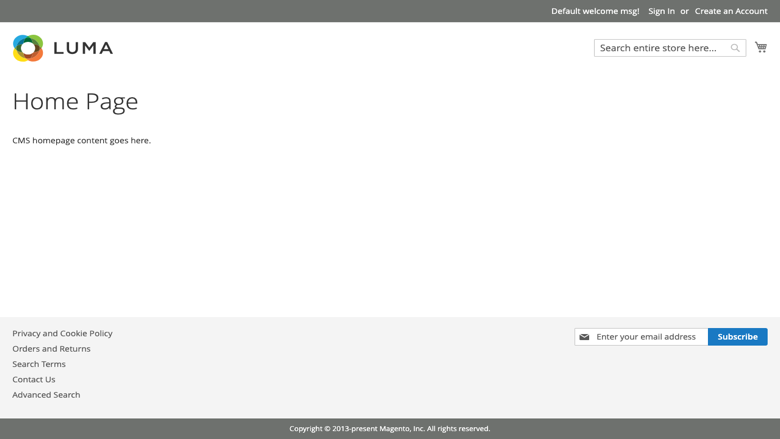
The Magento storefront, served on first boot with no manual setup.
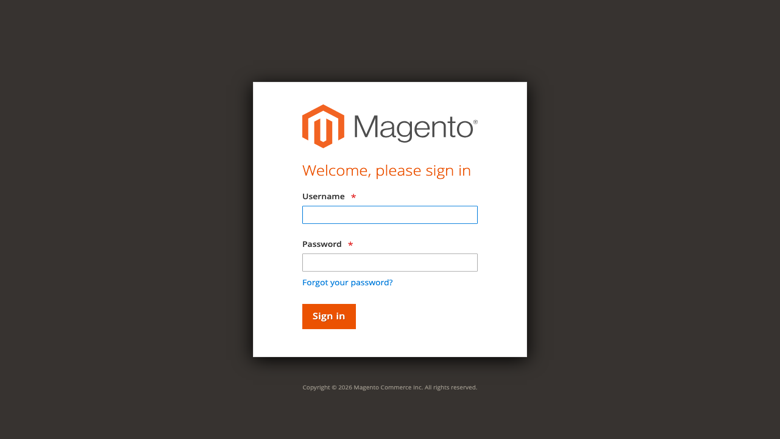
The Magento administrator sign-in page at /admin.
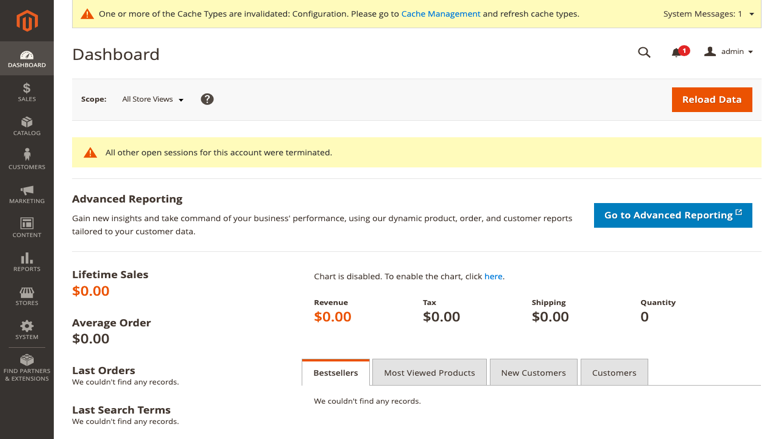
The Magento administrator dashboard after first sign-in.
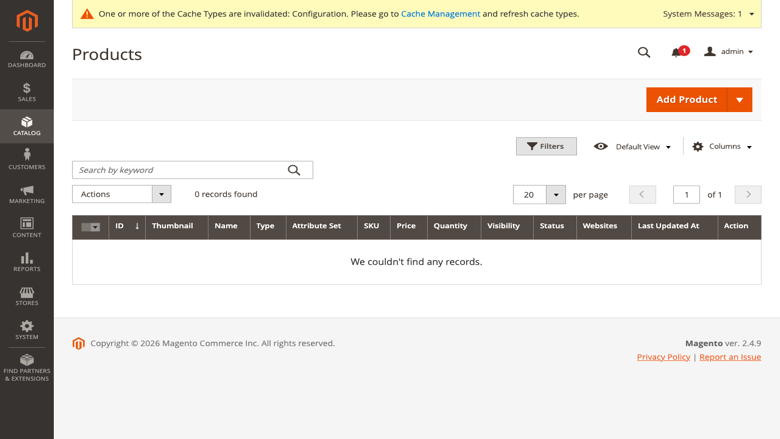
Managing products from the Magento administrator catalog screen.
Support
cloudimg provides 24/7/365 expert technical support for this image. Guaranteed response within 24 hours, one hour average for critical issues. Contact support@cloudimg.co.uk.
For general Magento administration questions consult the community at https://magento.com/community and the developer documentation at https://experienceleague.adobe.com/docs/commerce-operations/.