Marimo on Ubuntu 24.04 on Azure User Guide
Overview
marimo is an open-source reactive Python notebook. Cells re-run automatically based on their dependencies, so your notebook state is always consistent - no more hidden, out-of-order state. Notebooks are stored as pure .py files (git-friendly, importable as modules) and any notebook can be served as an interactive web app. It is the modern alternative to Jupyter for data scientists, ML engineers and analysts building dashboards, internal tools and reproducible analyses. The cloudimg image installs marimo 0.23.10 in a dedicated Python virtualenv, serves the notebook editor as a systemd service bound to loopback behind an nginx reverse proxy on port 80 with HTTP Basic auth, persists your notebooks on a dedicated Azure data disk, and generates a unique login password on the first boot of every VM. Backed by 24/7 cloudimg support.
What is included:
- marimo 0.23.10 in a Python virtualenv at
/opt/marimo/venv(with pandas, numpy, matplotlib and altair) - A sample reactive notebook at
/var/lib/marimo/sample.pydemonstrating dependency-driven cells, a slider widget and an altair chart - nginx on
:80fronting the loopback marimo editor with HTTP Basic auth and websocket proxying (marimo uses websockets for reactive updates) - A dedicated Azure data disk at
/var/lib/marimoholding your notebooks - separate from the OS disk and re-provisioned with every VM marimo.service+nginx.serviceas systemd units, enabled and active- 24/7 cloudimg support
Prerequisites
An active Azure subscription, an SSH key pair, and a VNet + subnet in the target region. Standard_B2ms (2 vCPU / 8 GiB RAM) is a good starting point; scale up for heavier notebooks. NSG inbound: allow 22/tcp from your management network and 80/tcp for the editor (front with TLS for public exposure - see Enabling HTTPS).
Step 1 - Deploy from the Azure Marketplace
Sign in to the Azure Portal, choose Create a resource, search the Marketplace for Marimo by cloudimg, and select Create. On Basics pick your subscription, resource group, region and size; under Administrator account choose SSH public key and paste your key; under Inbound port rules allow SSH (22) and HTTP (80). Review the dedicated data disk on the Disks tab, then Review + create -> Create.
Step 2 - Deploy from the Azure CLI
az vm create \
  --resource-group <your-rg> \
  --name marimo \
  --image <marketplace-image-urn> \
  --size Standard_B2ms \
  --admin-username azureuser \
  --ssh-key-values ~/.ssh/id_ed25519.pub \
  --vnet-name <your-vnet> --subnet <your-subnet> \
  --public-ip-sku Standard

az vm open-port --resource-group <your-rg> --name marimo --port 80 --priority 1010
Step 3 - Connect to your VM
ssh azureuser@<vm-public-ip>
Step 4 - Confirm the services are running
systemctl is-active marimo.service nginx.service
Both services report active. marimo starts in a few seconds.
Step 5 - Retrieve your password
The admin password is generated uniquely on the first boot of your VM and written to a root-only file:
sudo cat /root/marimo-credentials.txt
This file contains MARIMO_ADMIN_USER (admin) and MARIMO_ACCESS_PASSWORD, plus the editor URL. Store the password somewhere safe.
Step 6 - Check the health endpoint
nginx serves an unauthenticated health endpoint for load balancers and probes:
curl -s http://localhost/health
It returns ok.
Step 7 - Open the notebook editor
Browse to http://<vm-public-ip>/ and sign in as admin with the password from Step 5. marimo opens its home page - a workspace listing the notebooks on the data disk, including the bundled sample.py.
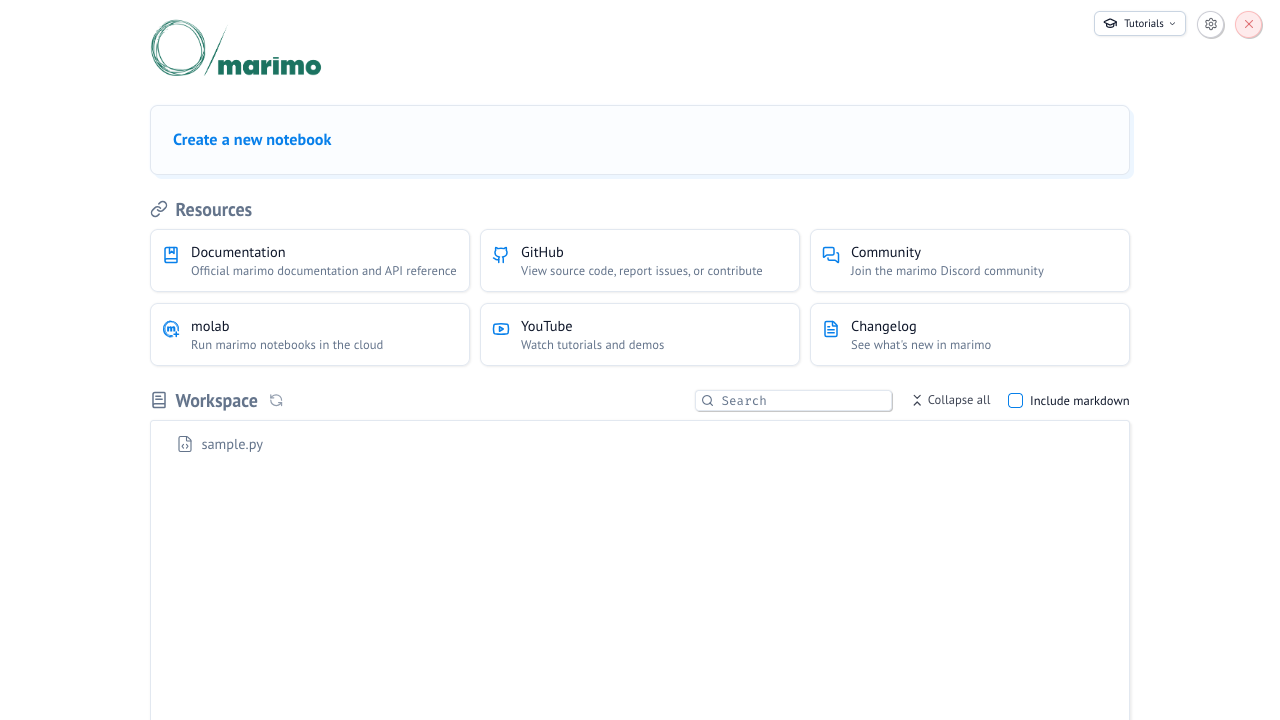
Open sample.py to enter the reactive editor. Each cell is a block of Python; marimo tracks the dependencies between cells and re-runs dependent cells automatically when you change one.
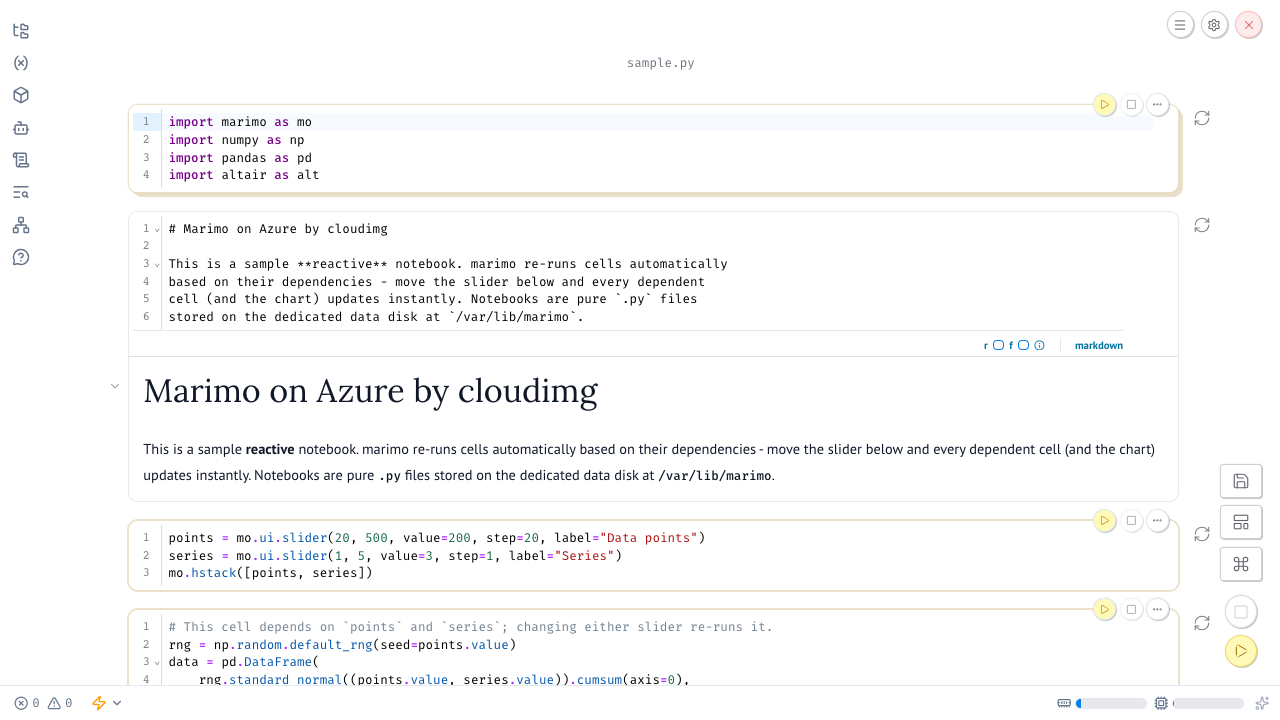
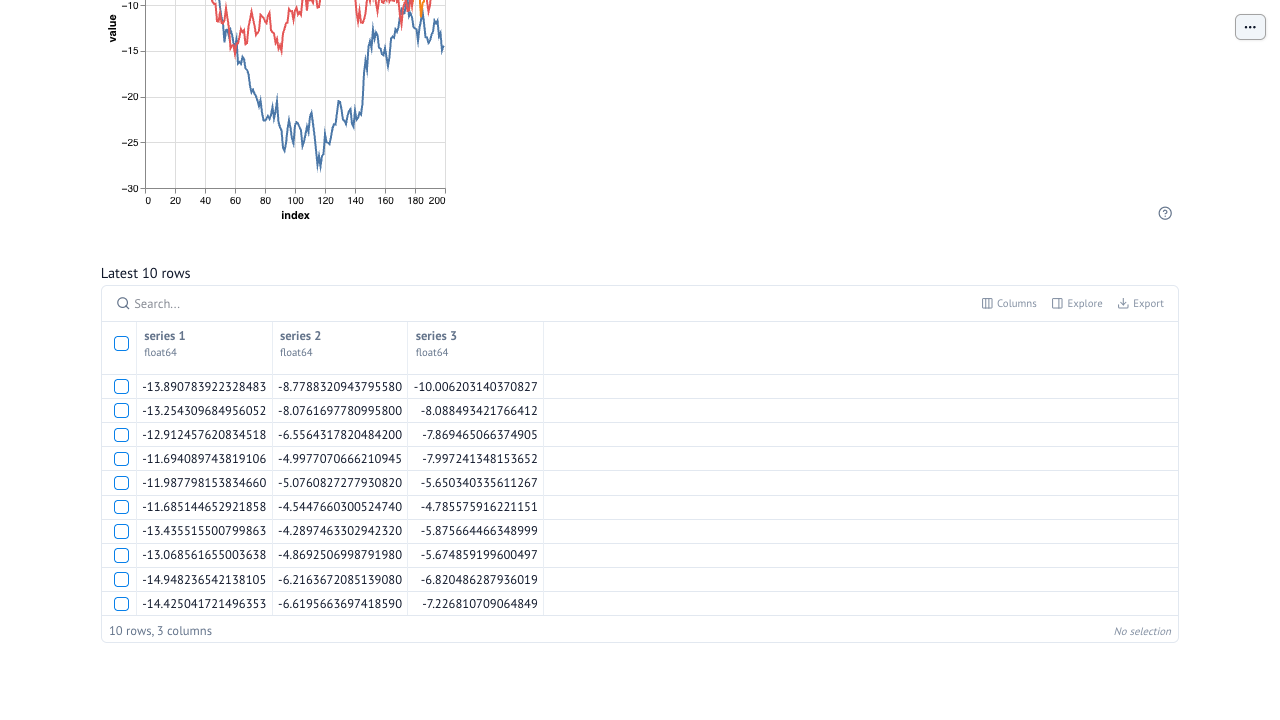
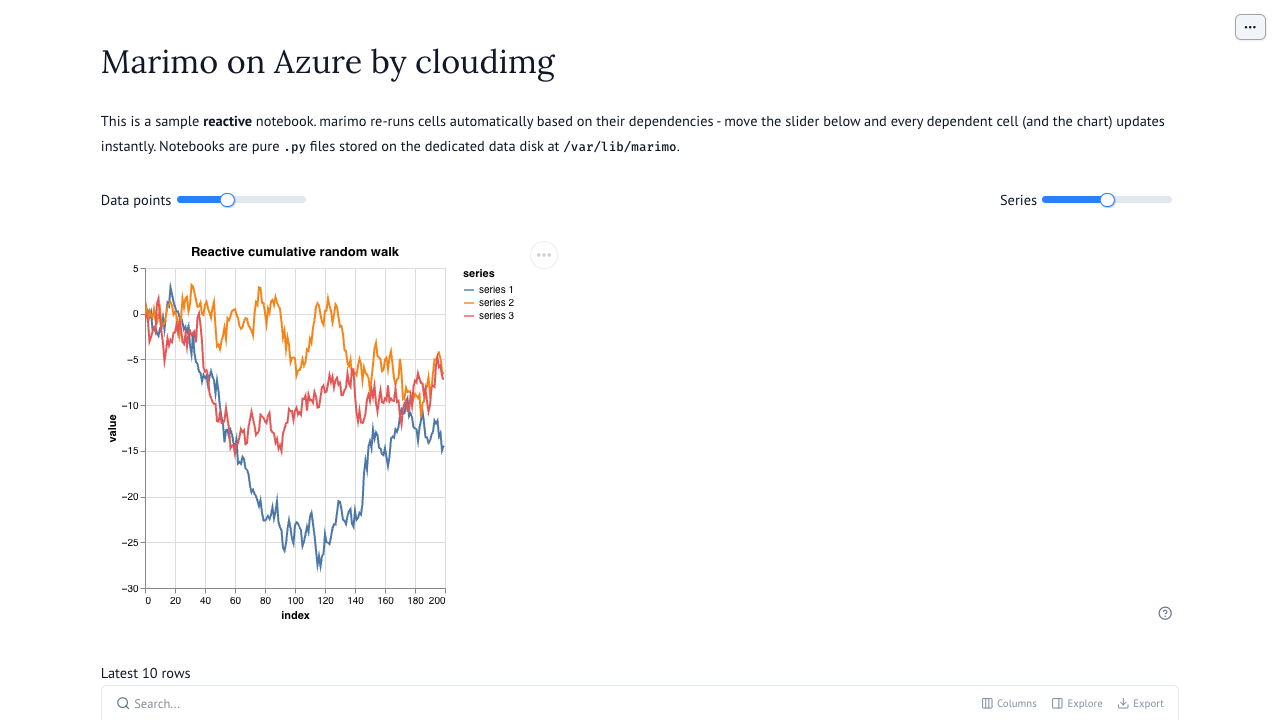
The sample notebook renders a slider widget and an altair chart. Move the Data points or Series slider and the chart re-runs instantly - that is marimo's reactivity.
Step 8 - Confirm the server from the command line
marimo exposes a health endpoint behind the same Basic auth. Confirm it is serving:
curl -s -u admin:<MARIMO_ACCESS_PASSWORD> http://localhost/marimo/health; echo
It returns {"status":"healthy"}.
Step 9 - Serve a notebook as an interactive app
Any marimo notebook can be served as a read-only interactive web app (no code cells, just the rendered widgets and outputs). Run it from the bundled virtualenv:
sudo -u marimo /opt/marimo/venv/bin/marimo run /var/lib/marimo/sample.py --headless --host 127.0.0.1 --port 2719
Front it with the same nginx pattern or open an SSH tunnel to view it. The app renders the title, the slider controls and the live chart.
Step 10 - Add your own notebook
Create or copy a .py notebook into the data directory; it appears in the marimo home page automatically:
# copy your notebook in, then refresh the marimo home page:
sudo cp my-notebook.py /var/lib/marimo/
sudo chown marimo:marimo /var/lib/marimo/my-notebook.py
Install any extra Python packages your notebook needs into the bundled virtualenv:
sudo /opt/marimo/venv/bin/pip install <your-packages>
sudo systemctl restart marimo
Step 11 - Confirm the notebooks live on the dedicated disk
Your notebooks are stored on the dedicated Azure data disk so they survive OS changes and can be resized independently:
findmnt /var/lib/marimo
The mount is backed by a separate Azure data disk captured into the image and re-provisioned on every VM.
Enabling HTTPS
The nginx reverse proxy terminates plain HTTP on port 80. For public exposure, put a certificate in front of it - add a DNS name for the VM and use the companion cloudimg nginx-ssl-certbot image as a TLS reverse proxy, or install certbot and extend the existing nginx site with a listen 443 ssl; server block. Keep marimo bound to loopback so the only public surface is the authenticated, TLS-terminated proxy, which already forwards the websocket marimo needs for reactivity.
Maintenance
- Your notebooks: add
.pyfiles to/var/lib/marimo/(owned bymarimo:marimo); they show up in the marimo home page. - Packages: install into
/opt/marimo/venvwith itspip. - Backups: snapshot the
/var/lib/marimodata disk. - Upgrades:
sudo /opt/marimo/venv/bin/pip install -U marimothensudo systemctl restart marimo. - Security patches: unattended-upgrades remains enabled so the OS continues to receive security updates automatically.
Support
cloudimg provides 24/7 expert support for this image. Contact support@cloudimg.co.uk.