
Medama Privacy-Focused Web Analytics on AWS User Guide
Overview
Medama is a self-hostable, privacy-focused website analytics platform. It gives you clear, real time insight into your website traffic without cookies, without logging IP addresses and without any additional visitor identifiers, so it helps you stay compliant with GDPR, PECR and similar regulations while still answering the questions that matter: which pages are popular, where visitors come from, which referrers and campaigns drive traffic, and how your audience breaks down by browser, operating system, device and country. Visitors are measured with a lightweight tracker script of less than one kilobyte, and the whole platform is a single self-contained Go binary with two embedded databases, so it stays lightweight and starts instantly.
The cloudimg image installs Medama and puts it behind an nginx reverse proxy. The appliance is secure by default: the internal service port is not exposed to the internet by the default security group, and there is no shared default password. A unique administrator credential is generated automatically on first boot, stored in a root only file on the instance, and is different on every machine you launch, so no secret is ever baked into the image. Because Medama sets a secure session cookie, signing in requires a localhost or HTTPS connection, and this guide walks you through both a simple SSH tunnel and enabling HTTPS on your own domain.
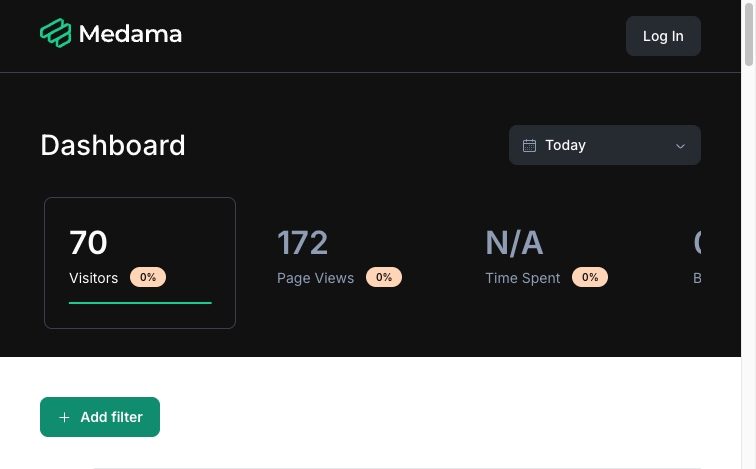
What is included:
- Medama single Go binary (
/usr/local/bin/medama), version 0.6.2 - Two embedded databases in
/var/lib/medama:me_meta.db(SQLite: users and websites) andme_analytics.db(DuckDB: analytics events), captured empty medama.servicerunning as themedamauser on internal port 8080nginx.servicereverse proxy on TCP 80, TLS readymedama-firstboot.servicewhich, on first boot, rotates the administrator password to a unique per instance value and writes it to a root only file- A real time analytics dashboard and a sub 1KB cookieless tracker served at
/script.js - Ubuntu 24.04 LTS base, latest patches, unattended security upgrades enabled
- 24/7 cloudimg support
Prerequisites
Before you deploy this image you need:
- An Amazon Web Services account where you can launch EC2 instances
- IAM permissions to launch instances, create security groups, and subscribe to AWS Marketplace products
- An EC2 key pair in the target Region for SSH access to the instance
- A VPC and subnet in the target Region, with a security group allowing inbound port 22 from your management network and inbound ports 80 and 443 from the networks your websites and users will reach the analytics server on
- The AWS CLI (version 2) installed locally if you plan to deploy from the command line
Connecting to your instance
Connect over SSH on port 22 as the default login user for the operating system variant you launched. This listing currently ships the following variant:
| OS variant | SSH login user |
|---|---|
| Ubuntu 24.04 LTS | ubuntu |
Medama runs on internal port 8080 and is served to the network through nginx on port 80. The security group opens ports 22, 80 and 443 only, so the internal port is never reachable directly from the internet.
Step 1: Launch the Instance from the AWS Marketplace
Sign in to the AWS Management Console, open the EC2 service, and select Launch instance. Under Application and OS Images choose AWS Marketplace AMIs and search for Medama. Select the cloudimg listing and choose Select, then Continue on the subscription summary.
Pick an instance type of m5.large or larger (Medama is very light, but m5.large is the tested recommendation). Choose your EC2 key pair under Key pair (login). Under Network settings select your VPC and subnet, and either create or select a security group that allows inbound port 22 from your management network and inbound ports 80 and 443 from the networks your websites and users use. Leave the root volume at the default size or larger.
Select Launch instance. First boot initialisation, including generating the per instance administrator credential, takes under a minute after the instance state becomes Running and the status checks pass.
Step 2: Launch the Instance from the AWS CLI
The following block launches an instance from the cloudimg Medama Marketplace AMI into an existing subnet and security group. Replace <ami-id> with the AMI ID shown on the Marketplace listing, <key-name> with your EC2 key pair name, <subnet-id> with your subnet ID, and <security-group-id> with a security group that opens ports 22, 80, and 443 as described above.
aws ec2 run-instances \
  --image-id <ami-id> \
  --instance-type m5.large \
  --key-name <key-name> \
  --subnet-id <subnet-id> \
  --security-group-ids <security-group-id> \
  --metadata-options "HttpTokens=required,HttpEndpoint=enabled" \
  --tag-specifications 'ResourceType=instance,Tags=[{Key=Name,Value=medama}]'
The image resolves this instance's public address on first boot using the EC2 Instance Metadata Service (IMDSv2), so it works with HttpTokens=required enabled.
Step 3: Connect via SSH
Connect as the ubuntu user (see the Connecting to your instance table above for other variants).
ssh ubuntu@<public-ip>
The message of the day prints the tracker host URL, the dashboard tunnel command and the key operational commands as soon as you log in.
Step 4: Retrieve your per-instance administrator credential
On first boot the image generates a unique administrator password for this instance and writes it, together with the resolved URLs, to a root only file. Read it with sudo:
sudo cat /root/medama-credentials.txt
You will see the username (always admin), the generated password, and the exact SSH tunnel command and tracker host for this instance:
# Medama on AWS - Per-VM Administrator Credential
MEDAMA_ADMIN_USERNAME=admin
MEDAMA_ADMIN_PASSWORD=<MEDAMA_ADMIN_PASSWORD>
MEDAMA_DASHBOARD_TUNNEL=ssh -L 8080:localhost:8080 ubuntu@<public-ip>
MEDAMA_DASHBOARD_LOCAL=http://localhost:8080
MEDAMA_TRACKER_URL=http://<public-ip>/
The password is unique to this instance and is not present in the AMI. Keep it safe; you can change it later from within the dashboard.
Step 5: Open the dashboard over an SSH tunnel
Medama sets a secure session cookie, so it only allows sign in from a localhost or HTTPS origin. The simplest way to reach the dashboard securely is an SSH tunnel that forwards a local port to Medama on the instance. From your own workstation run:
ssh -L 8080:localhost:8080 ubuntu@<public-ip>
Leave that session open, then browse to http://localhost:8080 on your workstation. You will be prompted to sign in.
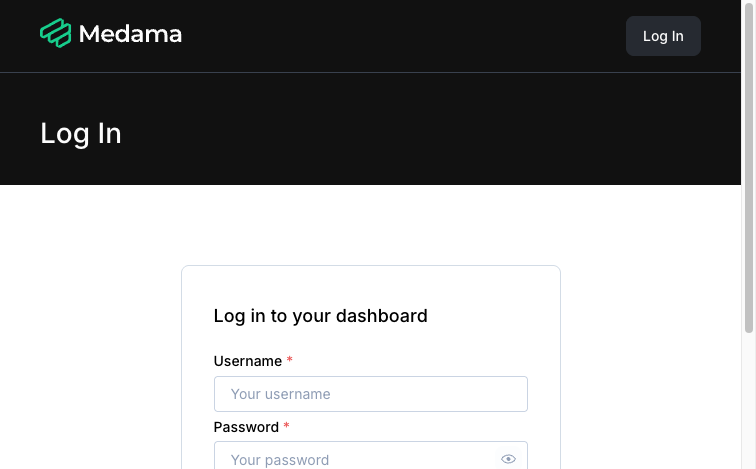
Enter the username admin and the password from /root/medama-credentials.txt. After signing in you land on the My Websites page, which is empty until you add your first site.
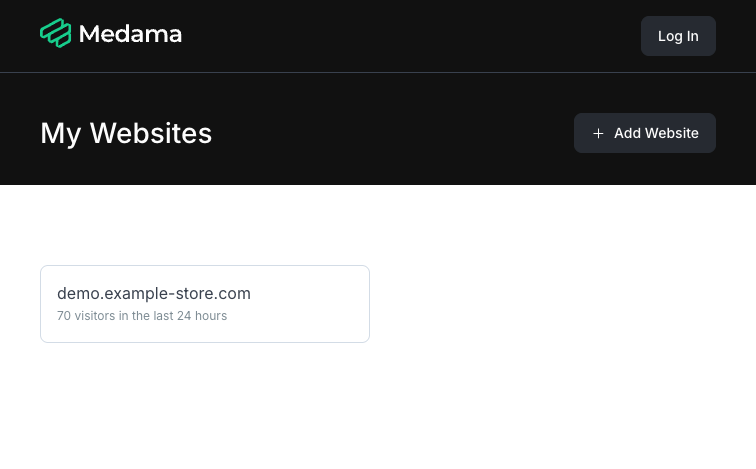
You can verify the login and administrator credential from the command line on the instance as well. This logs in over loopback and confirms the session is valid:
COOKIE=$(curl -s -D - -o /dev/null -m 15 -X POST http://127.0.0.1:8080/api/auth/login \
  -H 'Content-Type: application/json' \
  -d '{"username":"admin","password":"<MEDAMA_ADMIN_PASSWORD>"}' \
  | tr -d '\r' | grep -i '^set-cookie:' | grep -o '_me_sess=[^;]*' | head -1)
curl -s -o /dev/null -w 'authenticated /api/user -> HTTP %{http_code}\n' \
  -H "Cookie: $COOKIE" http://127.0.0.1:8080/api/user
A 200 confirms the credential works.
Step 6: Add a website and install the tracking snippet
In the dashboard select Add Website and enter the hostname of the site you want to measure (for example www.example.com). Then add the Medama tracking snippet to the <head> of that site's pages, pointing it at this instance's tracker host (the MEDAMA_TRACKER_URL value from your credentials file):
<script defer src="http://<public-ip>/script.js"></script>
The tracker is served unauthenticated through nginx, so your website's visitors can send page views to the instance while the dashboard stays protected behind the tunnel. Once traffic starts flowing, open the site from My Websites to see live statistics: visitors, page views, and the pages your audience is viewing.
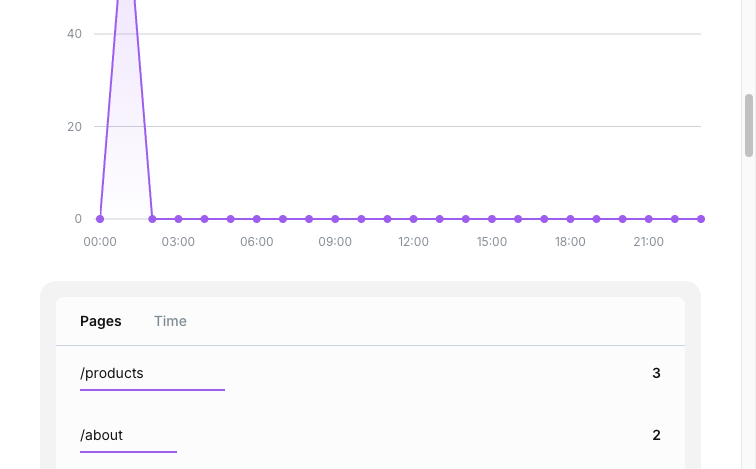
Step 7: Explore your analytics
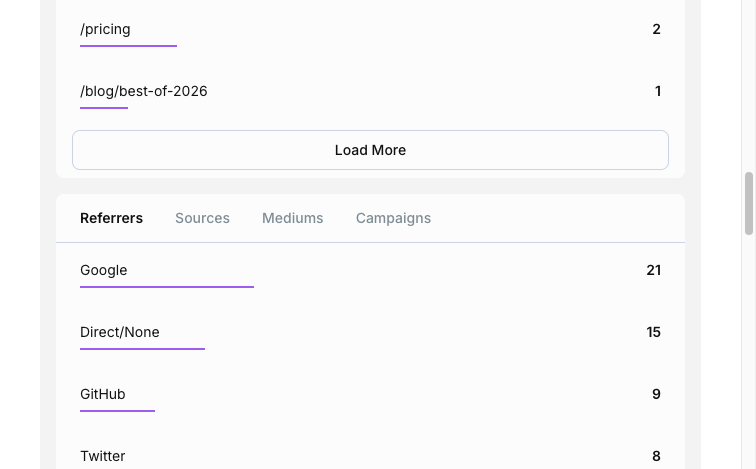
Medama breaks traffic down across several dimensions. The Referrers, Sources, Mediums and Campaigns tabs show where your visitors come from, including UTM tagged campaigns:
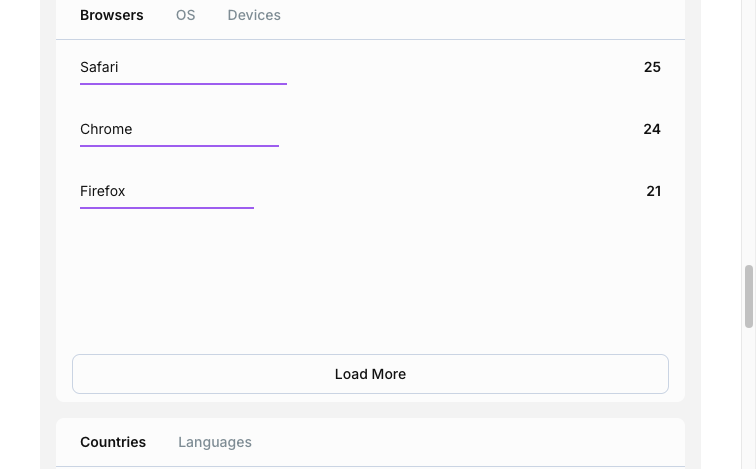
The Browsers, OS and Devices panels, along with Countries and Languages, describe your audience, all inferred without cookies or personal identifiers:
Use the date range selector at the top of the dashboard to move between today, the last few days, and longer periods.
Managing the services
Medama and nginx are managed with systemctl. Check their status at any time:
systemctl status medama.service nginx.service
Both should report active (running). Restart Medama after any configuration change with sudo systemctl restart medama, and reload nginx with sudo systemctl reload nginx. Confirm the Medama version with:
medama version
Enabling HTTPS
Serving the dashboard over HTTPS lets you and your team sign in directly from a browser without the SSH tunnel, and is strongly recommended for any production deployment. You have two options.
Option A - Medama's built-in automatic SSL. Point a DNS A record at this instance's public IP, then configure Medama to provision and renew a Let's Encrypt certificate for that domain by adding the -autossl flag (and optionally -autosslemail) to the service. Edit /etc/systemd/system/medama.service, append -autossl your-domain.com to the ExecStart line, then sudo systemctl daemon-reload && sudo systemctl restart medama. Medama will serve HTTPS on port 443 directly; ensure your security group allows inbound 443.
Option B - terminate TLS at nginx. Install a certificate with certbot's nginx plugin (sudo apt-get install -y certbot python3-certbot-nginx && sudo certbot --nginx -d your-domain.com) and let nginx continue to proxy to Medama on 127.0.0.1:8080. Once HTTPS is in place you can sign in to the dashboard directly at your domain, without the SSH tunnel.
Maintenance and upgrades
The base operating system has unattended security upgrades enabled, so OS patches are applied automatically. To upgrade Medama itself to a newer release, download the latest Linux binary from the Medama releases page, replace /usr/local/bin/medama, and restart the service:
sudo systemctl stop medama
# replace /usr/local/bin/medama with the new binary, then:
sudo systemctl start medama
Your analytics data in /var/lib/medama is preserved across upgrades. Back up that directory to retain your history.
Support
cloudimg provides 24/7 technical support for this product via email and live chat.
- Email: support@cloudimg.co.uk
- Live chat: available 24/7 on cloudimg.co.uk
We help with deployment and instance configuration, upgrades to new Medama releases, adding websites and installing the tracking snippet, TLS and certificate setup, retrieving and rotating the administrator credential, and performance tuning. Critical issues receive a one hour average response.
This is a repackaged open source software product with additional charges for cloudimg support services. Medama's core and dashboard are distributed under the Apache License 2.0 and its tracker under the MIT License. All product and company names are trademarks or registered trademarks of their respective holders. Use of them does not imply any affiliation with or endorsement by them.