MinIO on Ubuntu 24.04 on Azure User Guide
Overview
This guide covers the deployment and configuration of MinIO on Ubuntu 24.04 on Azure using cloudimg Azure Marketplace images. MinIO is the de facto open source S3-compatible object storage system. It speaks the AWS S3 wire protocol exactly, so every aws-sdk client, Velero, Restic, BorgBackup, Spark, Trino, ClickHouse, DuckDB, and any other S3-aware tool works without modification.
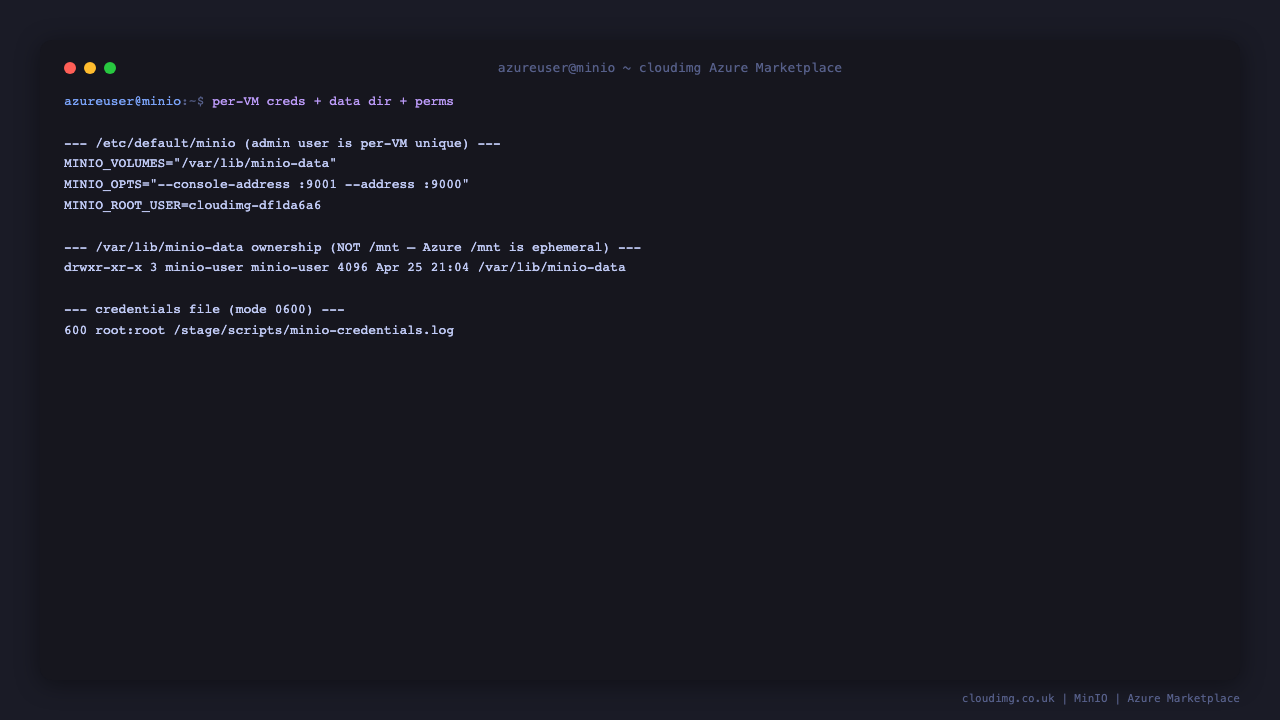
The image ships the latest stable MinIO server installed from the official dl.min.io .deb artefact, plus the mc command-line client at /usr/local/bin/mc. On every fresh customer virtual machine, minio-firstboot.service rotates both MINIO_ROOT_USER and MINIO_ROOT_PASSWORD from the build-time temp values to per-VM strong values, restarts MinIO so the new env is picked up, and writes credentials to /stage/scripts/minio-credentials.log (mode 0600). No two virtual machines ever share root credentials.
What is included:
-
MinIO server installed from the official
dl.min.io.deb(latest stable) -
mcclient at/usr/local/bin/mcfor command-line admin -
minio.servicesystemd unit auto-starting on boot -
minio-firstboot.servicesystemd oneshot that rotates root credentials -
Listeners: TCP 9000 (S3 API), TCP 9001 (Web Console)
-
Single-drive data directory at
/mnt/minio-data -
Bound to all interfaces by default; NSG controls actual reach
-
Ubuntu 24.04 LTS base with latest security patches applied at build time
-
Azure Linux Agent for seamless cloud integration and SSH key injection
-
24/7 cloudimg support with guaranteed 24 hour response SLA
Prerequisites
-
An active Azure subscription
-
A subscription to the MinIO on Ubuntu 24.04 listing on Azure Marketplace
-
An SSH public key for VM authentication
-
A virtual network and subnet in the target region
Recommended virtual machine size: Standard_B2s (2 vCPU, 4 GB RAM) for development and small workloads. Production deployments should use Standard_D2s_v3 or larger with attached Premium SSD data disks, ideally 4+ disks across multiple nodes for erasure-coded resilience.
Step 1: Deploy from the Azure Portal
Navigate to Marketplace in the Azure Portal, search for MinIO, select the cloudimg publisher entry, and click Create.
On the Networking tab attach a network security group that allows inbound TCP 22 from your management IP range, TCP 9001 from your admin networks (the Console), and TCP 9000 from your application networks (the S3 API). Do not expose the console (9001) to the public internet — root credentials are written in plain text on the VM and an internet-exposed console makes brute-force trivial. Pair with TLS at a reverse proxy (Nginx, Caddy, Apache, Azure Application Gateway) for any public deployment.
Click Review + create, wait for validation, then Create. Deployment takes around two minutes.
Step 2: Deploy from the Azure CLI
RG="minio-prod"
LOCATION="eastus"
VM_NAME="minio-01"
ADMIN_USER="azureuser"
GALLERY_IMAGE_ID="/subscriptions/<sub-id>/resourceGroups/azure-cloudimg/providers/Microsoft.Compute/galleries/cloudimgGallery/images/minio-ubuntu-24-04/versions/<version>"
SSH_KEY="$(cat ~/.ssh/id_rsa.pub)"

az group create --name "$RG" --location "$LOCATION"

az network vnet create \
  --resource-group "$RG" \
  --name minio-vnet --address-prefix 10.94.0.0/16 \
  --subnet-name minio-subnet --subnet-prefix 10.94.1.0/24

az network nsg create --resource-group "$RG" --name minio-nsg

az network nsg rule create \
  --resource-group "$RG" --nsg-name minio-nsg \
  --name allow-ssh --priority 100 \
  --source-address-prefixes "<your-mgmt-cidr>" \
  --destination-port-ranges 22 --access Allow --protocol Tcp

az network nsg rule create \
  --resource-group "$RG" --nsg-name minio-nsg \
  --name allow-s3-api --priority 110 \
  --source-address-prefixes 10.94.0.0/16 \
  --destination-port-ranges 9000 --access Allow --protocol Tcp

az network nsg rule create \
  --resource-group "$RG" --nsg-name minio-nsg \
  --name allow-console --priority 120 \
  --source-address-prefixes "<your-mgmt-cidr>" \
  --destination-port-ranges 9001 --access Allow --protocol Tcp

az vm create \
  --resource-group "$RG" --name "$VM_NAME" \
  --image "$GALLERY_IMAGE_ID" \
  --size Standard_B2s --storage-sku StandardSSD_LRS \
  --admin-username "$ADMIN_USER" --ssh-key-values "$SSH_KEY" \
  --vnet-name minio-vnet --subnet minio-subnet --nsg minio-nsg \
  --public-ip-sku Standard
Step 3: Connect via SSH
ssh azureuser@<vm-ip>
minio.service will already be running and minio-firstboot.service will already have rotated the root credentials.
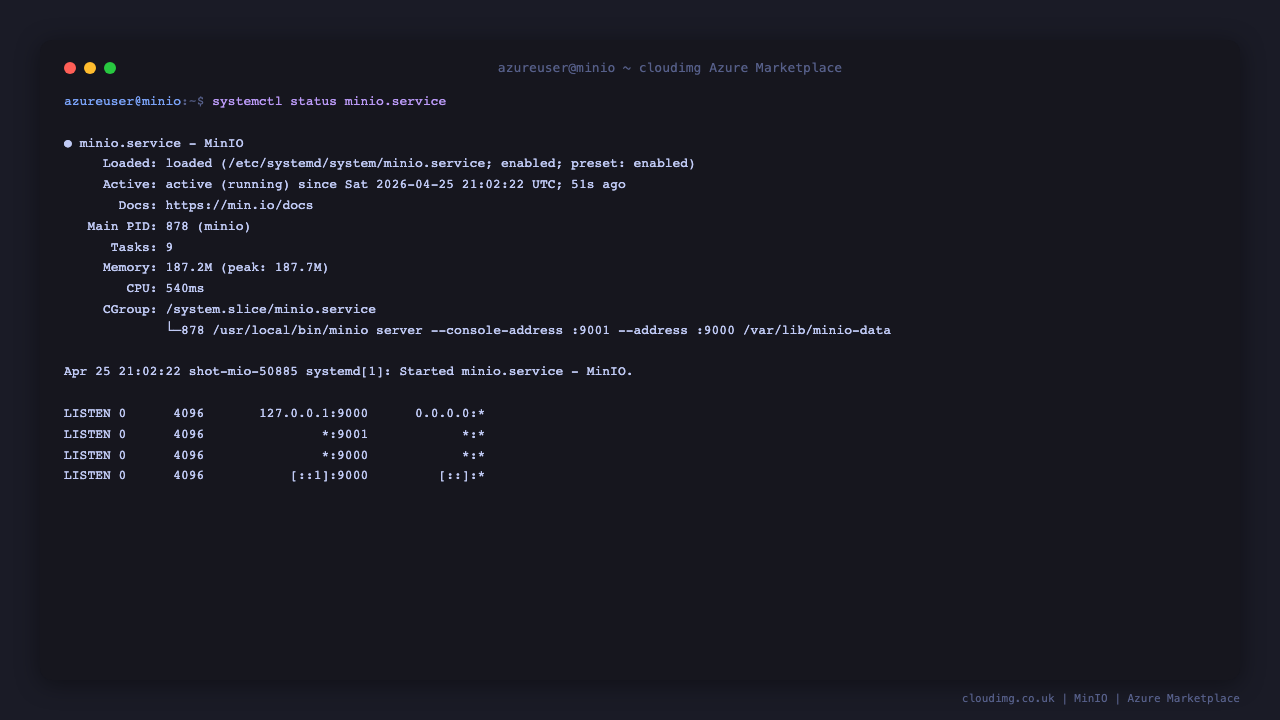
Step 4: Verify the MinIO Service
sudo systemctl status minio.service --no-pager
Expected: active (running). Confirm the firstboot sentinel:
sudo test -f /var/lib/cloudimg/minio-firstboot.done && echo FIRSTBOOT_DONE
Confirm both listeners:
sudo ss -tln | grep -E ':9000|:9001'
Confirm the health endpoint:
curl -s http://localhost:9000/minio/health/live
echo "exit=$?"
Step 5: Retrieve the Root Credentials
sudo cat /stage/scripts/minio-credentials.log
You will see:
ROOT_USER=<ROOT_USER>
ROOT_PASSWORD=<ROOT_PASSWORD>
S3_API_PORT=9000
CONSOLE_PORT=9001
Store both values in your secret store. The file is mode 0600 (root only).
Step 6: First Login to the Console
Open http://<vm-ip>:9001 in your browser. You will see the MinIO Console sign-in page:

Sign in using the ROOT_USER and ROOT_PASSWORD from Step 5. After login MinIO lands on the Object Browser:
Recommended: open Identity → Users in the left nav and create per-application accounts so production workloads do not authenticate as the shared root user.
Step 7: Create a Bucket
Navigate to Buckets in the left nav. On a fresh VM the list is empty:
Click Create Bucket, give it a name, and click Create Bucket again. From the command line, the same operation is:
export ROOT_USER="$(sudo awk -F= '/^ROOT_USER=/{print $2}' /stage/scripts/minio-credentials.log)"
export ROOT_PASS="$(sudo awk -F= '/^ROOT_PASSWORD=/{print $2}' /stage/scripts/minio-credentials.log)"
mc alias set local http://127.0.0.1:9000 "${ROOT_USER}" "${ROOT_PASS}" --api S3v4
mc mb local/cloudimg-test
Step 8: Manage Users + Access Keys
Navigate to Identity → Users in the left nav:

Best practice: create a per-application user account, attach the canned readwrite policy (or a custom least-privilege one), and generate a service access key + secret. Use those credentials in your application's S3 client configuration instead of the root credentials.
From the CLI, the same workflow is:
mc admin user add local app-user 'app-strong-password-here'
mc admin policy attach local readwrite --user app-user
Step 9: Built-in Metrics Dashboard
MinIO ships a built-in metrics dashboard at Monitoring → Metrics. It plots requests per second, bandwidth, error rates, and storage usage:

For longer-term metrics retention, MinIO exposes a Prometheus scrape endpoint at http://<vm-ip>:9000/minio/v2/metrics/cluster (root-token-authenticated). Pair with the cloudimg Grafana 12 image and a Prometheus instance for full observability.
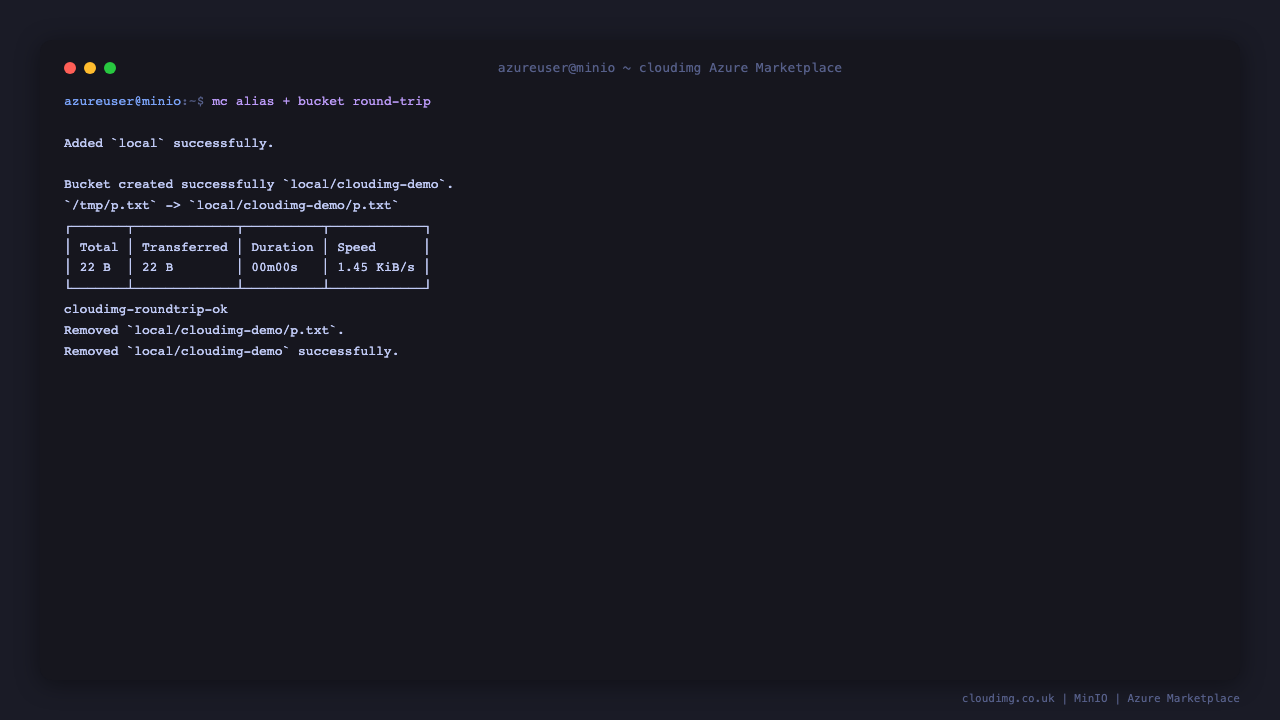
Step 10: Round-trip Test from the CLI
echo "cloudimg-roundtrip-ok" > /tmp/probe.txt
mc cp /tmp/probe.txt local/cloudimg-test/probe.txt
mc cp local/cloudimg-test/probe.txt /tmp/probe-back.txt
cat /tmp/probe-back.txt
mc rm local/cloudimg-test/probe.txt
mc rb local/cloudimg-test
Expected output: cloudimg-roundtrip-ok followed by clean removals.
Step 11: Connect from Application Code
Any aws-sdk works. A representative Python boto3 example:
python3 -c "
import boto3
s3 = boto3.client(
    's3',
    endpoint_url='http://<vm-ip>:9000',
    aws_access_key_id='<ROOT_USER>',
    aws_secret_access_key='<ROOT_PASSWORD>',
    region_name='us-east-1',
)
print(s3.list_buckets())
"
For production, generate a per-application access key in the Console (Identity → Users → click user → Service Accounts) and use those credentials, not the root.
Step 12: Server Components
Component Path
MinIO server binary /usr/local/bin/minio
mc client /usr/local/bin/mc
Data directory /mnt/minio-data
Server config /etc/default/minio
Systemd unit /etc/systemd/system/minio.service
Firstboot script /usr/local/sbin/minio-firstboot.sh
Firstboot service /etc/systemd/system/minio-firstboot.service
Credentials file /stage/scripts/minio-credentials.log
Firstboot sentinel /var/lib/cloudimg/minio-firstboot.done
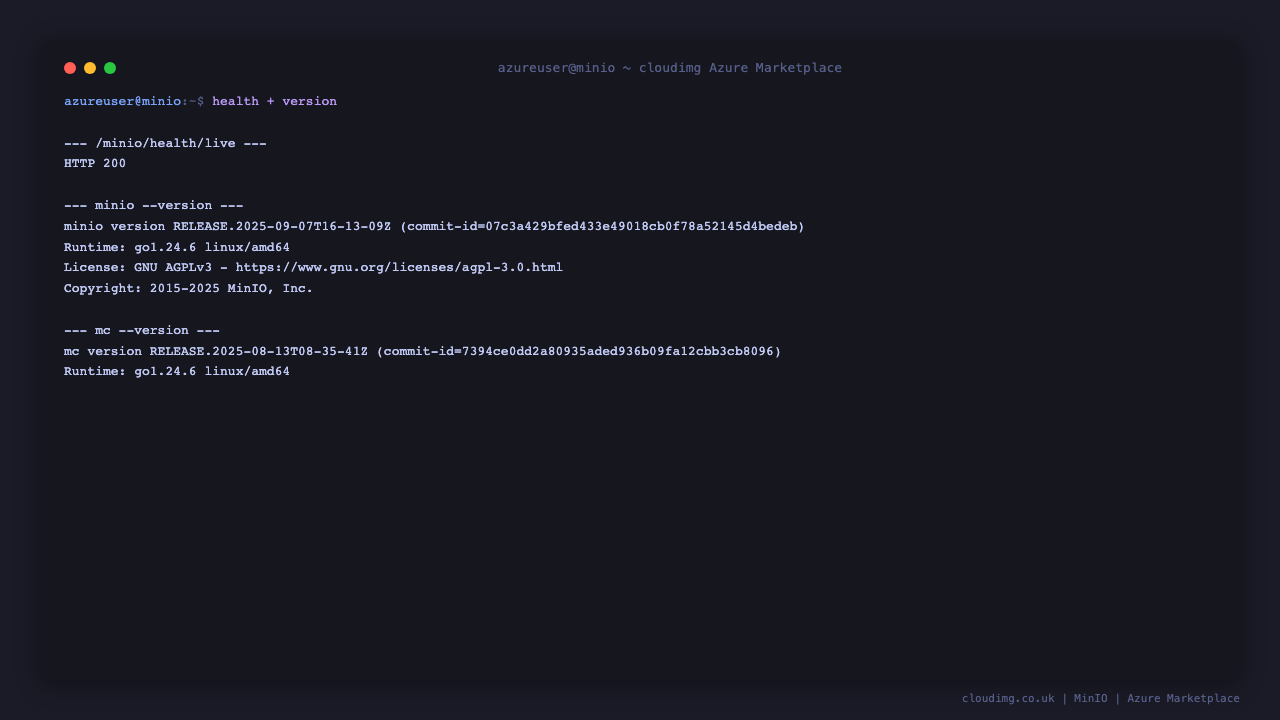
Inspect installed versions:
minio --version
mc --version
Step 13: Managing the MinIO Service
Status:
sudo systemctl status minio.service --no-pager
Stop / Start / Restart:
sudo systemctl stop minio.service
sudo systemctl start minio.service
sudo systemctl restart minio.service
View logs (systemd journal):
sudo journalctl -u minio.service --no-pager -n 50
Step 14: Production Hardening
The shipped image is single-node, single-drive — appropriate for development, staging, and small workloads. Production deployments should:
-
Use multi-node erasure coding — at least 4 drives in a coded set (across one or more nodes). MinIO's distributed mode requires
--server <pool>syntax in the start command. Edit/etc/default/minioMINIO_VOLUMESto point at the multi-drive layout. -
Front MinIO with TLS — terminate at a reverse proxy (cloudimg
nginx-ssl-certbot-ubuntu-24-04is purpose-built) or setMINIO_OPTS="--certs-dir /etc/minio/certs"after droppingpublic.crt+private.keyinto that directory. -
Restrict the console (9001) — admin networks only via NSG.
-
Restrict the API (9000) — to your application server subnets only via NSG.
-
Switch to a separate data disk — attach a Premium SSD, format with
xfs, mount at/mnt/minio-data, set ownershipminio-user:minio-user.
Step 15: Troubleshooting
Cannot reach the Console on port 9001
-
Confirm service running:
sudo systemctl status minio.service -
Confirm listeners bound:
sudo ss -tln | grep -E ':9000|:9001' -
Check journal:
sudo journalctl -u minio.service --no-pager -n 50 -
Confirm NSG allows TCP 9001 from your client source IP
Cannot authenticate to the Console
-
Re-read credentials:
sudo cat /stage/scripts/minio-credentials.log -
Confirm firstboot sentinel exists:
ls -la /var/lib/cloudimg/minio-firstboot.done -
If firstboot didn't run:
sudo systemctl status minio-firstboot.service --no-pager
S3 client errors with "InvalidAccessKeyId" or "SignatureDoesNotMatch"
-
Confirm the access key is exactly the value of
ROOT_USER(notMINIO_ROOT_USER) -
Confirm the secret is exactly
ROOT_PASSWORDwith no whitespace -
Confirm
region_nameis set tous-east-1(MinIO accepts any value but the SDK requires one) -
Confirm
endpoint_urlmatches the server's actual address and port
Service fails to start
-
Check journal:
sudo journalctl -u minio.service --no-pager -n 100 -
Check filesystem space:
df -h /mnt/minio-data -
Verify data directory ownership:
sudo ls -la /mnt/minio-data; should beminio-user:minio-user
Step 16: Security Recommendations
-
Rotate the root credentials on a schedule by editing
/etc/default/minioand restartingminio.service -
Create per-application users under Identity → Users; never connect application code as root
-
Restrict the console port (9001) to admin networks only
-
Enable TLS before exposing MinIO to anything other than a private VNet
-
Enable bucket versioning for buckets that hold important data:
mc version enable local/<bucket> -
Set bucket retention policies for compliance-heavy data:
mc retention set --default GOVERNANCE 30d local/<bucket> -
Audit access logs by enabling MinIO's audit webhook or kafka target
-
Keep MinIO updated by re-installing the latest
.debfromdl.min.ioperiodically; data is preserved across upgrades -
Shred the credentials file once the root credentials are stored in your secret store:
sudo shred -u /stage/scripts/minio-credentials.log
Step 17: Support and Licensing
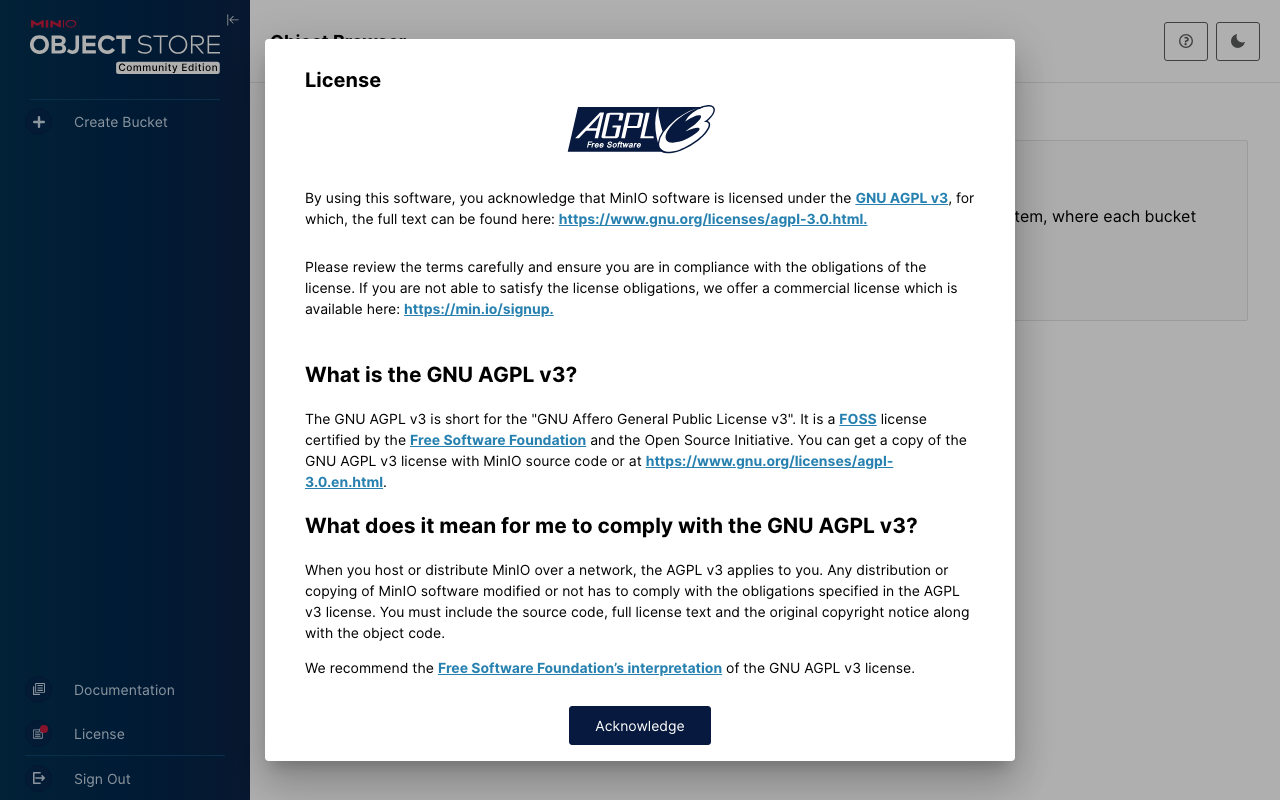
MinIO is dual-licensed under AGPLv3 (community) and a commercial license from MinIO Inc. The community AGPLv3 build is what cloudimg ships; if you redistribute MinIO as part of a closed-source product or SaaS, the AGPLv3 obligations apply or you can purchase a commercial license from MinIO Inc.
cloudimg provides commercial support for the cloudimg image (deployment, configuration, integration with other cloudimg products) separately from the MinIO project itself.
-
Email: support@cloudimg.co.uk
-
Website: www.cloudimg.co.uk
-
Support hours: 24/7 with guaranteed 24 hour response SLA
Deploy on Azure
Launch MinIO on Ubuntu 24.04 with 24/7 support from cloudimg.
View on Marketplace
Need Help?
Our support team is available 24/7.
support@cloudimg.co.uk