
NATS Server on AWS User Guide
Overview
This image runs NATS Server, the open source high performance messaging system from Synadia, fully installed and configured from the official upstream GitHub release. The NATS Server binary lives at /usr/local/bin/nats-server, runs under systemd as a dedicated nats system user, and starts automatically at boot.
JetStream, the NATS persistence layer, is enabled by default. The JetStream store directory and any NATS data files live on a separate, independently resizable EBS volume mounted at /var/lib/nats. The messaging persistence tier is kept off the operating system disk so it can be grown to accommodate larger streams, key value buckets and object stores without disturbing the rest of the instance.
On the first boot of every deployed instance, a one shot service generates a 32 character random password for the cloudimg NATS user, writes it to /root/nats-credentials.txt with file mode 0600, and configures it as the single authenticated user in /etc/nats/auth.conf. Every instance gets its own credentials, so the password is never baked into the image.
NATS Server is headless. There is no built in web console; status and metrics are exposed by the monitoring HTTP endpoints on port 8222 (/varz, /connz, /healthz, /jsz). Third party tools such as NATS Surveyor can attach if a UI is required.
Prerequisites
Before you deploy this image you need:
- An Amazon Web Services account where you can launch EC2 instances
- IAM permissions to launch instances, create security groups, and subscribe to AWS Marketplace products
- An EC2 key pair in the target Region for SSH access to the instance
- A VPC and subnet in the target Region, with a security group allowing inbound port 22 from your management network
- The AWS CLI version 2 installed locally if you plan to deploy from the command line
Step 1: Launch the Instance from the AWS Marketplace
Sign in to the AWS Management Console, open the EC2 service, and select Launch instance. Under Application and OS Images choose AWS Marketplace AMIs and search for NATS Server. Select the cloudimg listing and choose Select, then Continue on the subscription summary.
Pick an instance type of m5.large or larger as a balanced default; size the instance to the messaging workload you intend to run. Choose your EC2 key pair under Key pair (login). Under Network settings select your VPC and subnet, and either create or select a security group that allows inbound port 22 from your management network. If you intend to expose NATS to remote clients, also open inbound TCP 4222 (the NATS protocol) and, optionally, 8222 (the monitoring HTTP endpoint). Leave the root volume at the default size or larger.
Select Launch instance. First boot initialisation takes only a few seconds after the instance state becomes Running and the status checks pass.
Step 2: Launch the Instance from the AWS CLI
The following block launches an instance from the cloudimg NATS Server Marketplace AMI into an existing subnet and security group. Replace <ami-id> with the AMI ID shown on the Marketplace listing, <key-name> with your EC2 key pair name, <subnet-id> with your subnet ID, and <security-group-id> with a security group that opens port 22 from your management network.
aws ec2 run-instances \
  --image-id <ami-id> \
  --instance-type m5.large \
  --key-name <key-name> \
  --subnet-id <subnet-id> \
  --security-group-ids <security-group-id> \
  --block-device-mappings '{"DeviceName":"/dev/sda1","Ebs":{"VolumeSize":30,"VolumeType":"gp3"}}' \
  --metadata-options 'HttpTokens=required,HttpEndpoint=enabled' \
  --tag-specifications 'ResourceType=instance,Tags=[{Key=Name,Value=nats-server}]'
The image attaches a dedicated 20 GiB JetStream data volume automatically, mounted at /var/lib/nats. To start with more persistent storage, enlarge that volume on the Storage step in the console, or add a second block device mapping on the CLI.
Step 3: Connect to the Instance over SSH
Connect to the instance with SSH as the default login user for the operating system variant you launched. The login user differs by variant:
| Operating system variant | SSH login user |
|---|---|
| Ubuntu 24.04 | ubuntu |
Replace <key-file> with the path to your private key file and <instance-public-ip> with the public IP address or DNS name of the instance.
ssh -i <key-file> ubuntu@<instance-public-ip>
Step 4: Read the Rotated NATS Credentials
On first boot, nats-firstboot.service generated a 32 character random password for the cloudimg NATS user and wrote it to /root/nats-credentials.txt. The file is owned by root with mode 0600, so it must be read with sudo.
sudo cat /root/nats-credentials.txt
The file records the user, the rotated password, a ready to use NATS client URL with the credentials embedded, and the monitoring URL. Keep it private. To rotate the password later, edit the authorization block in /etc/nats/auth.conf and restart nats-server.service.
Step 5: Confirm the NATS Server
Check that the NATS Server service is active and reports its installed version:
sudo systemctl status nats-server.service --no-pager
nats-server --version
The captured image runs NATS Server 2.x from the official upstream GitHub release. Confirm the JetStream store directory is mounted on its own dedicated EBS volume:
findmnt /var/lib/nats
The SOURCE column shows the dedicated device (an NVMe disk), separate from the root filesystem.
Step 6: Probe the Monitoring HTTP Endpoints
NATS exposes its monitoring HTTP server on port 8222, bound to localhost in the captured image. The endpoints are unauthenticated and intended for operational tooling; they expose no message payloads.
The liveness probe returns {"status":"ok"} when the server is up:
curl http://127.0.0.1:8222/healthz
Sample server statistics and identity:
curl http://127.0.0.1:8222/varz | head -40
Sample JetStream state (account count, store usage, API call totals):
curl http://127.0.0.1:8222/jsz
Step 7: Publish and Subscribe with the NATS CLI
Install the official NATS CLI to run a publish subscribe round trip against the local server. The CLI is a single static Go binary.
sudo apt-get update -y && sudo apt-get install -y --no-install-recommends unzip curl jq
NATS_CLI_TAG=$(curl -fsSL https://api.github.com/repos/nats-io/natscli/releases/latest | jq -r '.tag_name')
NATS_CLI_VERSION=${NATS_CLI_TAG#v}
TMP=$(mktemp -d)
curl -fsSL -o "$TMP/nats.zip" "https://github.com/nats-io/natscli/releases/download/${NATS_CLI_TAG}/nats-${NATS_CLI_VERSION}-linux-amd64.zip"
unzip -o "$TMP/nats.zip" -d "$TMP" >/dev/null
sudo install -m 0755 "$(find "$TMP" -maxdepth 3 -type f -name nats | head -1)" /usr/local/bin/nats
nats --version
Read the rotated password and build the NATS URL:
NATS_PASSWORD=$(sudo awk -F': *' '/^NATS password:/ {print $2; exit}' /root/nats-credentials.txt)
NATS_URL="nats://cloudimg:${NATS_PASSWORD}@127.0.0.1:4222"
In one terminal, subscribe to the subject cloudimg.test:
nats sub --server "$NATS_URL" --count 1 'cloudimg.test'
In a second terminal, publish a message on the same subject:
nats pub --server "$NATS_URL" 'cloudimg.test' 'hello-from-nats'
The subscriber prints the received message and exits.
Step 8: Exercise JetStream Persistence
Create a JetStream stream backed by the dedicated data volume, publish a message into it, and confirm the stream now holds one message:
nats stream add --server "$NATS_URL" --subjects 'orders.>' --storage file --retention limits --discard old --max-msgs=-1 --max-bytes=-1 --max-age=0 --max-msg-size=-1 --dupe-window=2m --replicas=1 --no-allow-rollup --no-deny-delete --no-deny-purge ORDERS
nats pub --server "$NATS_URL" orders.new 'order-001'
nats stream info --server "$NATS_URL" ORDERS
The Messages field on the stream report shows 1. The stream's segment files live under /var/lib/nats/jetstream on the dedicated EBS volume.
Step 9: Expose NATS to the Network
The client port 4222 and the monitoring port 8222 are bound to 127.0.0.1 in the captured image so that no NATS traffic is exposed by default. To make NATS reachable from outside the instance:
- Edit
/etc/nats/nats-server.confand changehost: 127.0.0.1tohost: 0.0.0.0for the mainhostline. If you want to expose monitoring too, changehttp: 127.0.0.1:8222tohttp: 0.0.0.0:8222.
text
   sudo sed -i 's|^host: 127.0.0.1$|host: 0.0.0.0|' /etc/nats/nats-server.conf
- Restart NATS so the new bind addresses take effect:
text
   sudo systemctl restart nats-server.service
- In your EC2 security group, open inbound TCP 4222 from the client networks that need to publish or subscribe, and optionally TCP 8222 from your operational tooling network. Keep these ports closed to the open internet; NATS authentication is a single shared user and is not a substitute for network segmentation.
NATS clients can now connect using nats://cloudimg:<password>@<instance-public-ip>:4222.
Step 10: Maintenance
The NATS Server binary lives at /usr/local/bin/nats-server. To upgrade, download a newer release from github.com/nats-io/nats-server/releases, replace the binary, and restart the service:
sudo systemctl stop nats-server.service
sudo curl -fsSL -o /tmp/nats-server.tar.gz <release-tarball-url>
sudo tar -xzf /tmp/nats-server.tar.gz -C /tmp
sudo install -o root -g root -m 0755 /tmp/nats-server-*/nats-server /usr/local/bin/nats-server
sudo systemctl start nats-server.service
nats-server --version
To rotate the cloudimg user password, edit /etc/nats/auth.conf, change the password literal, restart the service, and update any client URLs.
Server configuration lives in /etc/nats/nats-server.conf (top level) and /etc/nats/auth.conf (the included authentication block). Server logs are visible with journalctl -u nats-server.service.
Screenshots
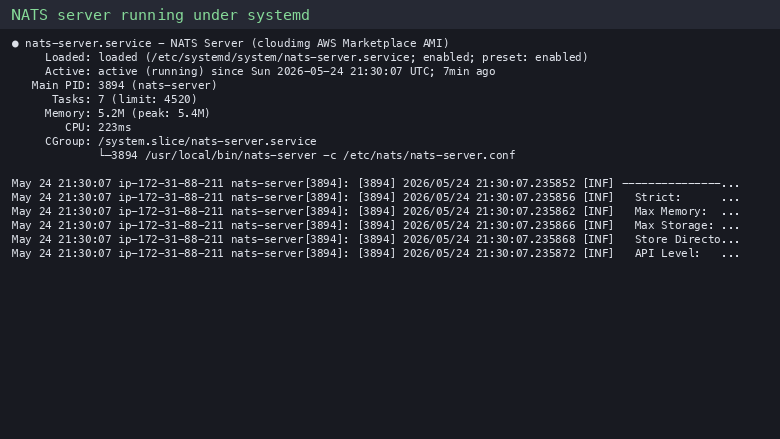
systemctl status nats-server showing the NATS service active and JetStream enabled.

curl against http://127.0.0.1:8222/healthz returning the healthy status JSON.
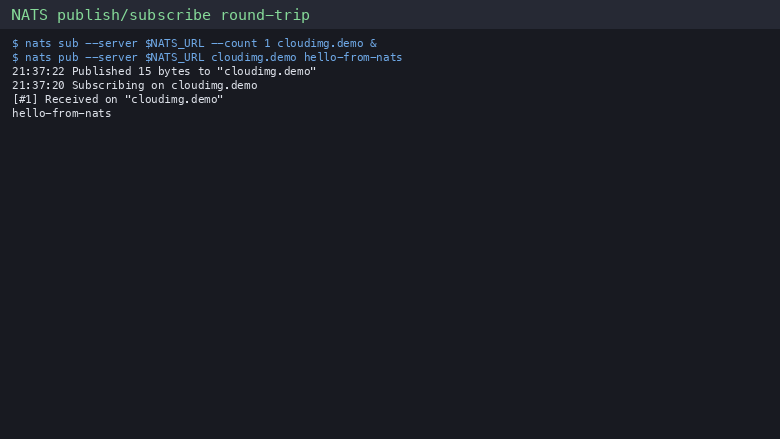
A nats pub and nats sub round trip confirming the messaging platform is ready.
Support
This image is supported by cloudimg with round the clock technical support. Open a ticket from the cloudimg support portal for help with deployment, JetStream configuration, clustering, authentication or client integration.