OpenProject on Ubuntu 24.04 on Azure User Guide
Overview
OpenProject is an open-source project management and team collaboration platform that covers the full delivery lifecycle: work packages (tasks, features and bugs), Gantt timelines, agile boards for Scrum and Kanban, a project wiki, time and cost tracking, budgets and team status reporting. The cloudimg image installs OpenProject 16 from the official all-in-one packager.io package, pairs it with PostgreSQL 16 and memcached, fronts it with nginx on port 80, stores the database and file attachments on a dedicated Azure data disk, and rotates the database password, the Rails secret and the administrator account on the first boot of every VM. Backed by 24/7 cloudimg support.
What is included:
- OpenProject 16 served on port 80 by nginx, reverse-proxying the bundled Puma application server on loopback
- PostgreSQL 16 and memcached on loopback, with the database data directory on a dedicated Azure data disk
- A dedicated Azure data disk at
/var/lib/openprojectfor the PostgreSQL database and the OpenProject file attachments - A per-VM database password, a fresh Rails secret and a unique administrator account generated on first boot
openproject.service(the Rails web and worker processes) andnginx.serviceas systemd units, enabled and active- 24/7 cloudimg support
Prerequisites
An active Azure subscription, an SSH key pair, and a VNet plus subnet in the target region. Standard_B4ms (4 vCPU / 16 GiB RAM) is a good starting point because OpenProject runs a Rails application, background workers and PostgreSQL together. NSG inbound: allow 22/tcp from your management network and 80/tcp for the OpenProject web interface (front with TLS for public exposure - see Enabling HTTPS).
Step 1 - Deploy from the Azure Marketplace
Sign in to the Azure Portal, choose Create a resource, search the Marketplace for OpenProject by cloudimg, and select Create. On Basics pick your subscription, resource group, region and size; under Administrator account choose SSH public key and paste your key; under Inbound port rules allow SSH (22) and HTTP (80). Review the dedicated data disk on the Disks tab, then Review + create -> Create.
Step 2 - Deploy from the Azure CLI
az vm create \
  --resource-group <your-rg> \
  --name openproject \
  --image <marketplace-image-urn> \
  --size Standard_B4ms \
  --admin-username azureuser \
  --ssh-key-values ~/.ssh/id_ed25519.pub \
  --vnet-name <your-vnet> --subnet <your-subnet> \
  --public-ip-sku Standard

az vm open-port --resource-group <your-rg> --name openproject --port 80 --priority 1010
Step 3 - Connect to your VM
ssh azureuser@<vm-public-ip>
Step 4 - Confirm OpenProject is running
On first boot OpenProject rotates its database password and Rails secret, resets the administrator account to a fresh per-VM password, sets the host name to your VM's public IP and starts the stack. The Rails application takes a short while to warm up on the very first boot; the health check below waits for it.
systemctl is-active openproject nginx
Both report active.
You can confirm the OpenProject health endpoint answers through nginx on port 80:
for i in $(seq 1 30); do
  code=$(curl -s -o /dev/null -w '%{http_code}' http://127.0.0.1/health_checks/default)
  [ "$code" = "200" ] && break
  sleep 5
done
curl -s -o /dev/null -w 'health: HTTP %{http_code}\n' http://127.0.0.1/health_checks/default
The health endpoint returns HTTP 200.

Step 5 - Retrieve the administrator password
The administrator account is unique to your VM and is generated on first boot. Read it as root:
sudo cat /root/openproject-credentials.txt
The file contains the login (admin), the email (admin@cloudimg.local) and a unique password. Change the email and password from the account settings after your first sign-in.

Step 6 - Verify the administrator can authenticate
You can confirm the per-VM administrator credentials authenticate by performing a real sign-in against the login form. The command below fetches the CSRF token, then posts the login (the password is taken from the credentials file shown above):
JAR=$(mktemp)
TOKEN=$(curl -s -c "$JAR" http://127.0.0.1/login | grep -oE 'name="authenticity_token"[^>]*value="[^"]+"' | head -1 | sed -E 's/.*value="([^"]+)".*/\1/')
curl -s -b "$JAR" -c "$JAR" -o /dev/null -w 'login: HTTP %{http_code}\n' \
  -X POST http://127.0.0.1/login \
  --data-urlencode "authenticity_token=$TOKEN" \
  --data-urlencode "username=admin" \
  --data-urlencode "password=<OPENPROJECT_ADMIN_PASSWORD>" \
  -H 'Referer: http://127.0.0.1/login'
rm -f "$JAR"
A correct password returns HTTP 302 (a redirect into the application); a wrong password re-renders the form as HTTP 422.
To use the REST API at /api/v3 instead, create a personal API token from My account -> Access tokens -> API in the web UI and authenticate with HTTP basic auth as apikey:<your-token>.
Step 7 - Sign in to OpenProject
Browse to http://<vm-public-ip>/login and sign in with admin and the password from the credentials file.
Step 8 - Work packages
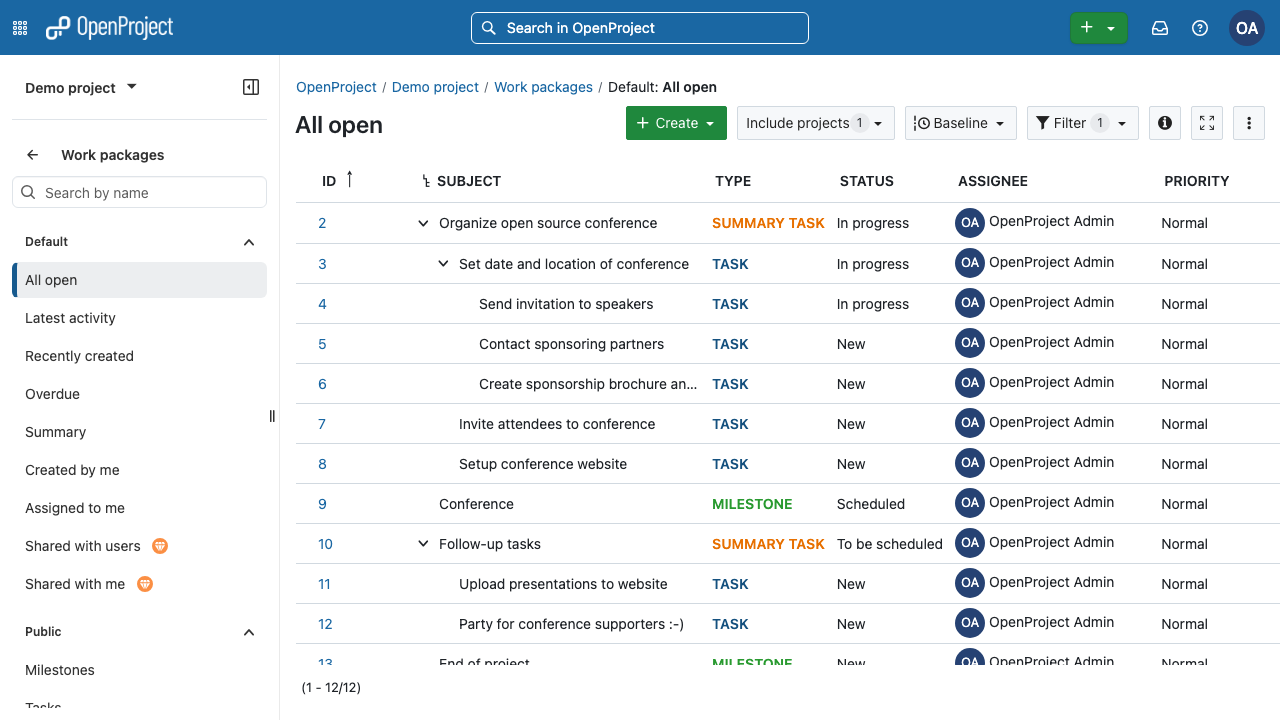
OpenProject organises work as work packages - tasks, features, bugs, milestones and more. Open a project and choose Work packages to see the list, filter and group it, and create new items. Each work package has a type, status, assignee, dates, priority and a full activity history.
Step 9 - Gantt timeline
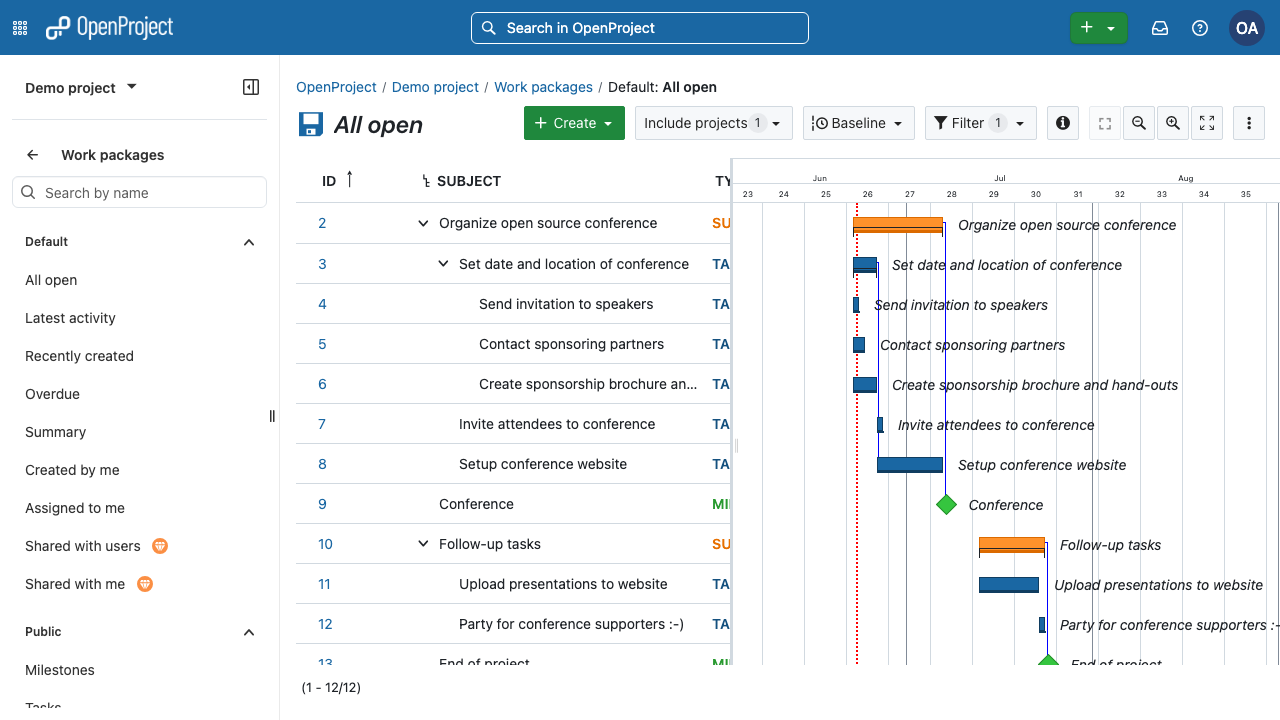
Switch the work packages view to the Gantt mode to see and adjust the project schedule on a timeline, set dependencies between work packages, and track milestones.
Step 10 - Work package detail
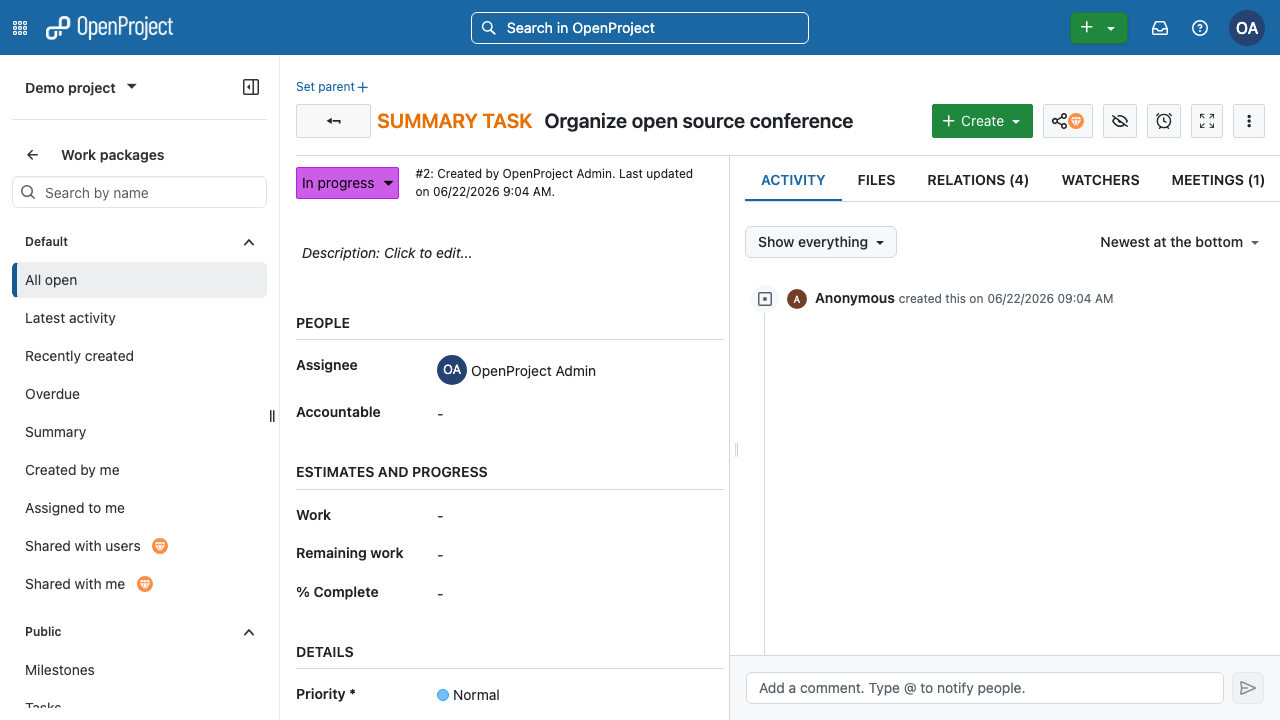
Open any work package to see and edit its full detail: status, assignee, dates, estimates and progress, priority, relations, watchers and a complete activity log with inline comments.
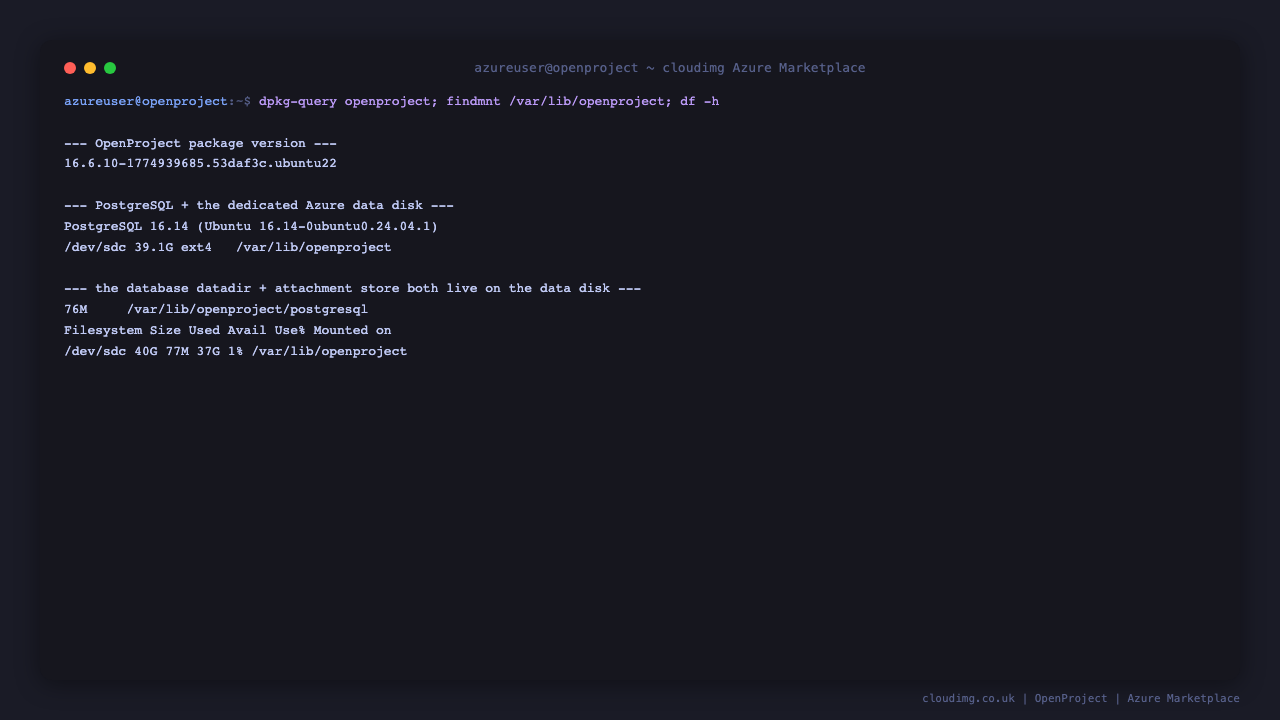
Step 11 - The dedicated data disk
The PostgreSQL database and the OpenProject file attachments live on a dedicated Azure data disk mounted at /var/lib/openproject, separate from the OS disk. This keeps your project data independent of the OS image and lets you resize the disk as your installation grows.
df -h /var/lib/openproject
findmnt /var/lib/openproject
Step 12 - Enabling HTTPS
For any public deployment, front OpenProject with TLS. Point a DNS A record at your VM's public IP, then install a certificate with Certbot and the nginx plugin. Run the following as prose-driven steps on your VM (replace the placeholders with your real values; do not paste them verbatim):
- Install Certbot:
sudo apt-get update && sudo apt-get install -y certbot python3-certbot-nginx - Obtain and install a certificate for your domain, supplying your contact email when prompted, by running certbot with the nginx plugin for
your-domain.example.com. - After issuance, tell OpenProject it is served over HTTPS by setting
OPENPROJECT_HTTPS="true"and the host name to your domain, for example: runsudo openproject config:set OPENPROJECT_HTTPS="true"followed bysudo openproject config:set SERVER_PROTOCOL_FORCE_HTTPS="true", then restart withsudo systemctl restart openprojectso generated links usehttps://.
Certbot installs a renewal timer automatically; certificates renew without further action.
Step 13 - Maintenance
- Updates: the OS continues to receive unattended security updates. OpenProject itself is upgraded with
sudo apt-get update && sudo apt-get install --only-upgrade openprojectfollowed bysudo openproject configure. - Backups: OpenProject ships a backup helper -
sudo openproject run backup- which dumps the PostgreSQL database and the attachments. Both live on the data disk under/var/lib/openproject. - Logs: application logs are available with
sudo openproject logs; nginx logs are under/var/log/nginx/.
Support
This image is maintained by cloudimg with 24/7 support. OpenProject is a trademark of its respective owners; cloudimg is not affiliated with or endorsed by the OpenProject project. For help with the image, contact support@cloudimg.co.uk.