Oracle Database 19c SE2 on AWS User Guide
Overview
This image runs Oracle Database 19c Long Term Support Standard Edition 2 on Oracle Linux 8. Oracle Database 19c is Oracle's Long Term Support release covered by Oracle Extended Support through April 2027 and is the recommended target for new Oracle Database deployments that do not yet need the 23ai feature set. Standard Edition 2 provides the core relational engine within the SE2 licensing envelope of two sockets and sixteen user threads, suitable for line of business systems, application back ends, and development databases.
The image ships with the binaries patched to the current Database Release Update applied via OPatch at build time, so the customer launches into a release that is already patched against the public CVE set covered by the Oracle DBRU cycle. A starter non container database named ORCL is preconfigured, the SQLPlus command line client is available in the Oracle home, and the Oracle listener is bound to port 1521* on all interfaces so SQL Developer and JDBC clients can connect remotely. The Oracle binaries and datafiles live on a dedicated 30 GiB EBS gp3 volume mounted at /opt/oracle, separate from the operating system disk, so the database tier is independently resizable. A systemd unit oracle-db.service starts the database on boot via Oracle's dbstart script.
The image ships with no shared credentials. On the first boot of every launched instance, a one shot service named oracle-db-19c-firstboot.service generates strong random passwords for the SYSTEM and SYS accounts, applies them inside the running database, and writes them to /root/oracle-db-credentials.txt with mode 0600 so that only the root user can read them. Two instances launched from the same image never share credentials.
Prerequisites
Before you deploy this image you need:
- An Amazon Web Services account where you can launch EC2 instances
- IAM permissions to launch instances, create security groups, and subscribe to AWS Marketplace products
- An EC2 key pair in the target Region for SSH access to the instance
- A VPC and subnet in the target Region, with a security group allowing inbound port 22 from your management network and inbound port 1521 from the trusted networks that will reach Oracle
- The AWS CLI (version 2) installed locally if you plan to deploy from the command line
Step 1: Launch the Instance from the AWS Marketplace
Sign in to the AWS Management Console, open the EC2 service, and select Launch instance. Under Application and OS Images choose AWS Marketplace AMIs and search for Oracle Database. Select the cloudimg listing for Oracle Database 19c SE2 on Oracle Linux 8 and choose Select, then Continue on the subscription summary.
Pick an instance type of m5.xlarge or larger. SE2 licensing is two sockets and sixteen user threads, so the m5.xlarge (4 vCPUs / 16 GB RAM) is the recommended baseline; m5.2xlarge or m5.4xlarge are within the SE2 cap and provide more headroom. Choose your EC2 key pair under Key pair (login). Under Network settings select your VPC and subnet, and either create or select a security group that allows inbound port 22 from your management network and inbound port 1521 from the trusted networks that will reach Oracle. Do not open port 1521 to the public internet.
Leave the root volume at the default size. The image adds a second 30 GiB gp3 EBS volume at /opt/oracle automatically; that is where the Oracle home and the ORCL datafiles live.
Select Launch instance. First boot initialisation takes approximately three to four minutes after the instance state becomes Running and the status checks pass, because the firstboot service waits for Oracle to fully open the database before rotating credentials.
Step 2: Launch the Instance from the AWS CLI
The following block launches an instance from the cloudimg Oracle Database 19c SE2 Marketplace AMI into an existing subnet and security group. Replace <ami-id> with the AMI ID shown on the Marketplace listing, <key-name> with your EC2 key pair name, <subnet-id> with your subnet ID, and <security-group-id> with a security group that opens ports 22 and 1521 as described above.
aws ec2 run-instances \
  --image-id <ami-id> \
  --instance-type m5.xlarge \
  --key-name <key-name> \
  --subnet-id <subnet-id> \
  --security-group-ids <security-group-id> \
  --block-device-mappings '[{"DeviceName":"/dev/sda1","Ebs":{"VolumeSize":50,"VolumeType":"gp3"}},{"DeviceName":"/dev/sdb","Ebs":{"VolumeSize":30,"VolumeType":"gp3"}}]' \
  --tag-specifications 'ResourceType=instance,Tags=[{Key=Name,Value=oracle-db-19c-01}]'
The command prints a JSON document on success. Note the instance ID, then retrieve its public address once it is running with aws ec2 describe-instances --instance-ids <instance-id> --query "Reservations[].Instances[].PublicIpAddress" --output text.
Step 3: Connect over SSH and Retrieve the Credentials
Wait for the EC2 instance to reach 2/2 status checks and for first boot to complete. Connect over SSH with the key pair you selected, using the ec2-user login name:
ssh -i <your-key.pem> ec2-user@<public-ip>
Once you are on the instance, read the credentials file with sudo:
sudo cat /root/oracle-db-credentials.txt
The file contains the per instance SYSTEM and SYS passwords, the Oracle SID (ORCL), and the listener port (1521). Sample contents:
Oracle Database 19c Standard Edition 2 - Per-Instance Credentials
================================================================
Generated: Thu May 28 15:30:00 UTC 2026
Instance:  i-0123456789abcdef0

SYSTEM_PASSWORD= EhYrkP1QmW9XnZA8tLpV
SYS_PASSWORD= TmKwQ8YzBnA9hSdF2pXR

ORACLE_SID=  ORCL
Listener:    port 1521 (TCP)
Copy these values somewhere secure such as a password manager or an encrypted vault, and do not commit them to source control. Every command block in this guide that talks to Oracle begins by reading the SYSTEM password from the credentials file into a SYSPWD shell variable, so every block is self contained.
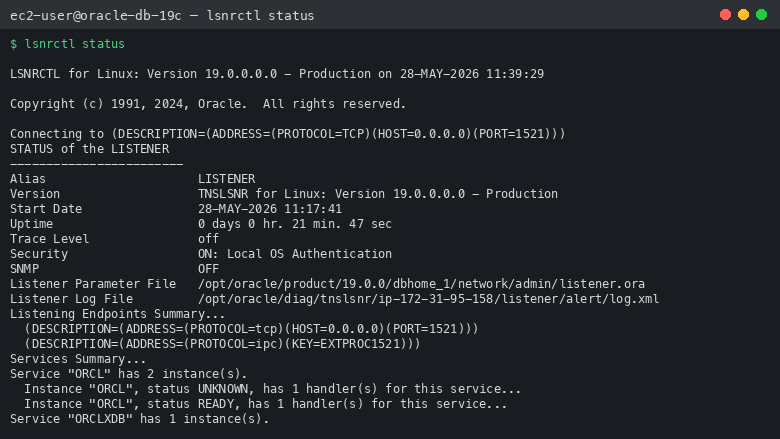
Step 4: Verify the Listener is Running
Oracle's TNS listener is the network endpoint for all client connections. Confirm it is up and serving the ORCL service:
sudo -u oracle bash -c "
    export ORACLE_HOME=/opt/oracle/product/19.0.0/dbhome_1
    export ORACLE_SID=ORCL
    export PATH=\$ORACLE_HOME/bin:\$PATH
    export LD_LIBRARY_PATH=\$ORACLE_HOME/lib
    lsnrctl status
"
The expected response confirms the listener is bound to all interfaces on TCP port 1521 and that the ORCL service has registered with it:
LSNRCTL for Linux: Version 19.0.0.0.0 - Production on 28-MAY-2026 15:30:00

Connecting to (DESCRIPTION=(ADDRESS=(PROTOCOL=TCP)(HOST=0.0.0.0)(PORT=1521)))
STATUS of the LISTENER
------------------------
Alias                     LISTENER
Version                   TNSLSNR for Linux: Version 19.0.0.0.0 - Production
Listening Endpoints Summary...
  (DESCRIPTION=(ADDRESS=(PROTOCOL=tcp)(HOST=0.0.0.0)(PORT=1521)))
  (DESCRIPTION=(ADDRESS=(PROTOCOL=ipc)(KEY=EXTPROC1521)))
Services Summary...
Service "ORCL" has 1 instance(s).
  Instance "ORCL", status READY, has 1 handler(s) for this service...
The command completed successfully
The kernel level confirmation that port 1521 is open:
sudo ss -tlnp | grep 1521
Returns:
LISTEN 0 128 0.0.0.0:1521 0.0.0.0:* users:(("tnslsnr",pid=<pid>,fd=12))
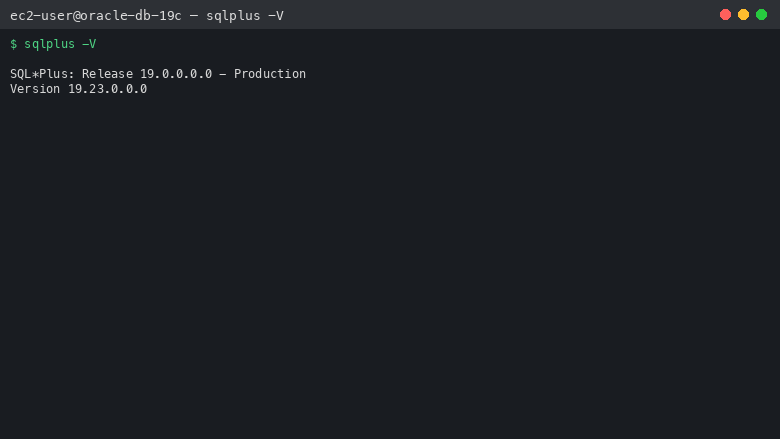
Step 5: Connect Locally with SQL*Plus
The simplest way to talk to the database from the instance is the SQL*Plus client that ships with the Oracle Database installation. Read the SYSTEM password from the credentials file, then connect to the ORCL service over the listener:
SYSPWD=$(sudo awk '/SYSTEM_PASSWORD/{print $NF}' /root/oracle-db-credentials.txt | head -1)
sudo -u oracle bash -c "
    export ORACLE_HOME=/opt/oracle/product/19.0.0/dbhome_1
    export ORACLE_SID=ORCL
    export PATH=\$ORACLE_HOME/bin:\$PATH
    export LD_LIBRARY_PATH=\$ORACLE_HOME/lib
    cat > /tmp/version-query.sql <<EOF
SELECT banner FROM v\\\$version WHERE banner LIKE 'Oracle%';
EXIT;
EOF
    sqlplus -S system/${SYSPWD}@localhost:1521/ORCL @/tmp/version-query.sql
    rm /tmp/version-query.sql
"
The expected response confirms the installed Oracle Database release with the applied DBRU patch level:
BANNER
--------------------------------------------------------------------------------
Oracle Database 19c Standard Edition 2 Release 19.0.0.0.0 - Production
You can also connect interactively. Switch to the oracle OS user and run sqlplus from that shell:
sudo su - oracle
export ORACLE_HOME=/opt/oracle/product/19.0.0/dbhome_1
export ORACLE_SID=ORCL
export PATH=$ORACLE_HOME/bin:$PATH
export LD_LIBRARY_PATH=$ORACLE_HOME/lib
sqlplus / as sysdba
In an interactive session, type EXIT; to leave SQL*Plus.
Step 6: Run a Sample Query
Create a small table, insert two rows, read them back, then drop the table. This exercise confirms that the database is writable and that the SYSTEM user has the standard DDL grants:
SYSPWD=$(sudo awk '/SYSTEM_PASSWORD/{print $NF}' /root/oracle-db-credentials.txt | head -1)
sudo -u oracle bash -c "
    export ORACLE_HOME=/opt/oracle/product/19.0.0/dbhome_1
    export ORACLE_SID=ORCL
    export PATH=\$ORACLE_HOME/bin:\$PATH
    export LD_LIBRARY_PATH=\$ORACLE_HOME/lib
    cat > /tmp/demo.sql <<EOF
CREATE TABLE demo_users (id NUMBER, name VARCHAR2(50), created_at DATE);
INSERT INTO demo_users VALUES (1, 'Alice', SYSDATE);
INSERT INTO demo_users VALUES (2, 'Bob',   SYSDATE);
COMMIT;
SELECT id, name, TO_CHAR(created_at,'YYYY-MM-DD') AS created_at FROM demo_users;
DROP TABLE demo_users;
EXIT;
EOF
    sqlplus -S system/${SYSPWD}@localhost:1521/ORCL @/tmp/demo.sql
    rm /tmp/demo.sql
"
Expected response:
Table created.

1 row created.

1 row created.

Commit complete.

        ID NAME                                               CREATED_AT
---------- -------------------------------------------------- ----------
         1 Alice                                              2026-05-28
         2 Bob                                                2026-05-28

Table dropped.
Step 7: Connect from a Remote Machine
The listener accepts remote connections on port 1521 over TCP. From a host with sqlplus installed (the Oracle Instant Client tarball contains it) and with port 1521 reachable from your security group, supply the SYSTEM password from /root/oracle-db-credentials.txt and connect using Oracle's "Easy Connect" syntax:
sqlplus system/<SYSTEM_PASSWORD>@<public-ip>:1521/ORCL
The connection string <public-ip>:1521/ORCL is equivalent to the following TNS descriptor, which you would use from an application that reads a tnsnames.ora file:
ORCL =
  (DESCRIPTION =
    (ADDRESS = (PROTOCOL = TCP)(HOST = <public-ip>)(PORT = 1521))
    (CONNECT_DATA =
      (SERVER = DEDICATED)
      (SERVICE_NAME = ORCL)
    )
  )
Or use SQL Developer
Oracle SQL Developer is a free graphical client published by Oracle. After downloading and launching SQL Developer locally, create a new connection with the values below:
| Setting | Value |
|---|---|
| Connection Name | cloudimg-oracle-19c (or any name you choose) |
| Authentication | Default |
| Username | SYSTEM |
| Password | Value of SYSTEM_PASSWORD from /root/oracle-db-credentials.txt |
| Connection Type | Basic |
| Role | default |
| Hostname | Your instance public IP address |
| Port | 1521 |
| Service Name | ORCL |
Click Test, and if the configured security group allows inbound 1521 from your IP, the status bar reports Success. Click Connect to open a SQL Worksheet.
Step 8: Manage the Oracle Service
The database is started on boot by the systemd unit oracle-db.service, which delegates to Oracle's dbstart script in $ORACLE_HOME/bin. Manage the service with the standard systemctl commands:
sudo systemctl status oracle-db.service --no-pager
Returns:
oracle-db.service - Oracle Database 19c (cloudimg)
   Loaded: loaded (/etc/systemd/system/oracle-db.service; enabled; vendor preset: disabled)
   Active: active (running)
  Process: 14909 ExecStart=/opt/oracle/product/19.0.0/dbhome_1/bin/dbstart /opt/oracle/product/19.0.0/dbhome_1 (code=exited, status=0/SUCCESS)
   CGroup: /system.slice/oracle-db.service
           ├─ ora_pmon_ORCL
           ├─ ora_psp0_ORCL
           ├─ ora_vktm_ORCL
           ...
To stop the database and listener cleanly:
sudo systemctl stop oracle-db.service
To start them again:
sudo systemctl start oracle-db.service
There is also a one shot unit oracle-db-19c-firstboot.service whose only job is to rotate credentials on the very first boot. It is gated on its sentinel file /var/lib/cloudimg/oracle-db-19c-firstboot.done and exits immediately on every subsequent boot.
Step 9: Filesystem Layout
The Oracle home and the ORCL database files live on the dedicated 30 GiB gp3 EBS volume mounted at /opt/oracle. This separation is intentional: the database tier can be resized independently of the operating system disk, and it can be snapshotted on its own for backup.
df -h /opt/oracle
Returns:
Filesystem      Size  Used Avail Use% Mounted on
/dev/nvme1n1     30G   16G   13G  56% /opt/oracle
The main directories the image exposes:
/opt/oracle/product/19.0.0/dbhome_1— the Oracle Database 19c home, owned by theoracleuser/opt/oracle/product/19.0.0/dbhome_1/bin— Oracle binaries, includingsqlplus,lsnrctl,dbstart,dbshut/opt/oracle/product/19.0.0/dbhome_1/network/admin— listener configuration (listener.ora) and TNS naming (tnsnames.ora)/opt/oracle/oradata/ORCL— datafiles, control file, online redo logs for the ORCL database/opt/oracle/diag— Automatic Diagnostic Repository, with the alert log under/opt/oracle/diag/rdbms/orcl/ORCL/trace/alert_ORCL.log/opt/oracle/oraInventory— the Oracle Universal Installer inventory/root/oracle-db-credentials.txt— per instanceSYSTEMandSYSpasswords, mode 0600 root only
Sample listing of the datafile directory:
sudo ls -la /opt/oracle/oradata/ORCL/
Returns:
-rw-r----- 1 oracle oinstall   9748480 May 28 15:30 control01.ctl
-rw-r----- 1 oracle oinstall  52429312 May 28 15:30 redo01.log
-rw-r----- 1 oracle oinstall  52429312 May 28 15:30 redo02.log
-rw-r----- 1 oracle oinstall  52429312 May 28 15:30 redo03.log
-rw-r----- 1 oracle oinstall 765411328 May 28 15:30 sysaux01.dbf
-rw-r----- 1 oracle oinstall 943718400 May 28 15:30 system01.dbf
-rw-r----- 1 oracle oinstall  62914560 May 28 15:30 temp01.dbf
-rw-r----- 1 oracle oinstall  78651392 May 28 15:30 undotbs01.dbf
-rw-r----- 1 oracle oinstall   5251072 May 28 15:30 users01.dbf
Step 10: Server Components
| Component | Version | Source |
|---|---|---|
| Oracle Database | 19c Long Term Support, Standard Edition 2 (patched to current DBRU) | Oracle 19c installation media + p36233263 DBRU |
| Oracle Linux | 8 | cloudimg golden base image |
| SQL*Plus | 19c | bundled in $ORACLE_HOME/bin |
| systemd unit | oracle-db.service |
baked into the image |
| Firstboot unit | oracle-db-19c-firstboot.service |
baked into the image |
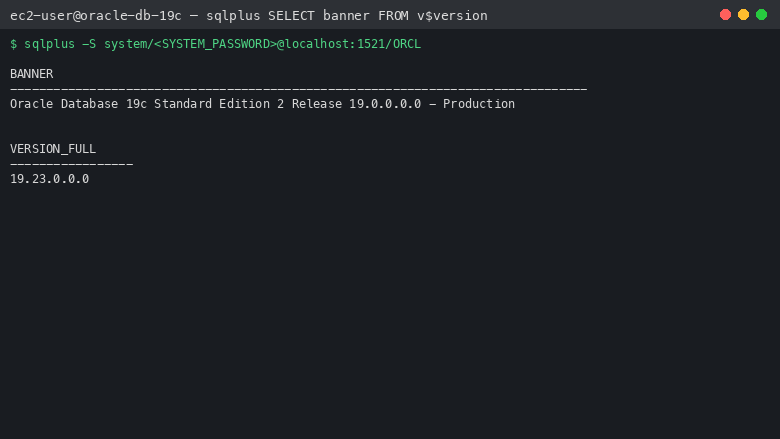
Step 11: Confirm the Applied DBRU Patch Level
This image is shipped with the current Oracle Database Release Update applied to the binaries at build time via OPatch. Confirm the applied patches with the Oracle OPatch utility:
sudo -u oracle bash -c "
    export ORACLE_HOME=/opt/oracle/product/19.0.0/dbhome_1
    \$ORACLE_HOME/OPatch/opatch lsinventory -bugs_fixed | head -20
"
The sqlplus banner reports the patched release:
SYSPWD=$(sudo awk '/SYSTEM_PASSWORD/{print $NF}' /root/oracle-db-credentials.txt | head -1)
sudo -u oracle bash -c "
    export ORACLE_HOME=/opt/oracle/product/19.0.0/dbhome_1
    export ORACLE_SID=ORCL
    export PATH=\$ORACLE_HOME/bin:\$PATH
    export LD_LIBRARY_PATH=\$ORACLE_HOME/lib
    cat > /tmp/vfull.sql <<EOF
SET HEADING OFF FEEDBACK OFF PAGESIZE 0
SELECT VERSION_FULL FROM V\\\$INSTANCE;
EXIT;
EOF
    sqlplus -S / as sysdba @/tmp/vfull.sql
    rm /tmp/vfull.sql
"
Returns the patched release identifier, for example 19.22.0.0.0 for the DBRU applied at this image's build time.
Step 12: Rotate the SYSTEM and SYS Passwords
For a production deployment, rotate the SYSTEM and SYS passwords that the first boot service generated. Connect as SYSDBA with operating system authentication and issue ALTER USER:
sudo -u oracle bash -c "
    export ORACLE_HOME=/opt/oracle/product/19.0.0/dbhome_1
    export ORACLE_SID=ORCL
    export PATH=\$ORACLE_HOME/bin:\$PATH
    export LD_LIBRARY_PATH=\$ORACLE_HOME/lib
    sqlplus -S / as sysdba <<EOF
ALTER USER SYSTEM IDENTIFIED BY \"<new-system-password>\";
ALTER USER SYS    IDENTIFIED BY \"<new-sys-password>\";
EXIT;
EOF
"
Store the new values in your secrets manager immediately. The file /root/oracle-db-credentials.txt is the per instance bootstrap record and should not be considered your source of truth after the first rotation.
Step 13: Tablespaces and Datafile Layout
The starter ORCL database has the standard Oracle tablespace layout: SYSTEM, SYSAUX, UNDOTBS1, USERS, and TEMP. The datafiles live under /opt/oracle/oradata/ORCL, which is on the dedicated 30 GiB gp3 EBS volume. As your workload grows, create application-specific tablespaces on the same volume and grow the volume in place.
SYSPWD=$(sudo awk '/SYSTEM_PASSWORD/{print $NF}' /root/oracle-db-credentials.txt | head -1)
sudo -u oracle bash -c "
    export ORACLE_HOME=/opt/oracle/product/19.0.0/dbhome_1
    export ORACLE_SID=ORCL
    export PATH=\$ORACLE_HOME/bin:\$PATH
    export LD_LIBRARY_PATH=\$ORACLE_HOME/lib
    cat > /tmp/tspaces.sql <<EOF
SET PAGESIZE 100 LINESIZE 200
COLUMN tablespace_name FORMAT A20
COLUMN file_name FORMAT A55
SELECT tablespace_name, ROUND(bytes/1024/1024) AS mb, file_name
FROM dba_data_files ORDER BY tablespace_name;
EXIT;
EOF
    sqlplus -S system/${SYSPWD}@localhost:1521/ORCL @/tmp/tspaces.sql
    rm /tmp/tspaces.sql
"
To add a new application tablespace with autoextend:
sudo -u oracle bash -c "
    export ORACLE_HOME=/opt/oracle/product/19.0.0/dbhome_1
    export ORACLE_SID=ORCL
    export PATH=\$ORACLE_HOME/bin:\$PATH
    export LD_LIBRARY_PATH=\$ORACLE_HOME/lib
    sqlplus -S / as sysdba <<EOF
CREATE TABLESPACE app_data
  DATAFILE '/opt/oracle/oradata/ORCL/app_data01.dbf' SIZE 1G
  AUTOEXTEND ON NEXT 256M MAXSIZE 16G;
EXIT;
EOF
"
Step 14: Backup Recommendations
Oracle Database 19c supports a range of backup strategies. For a single-instance image like this one, the two pragmatic options are filesystem snapshot of the EBS data volume and Oracle's own Recovery Manager (RMAN).
For a quick consistent backup, stop the database cleanly, snapshot the /opt/oracle EBS volume from the AWS Console or CLI, then start the database again:
sudo systemctl stop oracle-db.service
aws ec2 create-snapshot --volume-id <volume-id-of-/opt/oracle> \
  --description "oracle-db-19c $(date +%F)" \
  --tag-specifications 'ResourceType=snapshot,Tags=[{Key=Name,Value=oracle-data}]'
sudo systemctl start oracle-db.service
For a hot, point-in-time backup, configure RMAN to back up to an attached EBS volume or to S3 via an S3-compatible RMAN channel. RMAN integrates with Oracle's archive log mode and supports incremental backups. The full RMAN documentation is at the Oracle Database 19c Backup and Recovery User's Guide.
Step 15: Security Recommendations
Oracle Database 19c is the Long Term Support release covered by Oracle Extended Support through April 2027. Apply the following recommendations on a production deployment:
- Restrict port 1521 in the EC2 security group to your application subnets and management network. Never open the listener to the public internet.
- Rotate the SYSTEM and SYS passwords using the rotation step above, and store the new values in your secrets manager.
- Create per-application schema users with only the grants the application needs, instead of using
SYSTEMfor application traffic. - Apply the next Oracle Database Release Update when published by Oracle, by downloading the DBRU bundle from My Oracle Support and applying with OPatch and datapatch. This image is shipped with the current DBRU at build time, but Oracle publishes a new DBRU on a quarterly cadence.
- Enable Oracle auditing if your compliance regime requires it:
ALTER SYSTEM SET audit_trail=DB SCOPE=SPFILE;followed by a restart, thenAUDITstatements as needed. - Configure Oracle Native Network Encryption in
sqlnet.oraif client traffic crosses untrusted networks. The standard encryption settings are documented in the Oracle Database Net Services Reference. - Apply OS security patches by running
sudo dnf update -yon a regular maintenance schedule. Reboot the instance after a kernel update. - Take regular EBS snapshots of the
/opt/oraclevolume and store them in a separate account or Region. - Limit SSH access to a small management CIDR; do not leave port 22 open to
0.0.0.0/0in production.
Screenshots
The following screenshots are taken from a running Oracle Database 19c SE2 instance launched from this image.
Support
cloudimg provides 24/7/365 expert technical support for this image. Guaranteed response within 24 hours, one hour average for critical issues. Contact support@cloudimg.co.uk.
For general Oracle Database questions, performance tuning, and migration help, consult the official Oracle Database 19c documentation set at https://docs.oracle.com/en/database/oracle/oracle-database/19/index.html.
Oracle, Oracle Database, and related marks are trademarks or registered trademarks of Oracle Corporation. Use of them does not imply any affiliation with or endorsement by Oracle Corporation.