PrestaShop 9 on AWS User Guide
Overview

This image runs PrestaShop 9.0.1 on Apache 2.4 with PHP 8.3 and MariaDB 10.11. The database and web files each reside on their own dedicated EBS volume (20 GiB each), so each tier can be resized independently without touching the OS disk.
PrestaShop administrator credentials and database passwords are generated on the first boot of every deployed instance. Two instances launched from the same Amazon Machine Image never share passwords. The generated credentials are written to /root/prestashop-credentials.txt with mode 0600 so that only the root user can read them. The admin back-office URL is also randomised to a unique path on every instance for additional security.
Prerequisites
Before you deploy this image you need:
- An Amazon Web Services account where you can launch EC2 instances
- IAM permissions to launch instances, create security groups, and subscribe to AWS Marketplace products
- An EC2 key pair in the target Region for SSH access to the instance
- A VPC and subnet in the target Region, with a security group allowing inbound port 22 from your management network and inbound ports 80 and 443 from the public internet
- The AWS CLI (version 2) installed locally if you plan to deploy from the command line
Step 1: Launch the Instance from the AWS Marketplace
Sign in to the AWS Management Console, open the EC2 service, and select Launch instance. Under Application and OS Images choose AWS Marketplace AMIs and search for PrestaShop 9. Select the cloudimg listing and choose Select, then Continue on the subscription summary.
Pick an instance type of m5.large or larger for production workloads. Choose your EC2 key pair under Key pair (login). Under Network settings select your VPC and subnet, and either create or select a security group that allows inbound port 22 from your management network and inbound ports 80 and 443 from the public internet.
Select Launch instance. First boot initialisation takes approximately two to three minutes after the instance state becomes Running and the status checks pass. The first boot service runs the PrestaShop CLI installer during this time.
Step 2: Launch the Instance from the AWS CLI
The following block launches an instance from the cloudimg PrestaShop 9 Marketplace AMI. Replace <ami-id> with the AMI ID shown on the Marketplace listing, <key-name> with your EC2 key pair name, <subnet-id> with your subnet ID, and <security-group-id> with a security group that opens ports 22, 80, and 443.
aws ec2 run-instances \
  --image-id <ami-id> \
  --instance-type m5.large \
  --key-name <key-name> \
  --subnet-id <subnet-id> \
  --security-group-ids <security-group-id> \
  --tag-specifications 'ResourceType=instance,Tags=[{Key=Name,Value=prestashop-9-01}]'
The command prints a JSON document on success. Note the instance ID, then retrieve its public IP address once it is running:
aws ec2 describe-instances \
  --instance-ids <instance-id> \
  --query "Reservations[].Instances[].PublicIpAddress" \
  --output text
Step 3: Connect and Retrieve Credentials
Connect over SSH with the key pair you selected and the public IP address from step 2. The SSH login user depends on the operating system of the AMI variant you launched:
| AMI variant | SSH login user |
|---|---|
| PrestaShop 9 on Ubuntu 24.04 | ubuntu |
Wait approximately two to three minutes after the instance reaches the Running state before connecting — the first boot installer takes this long to complete.
ssh ubuntu@<public-ip>
sudo cat /root/prestashop-credentials.txt
You will see output similar to the following:
# PrestaShop 9 -- Per-VM Credentials
# Generated: Wed May 27 19:50:48 UTC 2026
prestashop.version=9.0.1
prestashop.store.url=http://54.243.8.39/
prestashop.admin.url=http://54.243.8.39/admin-cloudimg-b1c265b7/
prestashop.admin.email=admin@cloudimg.local
prestashop.admin.pass=34545d2ce191b42e503fb5da134df1d6
prestashop.db.name=prestashop
prestashop.db.user=prestashop
prestashop.db.pass=a809d56b97d2c7fa277d54cd848f0b2a
prestashop.admin.dir=admin-cloudimg-b1c265b7
mysql.root.password=60405fe63179cc67e9945ce990666b81
Copy the prestashop.admin.url, prestashop.admin.email, and prestashop.admin.pass values somewhere secure. Do not commit them to source control.
From the same SSH session you can confirm the stack is healthy:
php -v
PHP 8.3.6 (cli) (built: Mar 20 2026 02:32:55) (NTS)
Copyright (c) The PHP Group
Zend Engine v4.3.6, Copyright (c) Zend Technologies
    with Zend OPcache v8.3.6, Copyright (c), by Zend Technologies
apache2 -v
Server version: Apache/2.4.58 (Ubuntu)
Server built:   2026-05-05T13:22:45
mysql --version
mysql Ver 15.1 Distrib 10.11.14-MariaDB, for debian-linux-gnu (x86_64) using EditLine wrapper
systemctl is-active apache2 mariadb
active
active
Step 4: Access the Storefront
Open a browser and navigate to the prestashop.store.url value from your credentials file (for example http://<public-ip>/). You will see the default PrestaShop Classic theme storefront.
The storefront comes populated with sample products and categories. Customers can browse the catalogue, add products to their cart, and check out once a payment module is configured.
Step 5: Access the Admin Back Office
Open a browser and navigate to the prestashop.admin.url value from your credentials file (for example http://<public-ip>/admin-cloudimg-xxxx/). You will see the PrestaShop login page.
Enter the following credentials from your credentials file:
- Email:
admin@cloudimg.local - Password: the value of
prestashop.admin.pass
After logging in you will reach the PrestaShop dashboard, which shows sales statistics, recent orders, and stock alerts.

Step 6: Managing Products
From the back office, navigate to Catalog then Products to add, edit, or remove products. Click New product to create a listing. Fill in the product name, description, price, quantity, and upload product images. Select a category and configure shipping dimensions if required, then click Save to publish the product to the storefront.
Step 7: Managing Orders
Navigate to Orders then Orders to view all customer orders. Click an order row to open its detail view, which shows the ordered items, customer information, billing and shipping addresses, and the payment status. You can change the order status (for example from Payment accepted to Shipped), add a tracking number, and issue a partial or full refund from this view.
Step 8: Changing the Admin Password
To change the administrator password, log in to the back office and click your name in the top right corner, then select Edit. Under the Password section enter the current password and a new password, then click Save.
Alternatively, update the password directly from the command line:
sudo mysql -u root -p
# Enter the mysql.root.password from /root/prestashop-credentials.txt
UPDATE prestashop.ps_employee
  SET passwd = MD5('<new-password>')
  WHERE email = 'admin@cloudimg.local';
FLUSH PRIVILEGES;
EXIT;
Step 9: Connecting a Domain Name
To use a custom domain (for example shop.example.com):
- Create an A record in your DNS provider pointing
shop.example.comto your instance public IP address. - Log in to the back office, navigate to Configure then Shop Parameters then General and update the Shop URL field to
http://shop.example.com. - Click Save.
PrestaShop will now redirect all traffic to the domain name you set.
Step 10: Enable HTTPS with Let's Encrypt
Obtain a free TLS certificate using Certbot. Ensure port 443 is open in your security group and you have a valid domain name pointing to the instance.
sudo apt-get install -y certbot python3-certbot-apache
sudo certbot --apache -d shop.example.com
Certbot will automatically configure the Apache virtual host and redirect HTTP to HTTPS. PrestaShop must then be updated to use the HTTPS URL. Log in to the back office and navigate to Configure then Shop Parameters then General. Enable SSL and update the Shop URL to https://shop.example.com, then click Save.
Storage Layout
The image uses two dedicated EBS data volumes so database and web file storage are independent of the OS disk:
| Mount point | Size | Purpose |
|---|---|---|
/var/lib/mysql |
20 GiB | MariaDB data directory |
/var/www |
20 GiB | PrestaShop files (/var/www/prestashop) |
Both mounts use UUID-based fstab entries and include nofail so the instance remains bootable even if a volume is temporarily detached.
To resize a volume, use the AWS console or CLI to modify the EBS volume size, then extend the filesystem from within the instance:
sudo resize2fs /dev/nvme1n1
Replace /dev/nvme1n1 with the actual device for the volume you are extending (confirm with lsblk).
Maintenance
Updating PrestaShop
PrestaShop updates are managed through the back office Module Manager using the official 1-Click Upgrade module, or manually by replacing the application files. Refer to the PrestaShop documentation for your upgrade path.
System Updates
Apply OS security patches periodically:
sudo apt-get update && sudo apt-get -y dist-upgrade
sudo systemctl restart apache2
Backups
Back up the MariaDB database with mysqldump:
sudo mysqldump -u root -p prestashop > /tmp/prestashop-$(date +%Y%m%d).sql
Back up the PrestaShop files by creating a snapshot of the /var/www EBS volume from the AWS console or CLI.
cloudimg Support
24/7 technical support is included with your subscription. Contact cloudimg at support@cloudimg.co.uk for help with PrestaShop deployment, upgrades, performance tuning, module configuration, and database administration.
Screenshots
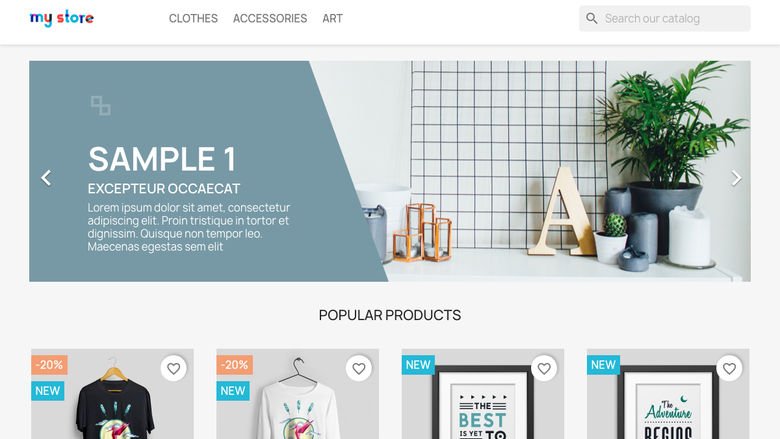
The PrestaShop 9 storefront running on first boot with no manual setup.
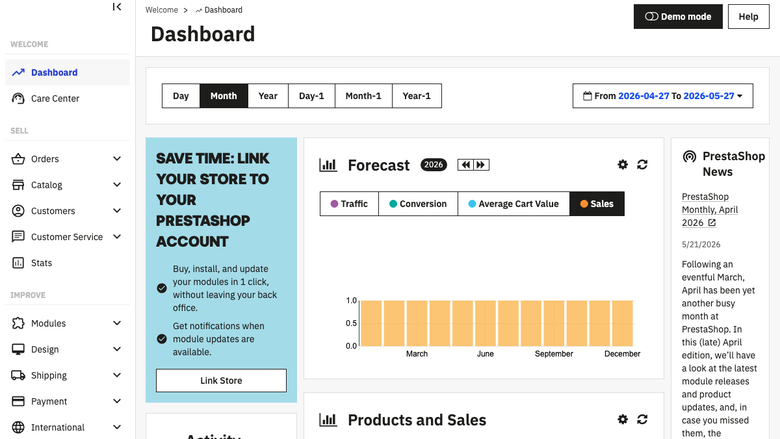
The PrestaShop 9 administration dashboard showing orders and products.
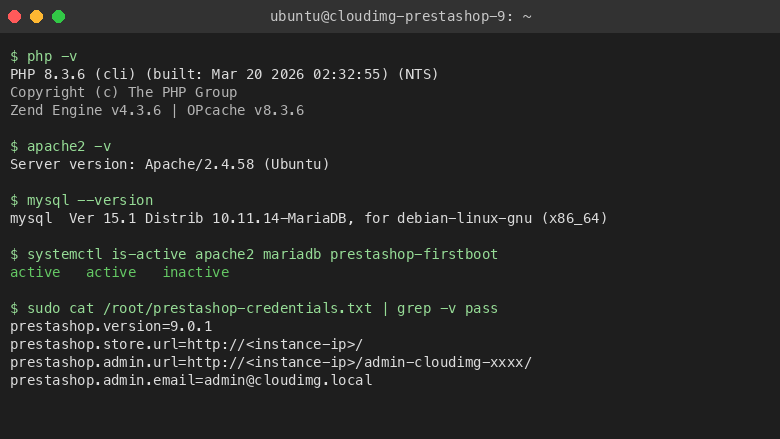
PHP 8.3, Apache 2.4 and MariaDB 10.11 stack information from the instance terminal.