PrestaShop 9 on Ubuntu 24.04 on Azure User Guide
Overview
PrestaShop is the leading open-source e-commerce platform — used by 300,000+ online stores worldwide to sell physical and digital goods. The cloudimg image installs PrestaShop 9.0.1 (the current Classic Edition release) on Apache 2.4 + PHP 8.3.6 + MariaDB 10.11, with the back-office admin URL randomized per VM and the install/ wizard directory removed at first boot. The default Hummingbird theme renders out of the box and a per-VM admin account is created at firstboot — you can sign into the back office, add products, and configure the shop the moment the VM is up.
What is included:
- PrestaShop 9.0.1 (OSL-3.0 / AFL-3.0) Classic Edition from the official PrestaShop CDN
- Apache 2.4 with mod_php (Ubuntu 24.04 noble main)
- PHP 8.3.6 with the extensions PrestaShop requires (gd, intl, mbstring, mysql, curl, xml, zip, bcmath, soap, opcache)
- MariaDB 10.11 from Ubuntu noble main, listening on 127.0.0.1 only
- Default Hummingbird theme, demo categories, demo products
- Randomized admin back-office URL per VM (
/admin-cloudimg-<8-hex>/) - Per-VM admin email
admin@cloudimg.local, 32-hex-character admin password - Per-VM 32-hex-character MariaDB password
- install/ directory removed at firstboot — PrestaShop refuses to render the storefront otherwise
- Two systemd units:
prestashop-firstboot.service(one-shot, runs before apache2 on first boot) and the standardapache2.serviceandmariadb.service - 5000+ free and paid modules available from the PrestaShop Addons marketplace
- 24/7 cloudimg support
Prerequisites
Active Azure subscription, SSH key, VNet + subnet. Standard_B2s (4 GB RAM) is comfortable for the LAMP stack with a default catalogue. NSG inbound: allow 22/tcp from your management CIDR and 80/tcp (and 443/tcp once you add TLS in Step 14) from any client CIDR that needs the storefront.
Step 1-3: Deploy + SSH (standard pattern)
ssh azureuser@<vm-ip>
Step 4: Service Status + Versions
sudo systemctl is-active apache2.service mariadb.service prestashop-firstboot.service
php --version | head -1
apache2 -v | head -1
mariadb --version

Step 5: Read Per-VM Credentials
sudo cat /stage/scripts/prestashop-credentials.log
Pick up PRESTASHOP_STOREFRONT_URL, PRESTASHOP_ADMIN_URL, PRESTASHOP_ADMIN_USER, PRESTASHOP_ADMIN_PASSWORD and PRESTASHOP_ADMIN_DIR (the randomized 8-hex admin path). Also includes the per-VM MariaDB password.
Step 6: HTTP Health + Storefront
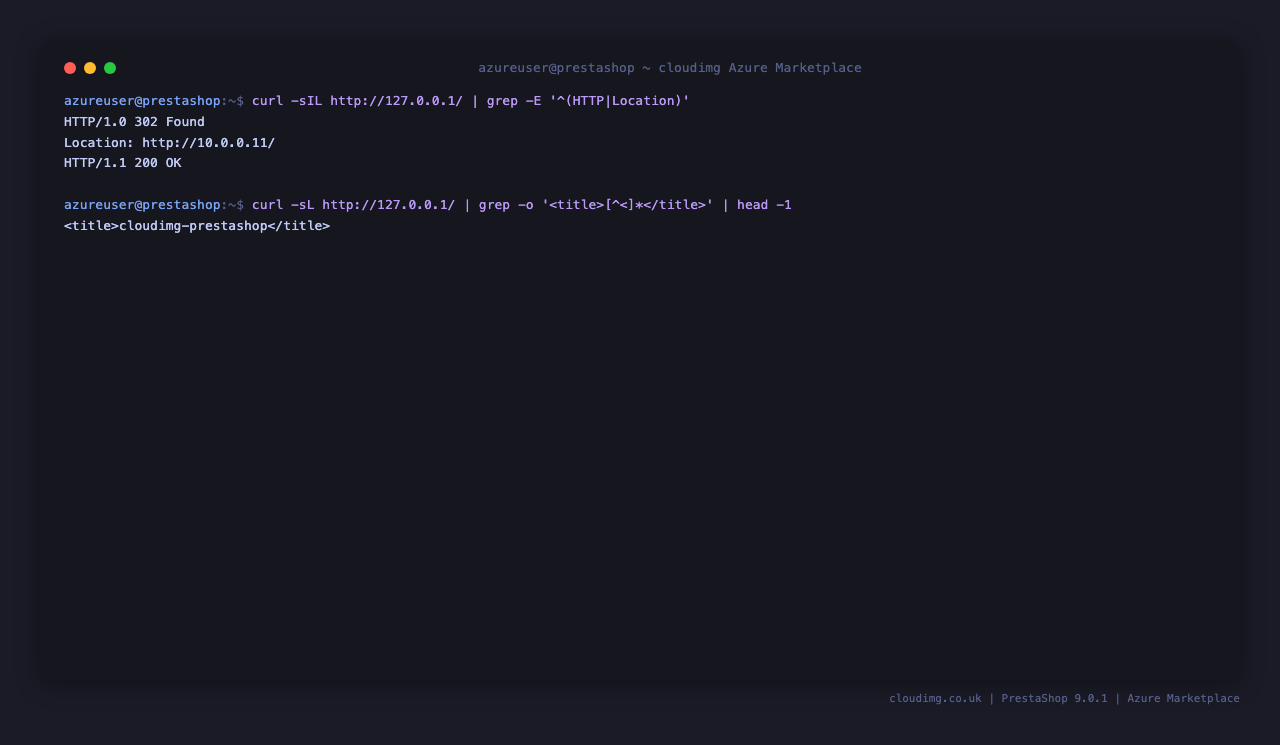
curl -sIL http://127.0.0.1/ | grep -E '^(HTTP|Location)'
curl -sL http://127.0.0.1/ | grep -o '<title>[^<]*</title>' | head -1
The first call shows the locale-redirect chain — PrestaShop 9 redirects / to /gb/ (the default GB locale) and the final hop returns 200. The second call extracts the <title> tag and confirms the shop name is cloudimg-prestashop.
Step 7: Browse the Storefront
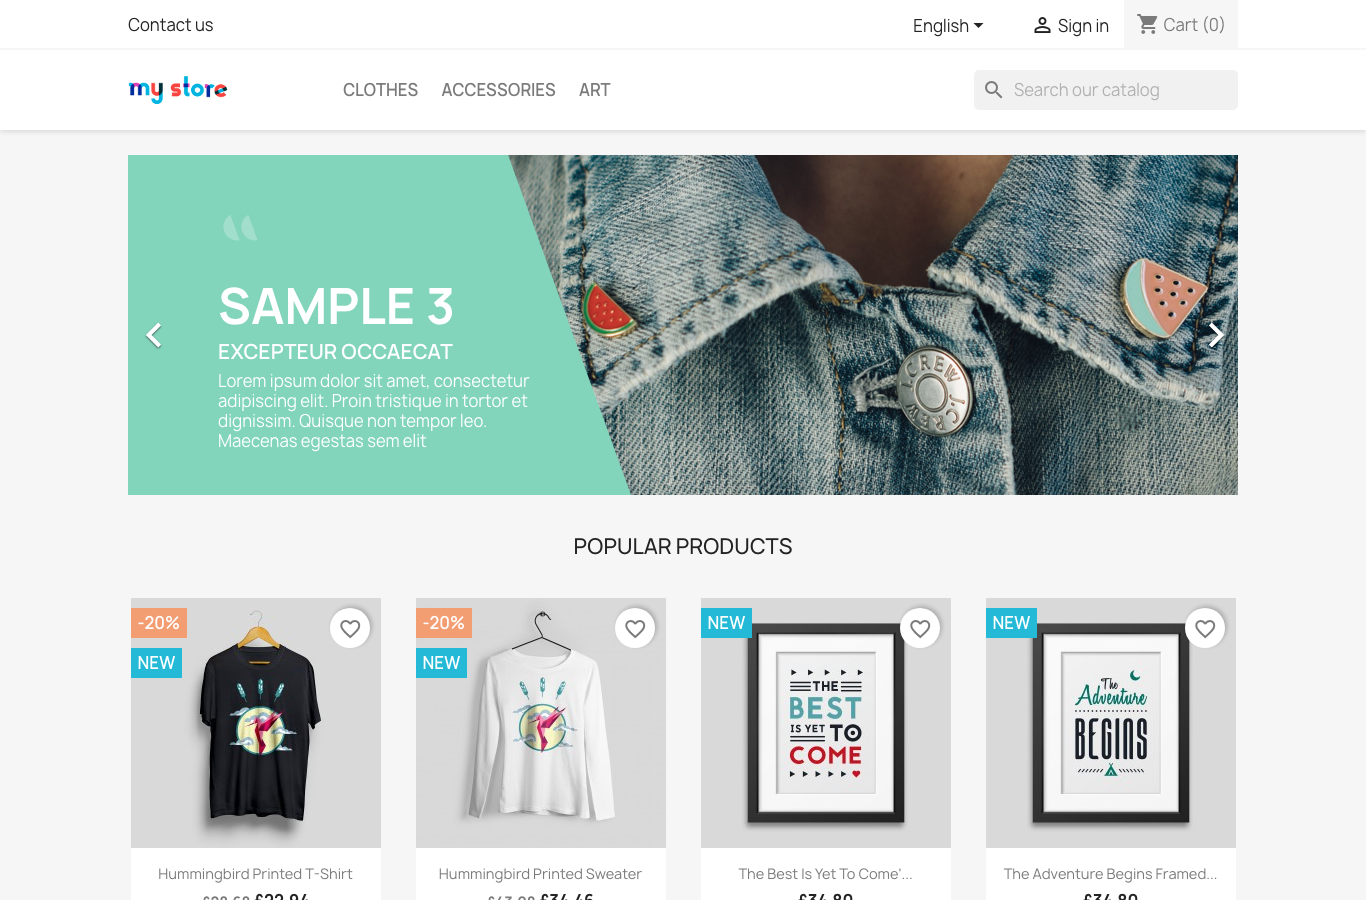
Browse to http://<vm-ip>/. The default Hummingbird theme renders with the demo header, navigation, product blocks, and footer.
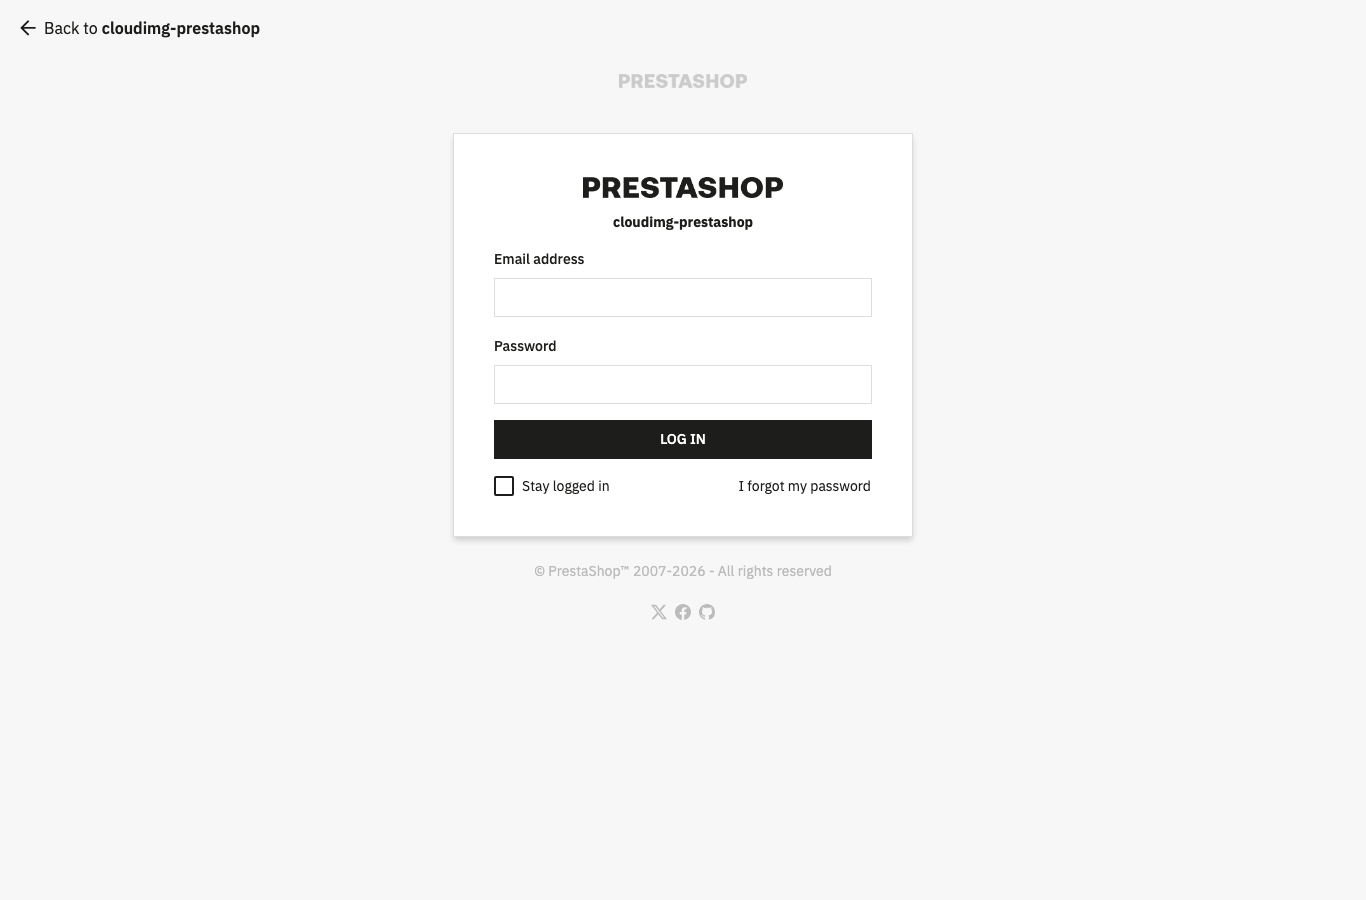
Step 8: Login to the Admin Back Office
Browse to http://<vm-ip>/<admin-dir>/ (the randomized path from Step 5). Log in with admin@cloudimg.local and the password from /stage/scripts/prestashop-credentials.log.
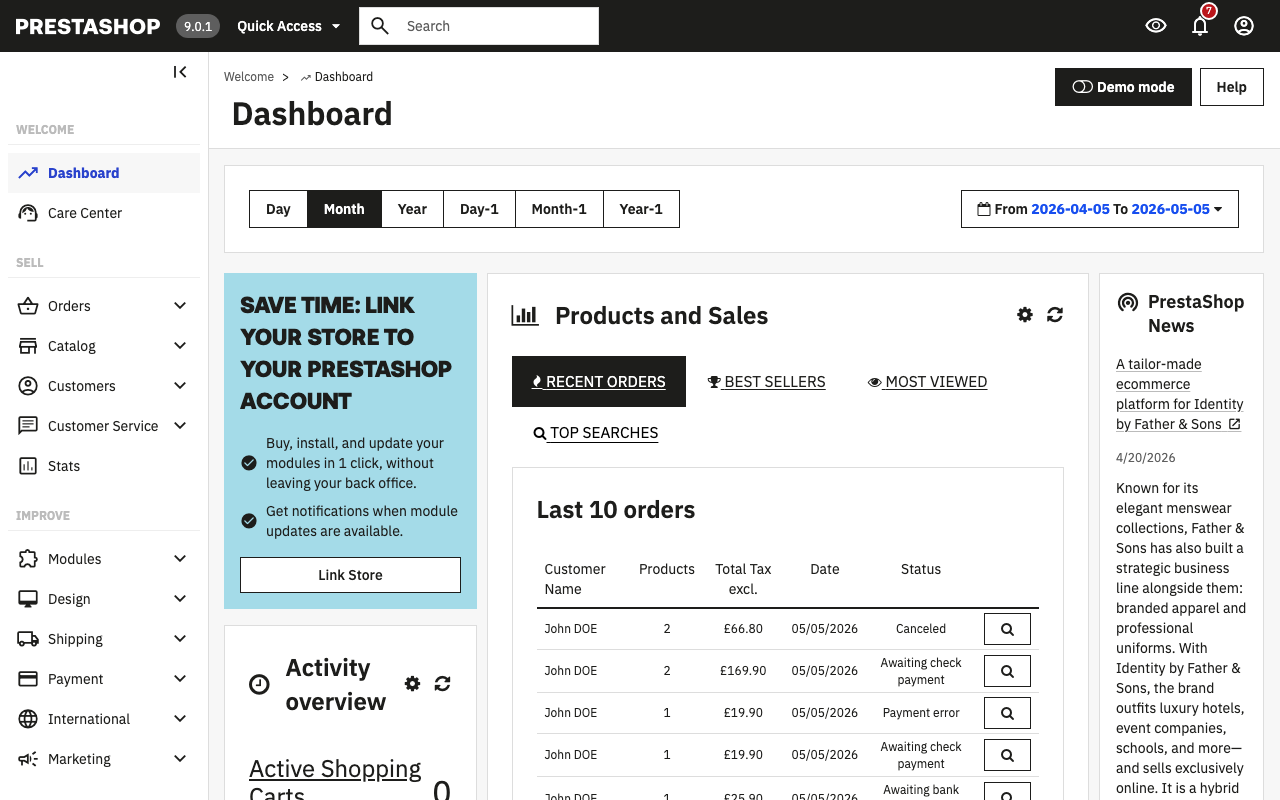
Step 9: Admin Dashboard
After login, the Dashboard shows the sales overview, today's stats, recent orders, top customers, and shop activity. The left sidebar gives access to Catalog, Orders, Customers, Modules, Design, Configure, and Advanced Parameters.
Step 10: Add a Product via the Admin
In the back office, navigate to Catalog → Products and click New product. Fill in the product name, retail price, quantity, and (optionally) a category and image. Click Save to publish — the product becomes visible on the storefront immediately.
For bulk imports, use Advanced Parameters → Import to load a CSV of products (PrestaShop accepts the standard CSV format with columns for ID, Name, Categories, Price, Quantity, etc.).
Step 11: Configure Shop Settings
Navigate to Configure → Shop Parameters → General to set the shop name, default currency, default language, and timezone. International → Localization lets you import country-specific tax rules and currencies. Shop Parameters → Order Settings configures the checkout flow, gift wrapping, and the minimum order total.
Step 12: Install Modules
PrestaShop has 5000+ free and paid modules available — payment gateways (Stripe, PayPal), shipping carriers (DHL, UPS), marketing (mailchimp, Klaviyo), and analytics. From the back office, navigate to Modules → Module Catalog to browse and install.
To install a module from the command line on the VM:
cd /var/www/prestashop
sudo -u www-data php bin/console prestashop:module install <module-name>
Step 13: Add Your Domain to the Shop
In the back office, navigate to Configure → Shop Parameters → General → Maintenance and the SEO and URLs sub-page. Set the Shop domain and SSL domain fields to your DNS name (for example shop.example.com), save, and then restart Apache so PrestaShop's URL rewriting picks up the change:
sudo systemctl restart apache2.service
Step 14: Install Let's Encrypt SSL
Point your domain DNS A record at this VM, then on the VM:
sudo apt-get install -y python3-certbot-apache
sudo certbot --apache -d shop.example.com -m you@example.com --agree-tos --non-interactive --redirect
Certbot edits the Apache vhost to add the SSL VirtualHost and a :80 → :443 redirect, then reloads Apache. Renewal is via the certbot.timer systemd unit (runs twice daily). Once HTTPS works, set Configure → Shop Parameters → General → Enable SSL to Yes in the back office to force secure cookies and https:// URLs site-wide.
Step 15: Backups
Take a consistent backup of the MariaDB database plus the on-disk image and upload directories:
PASS=$(sudo grep '^PRESTASHOP_DB_PASSWORD=' /stage/scripts/prestashop-credentials.log | cut -d= -f2-)
mysqldump -h 127.0.0.1 -u prestashop -p"$PASS" prestashop | gzip > /var/backups/prestashop-db-$(date +%F).sql.gz
sudo tar czf /var/backups/prestashop-img-$(date +%F).tgz -C /var/www/prestashop img upload
Periodically copy /var/backups to Azure Blob Storage (az storage blob upload-batch) for off-VM retention. Test the restore at least once before relying on it in production.
Step 16: Logs and Troubleshooting
sudo journalctl -u apache2.service --no-pager -n 80
sudo tail -50 /var/log/apache2/error.log
sudo tail -50 /var/log/apache2/access.log
sudo tail -50 /var/www/prestashop/var/logs/prod.log
PrestaShop's own debug log lives at /var/www/prestashop/var/logs/prod.log. For verbose error pages while developing or troubleshooting a module, edit /var/www/prestashop/config/defines.inc.php and set _PS_MODE_DEV_ to true, clear the cache (sudo -u www-data php bin/console cache:clear --no-warmup), and reload. Switch back to false before opening the storefront to customers.
Security
- Randomized admin back-office URL per VM (
/admin-cloudimg-<8-hex>/) — bots scanning the standard/admin/path get a404 - Per-VM admin password (32 hex characters from
openssl rand) - install/ directory removed at firstboot — PrestaShop refuses to render the storefront if it survives, eliminating the install-wizard takeover risk
- MariaDB listens on
127.0.0.1:3306only (loopback) — never reachable from the network - Per-VM MariaDB password (32 hex characters)
- Apache 2.4 + PHP 8.3 — both current stable upstream releases
- Optional TLS via certbot in Step 14
- NSG inbound restricted to
22/tcp(your management CIDR) and80/443/tcp(your customer CIDR)
Support
cloudimg provides 24/7/365 expert technical support. Guaranteed response within 24 hours, one hour average for critical issues. Contact support@cloudimg.co.uk.