QuestDB on Ubuntu 24.04 on Azure User Guide
Overview
QuestDB is a high-performance open-source time-series database built for fast ingestion and low-latency SQL analytics. It speaks standard SQL with time-series extensions (SAMPLE BY, LATEST ON, ASOF JOIN), ingests over the InfluxDB Line Protocol, REST and the PostgreSQL wire protocol, and ships an interactive web console for writing queries and visualising results. The cloudimg image installs QuestDB 9.4.3 (with its bundled Java runtime) at /opt/questdb, runs it as a dedicated questdb system user, binds every listener to loopback behind an nginx reverse proxy on TCP 80 with HTTP Basic auth, persists the QuestDB data root on a dedicated Azure data disk, and generates a unique web password on the first boot of every VM. Backed by 24/7 cloudimg support.
What is included:
- QuestDB 9.4.3 at
/opt/questdbwith a bundled Java runtime (no system Java required) - The interactive web console and the REST query/import API, fronted by nginx on
:80 - nginx HTTP Basic auth (open-source QuestDB has no built-in authentication) with a per-VM password in a root-only file
- A dedicated Azure data disk at
/var/lib/questdbholding the QuestDB data root (db, conf, log) - separate from the OS disk and re-provisioned with every VM - The PostgreSQL wire protocol (8812) and InfluxDB Line Protocol (9009) bound to loopback for local tooling and SSH tunnels
questdb.service+nginx.serviceas systemd units, enabled and active- 24/7 cloudimg support
Prerequisites
An active Azure subscription, an SSH key pair, and a VNet + subnet in the target region. Standard_B2ms (2 vCPU / 8 GiB RAM) is a good starting point; scale up for higher ingestion rates. NSG inbound: allow 22/tcp from your management network and 80/tcp for the web console and REST API (front with TLS for public exposure - see Enabling HTTPS).
Step 1 - Deploy from the Azure Marketplace
Sign in to the Azure Portal, choose Create a resource, search the Marketplace for QuestDB by cloudimg, and select Create. On Basics pick your subscription, resource group, region and size; under Administrator account choose SSH public key and paste your key; under Inbound port rules allow SSH (22) and HTTP (80). Review the dedicated data disk on the Disks tab, then Review + create then Create.
Step 2 - Deploy from the Azure CLI
az vm create \
  --resource-group <your-rg> \
  --name questdb \
  --image <marketplace-image-urn> \
  --size Standard_B2ms \
  --admin-username azureuser \
  --ssh-key-values ~/.ssh/id_ed25519.pub \
  --vnet-name <your-vnet> --subnet <your-subnet> \
  --public-ip-sku Standard

az vm open-port --resource-group <your-rg> --name questdb --port 80 --priority 1010
Step 3 - Connect to your VM
ssh azureuser@<vm-public-ip>
Step 4 - Confirm the services are running
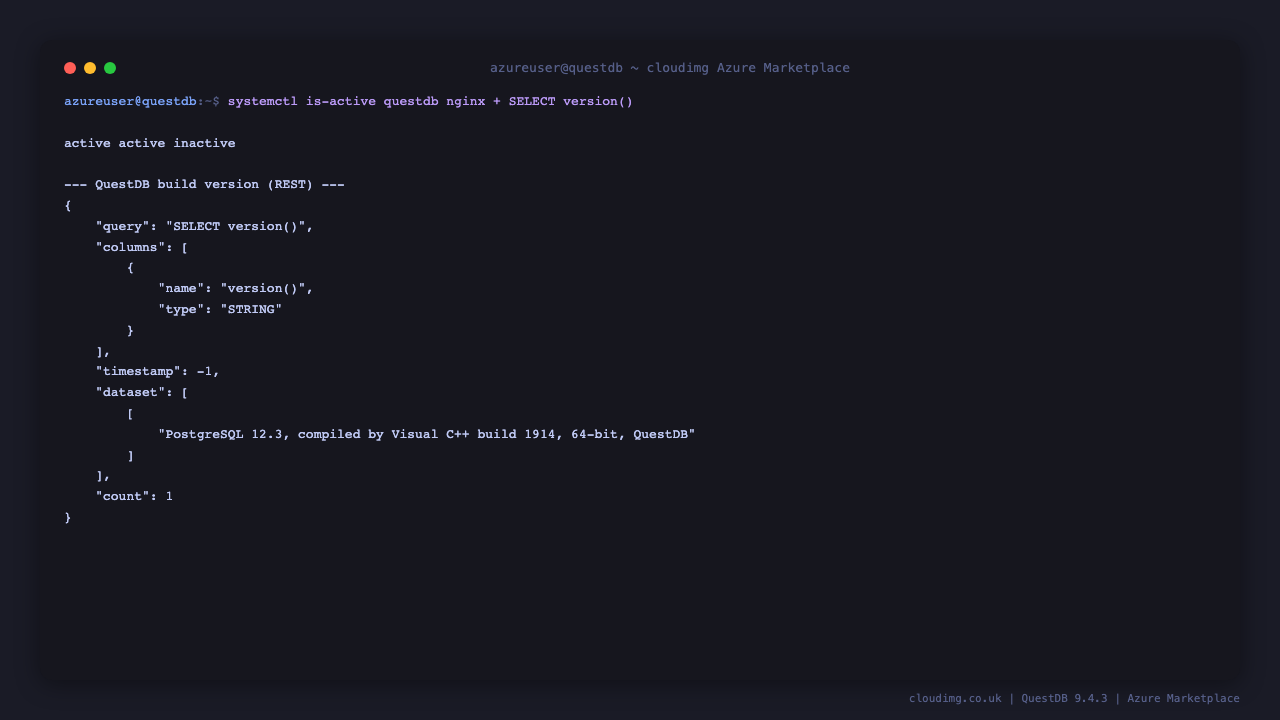
systemctl is-active questdb.service nginx.service
Both services report active. QuestDB starts in a few seconds and opens its loopback listeners. The REST API also reports the running build version:
Step 5 - Retrieve your web password
The admin password is generated uniquely on the first boot of your VM and written to a root-only file:
sudo cat /root/questdb-credentials.txt
This file contains QUESTDB_ADMIN_USER (admin) and QUESTDB_ADMIN_PASSWORD, plus the URLs for the web console and REST API. Store the password somewhere safe.
Step 6 - Check the health endpoint
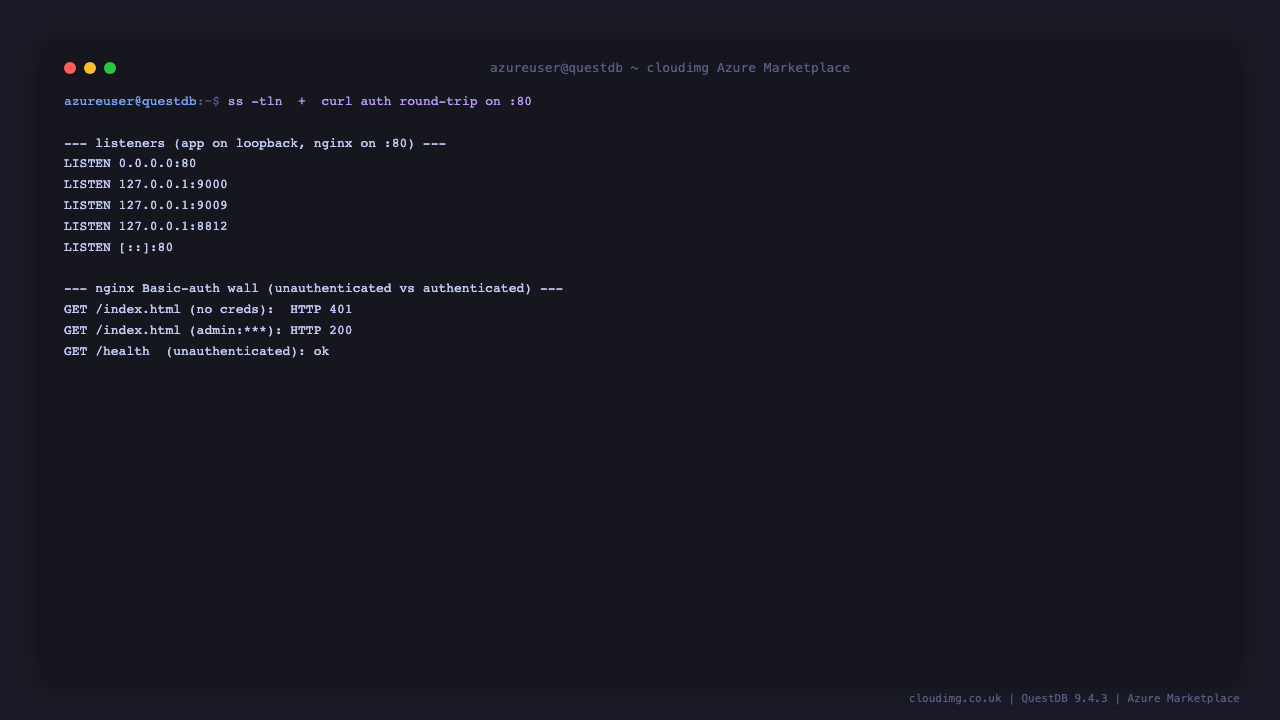
nginx serves an unauthenticated health endpoint for load balancers and probes:
curl -s http://localhost/health
It returns ok. Every other path is gated by the nginx Basic-auth wall, and QuestDB's own listeners stay bound to loopback:
Step 7 - Open the QuestDB web console
Browse to http://<vm-public-ip>/ and sign in as admin with the password from Step 5. The web console is the built-in SQL workbench: type a query in the editor and run it to get a results grid, with a schema explorer on the left and an import panel for CSV files.
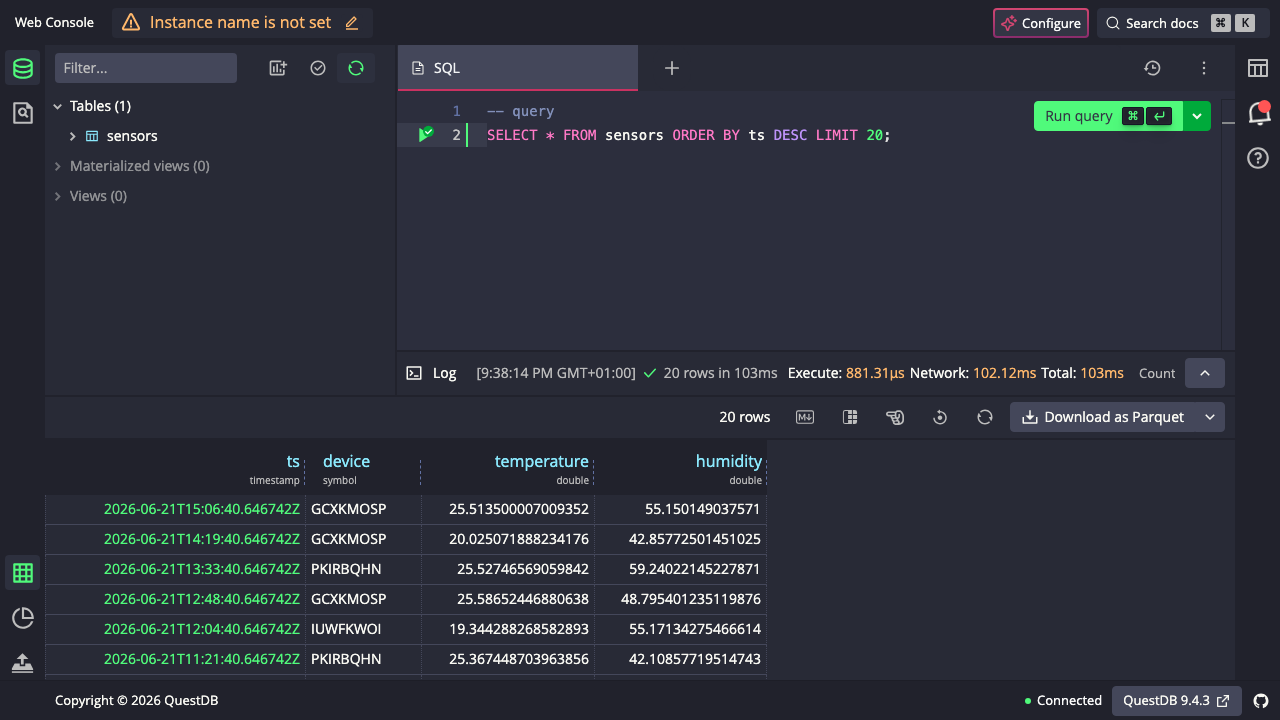
Create a table and insert a few rows, then select them back. The result grid shows the returned rows:
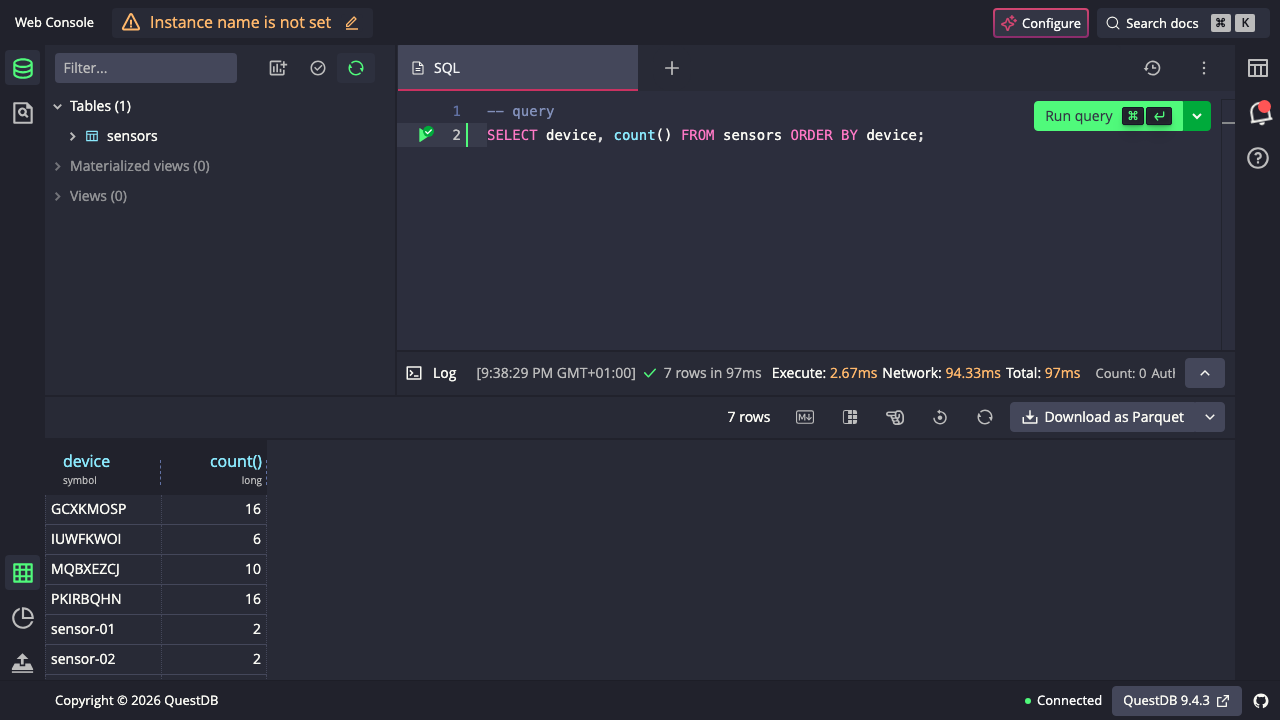
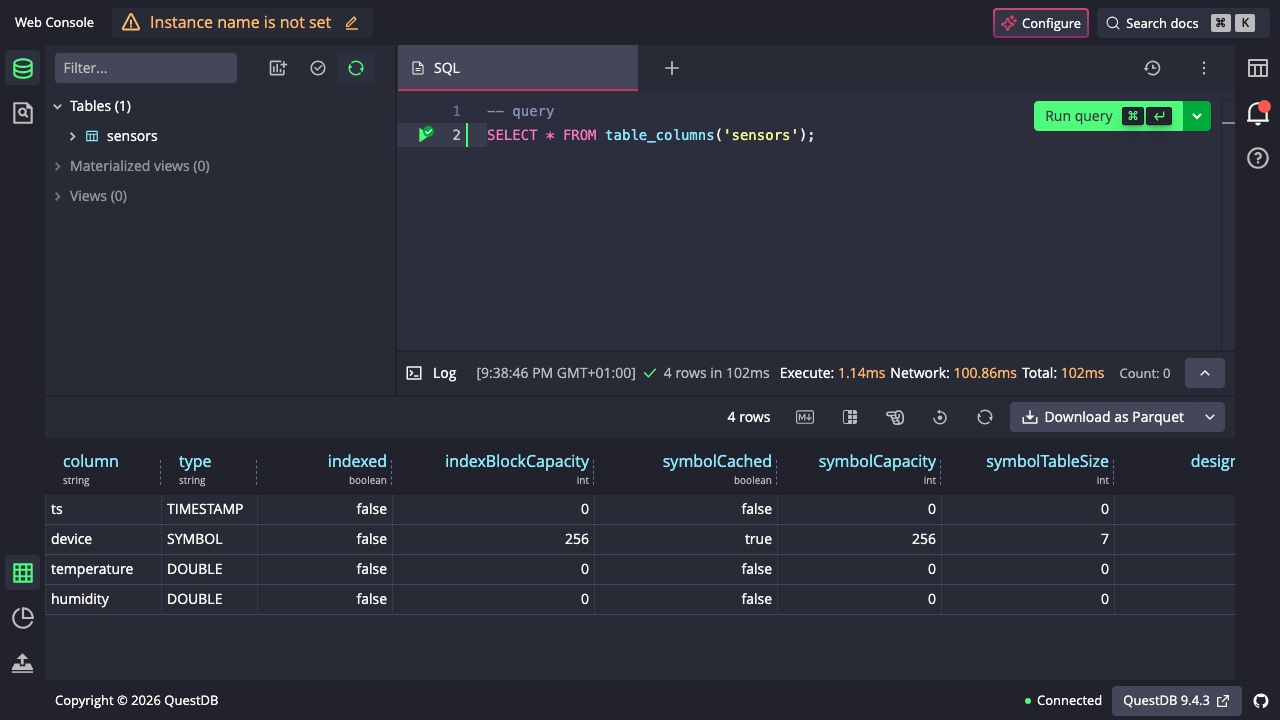
The schema explorer on the left lists every table and its columns and types:
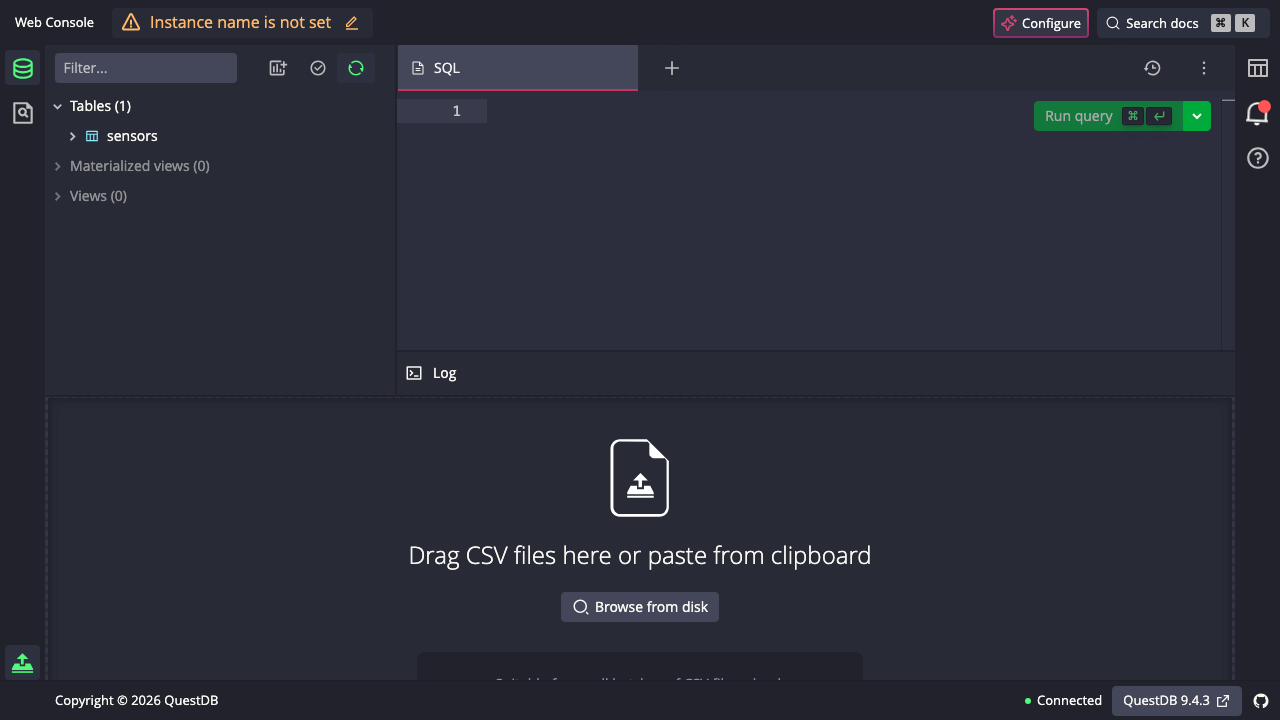
The Import panel lets you drag-and-drop a CSV file straight into a new or existing table:
Step 8 - Run SQL from the command line
The REST /exec endpoint runs SQL behind the same Basic auth and returns JSON. Confirm QuestDB is serving and report its version:
curl -s -u admin:<QUESTDB_ADMIN_PASSWORD> 'http://localhost/exec?query=SELECT%20version()' | head -c 300; echo
You get a JSON response with a dataset array carrying the running version string.
Step 9 - Create a table and ingest data
QuestDB accepts SQL DDL/DML over the same REST endpoint. Create a time-series table, insert a few rows, and query them back:
curl -s -u admin:<QUESTDB_ADMIN_PASSWORD> -G 'http://localhost/exec' --data-urlencode "query=CREATE TABLE IF NOT EXISTS readings (ts TIMESTAMP, sensor SYMBOL, value DOUBLE) TIMESTAMP(ts) PARTITION BY DAY WAL" >/dev/null
curl -s -u admin:<QUESTDB_ADMIN_PASSWORD> -G 'http://localhost/exec' --data-urlencode "query=INSERT INTO readings VALUES (now(), 'sensor-a', 12.5), (now(), 'sensor-b', 13.1)" >/dev/null
curl -s -u admin:<QUESTDB_ADMIN_PASSWORD> -G 'http://localhost/exec' --data-urlencode "query=SELECT count() FROM readings" | head -c 300; echo
The count query returns a dataset with the number of rows. A full REST round-trip - create a table, insert rows, and run an aggregation - looks like this:
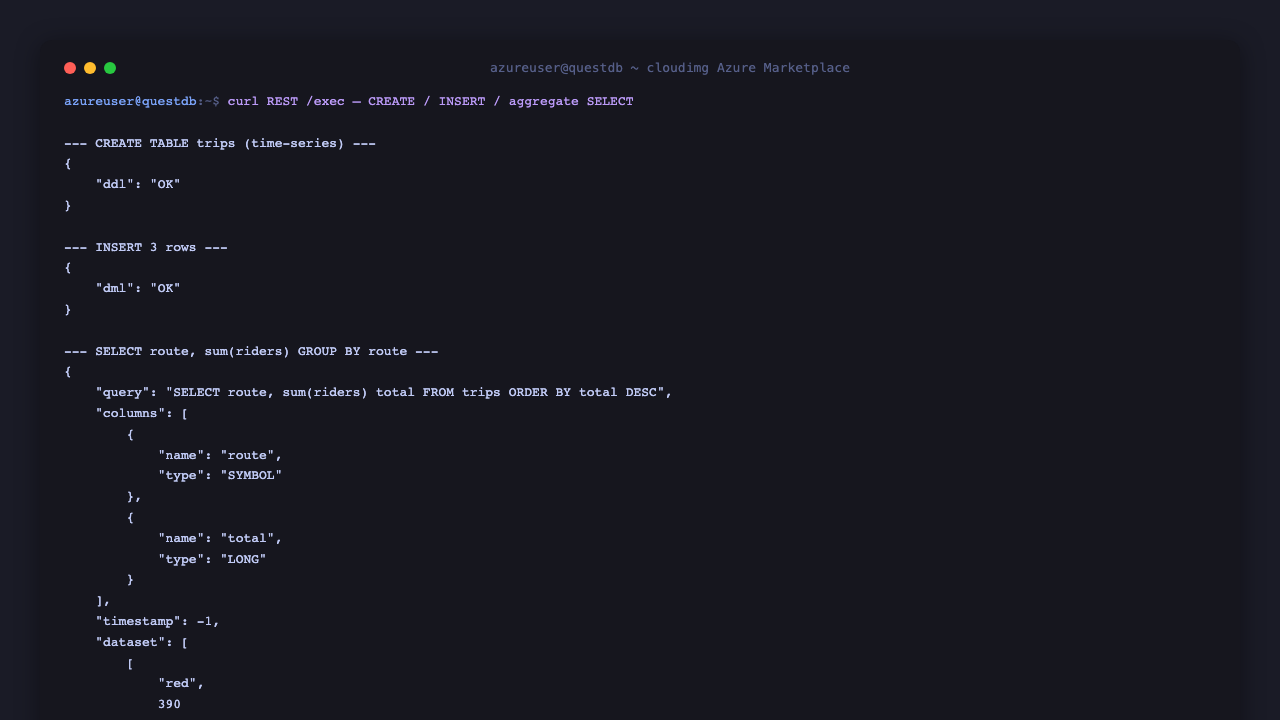
For high-throughput ingestion, point an InfluxDB Line Protocol client at 127.0.0.1:9009 over an SSH tunnel, or connect a PostgreSQL client to 127.0.0.1:8812 (both listeners are loopback-only - see below).
Step 10 - Confirm data lives on the dedicated disk
The QuestDB data root is stored on the dedicated Azure data disk so it survives OS changes and can be resized independently:
findmnt /var/lib/questdb
The mount is backed by a separate Azure data disk captured into the image and re-provisioned on every VM, with the QuestDB db, conf and log directories living on it:

Connecting over PostgreSQL wire and ILP
QuestDB also exposes the PostgreSQL wire protocol on 127.0.0.1:8812 and the InfluxDB Line Protocol on 127.0.0.1:9009. Both are bound to loopback so they are not exposed to the network. Reach them from your workstation with an SSH tunnel, for example:
ssh -L 8812:127.0.0.1:8812 -L 9009:127.0.0.1:9009 azureuser@<vm-public-ip>
Then connect a psql client to localhost:8812 (default user admin) or stream metrics to localhost:9009 with any ILP client.
Enabling HTTPS
The nginx reverse proxy terminates plain HTTP on port 80. For public exposure, put a certificate in front of it. The simplest path is to add a DNS name for the VM and use the companion cloudimg nginx-ssl-certbot image as a TLS reverse proxy, or install certbot and extend the existing nginx site with a listen 443 ssl; server block and your certificate paths. Keep QuestDB itself bound to loopback so the only public surface is the authenticated, TLS-terminated proxy.
Maintenance
- Configuration: server settings live in
/var/lib/questdb/conf/server.conf(all listeners are bound to loopback). Edit it andsudo systemctl restart questdbto apply. - Backups: snapshot the
/var/lib/questdbdata disk, or use QuestDB'sSNAPSHOTSQL for consistent backups. - Upgrades: replace the
/opt/questdbruntime with a newer release and restart the service; the on-disk data format is forward-compatible. - Security patches: unattended-upgrades remains enabled so the OS continues to receive security updates automatically.
Support
cloudimg provides 24/7 expert support for this image. Contact support@cloudimg.co.uk.