Reposilite on Ubuntu 24.04 on Azure User Guide
Overview
Reposilite is a lightweight self-hosted Maven repository manager for the JVM ecosystem. It hosts your own private Maven and Gradle artifacts, proxies and caches upstream repositories, and controls access with simple access tokens - all from a single Java application, without the operational weight of a full artifact server. The cloudimg image installs Reposilite 3.5.28 on a Temurin 21 JRE, runs it as a systemd service behind an nginx reverse proxy on port 80, stores the repository tree, configuration and the access-token database on a dedicated Azure data disk, and generates a unique manager access token on the first boot of every VM. Backed by 24/7 cloudimg support.
What is included:
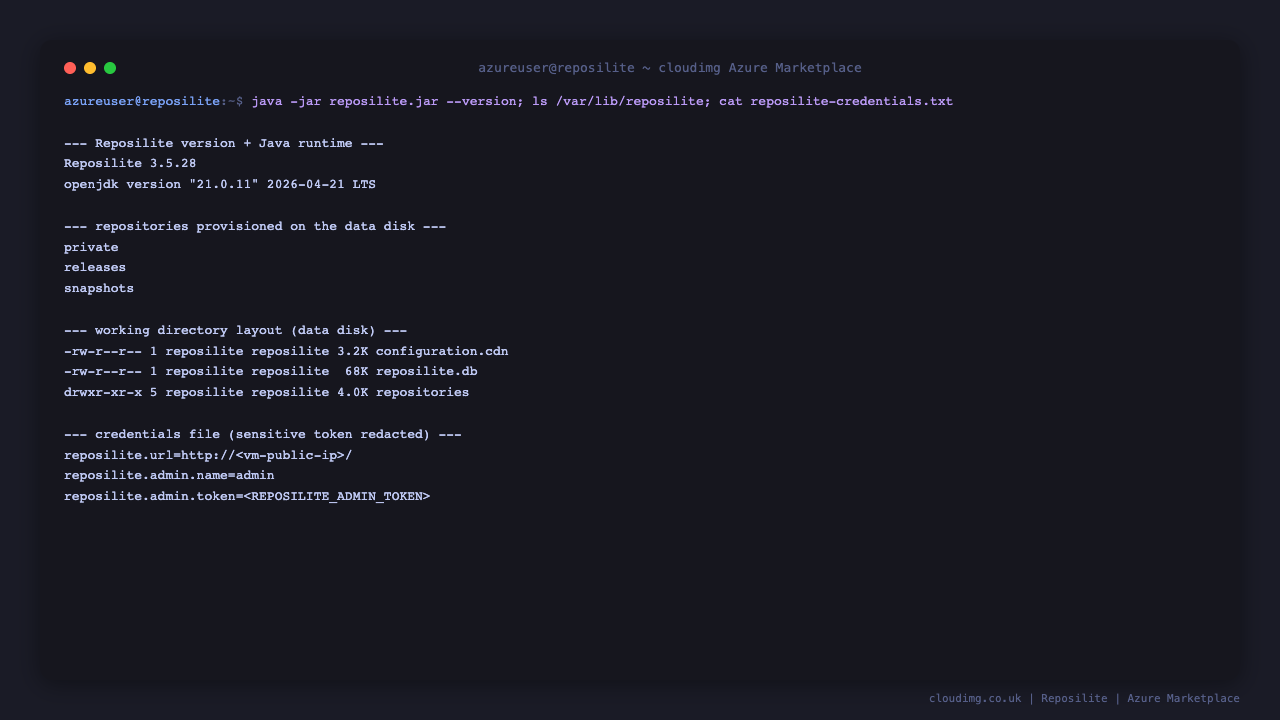
- Reposilite 3.5.28 running on an Eclipse Temurin 21 JRE
- The web dashboard and Maven/Gradle registry published on port 80 via nginx (with WebSocket upgrade and a 1 GiB body limit for large artifact deploys)
- Default
releases,snapshotsandprivaterepositories ready to use - A dedicated Azure data disk at
/var/lib/reposilitefor the repository tree, configuration and the access-token database - A unique manager access token generated on first boot, written to a root-only credentials file
reposilite.service+nginx.serviceas systemd units, enabled and active- 24/7 cloudimg support
Prerequisites
An active Azure subscription, an SSH key pair, and a VNet + subnet in the target region. Standard_B2ms (2 vCPU / 8 GiB RAM) is a good starting point. NSG inbound: allow 22/tcp from your management network and 80/tcp for the registry and dashboard (front with TLS for public exposure - see Enabling HTTPS).
Step 1 - Deploy from the Azure Marketplace
Sign in to the Azure Portal, choose Create a resource, search the Marketplace for Reposilite by cloudimg, and select Create. On Basics pick your subscription, resource group, region and size; under Administrator account choose SSH public key and paste your key; under Inbound port rules allow SSH (22) and HTTP (80). Review the dedicated data disk on the Disks tab, then Review + create -> Create.
Step 2 - Deploy from the Azure CLI
az vm create \
  --resource-group <your-rg> \
  --name reposilite \
  --image <marketplace-image-urn> \
  --size Standard_B2ms \
  --admin-username azureuser \
  --ssh-key-values ~/.ssh/id_ed25519.pub \
  --vnet-name <your-vnet> --subnet <your-subnet> \
  --public-ip-sku Standard

az vm open-port --resource-group <your-rg> --name reposilite --port 80 --priority 1010
Step 3 - Connect to your VM
ssh azureuser@<vm-public-ip>
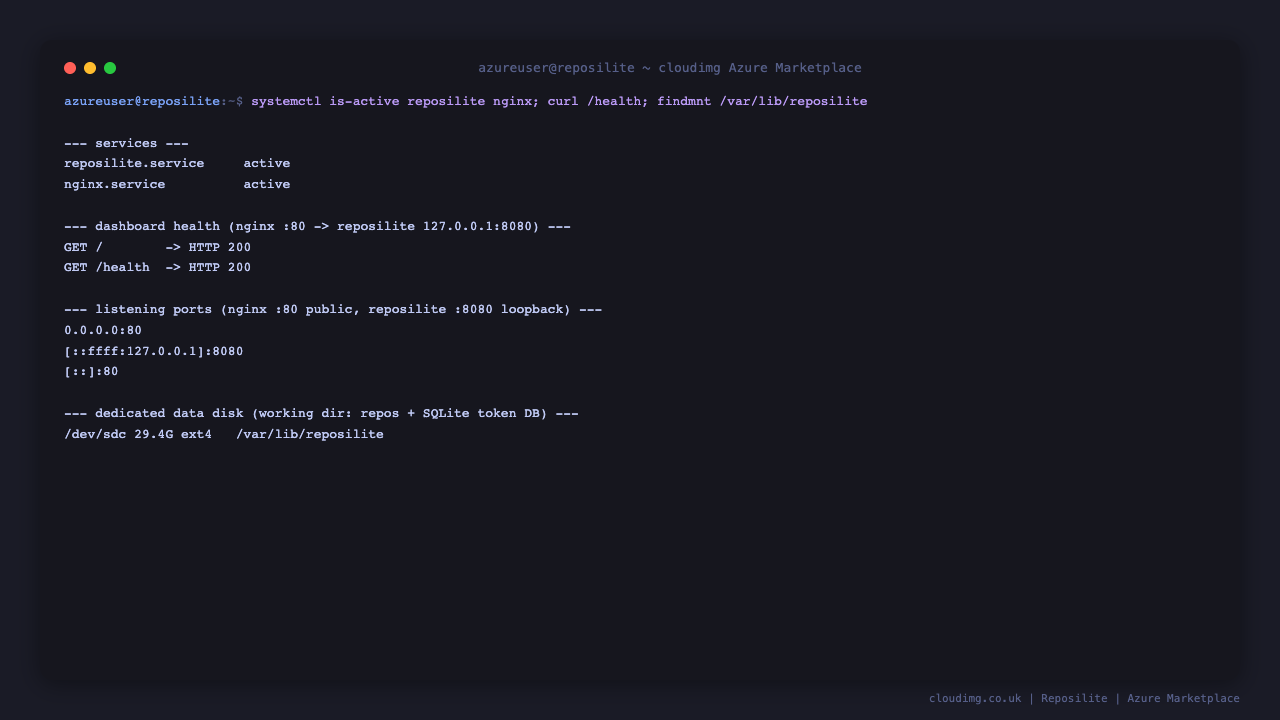
Step 4 - Confirm the services are running
systemctl is-active reposilite.service nginx.service
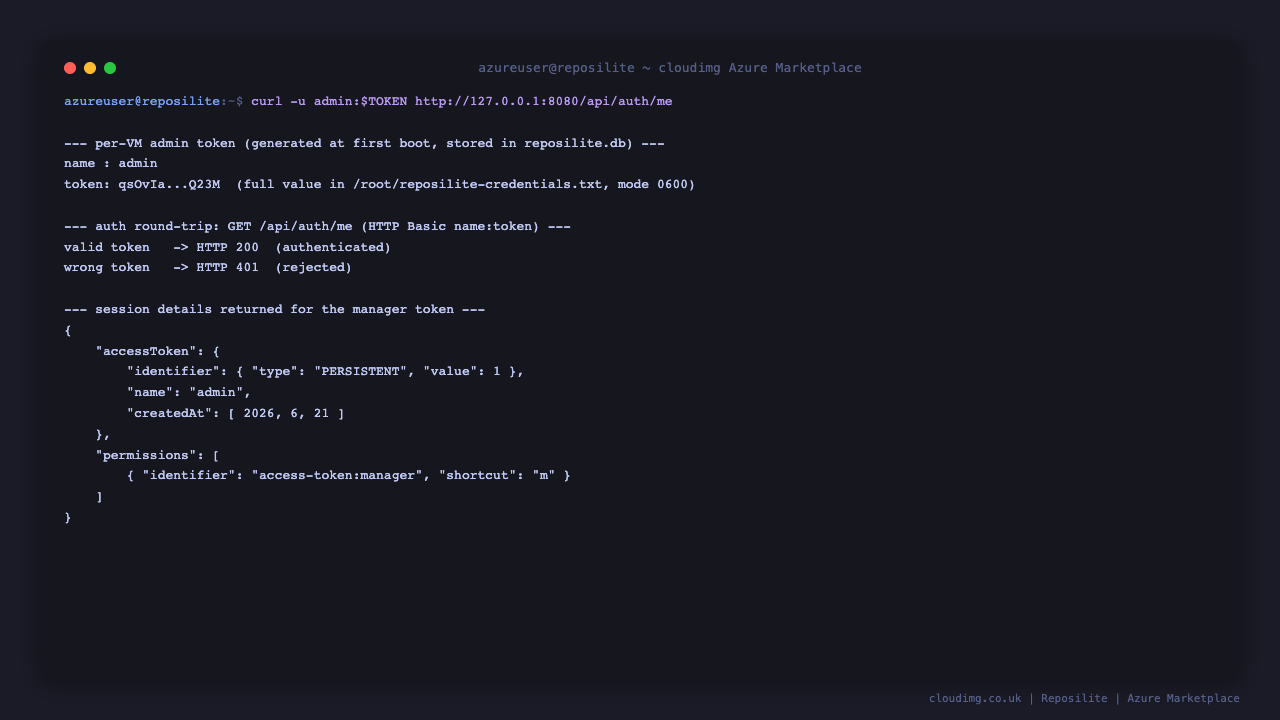
Both report active. On first boot Reposilite generates a unique manager access token and stores it in the access-token database on the data disk.
Step 5 - Retrieve your admin access token
The manager access token is generated uniquely on the first boot of your VM and written to a root-only file:
sudo cat /root/reposilite-credentials.txt
This file contains reposilite.admin.name (admin) and reposilite.admin.token. Store the token somewhere safe - it grants full management access.
Step 6 - Check the health endpoint
The Reposilite dashboard returns 200 unauthenticated, and nginx also serves a static health endpoint:
curl -s -o /dev/null -w '%{http_code}\n' http://localhost/health
Step 7 - Open the web dashboard
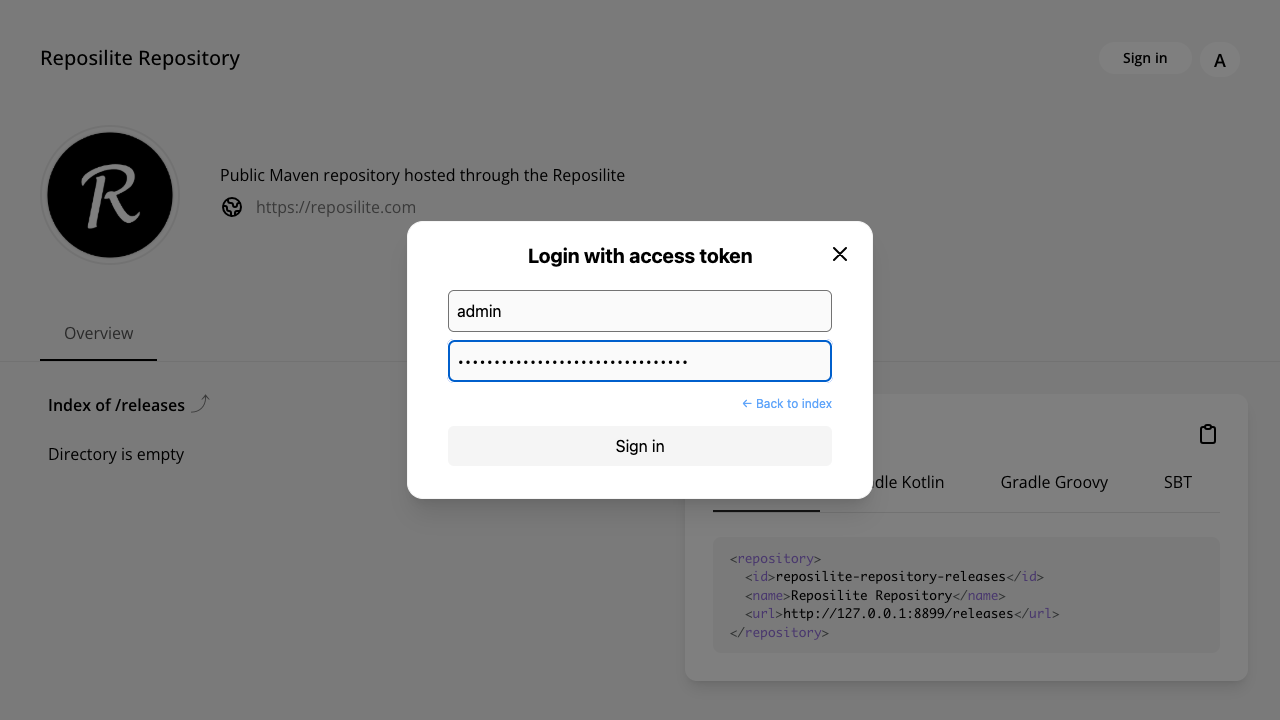
Browse to http://<vm-public-ip>/. The dashboard shows your repository index and, in the Repository details panel, ready-to-copy Maven, Gradle Kotlin, Gradle Groovy and SBT snippets for consuming artifacts.
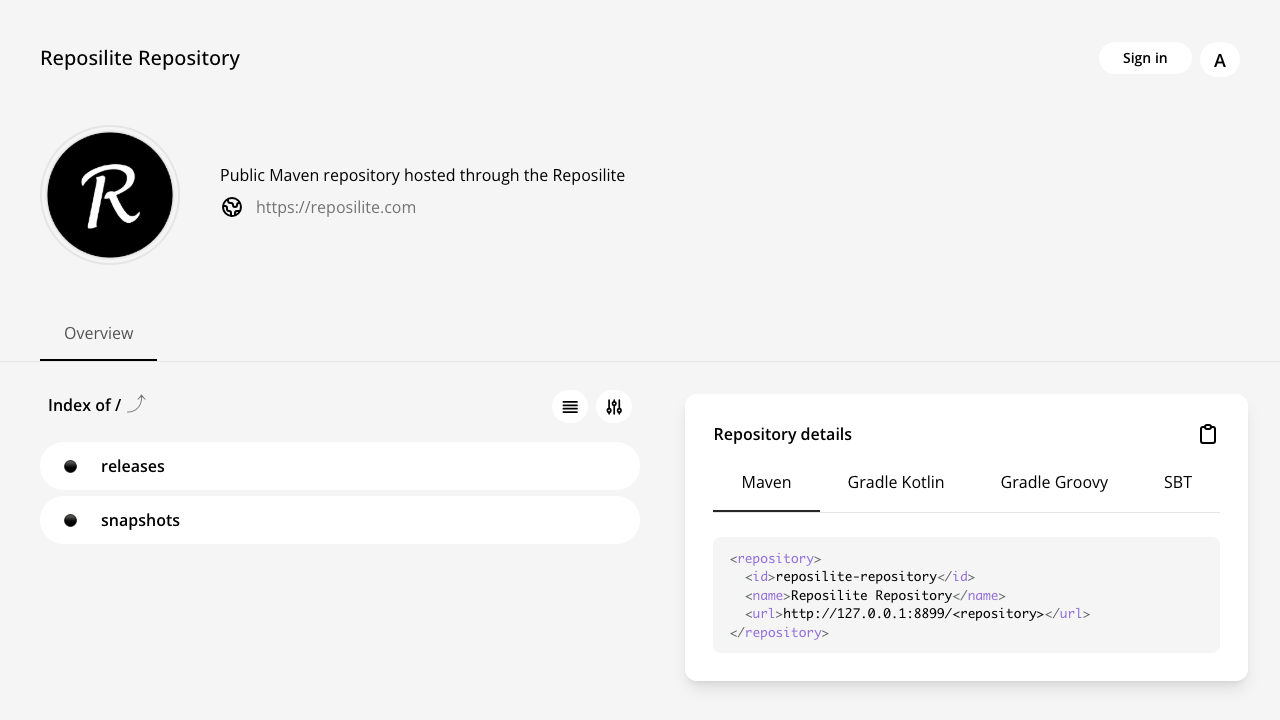
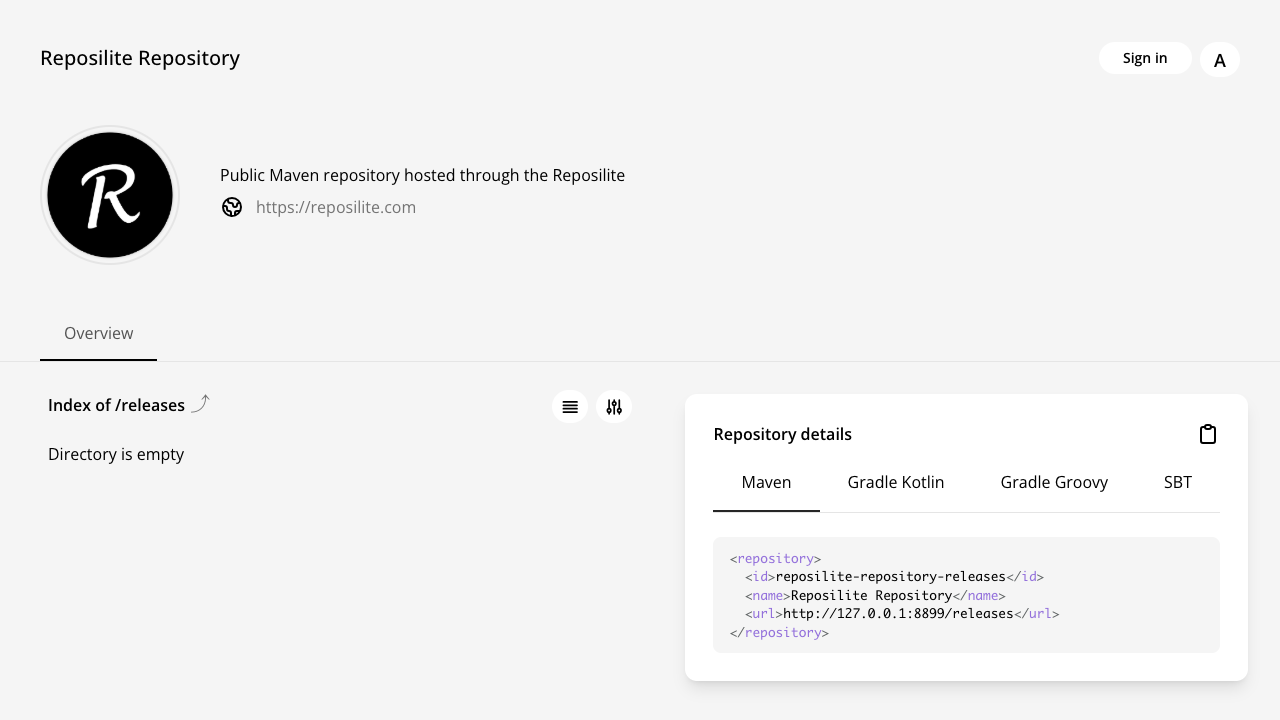
Click a repository (for example releases) to browse its artifact tree. A freshly deployed image starts empty:
Use Sign in in the top-right to authenticate with your access token (name admin, the token from Step 5):
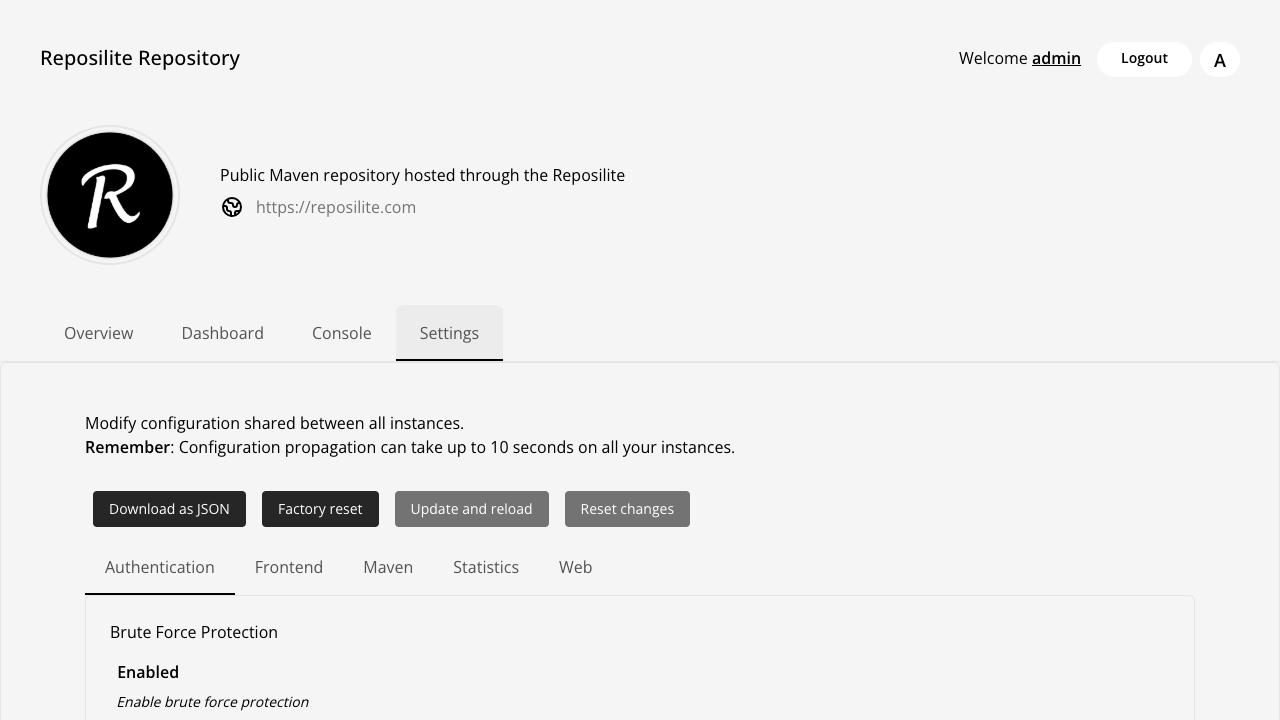
Once signed in as a manager you gain the Dashboard, Console and Settings tabs to manage repositories, tokens and shared configuration:
Step 8 - Confirm your access token authenticates
Reposilite exposes GET /api/auth/me for verifying credentials. Pass the token as HTTP Basic auth - a valid token returns 200, a missing or wrong token returns 401:
curl -s -o /dev/null -w '%{http_code}\n' -u 'admin:<REPOSILITE_ADMIN_TOKEN>' http://localhost/api/auth/me
Step 9 - Configure Maven to publish and consume artifacts
On a developer machine, add a server entry to ~/.m2/settings.xml using your token name as the username and the token value as the password:
<settings>
  <servers>
    <server>
      <id>reposilite-releases</id>
      <username>admin</username>
      <password><REPOSILITE_ADMIN_TOKEN></password>
    </server>
    <server>
      <id>reposilite-snapshots</id>
      <username>admin</username>
      <password><REPOSILITE_ADMIN_TOKEN></password>
    </server>
  </servers>
</settings>
Then point your project's pom.xml at the repositories (matching the <id> values above):
<distributionManagement>
  <repository>
    <id>reposilite-releases</id>
    <url>http://<vm-public-ip>/releases</url>
  </repository>
  <snapshotRepository>
    <id>reposilite-snapshots</id>
    <url>http://<vm-public-ip>/snapshots</url>
  </snapshotRepository>
</distributionManagement>
Deploy an artifact with mvn deploy. To consume artifacts, add a matching <repository> block under <repositories> in your pom.xml.
Step 10 - Configure Gradle to publish and consume artifacts
In Gradle (Kotlin DSL), declare the repository with your token credentials:
publishing {
    repositories {
        maven {
            url = uri("http://<vm-public-ip>/releases")
            credentials {
                username = "admin"
                password = "<REPOSILITE_ADMIN_TOKEN>"
            }
            isAllowInsecureProtocol = true
        }
    }
}
Run gradle publish to deploy. To resolve dependencies from Reposilite, add the same maven { ... } block under repositories { } in your build script.
Step 11 - Confirm storage lives on the dedicated disk
The repository tree, configuration and the access-token database are stored on the dedicated Azure data disk so they survive OS changes and can be resized independently:
findmnt /var/lib/reposilite
The mount is backed by a separate Azure data disk captured into the image and re-provisioned on every VM.
Enabling HTTPS
The nginx reverse proxy terminates plain HTTP on port 80. For public exposure, put a certificate in front of it - add a DNS name for the VM and install certbot, or use the companion cloudimg nginx-ssl-certbot image as a TLS reverse proxy. Keep Reposilite bound to loopback (127.0.0.1:8080) so the only public surface is the TLS-terminated proxy. Once you serve over HTTPS you can drop isAllowInsecureProtocol from the Gradle config above.
Maintenance
- Backups: snapshot the
/var/lib/reposilitedata disk to back up the repository tree, configuration and the access-token database. - Tokens: manage access tokens from the Console tab in the dashboard, or with the
token-generate <name> <permissions>andtoken-listconsole commands. Use thempermission for managers. - Service:
sudo systemctl restart reposiliteafter configuration changes; logs viajournalctl -u reposilite. - Security patches: unattended-upgrades remains enabled so the OS continues to receive security updates automatically.
Support
cloudimg provides 24/7 expert support for this image. Contact support@cloudimg.co.uk.