Smallstep step-ca on Ubuntu 24.04 on Azure User Guide
Overview
This image runs Smallstep step-ca, the open source online certificate authority for secure, automated X.509 and ACME certificate management. step-ca lets you run your own private PKI: an internal certificate authority that issues short-lived TLS certificates to your services, devices and workloads, with full support for the ACME protocol so any ACME client can request and renew certificates automatically. The image is delivered as a ready-to-use certificate authority appliance: step-ca.service is enabled and starts on boot, and every VM bootstraps its own unique certificate authority the first time it boots, so the moment you connect over SSH the CA is already running and healthy.
This is a headless certificate authority service. There is no web interface. step-ca runs as a long-lived daemon as the dedicated unprivileged step user, serving the CA's X.509 and ACME API over TLS. The matching step command line tool is installed for bootstrapping clients, inspecting certificates and issuing certificates from the provisioner.
The certificate authority listens on the loopback address only, at 127.0.0.1:8443. The CA configuration, the root and intermediate certificates and the encrypted signing keys all live on a dedicated, independently resizable Azure data disk mounted at /var/lib/step-ca, which is the CA's STEPPATH. The CA material sits on durable storage you can resize and snapshot independently of the operating system disk.
Prerequisites
Before you deploy this image you need:
- A Microsoft Azure subscription where you can create virtual machines
- Permissions to create VMs, virtual networks, network security groups and public IP addresses
- An SSH key pair for access to the VM (the Azure CLI can generate one)
- A virtual network and subnet in the target region, with a network security group allowing inbound port 22 from your management network
- The Azure CLI installed locally if you plan to deploy from the command line
Step 1: Launch the VM from the Azure Marketplace
Sign in to the Azure portal, open Create a resource, and search the Marketplace for step-ca by cloudimg. Select the cloudimg listing and choose Create.
On the Basics tab pick your subscription and resource group, a region, and a VM size of Standard_B2s or larger. Under Administrator account select SSH public key, set the username to azureuser, and supply your public key. Under Inbound port rules allow SSH (22) only. Complete the Networking tab with your virtual network and subnet, then select Review + create and Create.
First boot initialisation generates the VM's own unique certificate authority and takes a short moment after the VM state becomes Running; step-ca.service is serving its API by the time you can connect.
Step 2: Launch the VM from the Azure CLI
The following block launches a VM from the cloudimg step-ca image into an existing resource group. Replace the placeholders with your own values. The image reference comes from the Marketplace listing's Usage information.
az vm create \
  --resource-group <your-resource-group> \
  --name step-ca \
  --image <marketplace-image-urn> \
  --size Standard_B2s \
  --admin-username azureuser \
  --ssh-key-values ~/.ssh/id_rsa.pub \
  --public-ip-sku Standard
When the VM reaches the Running state, note its public IP address from the portal or with az vm list-ip-addresses.
Step 3: Connect to Your VM
Connect over SSH as azureuser using your key pair.
ssh azureuser@<vm-ip>
The login banner shows the most useful commands. The CA is already running and healthy.
Step 4: Confirm the step-ca Service and Version
Confirm the installed step-ca and step versions and that the certificate authority daemon is active. step-ca is the CA server; step is the client command line tool.
step-ca version
step version
systemctl is-active step-ca
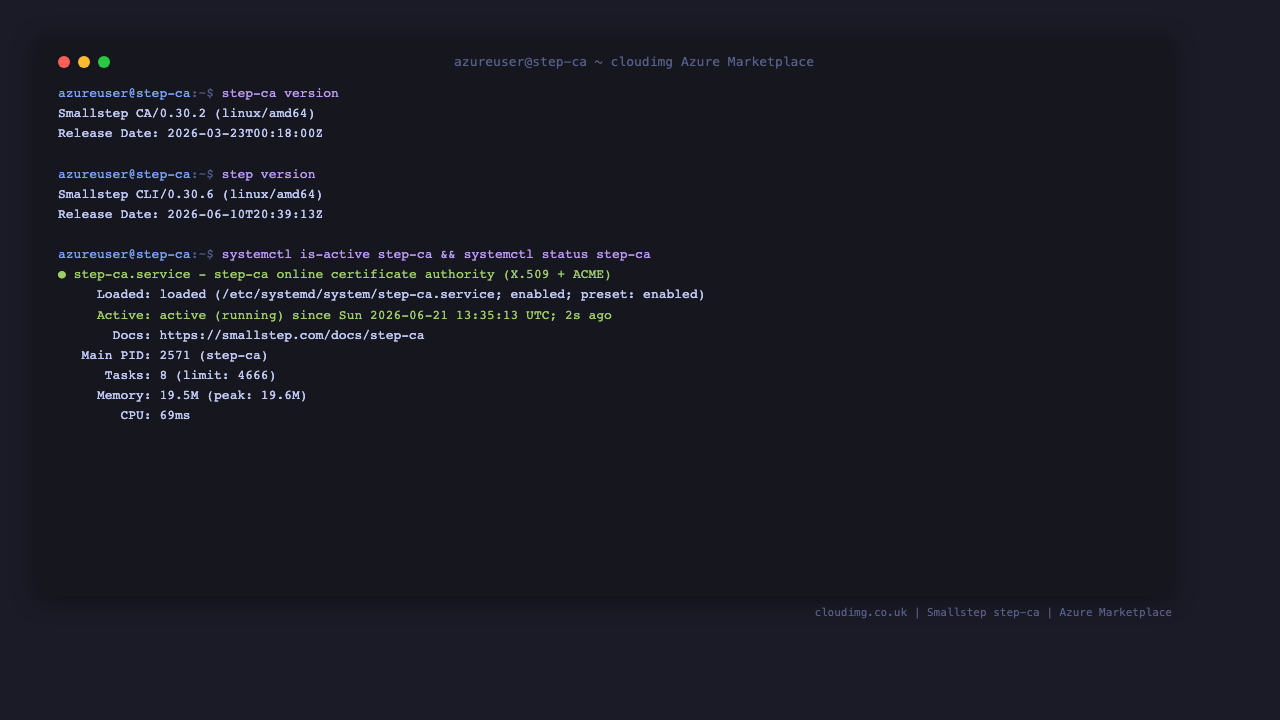
The service is active and the version is the pinned 0.30.2 release of step-ca with the matching 0.30.6 step CLI.
Step 5: Check the Certificate Authority Health
step-ca serves its X.509 and ACME API over TLS on the loopback address 127.0.0.1:8443. Because the API is served with the CA's own certificate chain, rooted in this VM's unique CA root rather than a public PKI, you query the health endpoint with curl -k.
curl -k https://127.0.0.1:8443/health
sudo ss -tln | grep 8443
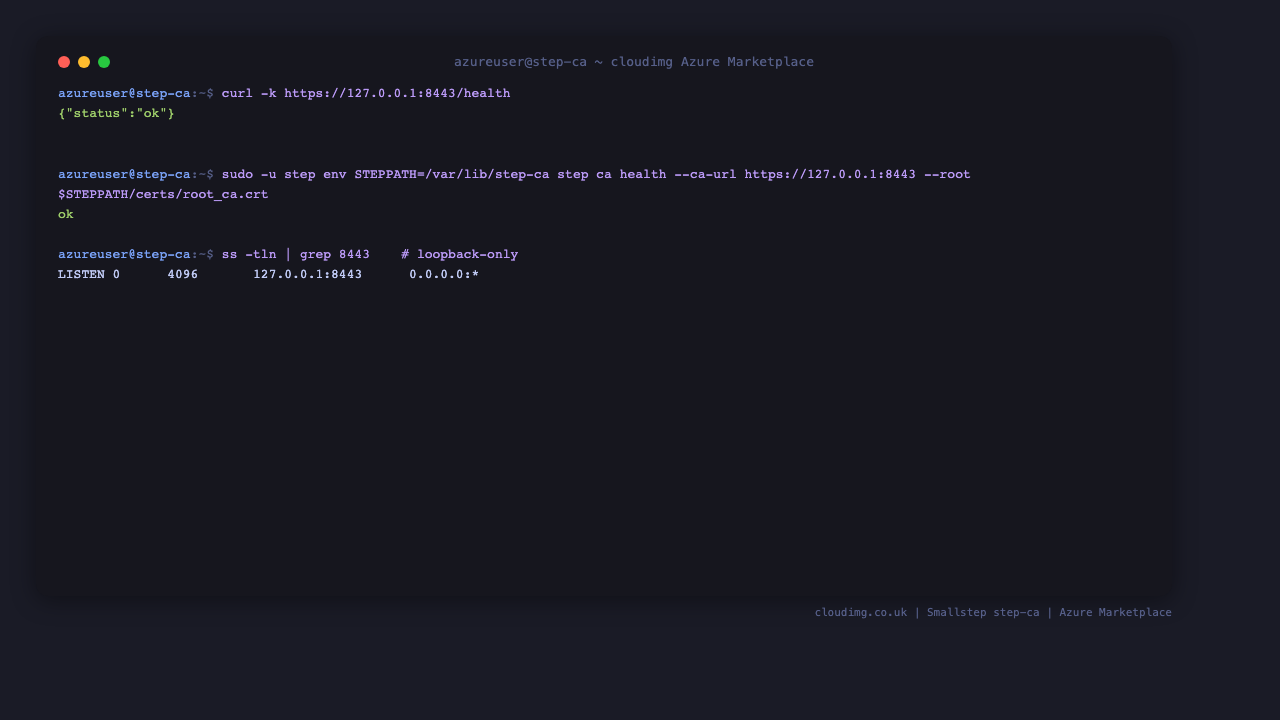
The health endpoint returns {"status":"ok"} and the listener is bound to 127.0.0.1:8443 only, so the CA is not exposed on any external interface.
Step 6: Read the Per-VM Credentials
On its first boot this VM generated its own random certificate authority key password and provisioner password and initialised a brand new certificate authority unique to this VM. The generated passwords, the provisioner name and the root certificate fingerprint are written to a root-only file. Read them with:
sudo cat /root/step-ca-credentials.txt
Keep these values safe. The provisioner password is what authorises issuing certificates, and the root fingerprint is what clients pin when they bootstrap against your CA.
Step 7: Issue a Certificate from the Provisioner
The CA has a password protected JWK provisioner named admin. Bootstrap a local client against the CA using the root fingerprint, then issue a short-lived leaf certificate. The block below reads the provisioner password and the root fingerprint straight from the credentials file, so it runs end to end without prompting.
export STEPPATH="$HOME/.step-demo"
FP=$(sudo grep '^stepca.root.fingerprint=' /root/step-ca-credentials.txt | cut -d= -f2-)
printf '%s' "<STEPCA_PROVISIONER_PASSWORD>" > /tmp/prov.pass
chmod 600 /tmp/prov.pass
step ca bootstrap --ca-url https://127.0.0.1:8443 --fingerprint "$FP" --force
step ca certificate web.internal /tmp/web.crt /tmp/web.key \
  --provisioner admin --provisioner-password-file /tmp/prov.pass --not-after 24h --force
rm -f /tmp/prov.pass
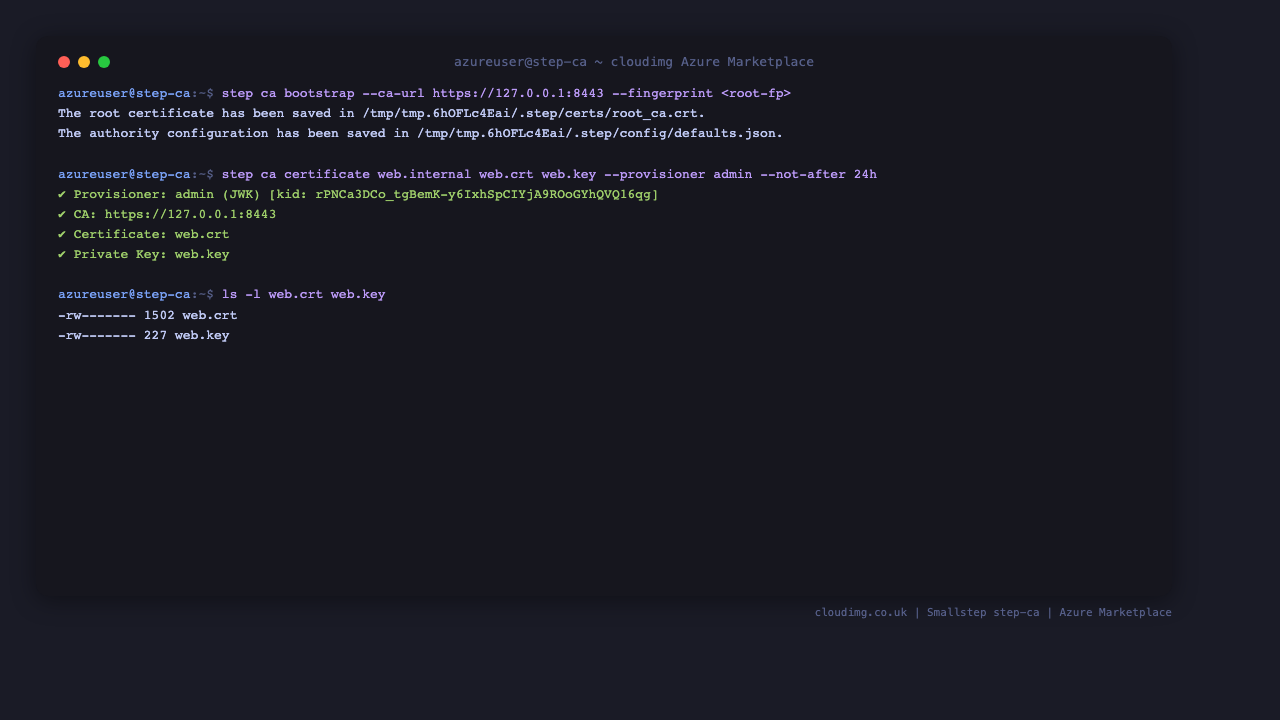
The step tool prints the provisioner, the CA URL and the paths of the issued certificate and private key. You now have a short-lived TLS certificate signed by your private CA.
Step 8: Inspect the Root Certificate
The root certificate is public material that clients trust. Inspect it and read its fingerprint with the step tool.
sudo -u step env STEPPATH=/var/lib/step-ca step certificate inspect /var/lib/step-ca/certs/root_ca.crt --short
sudo -u step env STEPPATH=/var/lib/step-ca step certificate fingerprint /var/lib/step-ca/certs/root_ca.crt
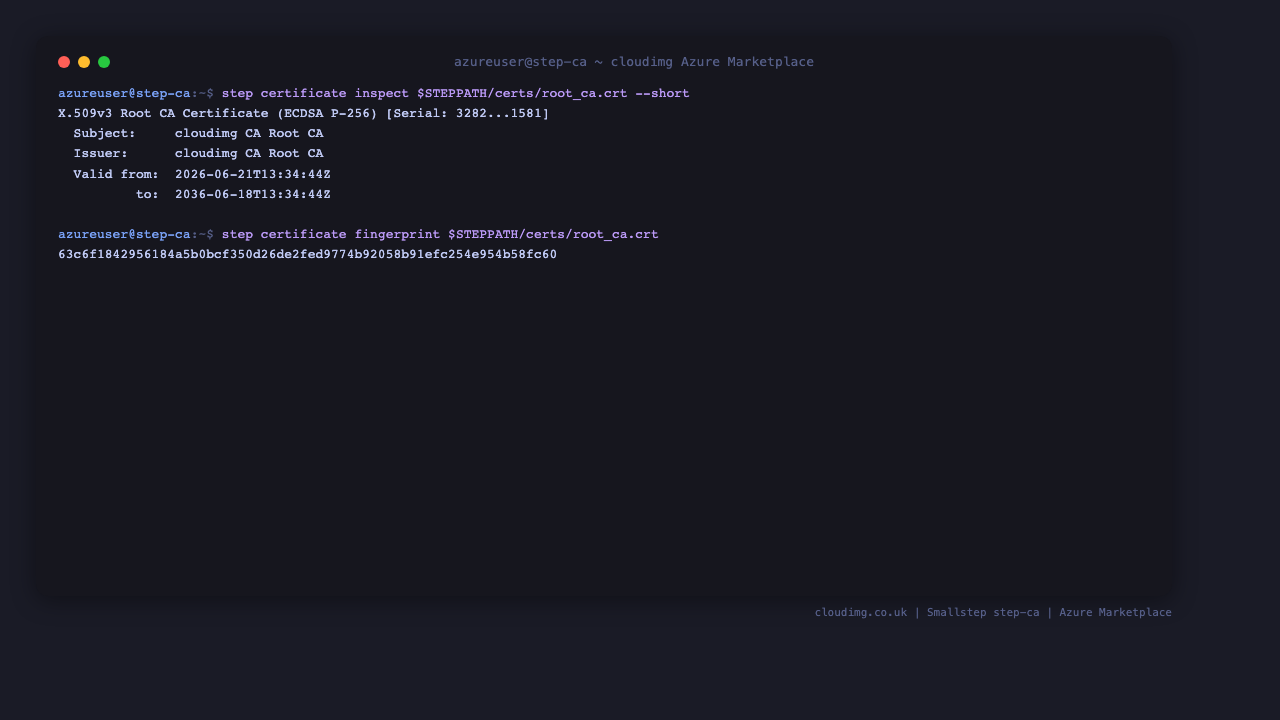
The root certificate is an ECDSA P-256 CA valid for ten years, issued and self-signed by this VM's own certificate authority.
Step 9: Open the CA Port for Remote Clients
The CA listens on loopback only by default, so out of the box only the VM itself can reach it. To let other hosts request certificates you must do two things: open the CA port in this VM's network security group, and make the CA reachable on a routable address.
To reach the running CA from your workstation without changing its binding, open an SSH tunnel:
ssh -L 8443:127.0.0.1:8443 azureuser@<vm-ip>
With the tunnel up, point a client at https://127.0.0.1:8443 from your workstation and bootstrap it with the root fingerprint shown in the credentials file.
To expose the CA to your network directly, add an inbound NSG rule for TCP 8443 from the client networks that need certificates, then re-initialise or reconfigure the CA so its address and DNS names match the routable address. Never open 8443 to the public internet without restricting the source ranges to the clients that need it.
Step 10: Use the ACME Provisioner
A default ACME provisioner is configured, so standard ACME clients can request and renew certificates automatically. Point any ACME client at the CA's ACME directory:
https://<ca-host>:8443/acme/acme/directory
Supply the CA root certificate to the client as its trust anchor (it is the public root_ca.crt under /var/lib/step-ca/certs). ACME clients then request and renew short-lived certificates against your private CA with no manual steps.
Step 11: Where the CA Material Lives
The certificate authority reads its configuration from a single JSON file, and all CA material lives on the dedicated data disk mounted at /var/lib/step-ca:
/var/lib/step-ca/config/ca.jsonis the main configuration: add and remove provisioners, adjust certificate lifetimes and templates, enable SSH certificates, and point ACME clients at the directory./var/lib/step-ca/certs/holds the public root and intermediate certificates./var/lib/step-ca/secrets/holds the encrypted signing keys, readable only by thestepuser.
After editing ca.json, reload the CA so it picks up the change:
sudo systemctl reload step-ca
systemctl is-active step-ca
Because the CA material sits on an independently resizable, snapshottable Azure data disk kept off the operating system disk, you can grow it and back it up without touching the OS volume.
Support
This image is maintained by cloudimg with 24/7 technical support by email and chat. Reach the team at support@cloudimg.co.uk for help with PKI design, provisioner configuration, ACME automation, certificate templates and lifetimes, SSH certificates, client bootstrapping, renewal and upgrade planning.
All product and company names are trademarks or registered trademarks of their respective holders. Use of them does not imply any affiliation with or endorsement by them.