Tinyproxy Egress Control Forward Proxy on AWS User Guide
Overview
Tinyproxy is a small, fast, open source HTTP and HTTPS forward proxy daemon. Clients on your network send their requests to it, it makes each request on their behalf, and it returns the response. It is a single lightweight service with a plain text configuration file and a very small memory footprint.
The cloudimg image builds Tinyproxy as an egress control proxy for your own VPC: one auditable outbound hop for instances that must reach the internet but should not have a general route to it. That role only works if the proxy is genuinely closed, because an open forward proxy is an abuse vector. So this image is closed by default three times over, and it can prove it.
The three locks:
- A deny by default source address allow list. The shipped
/etc/tinyproxy/tinyproxy.confpermits loopback and the private RFC1918 and RFC4193 ranges only. Because at least oneAllowrule is present, Tinyproxy denies every source that does not match, including the entire public internet, and it does so before it even looks at credentials. There is deliberately noAllow 0.0.0.0/0anywhere in the image. - Mandatory proxy authentication with no shared secret. On first boot the instance generates its own proxy password and injects it into the configuration. Every client must then present that username and password. Nothing is baked into the image, so no two instances ever share a credential.
- A closed security group by default. The Marketplace recommended security group for this listing opens SSH only. You open the proxy port yourself, scoped to your own VPC or subnet CIDR, so it is never exposed to the internet by an accidental default.
Tunnelled (CONNECT) connections are additionally restricted to the standard TLS ports, so the proxy cannot be repurposed to reach arbitrary TCP services, and the proxy identification header is disabled.
What is included:
- Tinyproxy 1.11.1, installed from the distribution archive and running as the unprivileged
tinyproxysystem user - A hardened
/etc/tinyproxy/tinyproxy.confwith a deny by default source address allow list and no allow all rule tinyproxy.servicelistening on TCP 8888tinyproxy-firstboot.service, which generates this instance's proxy password, injects it, re-asserts the secure configuration and proves the posture before reporting ready/usr/local/sbin/tinyproxy-roundtrip.sh, a one command proof of the whole security posture/usr/local/sbin/tinyproxy-exposure-check.sh, which fails closed if anything unexpected is listening on a non loopback address- A root only credentials file at
/root/tinyproxy-credentials.txt - Ubuntu 24.04 LTS base, latest patches, unattended security upgrades enabled
- 24/7 cloudimg support
Prerequisites
Before you deploy this image you need:
- An Amazon Web Services account where you can launch EC2 instances
- IAM permissions to launch instances, create security groups, and subscribe to AWS Marketplace products
- An EC2 key pair in the target Region for SSH access to the instance
- A VPC and subnet in the target Region. The proxy instance needs outbound internet access; the clients that will use it do not
- A security group allowing inbound TCP 22 from your management network. You will add inbound TCP 8888 scoped to your own VPC or subnet CIDR in Step 3
- The AWS CLI (version 2) installed locally if you plan to deploy from the command line
Connecting to your instance
Connect over SSH on port 22 as the default login user for the operating system variant you launched. This listing currently ships the following variant:
| OS variant | SSH login user |
|---|---|
| Ubuntu 24.04 LTS | ubuntu |
The proxy itself listens on TCP 8888 and is reached by your client hosts, not by SSH.
Step 1: Launch the Instance from the AWS Marketplace
Sign in to the AWS Management Console, open the EC2 service, and select Launch instance. Under Application and OS Images choose AWS Marketplace AMIs and search for Tinyproxy. Select the cloudimg listing and choose Select, then Continue on the subscription summary.
Pick an instance type of m5.large or larger (Tinyproxy is very light, but m5.large is the tested recommendation). Choose your EC2 key pair under Key pair (login). Under Network settings select your VPC and a subnet that has outbound internet access, and either create or select a security group that allows inbound port 22 from your management network.
Select Launch instance. First boot initialisation takes a few seconds after the instance state becomes Running and the status checks pass.
Step 2: Launch the Instance from the AWS CLI
The following command launches an instance from the cloudimg Tinyproxy Marketplace AMI into an existing subnet and security group. Replace <ami-id> with the AMI ID shown on the Marketplace listing, <key-name> with your EC2 key pair name, <subnet-id> with your subnet ID, and <security-group-id> with a security group that opens port 22 as described above.
aws ec2 run-instances \
  --image-id <ami-id> \
  --instance-type m5.large \
  --key-name <key-name> \
  --subnet-id <subnet-id> \
  --security-group-ids <security-group-id> \
  --metadata-options "HttpTokens=required,HttpEndpoint=enabled" \
  --tag-specifications 'ResourceType=instance,Tags=[{Key=Name,Value=tinyproxy}]'
The image resolves this instance's addresses on first boot using the EC2 Instance Metadata Service (IMDSv2), so it works with HttpTokens=required enabled.
Step 3: Open the proxy port to your own network only
This is the step that matters most, and it is deliberately left to you. The listing's recommended security group opens SSH only, so the proxy port is not reachable until you say so. Add one inbound rule for TCP 8888 and scope it to your own VPC or subnet CIDR, never to 0.0.0.0/0.
In the console: EC2 > Security Groups > your group > Inbound rules > Edit inbound rules > Add rule, then set Type to Custom TCP, Port range to 8888, and Source to Custom with your own VPC CIDR.
From the AWS CLI, replacing <security-group-id> with your group and <your-vpc-cidr> with your own range:
aws ec2 authorize-security-group-ingress \
  --group-id <security-group-id> \
  --protocol tcp --port 8888 \
  --cidr <your-vpc-cidr>
Even if this rule were ever widened by mistake, the proxy would still refuse a client from outside the private ranges. That is Step 7.
Step 4: Connect via SSH
Connect as the ubuntu user (see the Connecting to your instance table above for other variants).
ssh ubuntu@<public-ip>
The message of the day prints the proxy endpoint and the key operational commands as soon as you log in.
Step 5: Confirm the service is running
First boot starts Tinyproxy once it has generated this instance's proxy password and re-asserted the secure configuration.
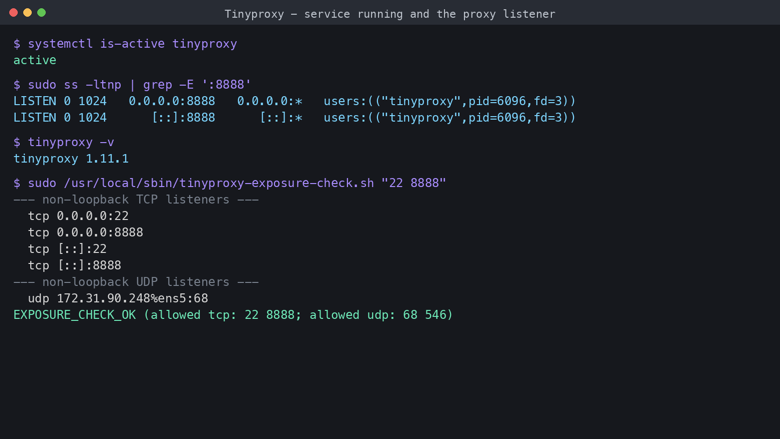
systemctl is-active tinyproxy
Real output from a running instance:
active
Confirm the proxy owns port 8888:
sudo ss -ltnp | grep -E ':8888'
Real output:
LISTEN 0      1024         0.0.0.0:8888      0.0.0.0:*    users:(("tinyproxy",pid=6096,fd=3))
LISTEN 0      1024            [::]:8888         [::]:*    users:(("tinyproxy",pid=6096,fd=3))
Step 6: Review the shipped access control list
The whole security posture is readable in one place. This prints the access control and tunnelling directives from the live configuration (the BasicAuth line holding this instance's password is deliberately not printed):
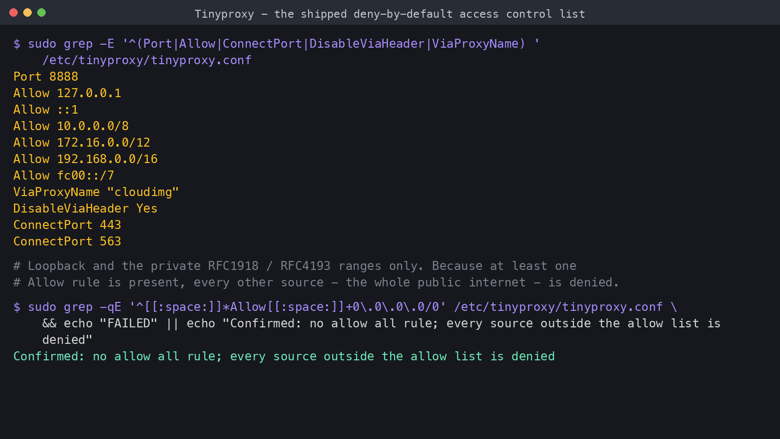
sudo grep -E '^(Port|Allow|ConnectPort|DisableViaHeader|ViaProxyName) ' /etc/tinyproxy/tinyproxy.conf
Real output from a running instance:
Port 8888
Allow 127.0.0.1
Allow ::1
Allow 10.0.0.0/8
Allow 172.16.0.0/12
Allow 192.168.0.0/16
Allow fc00::/7
ViaProxyName "cloudimg"
DisableViaHeader Yes
ConnectPort 443
ConnectPort 563
Because at least one Allow rule is present, every source that does not match one of those lines is denied. Confirm there is no allow all rule anywhere:
if sudo grep -qE '^[[:space:]]*Allow[[:space:]]+0\.0\.0\.0/0' /etc/tinyproxy/tinyproxy.conf; then
  echo "FAILED: an allow all rule is present"
  exit 1
fi
echo "Confirmed: no allow all rule; every source outside the allow list is denied"
Real output:
Confirmed: no allow all rule; every source outside the allow list is denied
Step 7: Prove the whole posture with one command
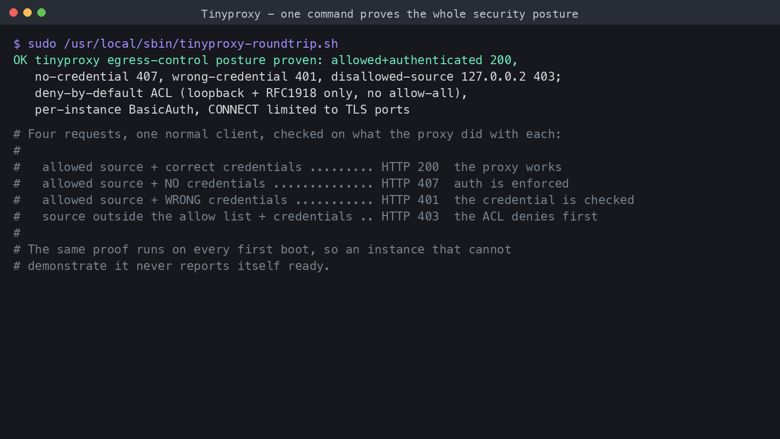
The image ships a single command that exercises every lock against the running service. It stands up a temporary local origin, then makes four requests with a normal client and checks what the proxy did with each one.
sudo /usr/local/sbin/tinyproxy-roundtrip.sh
Real output from a running instance:
OK tinyproxy egress-control posture proven: allowed+authenticated 200, no-credential 407, wrong-credential 401, disallowed-source 127.0.0.2 403; deny-by-default ACL (loopback + RFC1918 only, no allow-all), per-instance BasicAuth, CONNECT limited to TLS ports
Reading that line:
| Request | Result | What it proves |
|---|---|---|
| Allowed source, correct credentials | HTTP 200 | The proxy actually works |
| Allowed source, no credentials | HTTP 407 | Proxy authentication is enforced |
| Allowed source, wrong credentials | HTTP 401 | The credential is really checked |
| Source outside the allow list, correct credentials | HTTP 403 | The access control list denies before authentication is even considered |
The same proof runs automatically on every first boot, so an instance that cannot demonstrate it never reports itself ready.
Tinyproxy answers 401 Unauthorized when a client sends a proxy credential that is wrong, and 407 Proxy Authentication Required only when the client sends no credential at all. Both are refusals; the distinction is upstream behaviour, not a configuration choice.
Step 8: Retrieve this instance's proxy credentials
First boot generates a proxy password unique to this instance and writes it, with the proxy endpoint, to a root only file. Nothing secret ships inside the image, so this file is the only place the credential exists.
Print the non secret fields and confirm the password line is present, without putting the password on your screen:
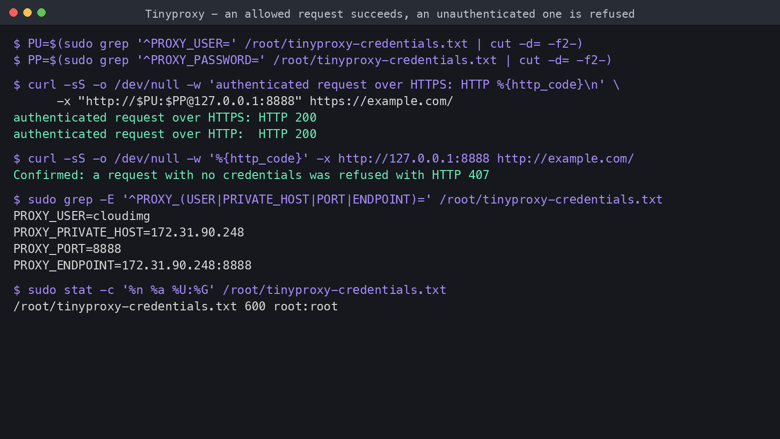
sudo grep -E '^PROXY_(USER|PRIVATE_HOST|PORT|ENDPOINT)=' /root/tinyproxy-credentials.txt
echo "PROXY_PASSWORD lines present: $(sudo grep -c '^PROXY_PASSWORD=' /root/tinyproxy-credentials.txt)"
sudo stat -c '%n %a %U:%G' /root/tinyproxy-credentials.txt
Real output from a running instance:
PROXY_USER=cloudimg
PROXY_PRIVATE_HOST=172.31.90.248
PROXY_PORT=8888
PROXY_ENDPOINT=172.31.90.248:8888
PROXY_PASSWORD lines present: 1
/root/tinyproxy-credentials.txt 600 root:root
When you do need the password itself, read the whole file. It looks like this, with the password shown here as a placeholder:
# Tinyproxy egress-control forward proxy - credentials for THIS instance, generated on
# its first boot. They are unique to this instance; nothing is baked into the image.
# Keep this file secret (0600 root:root).
#
PROXY_USER=cloudimg
PROXY_PASSWORD=<PROXY_PASSWORD>
PROXY_HOST=203.0.113.10
PROXY_PRIVATE_HOST=172.31.90.248
PROXY_PORT=8888
PROXY_ENDPOINT=172.31.90.248:8888
PROXY_ENDPOINT uses the instance's private address on purpose: that is how clients elsewhere in your VPC should reach it.
Step 9: Send a request through the proxy
This makes a real outbound request through the proxy, reading the credential from the root only file at run time so it never appears on screen:
PU=$(sudo grep '^PROXY_USER=' /root/tinyproxy-credentials.txt | cut -d= -f2-)
PP=$(sudo grep '^PROXY_PASSWORD=' /root/tinyproxy-credentials.txt | cut -d= -f2-)
curl -sS -o /dev/null -w 'authenticated request over HTTPS: HTTP %{http_code}\n' \
  --max-time 20 -x "http://$PU:$PP@127.0.0.1:8888" https://example.com/
curl -sS -o /dev/null -w 'authenticated request over HTTP:  HTTP %{http_code}\n' \
  --max-time 20 -x "http://$PU:$PP@127.0.0.1:8888" http://example.com/
Real output from a running instance:
authenticated request over HTTPS: HTTP 200
authenticated request over HTTP:  HTTP 200
The HTTPS request goes through a CONNECT tunnel on port 443, which is one of the two tunnel ports this image permits.
Now confirm that the same request without a credential is refused:
CODE=$(curl -sS -o /dev/null -w '%{http_code}' --max-time 20 -x http://127.0.0.1:8888 http://example.com/ 2>/dev/null)
if [ "$CODE" = "407" ]; then
  echo "Confirmed: a request with no credentials was refused with HTTP 407"
else
  echo "FAILED: expected HTTP 407 but observed HTTP $CODE"
  exit 1
fi
Real output:
Confirmed: a request with no credentials was refused with HTTP 407
Step 10: Point your own clients at the proxy
From any host inside your VPC that is covered by the allow list, set the standard proxy environment variables. Replace USER and PASSWORD with the values from Step 8 and <proxy-private-ip> with the PROXY_PRIVATE_HOST value:
export http_proxy=http://USER:PASSWORD@<proxy-private-ip>:8888
export https_proxy=$http_proxy
export no_proxy=169.254.169.254,localhost,127.0.0.1
curl -sS -o /dev/null -w '%{http_code}\n' https://example.com/
Keeping 169.254.169.254 in no_proxy matters: the EC2 Instance Metadata Service must never be reached through a proxy.
For a system wide setting, most tooling also reads the same variables from /etc/environment. Package managers have their own settings: APT reads /etc/apt/apt.conf.d/, and dnf/yum read a proxy= line in their configuration file.
Step 11: Confirm nothing else is exposed
The image ships a check that enumerates every listening socket and fails closed if anything unexpected is bound to a non loopback address. It runs during the build and again immediately before the image is captured, and you can run it yourself at any time:
sudo /usr/local/sbin/tinyproxy-exposure-check.sh "22 8888"
Real output from a running instance:
--- non-loopback TCP listeners ---
  tcp 0.0.0.0:22
  tcp 0.0.0.0:8888
  tcp [::]:22
  tcp [::]:8888
--- non-loopback UDP listeners ---
  udp 172.31.90.248%ens5:68
EXPOSURE_CHECK_OK (allowed tcp: 22 8888; allowed udp: 68 546)
Only SSH and the proxy port are reachable from the network. The UDP entry is the DHCP client.
Step 12: Read the proxy log
Every request through the proxy is logged in one place, which is the point of routing egress through a single hop.
sudo tail -4 /var/log/tinyproxy/tinyproxy.log
Real output from a running instance:
CONNECT   Jul 26 05:55:39.121 [6096]: Established connection to host "example.com" using file descriptor 7.
INFO      Jul 26 05:55:39.130 [6096]: Closed connection between local client (fd:6) and remote client (fd:7)
CONNECT   Jul 26 05:55:39.138 [6096]: Connect (file descriptor 6): 127.0.0.1
CONNECT   Jul 26 05:55:39.142 [6096]: Request (file descriptor 6): GET http://example.com/ HTTP/1.1
Set LogLevel Connect in the configuration to log every request line, or LogLevel Warning to quieten it down.
Widening the allow list to your own ranges
If your VPC CIDR is outside the RFC1918 ranges, or you want to narrow the allow list further to a single subnet, edit the configuration and restart. Add or replace Allow lines, then apply:
sudo nano /etc/tinyproxy/tinyproxy.conf
# add, for example:  Allow 10.42.0.0/16
sudo systemctl restart tinyproxy
sudo /usr/local/sbin/tinyproxy-roundtrip.sh
Re-running the proof after any configuration change is the fastest way to confirm you have not accidentally opened the proxy. Never add Allow 0.0.0.0/0: that turns the instance into an open proxy, which will be found and abused within hours.
Rotating the proxy password
The password lives on one line of the configuration file:
sudo nano /etc/tinyproxy/tinyproxy.conf
# edit the line:  BasicAuth cloudimg <new-password>
sudo systemctl restart tinyproxy
Then update /root/tinyproxy-credentials.txt so the file stays the single source of truth for the instance, and update any client that uses it.
Filtering which destinations may be reached
Tinyproxy can also restrict where clients are allowed to go, which pairs naturally with egress control. Create a filter file with one pattern per line and reference it from the configuration:
sudo tee /etc/tinyproxy/filter >/dev/null <<'EOF'
^example\.com$
^.*\.internal$
EOF
sudo tee -a /etc/tinyproxy/tinyproxy.conf >/dev/null <<'EOF'
Filter "/etc/tinyproxy/filter"
FilterURLs Off
FilterExtended On
FilterDefaultDeny Yes
EOF
sudo systemctl restart tinyproxy
FilterDefaultDeny Yes makes the filter an allow list: only destinations matching a pattern are reachable. Leave it off to use the filter as a block list instead.
Maintenance
Service control
sudo systemctl status tinyproxy
sudo systemctl restart tinyproxy
sudo journalctl -u tinyproxy -n 50 --no-pager
Configuration
The single configuration file is /etc/tinyproxy/tinyproxy.conf. The distribution's stock file is kept alongside it as tinyproxy.conf.orig for reference. After any change, restart the service and re-run the posture proof.
Updates
The image has unattended security upgrades enabled. To update Tinyproxy itself along with the rest of the system:
sudo apt-get update && sudo apt-get upgrade -y
sudo systemctl restart tinyproxy
sudo /usr/local/sbin/tinyproxy-roundtrip.sh
Tuning
MaxClients (default 100 in this image) caps concurrent connections, and Timeout (600 seconds) controls how long an idle connection is held. Raise MaxClients before raising the instance size; Tinyproxy is rarely the bottleneck.
Troubleshooting
| Symptom | Likely cause | Fix |
|---|---|---|
| Client gets HTTP 403 | The client's source address is not covered by an Allow line |
Add the client's CIDR to /etc/tinyproxy/tinyproxy.conf and restart |
| Client gets HTTP 407 | No proxy credential was sent | Include the username and password in the proxy URL, or in your client's proxy authentication settings |
| Client gets HTTP 401 | A credential was sent but it is wrong | Re-read the password from /root/tinyproxy-credentials.txt |
| Connection times out from another host | Security group does not allow TCP 8888 from that host | Add the inbound rule from Step 3, scoped to your own CIDR |
| HTTPS works but a non standard TLS port fails | CONNECT is restricted to ports 443 and 563 |
Add a ConnectPort line for the port you need, and only that port |
| Instance metadata calls fail on a client | The metadata service is being sent through the proxy | Add 169.254.169.254 to no_proxy |
Support
cloudimg provides 24/7 technical support for this image via email and live chat.
- Email: support@cloudimg.co.uk
- Live chat: available 24/7 on cloudimg.co.uk
Tinyproxy is free software maintained by the Tinyproxy project and its contributors, licensed under the GNU General Public License version 2. cloudimg is not affiliated with or endorsed by the Tinyproxy project.