Traefik Proxy on AWS User Guide
Overview
This image runs Traefik Proxy, the modern, cloud native reverse proxy and load balancer that makes publishing services simple. Traefik discovers your services through the file, Docker, Kubernetes and other providers, routes traffic with expressive rule matchers, terminates TLS and obtains certificates automatically from Let's Encrypt.
The Traefik static binary is installed under /usr/local/bin/traefik and runs as a dedicated unprivileged traefik system account under a systemd service that starts it on boot and restarts it on failure. The service is granted only the CAP_NET_BIND_SERVICE capability so it can bind the privileged ports 80 and 443 without running as root. The static configuration, the dynamic configuration directory and the Let's Encrypt certificate store live under /etc/traefik, which is a dedicated, independently resizable EBS data volume.
The Traefik dashboard ships with no authentication by default, so it is never exposed unprotected. A dynamic router publishes the dashboard and API on the web entrypoint (port 80) under the /dashboard and /api path prefixes, gated by an HTTP Basic authentication middleware. The dashboard password is generated on the first boot of every deployed instance, so two instances launched from the same Amazon Machine Image never share a password. It is written to /root/traefik-credentials.txt with mode 0600 so that only the root user can read it.
Prerequisites
Before you deploy this image you need:
- An Amazon Web Services account where you can launch EC2 instances
- IAM permissions to launch instances, create security groups, and subscribe to AWS Marketplace products
- An EC2 key pair in the target Region for SSH access to the instance
- A VPC and subnet in the target Region, with a security group allowing inbound port 22 from your management network, port 80 for the dashboard and the web entrypoint, and port 443 for the websecure entrypoint
- The AWS CLI (version 2) installed locally if you plan to deploy from the command line
Step 1: Launch the Instance from the AWS Marketplace
Sign in to the AWS Management Console, open the EC2 service, and select Launch instance. Under Application and OS Images choose AWS Marketplace AMIs and search for Traefik Proxy. Select the cloudimg listing and choose Select, then Continue on the subscription summary.
Pick an instance type of t3.medium or larger. Choose your EC2 key pair under Key pair (login). Under Network settings select your VPC and subnet, and either create or select a security group that opens port 22 from your management network, port 80 for the dashboard and web entrypoint, and port 443 for the websecure entrypoint. Leave the root volume at the default size or larger.
Select Launch instance. First boot initialisation takes a few seconds after the instance state becomes Running and the status checks pass.
Step 2: Launch the Instance from the AWS CLI
The following block launches an instance from the cloudimg Traefik Proxy Marketplace AMI into an existing subnet and security group. Replace <ami-id> with the AMI ID shown on the Marketplace listing, <key-name> with your EC2 key pair name, <subnet-id> with your subnet ID, and <security-group-id> with a security group that opens ports 22, 80 and 443 as described above.
aws ec2 run-instances \
  --image-id <ami-id> \
  --instance-type t3.medium \
  --key-name <key-name> \
  --subnet-id <subnet-id> \
  --security-group-ids <security-group-id> \
  --tag-specifications 'ResourceType=instance,Tags=[{Key=Name,Value=traefik}]'
When the instance reaches the Running state and its status checks pass, note its public IP address or DNS name from the EC2 console or with aws ec2 describe-instances.
Step 3: Connect to Your Instance
Connect over SSH using your key pair and the login user for your operating system variant.
| OS variant | SSH login user |
|---|---|
| Ubuntu 24.04 | ubuntu |
ssh -i <key-name>.pem ubuntu@<public-ip>
Step 4: Retrieve the Dashboard Password
The dashboard password is unique to your instance and was generated on first boot. Read it as root:
sudo cat /root/traefik-credentials.txt
The file lists the dashboard URL, the dashboard user (admin) and the generated password, along with usage notes. Keep this password somewhere safe.
Step 5: Sign In to the Web Dashboard
The dashboard and API are served on port 80 under the /dashboard and /api path prefixes, behind an HTTP Basic authentication middleware. In a browser, go to:
http://<instance-public-ip>/dashboard/
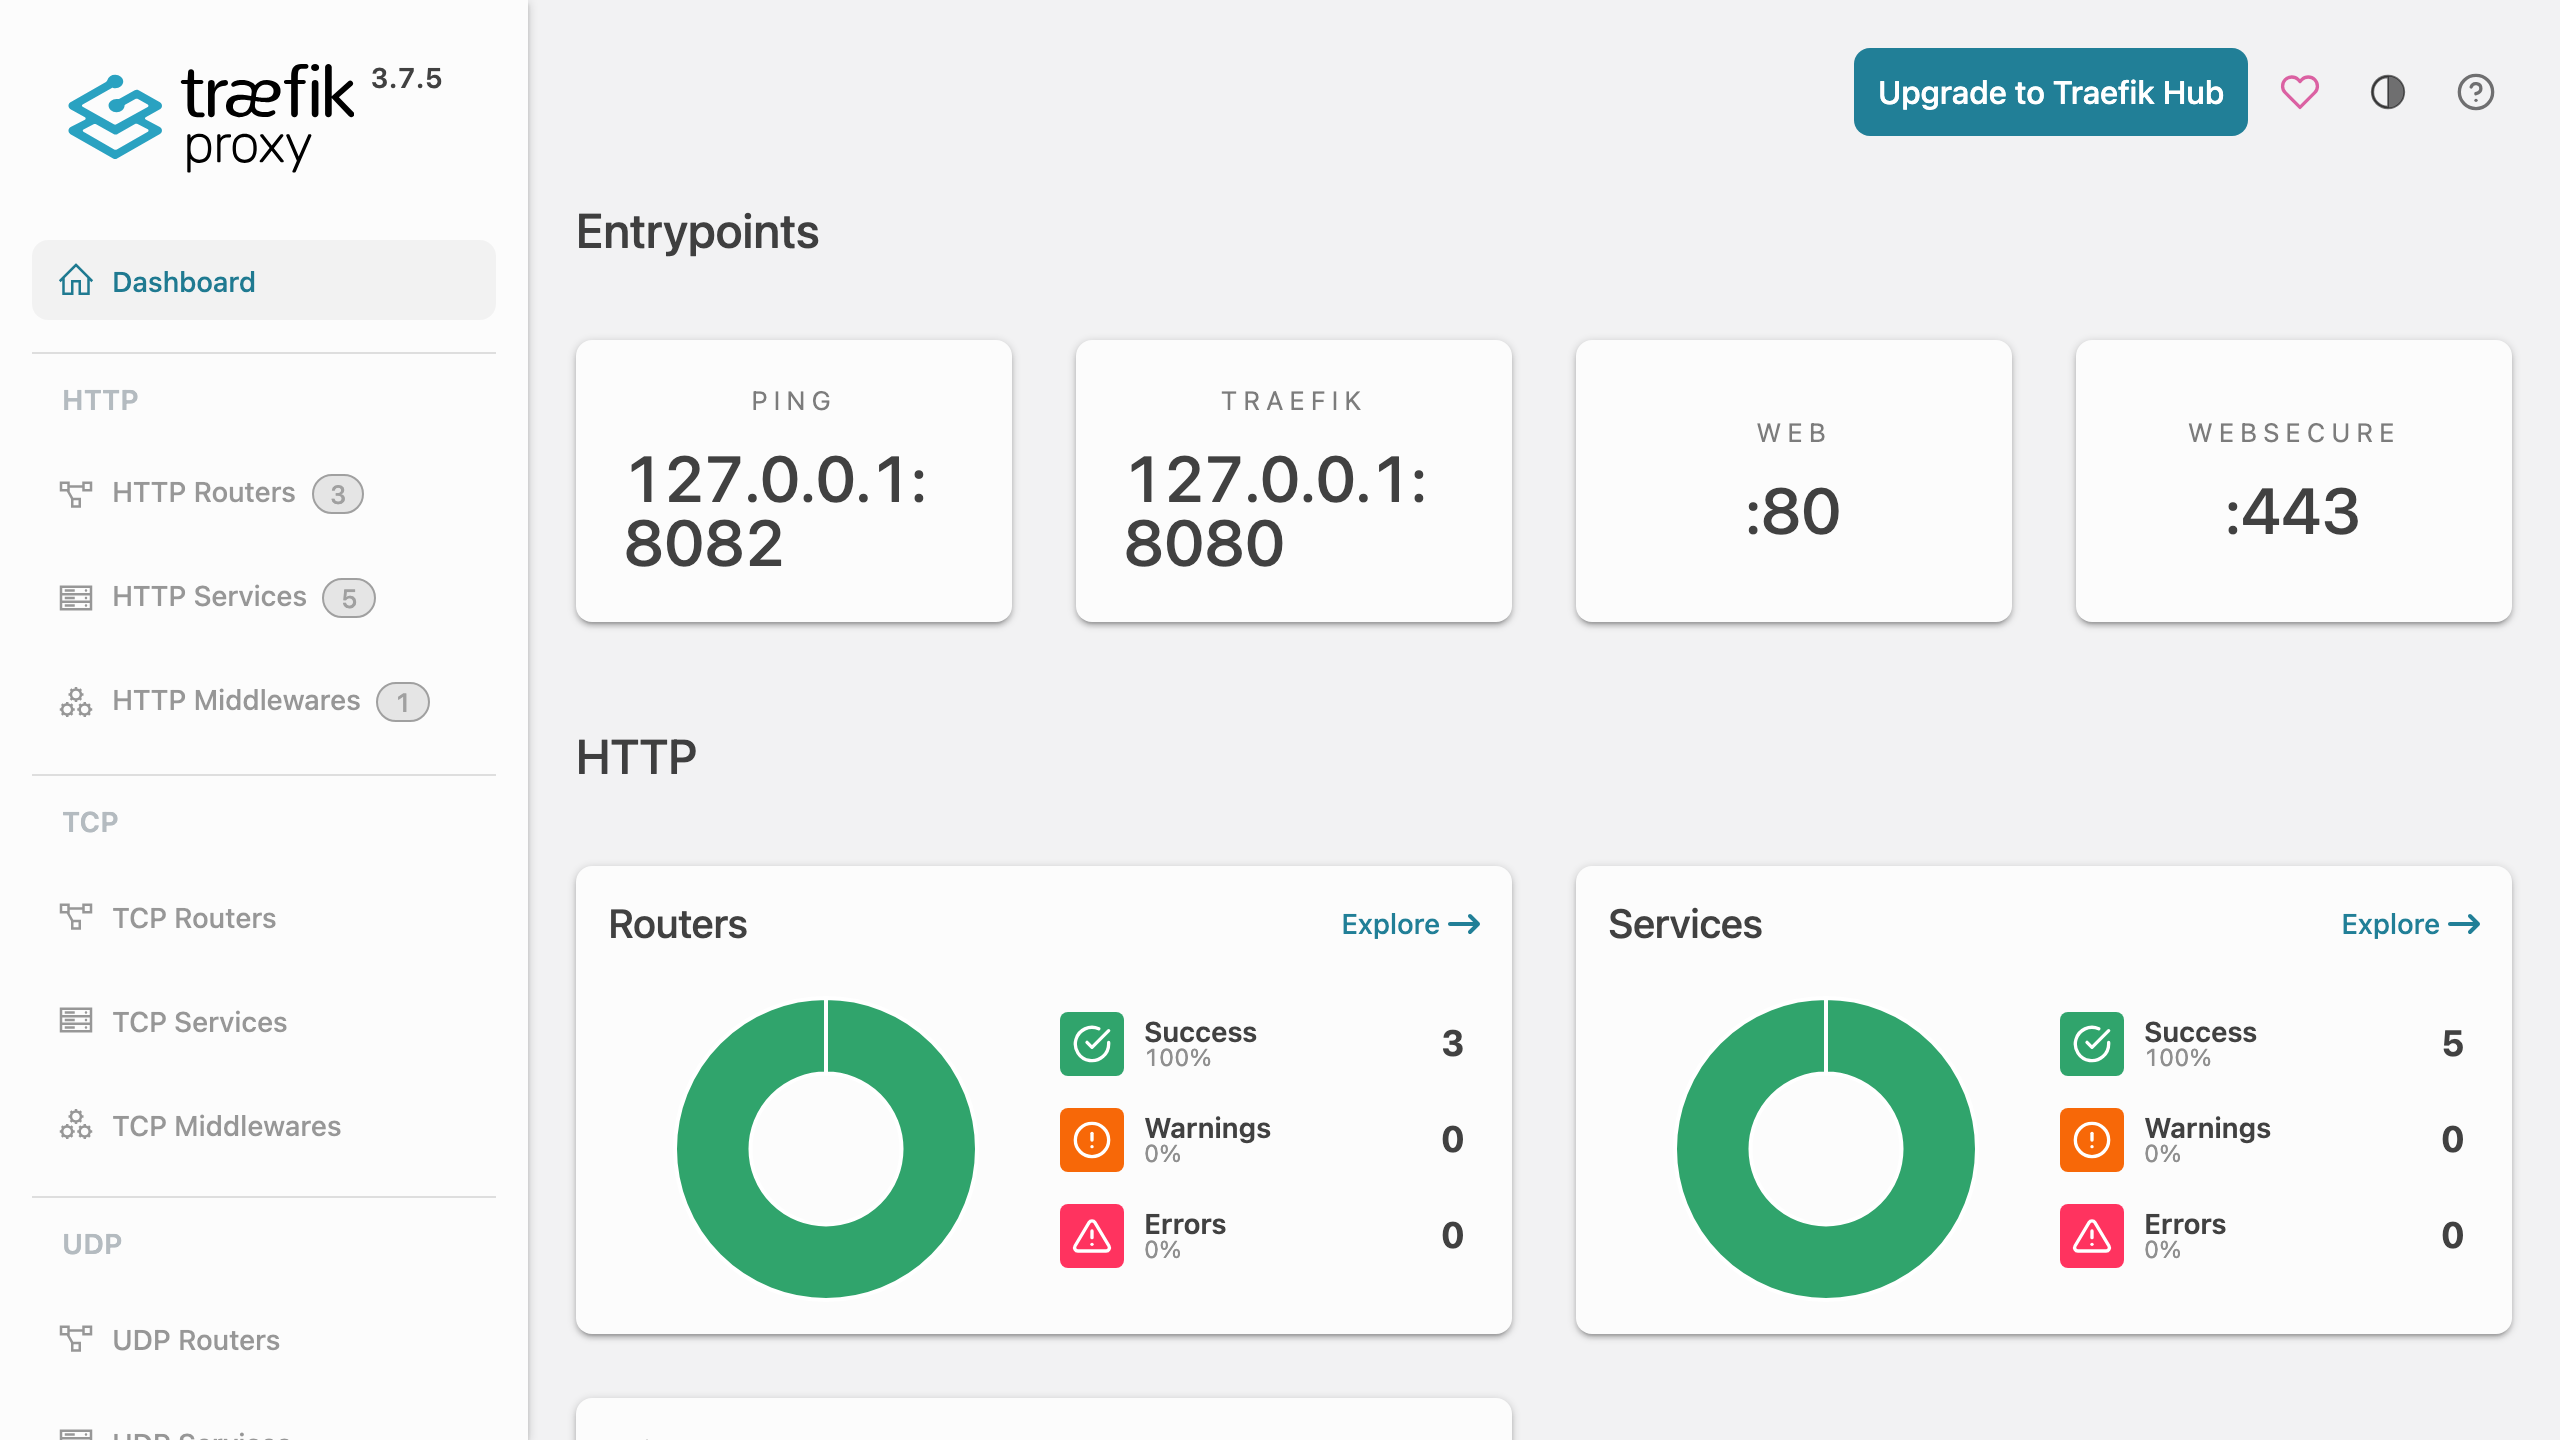
You are prompted for credentials. Sign in as admin with the password from the credentials file. The dashboard home shows your entrypoints (the web entrypoint on :80, the websecure entrypoint on :443, and the loopback traefik and ping entrypoints) and a live count of HTTP and TCP routers, services and middlewares.
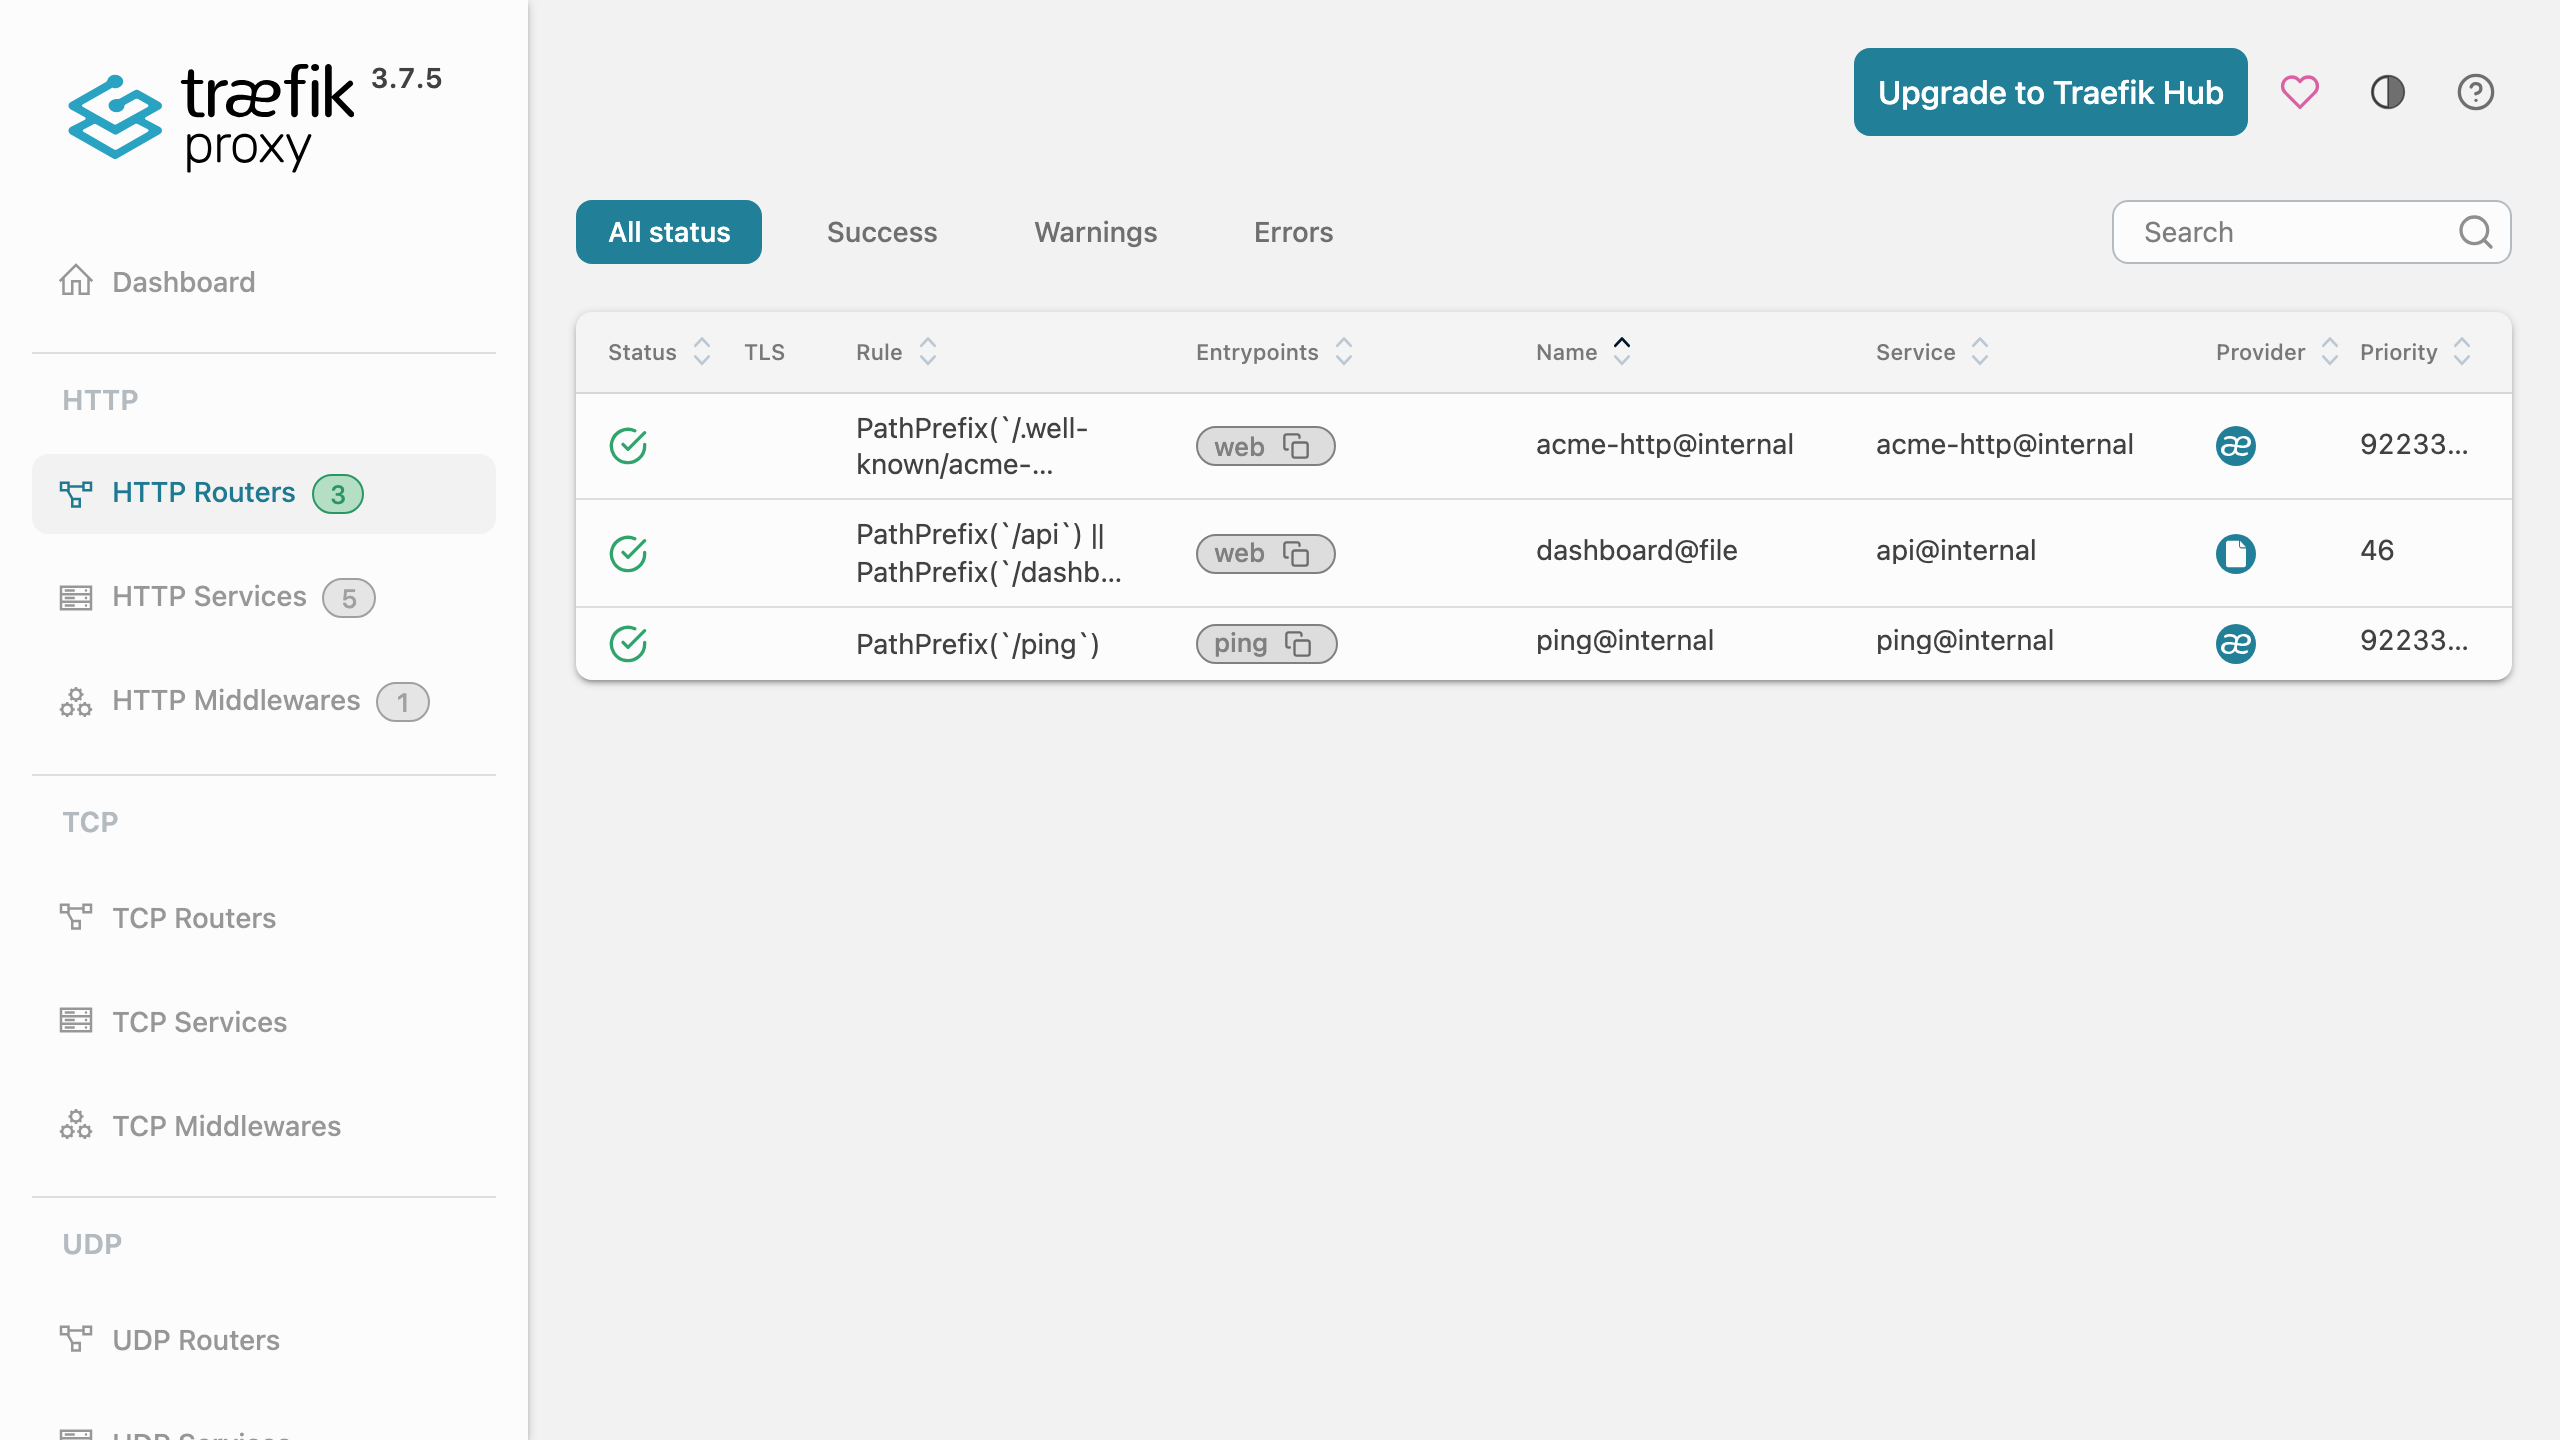
Select HTTP Routers in the sidebar to list every configured router with its rule, entrypoints, service and priority. Out of the box you see the router that publishes the dashboard and API and the internal ACME and ping routers.
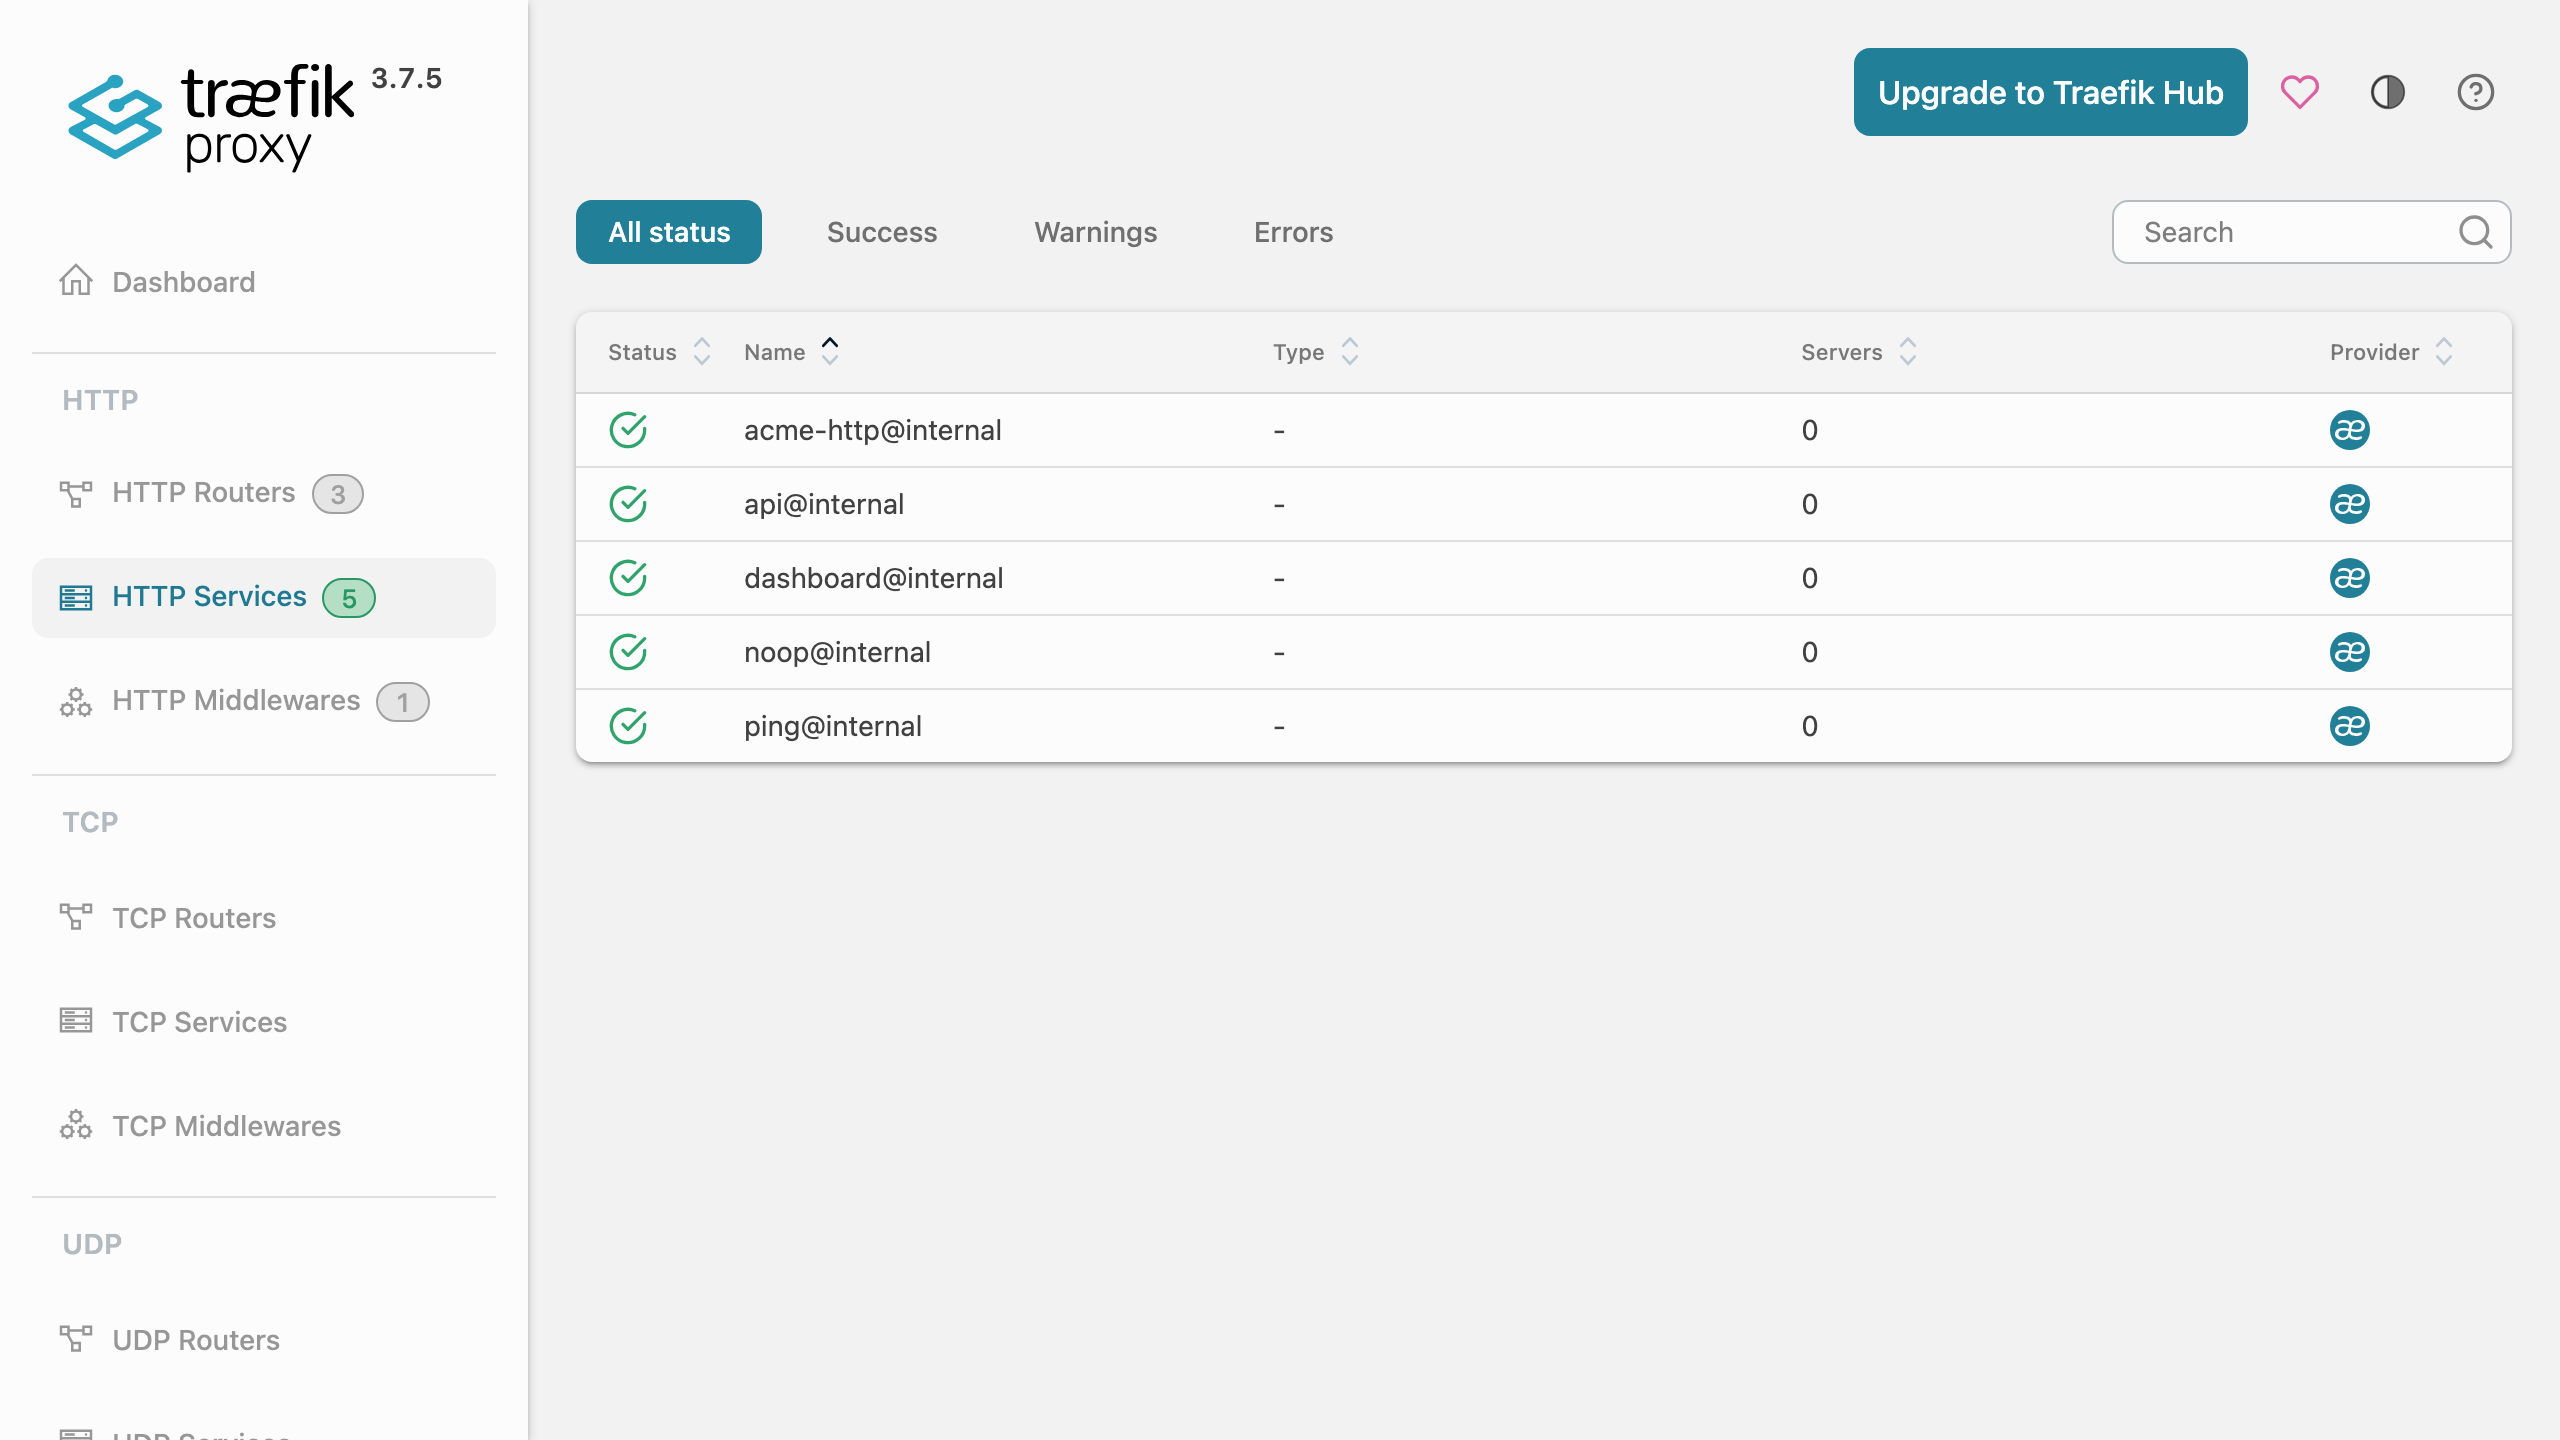
Select HTTP Services to inspect the backend services, their load balancer servers and their health status. Routers reference services by name, and a service is what actually load balances across your backend servers.
Step 6: Confirm Traefik Is Running
Over SSH, confirm the service is active, the health endpoint answers, and the entrypoints are listening:
sudo systemctl is-active traefik
curl -s http://127.0.0.1:8082/ping
The first command reports active and the ping endpoint returns OK. Confirm the binary version and that the entrypoints are bound:
traefik version
sudo ss -tlnp | grep -E ':(80|443|8080|8082) '
You should see Traefik listening on :80 (the web entrypoint) and :443 (the websecure entrypoint), with the dashboard entrypoint on 127.0.0.1:8080 and the ping entrypoint on 127.0.0.1:8082 bound to loopback only.
Step 7: The Configuration Layout
Traefik is configured in two parts. The static configuration at /etc/traefik/traefik.yml defines the entrypoints, providers, the API and dashboard, and the certificate resolvers; it is read once at startup. The dynamic configuration lives in /etc/traefik/dynamic/ and is watched by the file provider, so adding, editing or removing routers, services and middlewares there hot reloads with no service restart.
sudo ls -la /etc/traefik/dynamic/
You see dashboard.yml, which publishes the dashboard and API behind the HTTP Basic authentication middleware. Drop your own YAML files alongside it to publish your backends.
Step 8: Publish a Backend Service
To route traffic to one of your backends, create a router and a service in a new file under the watched dynamic config directory. The following example, saved as /etc/traefik/dynamic/my-app.yml, routes requests whose Host header is app.example.com on the web entrypoint to a backend at 10.0.0.10:8080:
http:
  routers:
    my-app:
      rule: "Host(`app.example.com`)"
      entryPoints:
        - web
      service: my-app
  services:
    my-app:
      loadBalancer:
        servers:
          - url: "http://10.0.0.10:8080"
Save the file and Traefik hot reloads it within a second. Refresh the HTTP Routers and HTTP Services views in the dashboard and your new router and service appear. Define weighted load balancing, health checks, sticky sessions, rate limiting, headers, redirects and circuit breakers the same way; see the Traefik routing documentation for the full set of options.
Step 9: Query the API
The Traefik API is published alongside the dashboard on port 80 under /api, behind the same HTTP Basic authentication. From outside the instance, send requests to http://<instance-public-ip>/api/... with basic auth user admin and the generated password. For example, fetch the routers overview:
curl -s -u admin:<password> http://<instance-public-ip>/api/http/routers
The /api/overview endpoint returns the counts shown on the dashboard home, and /api/http/routers, /api/http/services and /api/http/middlewares return the full live configuration as JSON.
Step 10: The Data Volume
The static config, the dynamic config directory and the Let's Encrypt certificate store all live on a dedicated EBS volume mounted at /etc/traefik. This keeps your routing configuration and certificates off the operating system disk and lets you resize or snapshot them independently. Confirm the mount with:
df -h /etc/traefik
To grow the volume, expand the EBS volume in the AWS console, then grow the filesystem on the instance with sudo resize2fs on the underlying device. Because the dynamic config and the ACME store live here, your routers and issued certificates survive replacing the instance.
Step 11: Enable Automatic HTTPS with Let's Encrypt
A Let's Encrypt certificate resolver named letsencrypt is pre configured in the static config using the ACME HTTP-01 challenge, with its store at /etc/traefik/acme.json. It is inert until you attach it to a router with a real domain. To enable HTTPS for a backend, point a DNS A record at the instance's public IP, then add a router on the websecure entrypoint with TLS and the resolver, for example in /etc/traefik/dynamic/my-app.yml:
http:
  routers:
    my-app-secure:
      rule: "Host(`app.example.com`)"
      entryPoints:
        - websecure
      service: my-app
      tls:
        certResolver: letsencrypt
Edit the resolver email in /etc/traefik/traefik.yml to your own address before requesting certificates in production. On the first request for the domain, Traefik obtains and stores the certificate automatically and renews it before expiry. Restrict the security group so that only the networks that need to reach your services can connect to ports 80 and 443.
Step 12: Backup and Maintenance
Back up your configuration and certificates by snapshotting the /etc/traefik EBS volume, which captures the static config, the dynamic config directory and the ACME store. Apply operating system security updates with sudo apt-get update && sudo apt-get upgrade and reboot when a new kernel is installed; Traefik starts automatically on boot. To upgrade Traefik itself, replace the binary at /usr/local/bin/traefik with a newer release and restart the service with sudo systemctl restart traefik.
Support
This image is published and supported by cloudimg. Support covers deployment, router and middleware configuration, provider setup, automatic TLS and Let's Encrypt, load balancing strategies, and edge hardening. Contact cloudimg through the support channel listed on the AWS Marketplace listing.
All product and company names are trademarks or registered trademarks of their respective holders. Use of them does not imply any affiliation with or endorsement by them.