Traefik Proxy on Ubuntu 24.04 on Azure User Guide
Overview
Traefik Proxy is the cloud-native edge router that makes publishing your services fast and easy. It receives requests on behalf of your system and routes them to the right backend using a rich rule engine (host, path, headers and more), with built-in load balancing, middlewares (auth, rate limiting, retries, redirects), automatic HTTPS via Let's Encrypt, and a live web dashboard. The cloudimg image installs Traefik 3.7.5 as a dedicated systemd service that binds ports 80 and 443 directly, exposes its dashboard at /dashboard/ behind HTTP basic auth, persists ACME certificate storage and logs on a dedicated Azure data disk, and generates a unique dashboard password on the first boot of every VM. Backed by 24/7 cloudimg support.
What is included:
- Traefik Proxy 3.7.5 (a single static Go binary) at
/usr/local/bin/traefik web(:80),websecure(:443) and a loopbackping(127.0.0.1:8082) entrypoint- The built-in dashboard/API at
/dashboard/on:80, protected by a basicAuth middleware (api.insecureisfalse) - A pre-configured Let's Encrypt certificate resolver (HTTP challenge)
- A dedicated Azure data disk at
/var/lib/traefikfor ACME storage (acme.json) and logs - separate from the OS disk and re-provisioned with every VM - File-provider dynamic configuration in
/etc/traefik/dynamic/for your routers and services traefik.servicerunning as an unprivileged user with onlyCAP_NET_BIND_SERVICE- 24/7 cloudimg support
Prerequisites
An active Azure subscription, an SSH key pair, and a VNet + subnet in the target region. Standard_B2ms (2 vCPU / 8 GiB RAM) is a good starting point; scale up for high request volumes. NSG inbound: allow 22/tcp from your management network, 80/tcp and 443/tcp for the proxied traffic and the dashboard. For real Let's Encrypt certificates, point a DNS name at the VM's public IP.
Step 1 - Deploy from the Azure Marketplace
Sign in to the Azure Portal, choose Create a resource, search the Marketplace for Traefik Proxy by cloudimg, and select Create. On Basics pick your subscription, resource group, region and size; under Administrator account choose SSH public key and paste your key; under Inbound port rules allow SSH (22), HTTP (80) and HTTPS (443). Review the dedicated data disk on the Disks tab, then Review + create -> Create.
Step 2 - Deploy from the Azure CLI
az vm create \
  --resource-group <your-rg> \
  --name traefik \
  --image <marketplace-image-urn> \
  --size Standard_B2ms \
  --admin-username azureuser \
  --ssh-key-values ~/.ssh/id_ed25519.pub \
  --vnet-name <your-vnet> --subnet <your-subnet> \
  --public-ip-sku Standard

az vm open-port --resource-group <your-rg> --name traefik --port 80 --priority 1010
az vm open-port --resource-group <your-rg> --name traefik --port 443 --priority 1020
Step 3 - Connect to your VM
ssh azureuser@<vm-public-ip>
Step 4 - Confirm the service is running
systemctl is-active traefik.service
It reports active. Traefik starts in under a second.
Step 5 - Retrieve your dashboard password
The dashboard password is generated uniquely on the first boot of your VM and written to a root-only file:
sudo cat /root/traefik-credentials.txt
This file contains TRAEFIK_ADMIN_USER (admin) and TRAEFIK_ADMIN_PASSWORD, plus the dashboard URL. Store the password somewhere safe.
Step 6 - Check the health endpoint
Traefik exposes an unauthenticated ping endpoint on a loopback entrypoint for health probes:
curl -s http://localhost:8082/ping
It returns OK.
Step 7 - Open the dashboard
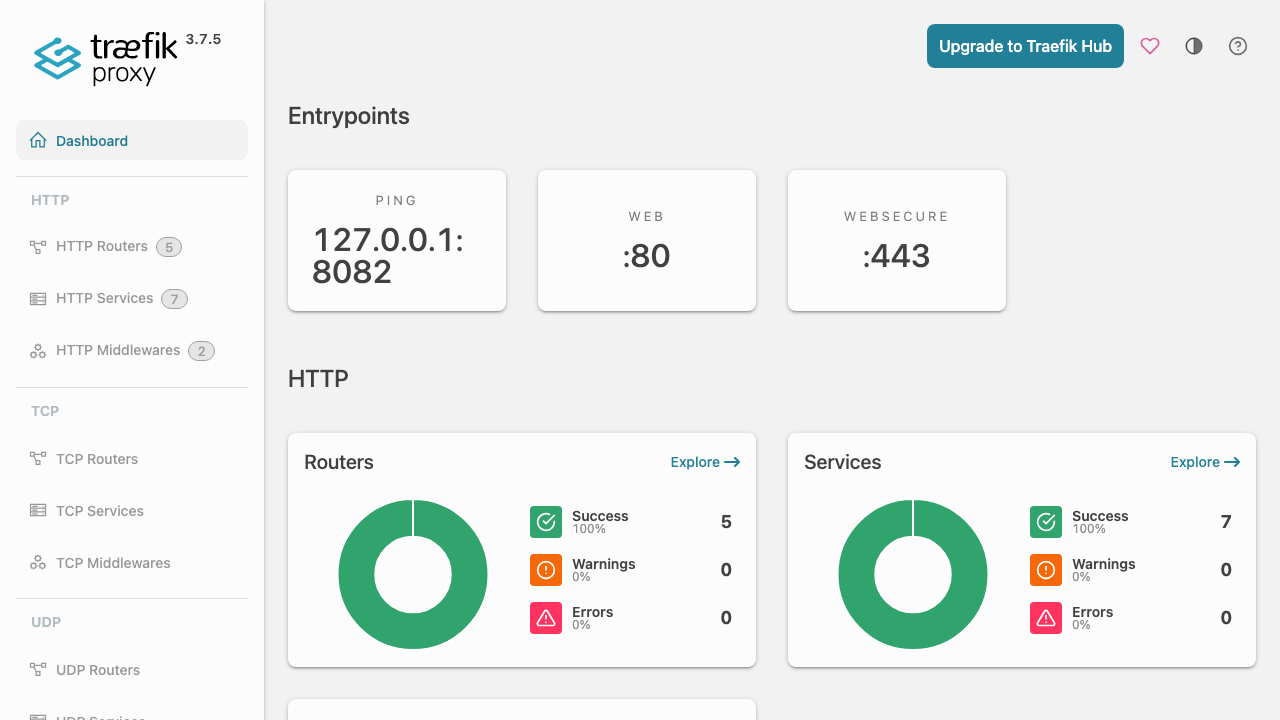
Browse to http://<vm-public-ip>/dashboard/ and sign in as admin with the password from Step 5. The dashboard shows your entrypoints, and the routers, services and middlewares Traefik has loaded, with live health.
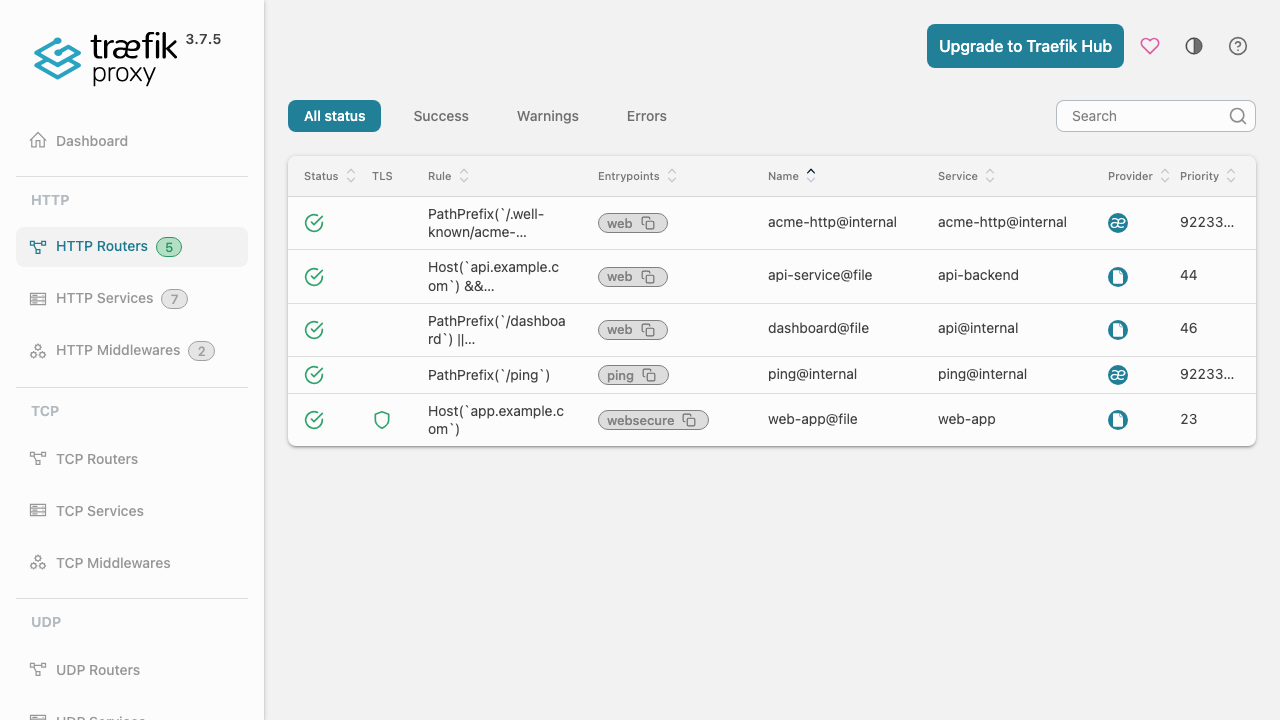
The HTTP Routers view lists every router and the rule that matches requests to it:
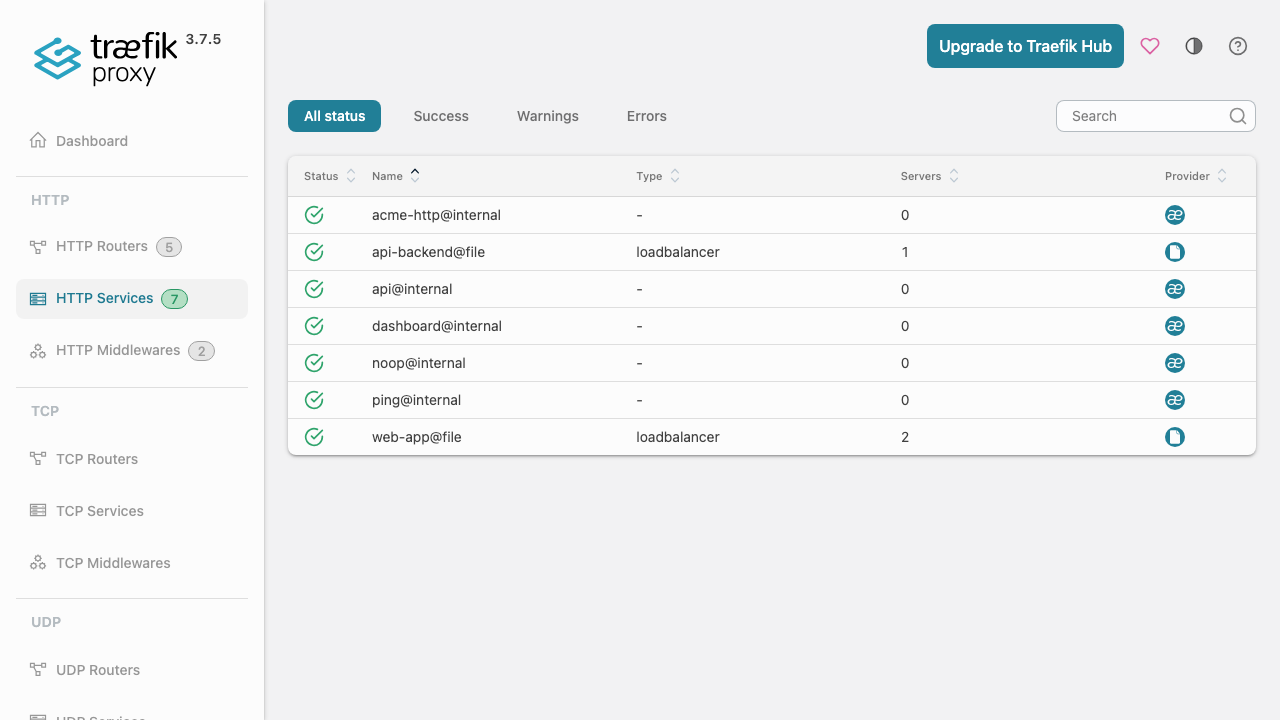
The HTTP Services view shows your backends and their load-balanced servers:
Step 8 - Confirm the API from the command line
The Traefik API is available behind the same basic auth. Confirm it is serving and reports its router/provider tree:
curl -s -u admin:<TRAEFIK_ADMIN_PASSWORD> http://localhost/api/overview | head -c 300; echo
You get a JSON response describing the http, tcp and udp routers, services and middlewares, plus enabled features and providers.
Step 9 - Define a router and service
Traefik watches /etc/traefik/dynamic/ for configuration. Drop a YAML file there to route a hostname to your backend, with TLS from the pre-configured Let's Encrypt resolver and a rate-limit middleware:
# /etc/traefik/dynamic/my-app.yml
http:
  routers:
    my-app:
      rule: "Host(`app.example.com`)"
      service: my-app
      entryPoints: ["websecure"]
      tls:
        certResolver: letsencrypt
  services:
    my-app:
      loadBalancer:
        servers:
          - url: "http://10.0.1.10:8080"
          - url: "http://10.0.1.11:8080"
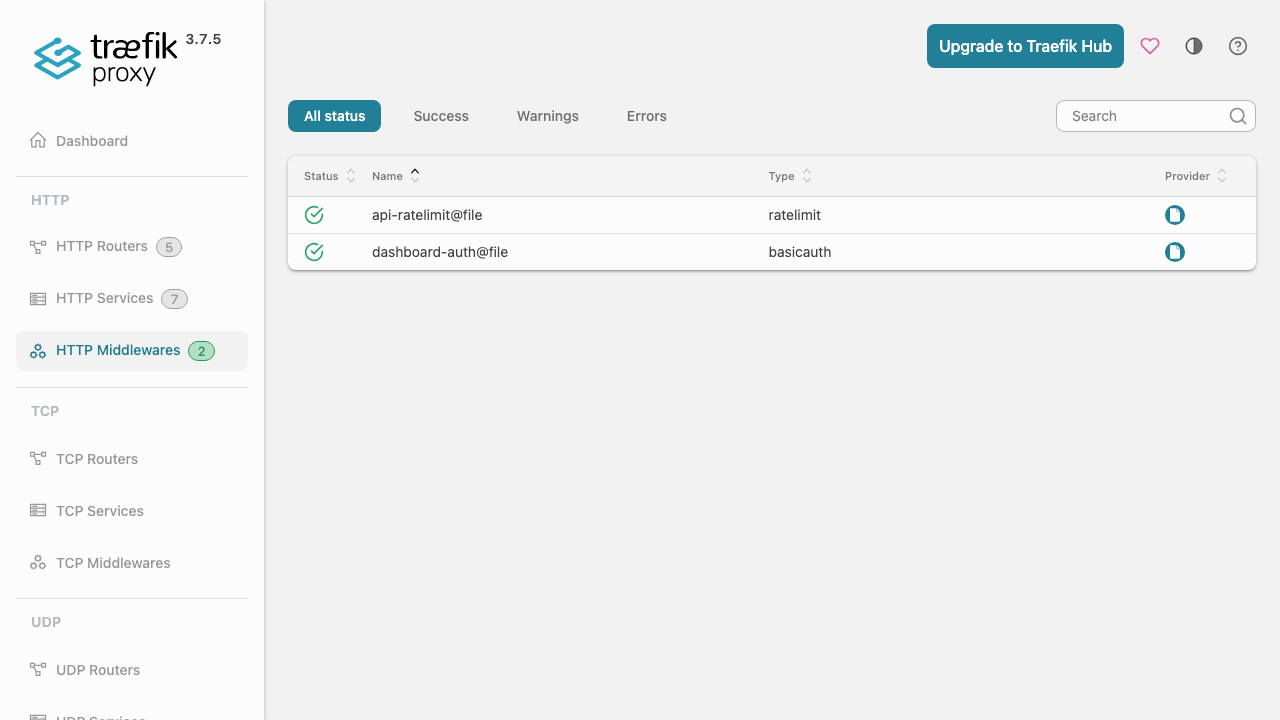
Traefik picks up the change immediately (no restart needed) and the new router and service appear in the dashboard. Manage middlewares - auth, rate limiting, redirects, headers - the same way:
Step 10 - Confirm ACME storage lives on the dedicated disk
Issued certificates (acme.json) and the access and Traefik logs are stored on the dedicated Azure data disk so they survive OS changes and can be resized independently:
findmnt /var/lib/traefik
The mount is backed by a separate Azure data disk captured into the image and re-provisioned on every VM.
Enabling HTTPS
The image ships a letsencrypt certificate resolver pre-configured with the HTTP challenge. To get a real certificate: point a DNS name at the VM's public IP, set your email in /etc/traefik/traefik.yml (the certificatesResolvers.letsencrypt.acme.email field) and sudo systemctl restart traefik, then attach tls.certResolver: letsencrypt to a router on the websecure entrypoint (as in Step 9). Traefik requests, installs and renews the certificate automatically and stores it in acme.json on the data disk.
Maintenance
- Routes: add or edit YAML files in
/etc/traefik/dynamic/; Traefik reloads them automatically. - Backups: snapshot the
/var/lib/traefikdata disk to back up issued certificates. - Upgrades: replace
/usr/local/bin/traefikwith a newer release andsudo systemctl restart traefik. - Security patches: unattended-upgrades remains enabled so the OS continues to receive security updates automatically.
Support
cloudimg provides 24/7 expert support for this image. Contact support@cloudimg.co.uk.