
Zot OCI Registry on AWS User Guide
Overview
This image runs Zot, the open source, production-ready, vendor-neutral, OCI-native container image registry from the project-zot community. Zot stores and distributes container images and OCI artifacts with content deduplication, garbage collection, image signature and SBOM support, registry-to-registry sync and mirroring, and a built-in web UI for browsing repositories, tags and per-image vulnerabilities. It is a single self-contained Go binary.
Zot binds to the loopback interface on 127.0.0.1:5000 and is fronted by nginx, which terminates HTTPS on port 443 and is the only public listener. The registry's raw port is never exposed directly. The registry configuration, the OCI blob storage tree and the htpasswd authentication database live on a dedicated EBS data volume mounted at /var/lib/zot, independently resizable and separate from the operating system disk.
The image is secure by default. On the first boot of every deployed instance, a one-shot service generates a per-instance admin password, mints a per-instance self-signed TLS certificate, and records the credentials in /root/zot-credentials.txt with mode 0600. Anonymous pull and push are denied, so nothing in the registry is readable or writable without authentication. No shared or default credentials, and no shared TLS key, ship in the image.
Prerequisites
Before you deploy this image you need:
- An Amazon Web Services account where you can launch EC2 instances
- IAM permissions to launch instances, create security groups, and subscribe to AWS Marketplace products
- An EC2 key pair in the target Region for SSH access to the instance
- A VPC and subnet in the target Region, with a security group allowing inbound port 22 from your management network and inbound port 443 from the developer machines and CI systems that will use the registry
- The AWS CLI (version 2) installed locally if you plan to deploy from the command line
- A container client to push and pull images: docker, podman, skopeo or oras
Step 1: Launch the Instance from the AWS Marketplace
Sign in to the AWS Management Console, open the EC2 service, and select Launch instance. Under Application and OS Images choose AWS Marketplace AMIs and search for Zot OCI Registry. Select the cloudimg listing and choose Select, then Continue on the subscription summary.
Pick an instance type of m5.large or larger. Choose your EC2 key pair under Key pair (login). Under Network settings select your VPC and subnet, and either create or select a security group that allows inbound port 22 from your management network and inbound port 443 from where you will use the registry. Leave the root volume at the default size or larger; the image adds a separate data volume for the registry's storage automatically.
Select Launch instance. First boot initialisation takes under a minute after the instance state becomes Running and the status checks pass.
Step 2: Launch the Instance from the AWS CLI
The following block launches an instance from the cloudimg Zot Marketplace AMI into an existing subnet and security group. Replace <ami-id> with the AMI ID shown on the Marketplace listing, <key-name> with your EC2 key pair name, <subnet-id> with your subnet ID, and <security-group-id> with a security group that opens port 22 and port 443 as described above.
aws ec2 run-instances \
  --image-id <ami-id> \
  --instance-type m5.large \
  --key-name <key-name> \
  --subnet-id <subnet-id> \
  --security-group-ids <security-group-id> \
  --block-device-mappings '[{"DeviceName":"/dev/sda1","Ebs":{"VolumeSize":20,"VolumeType":"gp3"}}]' \
  --tag-specifications 'ResourceType=instance,Tags=[{Key=Name,Value=zot-registry-01}]'
The command prints a JSON document on success. Note the instance ID, then retrieve its public address once it is running with aws ec2 describe-instances --instance-ids <instance-id> --query "Reservations[].Instances[].PublicIpAddress" --output text.
Step 3: Connect to Your Instance
Connect over SSH with the key pair you selected and the public IP address of the instance. The SSH login user depends on the operating system of the AMI variant you launched:
| AMI variant | SSH login user |
|---|---|
| Zot OCI Registry 2.1.17 on Ubuntu 24.04 | ubuntu |
ssh -i <key-name>.pem ubuntu@<public-ip>
Once connected, confirm the registry and its reverse proxy are running:
sudo systemctl start zot nginx
sudo systemctl is-active zot nginx
Both units report active:
active
active
Step 4: Retrieve the Admin Password
A per-instance admin password is generated on first boot and written to a root-only file. Read it over SSH:
sudo cat /root/zot-credentials.txt
The file records the registry URL, the admin username (admin) and the generated password:
# Zot 2.1.17 OCI registry - generated on first boot by zot-firstboot.service
# These credentials are unique to this instance. Store them somewhere safe.

ZOT_URL=https://<public-ip>/
ZOT_ADMIN_USER=admin
ZOT_ADMIN_PASSWORD=<generated-per-instance>
The registry denies anonymous access, so keep this password safe. You can verify the security posture directly on the instance: the health endpoint answers unauthenticated, the registry API returns 401 without credentials, and the same request with the admin password lists the repositories.
curl -sk -o /dev/null -w 'health: %{http_code}\n' https://localhost/health
curl -sk -o /dev/null -w 'registry unauthenticated: %{http_code}\n' https://localhost/v2/
PASS=$(sudo grep '^ZOT_ADMIN_PASSWORD=' /root/zot-credentials.txt | cut -d= -f2-)
curl -sk -u "admin:$PASS" https://localhost/v2/_catalog
A fresh instance responds:
health: 200
registry unauthenticated: 401
{"repositories":[]}
Step 5: Sign In to the Web UI
Open https://<public-ip>/ in a browser. Because the instance ships a per-instance self-signed certificate, your browser shows a certificate warning the first time; accept it to proceed, or replace the certificate with a CA-signed one as described in Step 8. Sign in as admin with the password from Step 4. The web UI opens on the repositories home view, listing the images held in the registry.
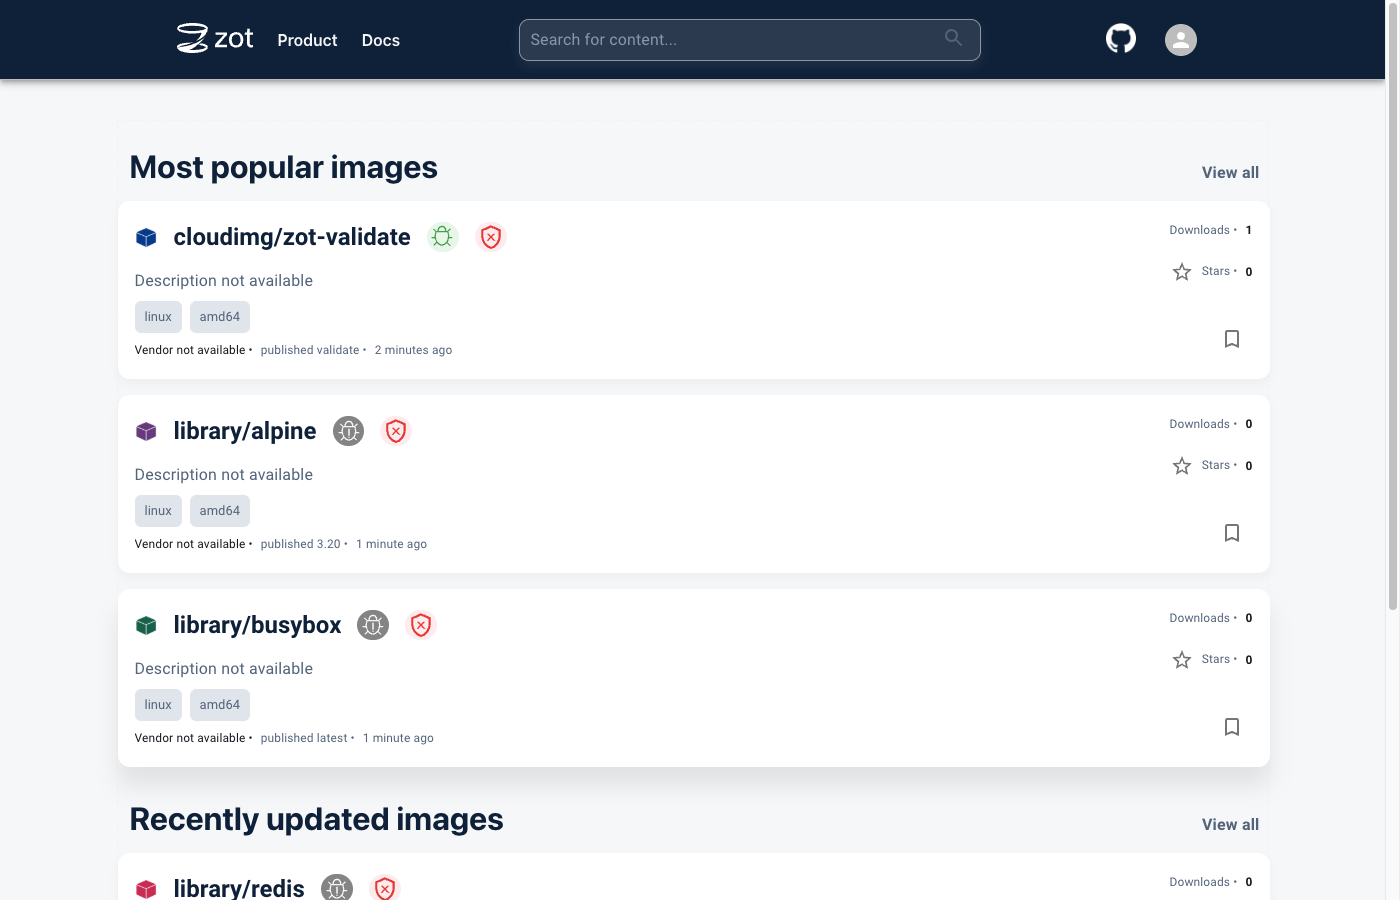
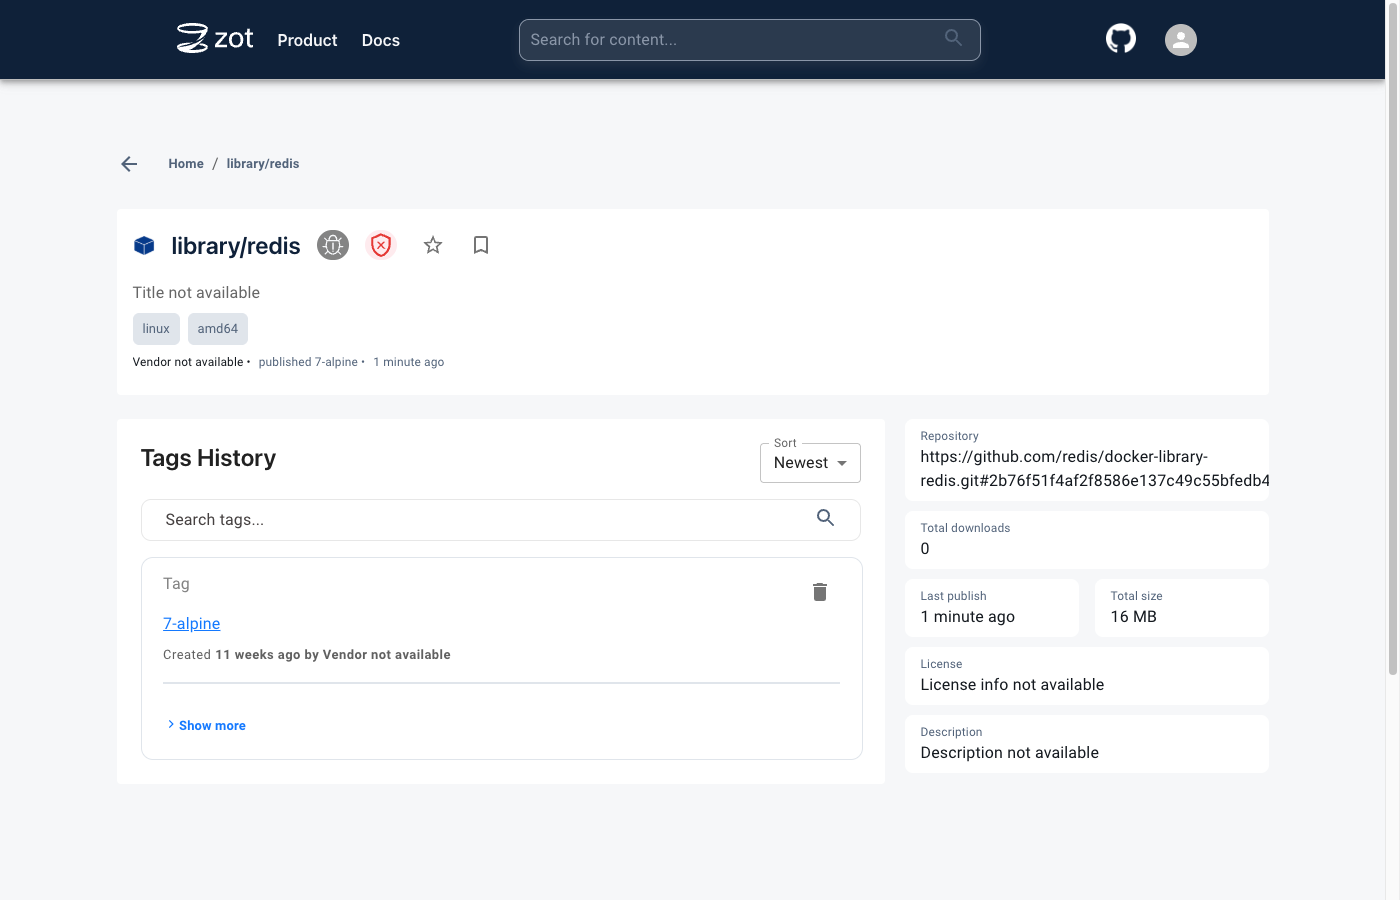
Selecting a repository opens its detail page, with the tag history and repository metadata such as total size, last publish time and license.
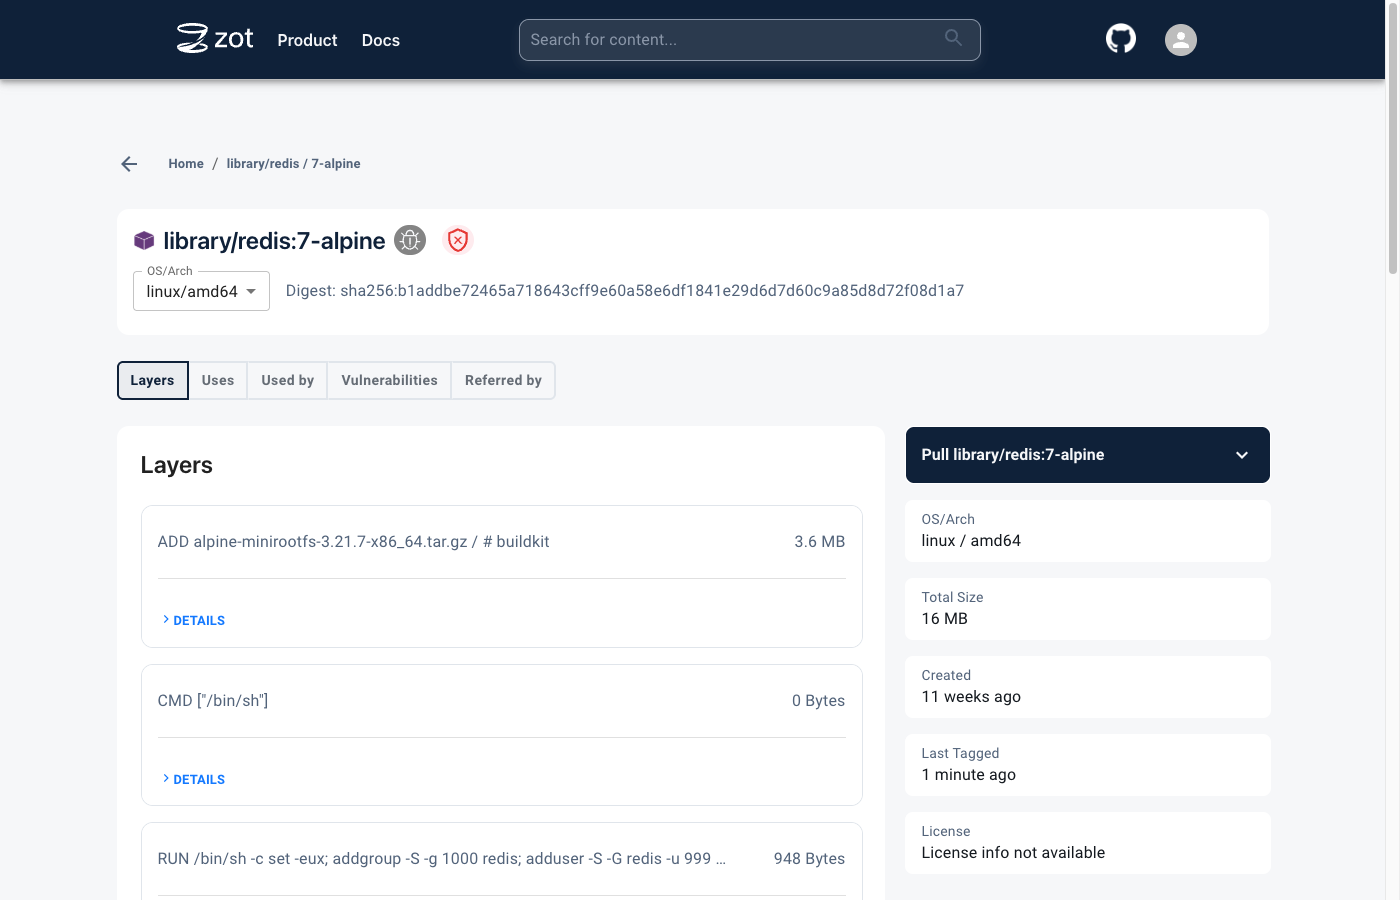
Selecting a tag opens the image detail view, showing the manifest digest, the image layers, the ready-to-copy pull command and the image metadata.
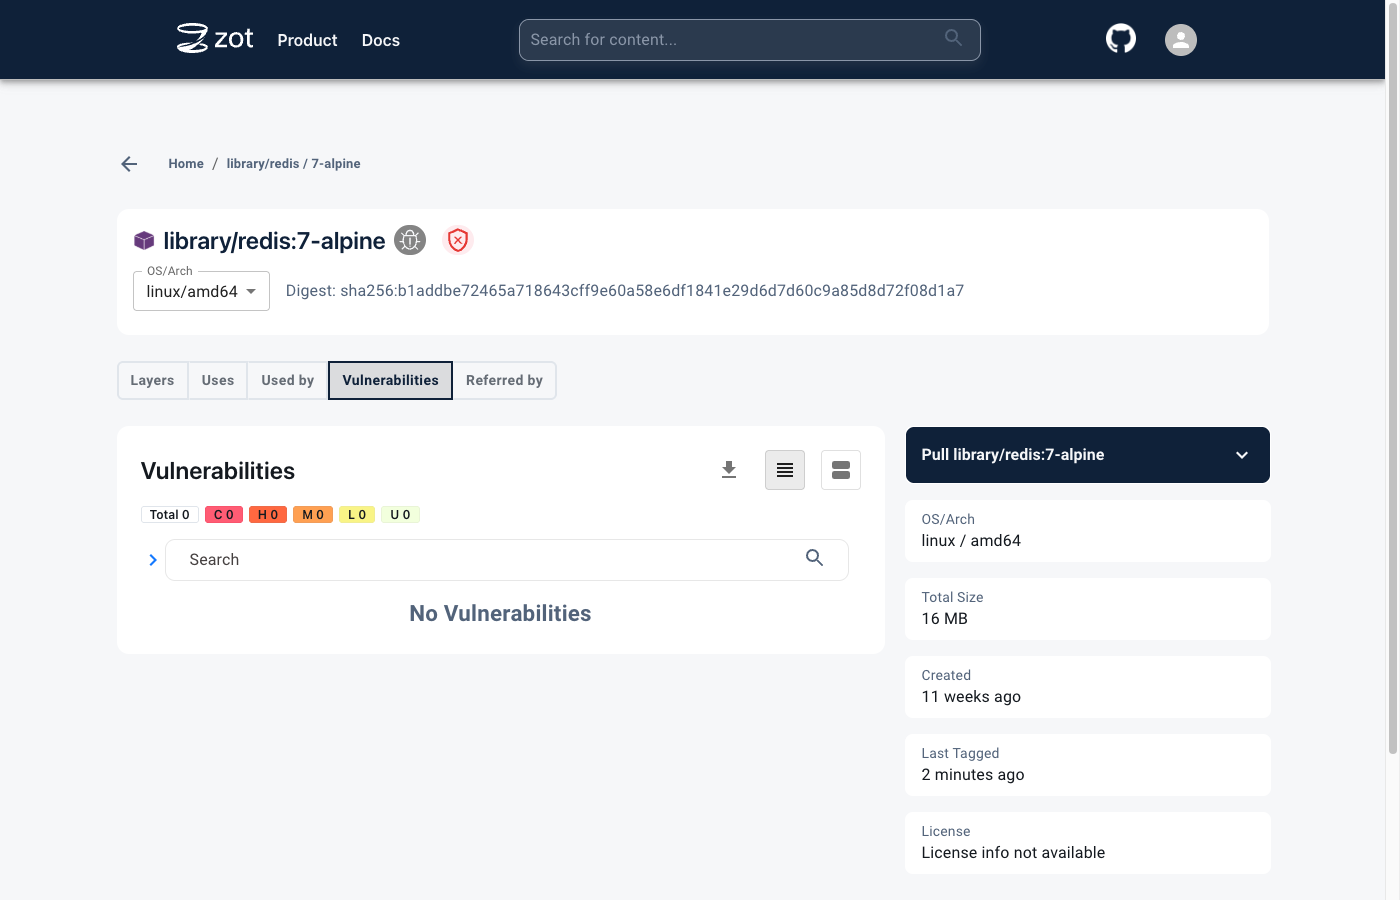
The Vulnerabilities tab reports the results of the bundled search extension's vulnerability scan for the selected image, summarised by severity.
Step 6: Log In and Push an Image
Log in from a developer machine with your container client. Because the registry uses a self-signed certificate, either trust it (Step 8) or configure the client to allow it. The examples below use the instance public IP as the registry host; substitute your own DNS name once you have one.
With docker, log in and push an image:
docker login <public-ip>
docker tag alpine:latest <public-ip>/library/alpine:latest
docker push <public-ip>/library/alpine:latest
With podman:
podman login <public-ip>
podman push docker.io/library/alpine:latest <public-ip>/library/alpine:latest
With skopeo, copy an image straight from another registry:
skopeo copy --dest-creds admin:yourpassword docker://docker.io/library/alpine:latest docker://<public-ip>/library/alpine:latest
Enter admin and the password from Step 4 when prompted. After the push, the repository appears in the web UI and in the authenticated catalog. Anonymous pull and push are refused with 401 until you authenticate.
Step 7: Registry Storage and the Data Volume
The registry's configuration, its OCI blob storage tree and the htpasswd authentication database live on a dedicated EBS data volume mounted at /var/lib/zot, so storage is independently resizable and separate from the operating system disk. Zot deduplicates blob content and runs periodic garbage collection to keep the store compact.
df -h /var/lib/zot
findmnt /var/lib/zot
The output confirms the registry data is on its own filesystem:
Filesystem      Size  Used Avail Use% Mounted on
/dev/nvme1n1     40G  2.6G   35G   7% /var/lib/zot
/dev/nvme1n1 /var/lib/zot ext4 ...
To grow the store, modify the EBS volume in the AWS console or CLI, then extend the filesystem on the instance. The registry configuration lives at /etc/zot/config.json.
Step 8: Configure a CA-Signed Certificate
The instance ships with a per-instance self-signed certificate under /etc/zot/tls, which is why clients see a certificate warning. For production use, put a trusted name in front of the registry. Point a DNS record at the instance, then obtain a certificate from your certificate authority and install it in place of the self-signed pair, or terminate TLS on a load balancer. As a quick alternative for a public DNS name, you can use certbot to obtain a Let's Encrypt certificate and point the nginx ssl_certificate and ssl_certificate_key directives at it:
sudo apt-get install -y certbot
sudo certbot certonly --standalone -d your-registry-host.your-domain.com
Update the nginx site under /etc/nginx/sites-available/zot to reference the issued certificate, then reload nginx. Once the registry presents a trusted certificate, container clients no longer need to trust the self-signed certificate.
Step 9: Confirm the Installed Version
sudo /usr/local/bin/zot --version
The command prints a JSON line whose commit field carries the release tag and whose binary-type field confirms the search and UI extensions are compiled in:
{"level":"info","message":"version","distribution-spec":"1.1.1","commit":"v2.1.17-0-g08b2687","binary-type":"...-search-sync-ui-userprefs",...}
Backup and Maintenance
- Storage: the registry data lives on the dedicated EBS volume at
/var/lib/zot. Take EBS snapshots of that volume to back up your images and artifacts, and grow the volume as your registry fills. - Configuration: the registry configuration is at
/etc/zot/config.jsonand the nginx reverse proxy site is at/etc/nginx/sites-available/zot. Restart withsudo systemctl restart zot nginxafter any change. - Users and access control: the image ships a single
adminuser in the htpasswd database at/var/lib/zot/htpasswd. Add more users withsudo htpasswd -B /var/lib/zot/htpasswd <username>and grant them access inaccessControlin the registry configuration; anonymous access stays denied. - Credentials: the per-instance admin password is in
/root/zot-credentials.txt. Rotate it by updating the htpasswd entry. - Updates: apply operating system security updates with
sudo apt-get updatefollowed bysudo apt-get -y dist-upgrade, and reboot if a new kernel is installed. - Support: 24/7 technical support is available by email and chat from cloudimg. Contact support for help with TLS, additional users and access control, registry sync and mirroring, storage sizing and upgrade planning.
Support
This image is published by cloudimg with 24/7 technical support by email and chat. All product and company names are trademarks or registered trademarks of their respective holders. Use of them does not imply any affiliation with or endorsement by them.