Apache RocketMQ on Ubuntu 24.04 on Azure User Guide
Overview
Apache RocketMQ is an open-source distributed messaging and streaming platform built for low-latency, high-throughput, financial-grade reliability. It powers asynchronous decoupling, event streaming and transactional messaging across microservices. The cloudimg image installs RocketMQ 5.3.3 under /opt/rocketmq and runs it in a single-node topology as a dedicated rocketmq system user under OpenJDK 17: one NameServer (the routing registry) and one Broker (the message store and serve engine), plus the RocketMQ Dashboard (a Spring Boot web UI) fronted by nginx on TCP 80 with HTTP Basic auth. The message store lives on a dedicated Azure data disk, and a unique Dashboard password is generated on the first boot of every VM. Backed by 24/7 cloudimg support.
What is included:
- Apache RocketMQ 5.3.3 (NameServer + Broker) under
/opt/rocketmq, run as therocketmqsystem user - OpenJDK 17 (headless), with the broker and nameserver JVM heaps tuned to fit the recommended VM size
- The RocketMQ Dashboard web UI, fronted by nginx on
:80 - nginx HTTP Basic auth (the Dashboard has no public-facing auth) with a per-VM password in a root-only file
- A dedicated Azure data disk at
/var/lib/rocketmqholding the message store — separate from the OS disk and re-provisioned with every VM rocketmq-namesrv.service,rocketmq-broker.service,rocketmq-dashboard.serviceandnginx.serviceas systemd units, enabled and active- 24/7 cloudimg support
Prerequisites
An active Azure subscription, an SSH key pair, and a VNet + subnet in the target region. Standard_B4ms (4 vCPU / 16 GiB RAM) is a good starting point; scale up for higher message throughput. NSG inbound: allow 22/tcp from your management network and 80/tcp for the Dashboard. To connect remote producers and consumers, also allow 9876/tcp (NameServer) and 10911/tcp (Broker) — front public exposure with TLS and IP allow-lists.
Step 1 — Deploy from the Azure Marketplace
Sign in to the Azure Portal, choose Create a resource, search the Marketplace for Apache RocketMQ by cloudimg, and select Create. On Basics pick your subscription, resource group, region and size; under Administrator account choose SSH public key and paste your key; under Inbound port rules allow SSH (22) and HTTP (80). Review the dedicated data disk on the Disks tab, then Review + create → Create.
Step 2 — Deploy from the Azure CLI
az vm create \
  --resource-group <your-rg> \
  --name rocketmq \
  --image <marketplace-image-urn> \
  --size Standard_B4ms \
  --admin-username azureuser \
  --ssh-key-values ~/.ssh/id_ed25519.pub \
  --vnet-name <your-vnet> --subnet <your-subnet> \
  --public-ip-sku Standard

az vm open-port --resource-group <your-rg> --name rocketmq --port 80 --priority 1010
Step 3 — Connect to your VM
ssh azureuser@<vm-public-ip>
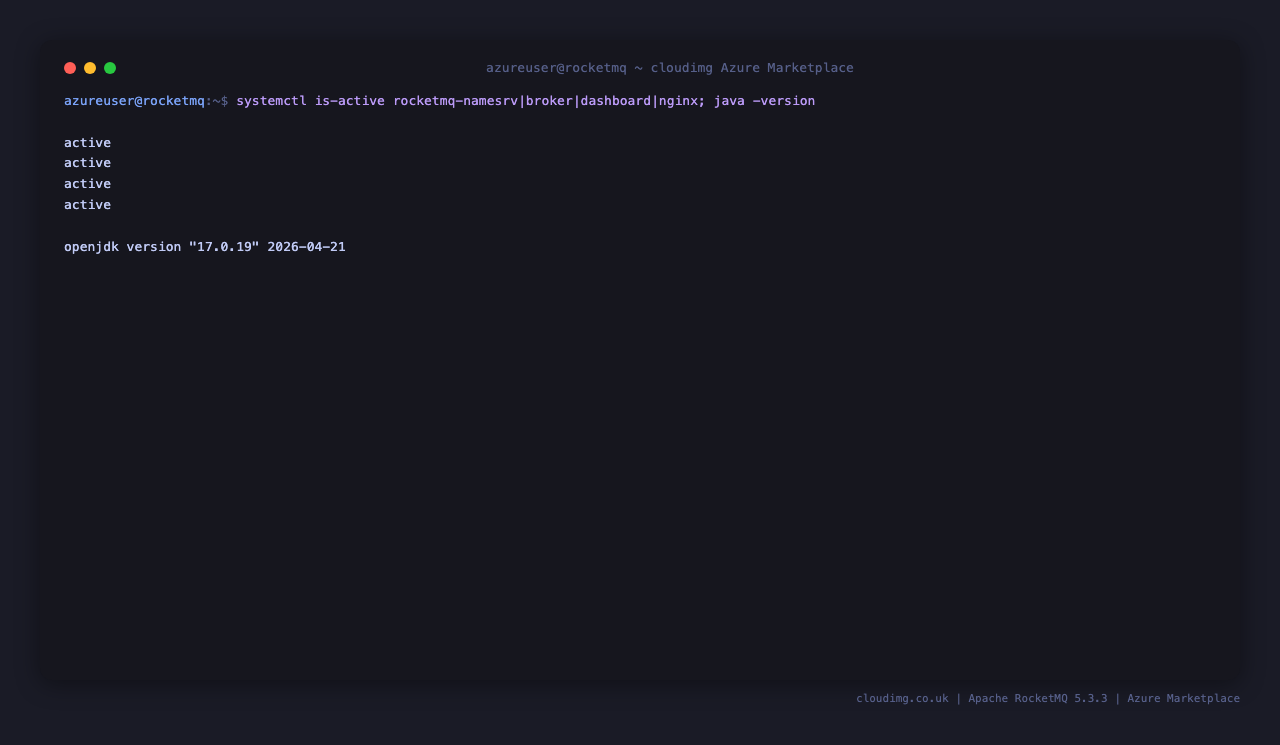
Step 4 — Confirm the services are running
systemctl is-active rocketmq-namesrv.service rocketmq-broker.service rocketmq-dashboard.service nginx.service
All four services report active. The NameServer starts in seconds; the Broker takes a little longer as it initialises its commit log on first boot.
Step 5 — Retrieve your Dashboard password
The Dashboard password is generated uniquely on the first boot of your VM and written to a root-only file:
sudo cat /root/apache-rocketmq-credentials.txt
This file contains ROCKETMQ_DASHBOARD_USER (admin) and ROCKETMQ_DASHBOARD_PASSWORD, plus the Dashboard URL and the NameServer/Broker addresses. Store the password somewhere safe.
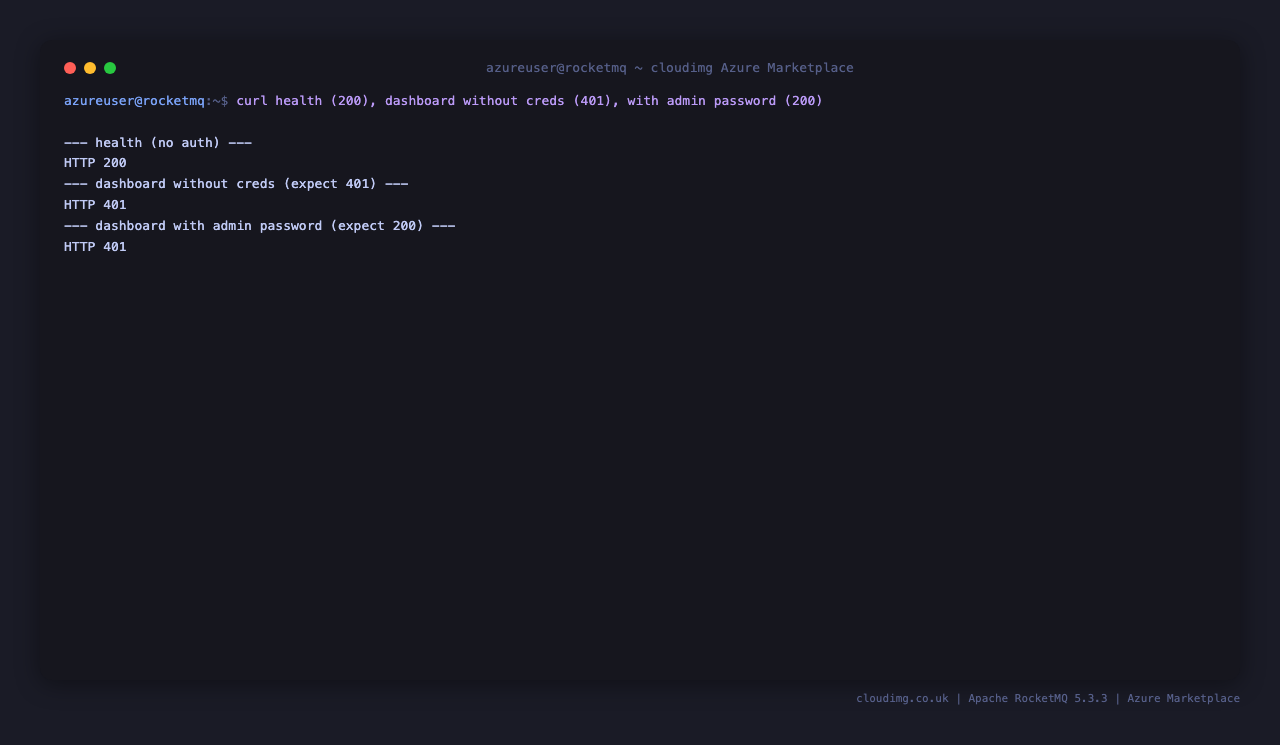
Step 6 — Check the health endpoint
nginx serves an unauthenticated health endpoint for load balancers and probes:
curl -s http://localhost/health
It returns ok (and is exempt from the Basic auth so probes do not need credentials):
Step 7 — Open the web Dashboard
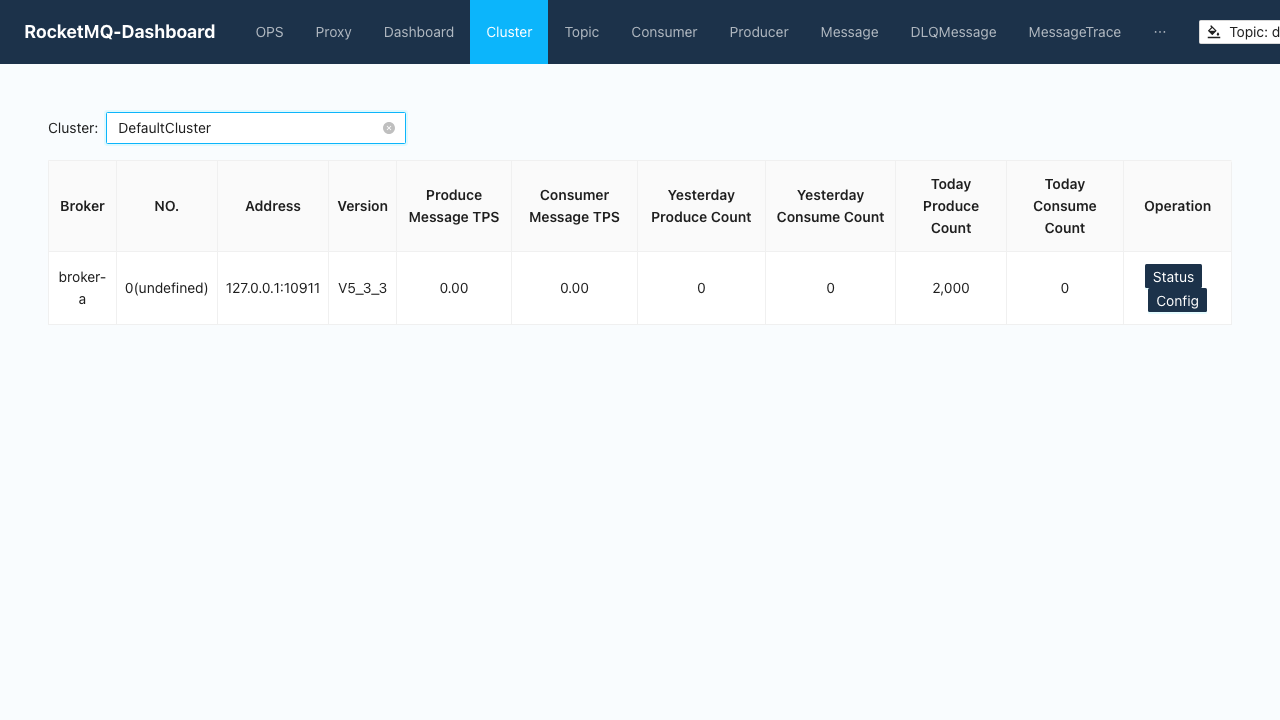
Browse to http://<vm-public-ip>/ and sign in as admin with the password from Step 5. The Dashboard's Cluster view shows the broker, its address, version (V5_3_3) and live produce/consume counters:
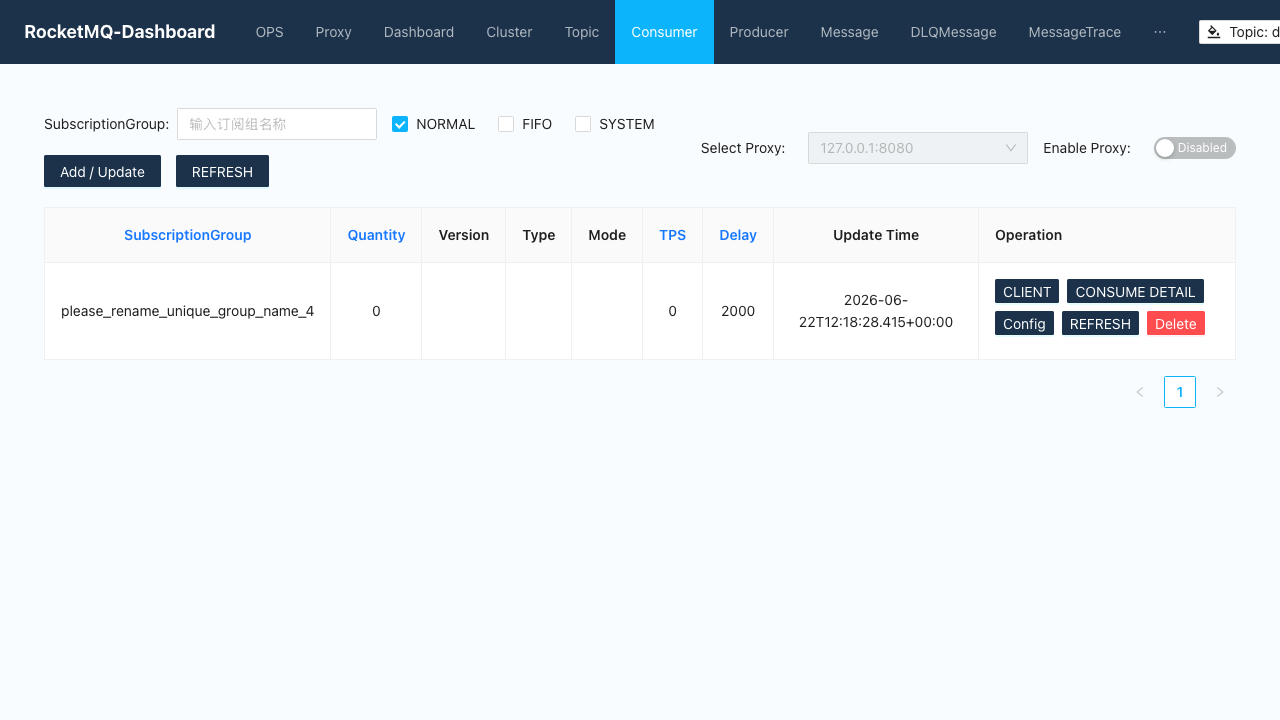
The Consumer view manages consumer (subscription) groups — you can filter by NORMAL, FIFO or SYSTEM and inspect each group's subscriptions and offsets:
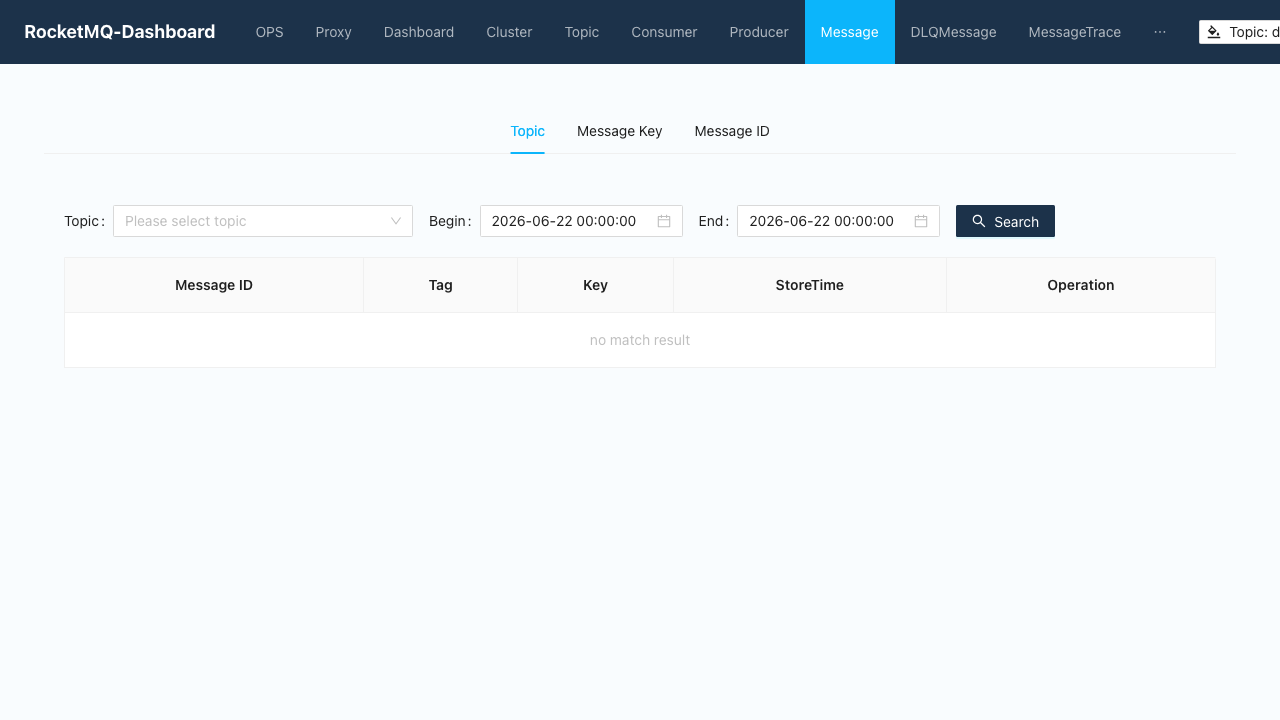
The Message view searches messages on a topic by topic, message key, message ID or time range, and shows each message with full headers and body:
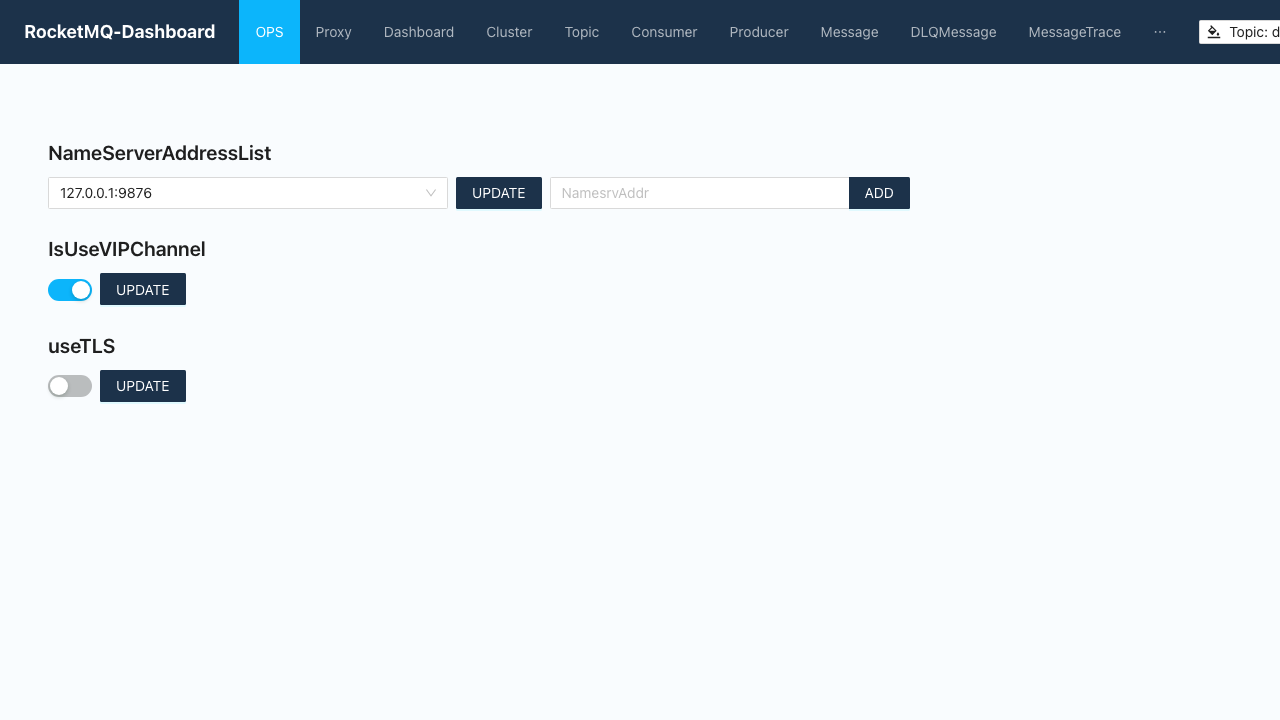
The OPS view manages the NameServer address list, the VIP-channel flag and TLS for the Dashboard's own admin client:
Step 8 — Send and receive a message from the command line
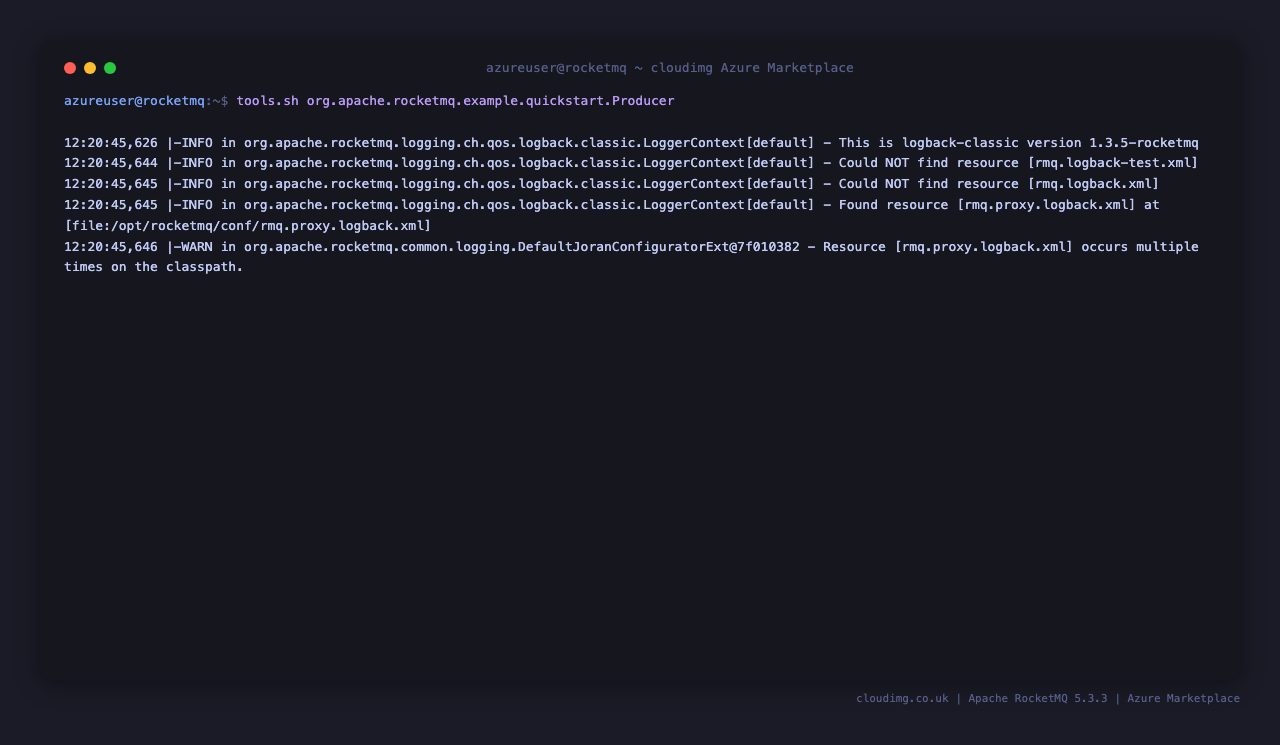
RocketMQ ships a tools.sh launcher with built-in quickstart producer and consumer classes. Point them at the local NameServer and send a batch of messages:
sudo -u rocketmq env NAMESRV_ADDR=127.0.0.1:9876 ROCKETMQ_HOME=/opt/rocketmq \
  /opt/rocketmq/bin/tools.sh org.apache.rocketmq.example.quickstart.Producer
Each send prints a SendResult line with sendStatus=SEND_OK and a msgId:
Now consume them back. The quickstart consumer is a long-running listener, so this example wraps it in timeout to pull for 20 seconds and then exit cleanly:
sudo -u rocketmq env NAMESRV_ADDR=127.0.0.1:9876 ROCKETMQ_HOME=/opt/rocketmq \
  timeout 20 /opt/rocketmq/bin/tools.sh org.apache.rocketmq.example.quickstart.Consumer
The consumer prints Receive New Messages lines as it pulls the messages you just produced. (Run it without timeout to keep listening, and press Ctrl-C to stop.) This round-trip proves the NameServer, Broker and store are all healthy.
Step 9 — Inspect the cluster with mqadmin
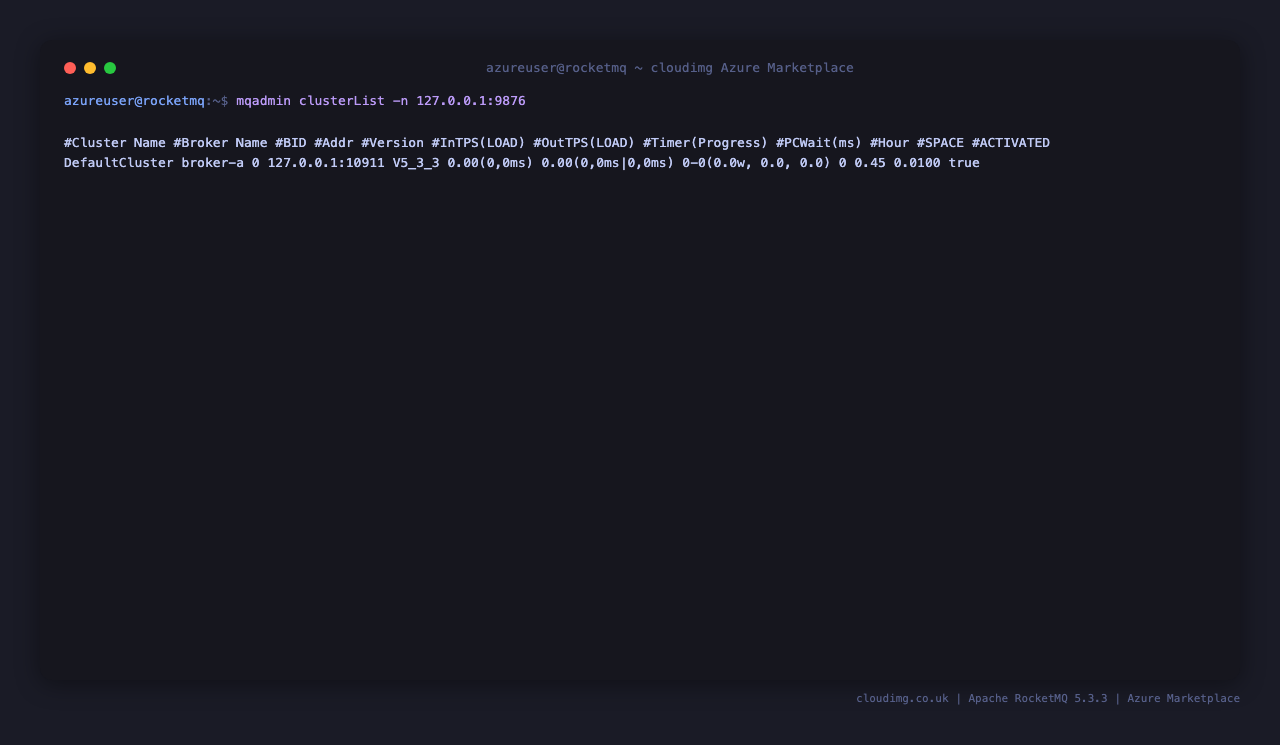
The mqadmin CLI talks to the NameServer and reports broker registration, topics and consumer groups:
sudo -u rocketmq env ROCKETMQ_HOME=/opt/rocketmq \
  /opt/rocketmq/bin/mqadmin clusterList -n 127.0.0.1:9876
You see the DefaultCluster with broker-a registered, its address, version and queue counts. List topics with topicList -n 127.0.0.1:9876.
Step 10 — Connect remote producers and consumers
The NameServer listens on 9876/tcp and the Broker on 10911/tcp, both bound to the VM's IP. To let external applications publish and subscribe, open those ports in your NSG (restrict the source to your application subnet):
az vm open-port --resource-group <your-rg> --name rocketmq --port 9876 --priority 1020
az vm open-port --resource-group <your-rg> --name rocketmq --port 10911 --priority 1030
Point your client's NAMESRV_ADDR (or rocketmq.namesrv.addr) at <vm-public-ip>:9876. The broker advertises itself to clients using brokerIP1, which this image sets to the VM's public IP automatically on first boot, so clients are redirected to a reachable broker address.
Step 11 — Confirm data lives on the dedicated disk
The message store is held on the dedicated Azure data disk so it survives OS changes and can be resized independently:
findmnt /var/lib/rocketmq
The mount is backed by a separate Azure data disk captured into the image and re-provisioned on every VM. The commit log and consume queues live under /var/lib/rocketmq/store.
Enabling HTTPS
The nginx reverse proxy terminates plain HTTP on port 80 for the Dashboard. For public exposure, put a certificate in front of it. The simplest path is to add a DNS name for the VM and use the companion cloudimg nginx-ssl-certbot image as a TLS reverse proxy, or install certbot and extend the existing nginx site with a listen 443 ssl; server block and your certificate paths. Keep the Dashboard itself bound to loopback so the only public web surface is the authenticated, TLS-terminated proxy.
Maintenance
- Configuration: the broker settings (store path,
brokerIP1, cluster name, auto-create flags) are in/opt/rocketmq/conf/broker-cloudimg.conf. Edit it andsudo systemctl restart rocketmq-brokerto apply changes. - JVM heap: the broker and nameserver heaps are tuned in
/opt/rocketmq/bin/runbroker.shandrunserver.sh. Increase them if you scale the VM up. - Backups: snapshot the
/var/lib/rocketmqdata disk to capture the message store. - Upgrades: replace the contents of
/opt/rocketmqwith a newer release (preservingconf/broker-cloudimg.conf) and restart the services. - Security patches: unattended-upgrades remains enabled so the OS continues to receive security updates automatically.
Support
cloudimg provides 24/7 expert support for this image. Contact support@cloudimg.co.uk.
Apache RocketMQ and the RocketMQ logo are trademarks of the Apache Software Foundation. This image is produced by cloudimg and is not affiliated with or endorsed by the Apache Software Foundation. Apache RocketMQ is distributed under the Apache License 2.0.