
Harbor Container Registry on AWS User Guide
Overview
This image runs Harbor as a single node deployment. Harbor is the CNCF graduated open source registry that secures container artefacts with policies and role based access control, scans images for vulnerabilities with the integrated Trivy scanner, and supports replication across registries. The image delivers Harbor fully installed and configured, so a complete private container registry is running within minutes of launch.
Harbor runs as a Docker Compose stack: nginx as the front proxy on port 80, the Harbor core, the portal web user interface, the registry, the registryctl, the jobservice, a local PostgreSQL metadata database, Redis and the Trivy vulnerability scanner. The whole stack is brought up and down by a single harbor.service systemd unit at boot. Docker Engine and the Docker Compose plugin are installed from the official Docker package repository.
The Harbor administrator password is generated on the first boot of every deployed instance. Two instances launched from the same Amazon Machine Image never share an administrator password. The initial administrator password is written to /root/harbor-credentials.txt with mode 0600 so that only the root user can read it.
The Harbor data directory at /data lives on a separate, independently resizable EBS volume mounted at the data root. Registry image blobs, the Harbor PostgreSQL metadata database, the Redis state and the Trivy scan cache all land on this dedicated disk rather than the operating system disk.
Prerequisites
Before you deploy this image you need:
- An Amazon Web Services account where you can launch EC2 instances
- IAM permissions to launch instances, create security groups, and subscribe to AWS Marketplace products
- An EC2 key pair in the target Region for SSH access to the instance
- A VPC and subnet in the target Region, with a security group allowing inbound port 22 from your management network and inbound ports 80 and 443 from the network you will reach the Harbor web interface from
- The AWS CLI (version 2) installed locally if you plan to deploy from the command line
- A Docker client on your workstation to push and pull images
Step 1: Launch the Instance from the AWS Marketplace
Sign in to the AWS Management Console, open the EC2 service, and select Launch instance. Under Application and OS Images choose AWS Marketplace AMIs and search for Harbor. Select the cloudimg listing and choose Select, then Continue on the subscription summary.
Pick an instance type of m5.large or larger. Harbor runs ten containers in its Compose stack including a PostgreSQL database, Redis and the Trivy vulnerability scanner, so it benefits from at least two vCPUs and 8 GiB of memory. Choose your EC2 key pair under Key pair (login). Under Network settings select your VPC and subnet, and either create or select a security group that allows inbound port 22 from your management network and inbound ports 80 and 443 from the network you will reach the web interface and the registry from. Leave the root volume at the default size or larger. The image also attaches a separate 50 GiB gp3 data volume to /data for the registry storage tier.
Select Launch instance. First boot initialisation takes approximately two to three minutes after the instance state becomes Running and the status checks pass; Harbor brings its full Compose stack up on the customer's first boot, including the metadata database initialisation and the admin password rotation.
Step 2: Launch the Instance from the AWS CLI
The following block launches an instance from the cloudimg Harbor Marketplace AMI into an existing subnet and security group. Replace <ami-id> with the AMI ID shown on the Marketplace listing, <key-name> with your EC2 key pair name, <subnet-id> with your subnet ID, and <security-group-id> with a security group that opens ports 22, 80 and 443 as described above.
aws ec2 run-instances \
  --image-id <ami-id> \
  --instance-type m5.large \
  --key-name <key-name> \
  --subnet-id <subnet-id> \
  --security-group-ids <security-group-id> \
  --block-device-mappings '[{"DeviceName":"/dev/sda1","Ebs":{"VolumeSize":30,"VolumeType":"gp3"}}]' \
  --tag-specifications 'ResourceType=instance,Tags=[{Key=Name,Value=harbor-01}]'
The command prints a JSON document on success. Note the instance ID, then retrieve its public address once it is running with aws ec2 describe-instances --instance-ids <instance-id> --query "Reservations[].Instances[].PublicIpAddress" --output text.
Step 3: Connect and Retrieve Initial Credentials
Connect over SSH with the key pair you selected and the public IP address from step 2. The SSH login user depends on the operating system of the AMI variant you launched:
| AMI variant | SSH login user |
|---|---|
| Harbor on Ubuntu 24.04 | ubuntu |
The first boot service runs the Harbor REST API password rotation before the credentials file is written, so the file is always in place when you log in for the first time.
sudo cat /root/harbor-credentials.txt
You will see a plain text file containing the Harbor URL, the administrator username (admin) and the administrator password. Copy these values somewhere secure (a password manager or encrypted vault). Do not commit them to source control.
From the same SSH session you can confirm the deployment is healthy. The Harbor health endpoint needs no authentication and reports every component of the Compose stack:
curl -fsS http://127.0.0.1/api/v2.0/health
A JSON document reporting the core, database, jobservice, portal, redis, registry, registryctl and trivy components confirms the full stack is up.
You can also inspect the Compose stack directly:
sudo docker compose -f /opt/harbor/harbor/docker-compose.yml ps
Every container is reported as Up (healthy) once the stack has warmed up.
Step 4: First Login to the Harbor Web Interface
Open a web browser and navigate to http://<public-ip>/. Harbor presents the sign-in form to visitors who do not yet have a session.

Enter the administrator username admin and the administrator password from /root/harbor-credentials.txt. Select LOG IN. On the first successful sign in Harbor records your session and shows the navigation rail down the left of every page.
Step 5: The Projects Page
After signing in, Harbor opens the Projects page. The shipped image registers one default public project, library, ready to receive container images. Projects are how Harbor groups container repositories and applies access control, replication, scanning and retention policies.

The summary cards along the top show the number of private and public projects, the number of repositories, and the total quota used by the registry. The table lists every project with its access level, your role, the project type, the repository count and the creation time. To create another project, select + NEW PROJECT above the table.
Step 6: Open the library Project
Select library in the projects table to open the project detail view. The detail view has tabs for Summary, Repositories, Members, Labels, Scanner, P2P Preheat, Policy, Robot Accounts, Webhooks, Logs and Configuration.

The Repositories tab is selected by default. On a freshly launched instance the project is empty: Harbor reports "We couldn't find any repositories!" with a 0 item count. The PUSH COMMAND drop-down on the right reveals the exact docker push command you need to push your first image into the project.
Step 7: Push and Pull Your First Image
From a workstation with Docker installed, sign in to the Harbor registry, tag an existing image with the registry hostname, and push it.
docker login <instance-public-ip>
# Username: admin
# Password: paste the admin password from /root/harbor-credentials.txt

docker pull nginx:stable
docker tag nginx:stable <instance-public-ip>/library/nginx:stable
docker push <instance-public-ip>/library/nginx:stable
After the push completes, refresh the project's Repositories tab in the web interface and library/nginx appears with one artefact. You can pull the same image back from any other Docker client that can reach the registry:
docker pull <instance-public-ip>/library/nginx:stable
Step 8: Vulnerability Scanning
The shipped image enables Trivy as the default vulnerability scanner. Open a repository in the web interface and select an artefact, then SCAN. Trivy pulls the image layers, scans them against its CVE database, and reports the result on the artefact row with a severity breakdown of critical, high, medium and low findings. You can also schedule periodic scans of every artefact in a project from the project's Configuration tab.
To trigger a scan from the command line use the REST API (replace nginx and stable with the repository and tag you want scanned):
PASS=$(sudo grep '^harbor.admin.pass=' /root/harbor-credentials.txt | cut -d= -f2-)
curl -fsS -u admin:"$PASS" -X POST \
  http://127.0.0.1/api/v2.0/projects/library/repositories/nginx/artifacts/stable/scan
The first scan downloads the Trivy CVE database and may take a couple of minutes; subsequent scans are quick.
Step 9: System Administration
The Administration group in the navigation rail collects every cluster-wide setting: Users, Robot Accounts, Registries (for replication source / target endpoints), Replications, Distributions, Labels, Project Quotas, Interrogation Services (the scanner configuration), Clean Up (the garbage collector) and the global Configuration.

The Users page lists every named user, with the administrator flag, the email address and the registration time. Use + NEW USER to add a named account for a team member instead of having them sign in as admin. The SET AS ADMIN action promotes a selected user to administrator. Each user can then be added to one or more projects as a Project Admin, Master, Developer, Guest or Limited Guest from the project's Members tab.
Step 10: Server Components
The deployed image contains the following components:
| Component | Purpose |
|---|---|
| Harbor 2.x | Container registry, vulnerability scanning, role based access control |
| Docker Engine | Container runtime that hosts the Harbor Compose stack |
| Docker Compose plugin | Brings the Harbor stack up and down as a single Compose project |
harbor.service systemd unit |
Wraps docker compose up -d / down at the install directory |
harbor-firstboot.service systemd unit |
One shot service that rotates the admin password on first boot |
Inside the Compose stack the following containers run:
| Container | Purpose |
|---|---|
nginx |
Front proxy on port 80, routes traffic to portal, core, registry, registryctl |
harbor-core |
Harbor application server, business logic and the REST API |
harbor-portal |
The Angular single page web user interface |
registry |
The OCI distribution registry that stores image blobs |
registryctl |
Registry management daemon, used by the Harbor core |
harbor-jobservice |
Background job runner (replication, scanning, garbage collection) |
harbor-db |
PostgreSQL metadata database for Harbor |
redis |
Cache for the Harbor core, the jobservice and the registry |
harbor-log |
Centralised log collector for every Harbor container |
trivy-adapter |
Trivy vulnerability scanner adapter for Harbor |
Step 11: Filesystem Layout
| Path | Purpose |
|---|---|
/opt/harbor/harbor/ |
Harbor installation directory: install.sh, prepare, docker-compose.yml, harbor.yml |
/opt/harbor/harbor/harbor.yml |
Harbor configuration (hostname, ports, secret key, data root) |
/opt/harbor/harbor/docker-compose.yml |
Compose definition rendered from harbor.yml by the prepare script |
/data/ |
Harbor data root on a dedicated EBS volume |
/data/registry/ |
OCI distribution registry image blobs |
/data/database/ |
PostgreSQL metadata database for Harbor |
/data/redis/ |
Redis persistence files |
/data/job_logs/ |
Background job logs |
/data/secret/ |
Internal Harbor signing keys |
/data/trivy-adapter/ |
Trivy CVE database cache |
/root/harbor-credentials.txt |
Per instance administrator password, generated on first boot, root only |
The data volume is mounted by UUID in /etc/fstab with the nofail option, so the instance always boots even if the volume is detached.
Step 12: Managing the Services
The Harbor Compose stack is started by systemd at boot through the harbor.service unit. Manage it as follows:
sudo systemctl status harbor.service
To restart the whole stack:
sudo systemctl restart harbor.service
To inspect or follow individual containers, use docker compose from the install directory:
cd /opt/harbor/harbor && sudo docker compose ps --format 'table {{.Name}}\t{{.Status}}'
sudo docker compose -f /opt/harbor/harbor/docker-compose.yml logs --tail 100 harbor-core
sudo docker compose -f /opt/harbor/harbor/docker-compose.yml logs -f nginx
To follow the systemd unit log:
sudo journalctl -u harbor.service -n 50 --no-pager
Step 13: Using the REST API
The Harbor REST API is served on the same port 80 as the web interface, under the /api/v2.0/ prefix. Authenticate with HTTP basic auth using the administrator credentials. The following block lists every project on the registry:
PASS=$(sudo grep '^harbor.admin.pass=' /root/harbor-credentials.txt | cut -d= -f2-)
curl -fsS -u admin:"$PASS" http://127.0.0.1/api/v2.0/projects
The full REST API reference is published as an OpenAPI document at http://<public-ip>/devcenter-api-2.0, and in the Harbor documentation at https://goharbor.io/docs/latest/install-config/configure-https/.
Step 14: Change the Administrator Password
For a production deployment rotate the administrator password that was generated on first boot. Use the REST API with the current password:
OLD=$(sudo grep '^harbor.admin.pass=' /root/harbor-credentials.txt | cut -d= -f2-)
curl -fsS -u admin:"$OLD" -X PUT \
  -H 'Content-Type: application/json' \
  -d '{"old_password":"'"$OLD"'","new_password":"<NEW_PASSWORD>"}' \
  http://127.0.0.1/api/v2.0/users/1/password
You can also create additional named users and assign them roles such as Project Admin, Master, Developer, Guest or Limited Guest from a project's Members tab, so team members do not share the administrator account. Robot accounts under Robot Accounts are the preferred mechanism for CI pipelines that need to push or pull images programmatically.
Step 15: Enable HTTPS
The Compose stack listens on plain HTTP on port 80. For any deployment beyond a trusted management network, enable HTTPS so credentials and image layers cannot be intercepted. Harbor has first class HTTPS support: edit /opt/harbor/harbor/harbor.yml, uncomment the https: block, set port: 443, point certificate: and private_key: at your TLS certificate and private key files, and re run prepare followed by docker compose up -d:
sudo vi /opt/harbor/harbor/harbor.yml
# Uncomment the https: block, set port: 443, certificate, private_key
cd /opt/harbor/harbor
sudo ./prepare
sudo docker compose down
sudo docker compose up -d
For a custom hostname update hostname: in harbor.yml to your hostname before running prepare. Then restrict the instance security group so port 80 is only used for the HTTP-to-HTTPS redirect and port 443 carries the live traffic.
If you need a free, automatically renewed certificate, run certbot --standalone to obtain a Let's Encrypt certificate, point Harbor at the issued files, and add a renewal hook that copies the renewed files into place and runs prepare + docker compose up -d.
Step 16: Backups and Maintenance
Harbor has two data sources that must be backed up together: the PostgreSQL metadata database in /data/database, which holds projects, users, role bindings, scan results and replication state, and the OCI registry blobs in /data/registry, which hold the image layers themselves.
sudo systemctl stop harbor.service
sudo tar -czf /var/backups/harbor-data-$(date +%F).tgz -C /data .
sudo systemctl start harbor.service
Ship the artefact to an Amazon S3 bucket or another object store. Because the data root is on its own EBS volume, you can also take EBS snapshots of that volume for point in time recovery without taking the service offline; snapshots are crash consistent.
For kernel and package updates, Ubuntu's unattended-upgrades is enabled by default, so security patches apply automatically. To upgrade Harbor itself, download the new offline installer tarball from https://github.com/goharbor/harbor/releases, follow the Harbor upgrade documentation at https://goharbor.io/docs/latest/administration/upgrade/, and re-run the prepare and install.sh scripts.
Step 17: Scaling Beyond a Single Instance
For larger deployments decouple Harbor from the single instance pattern:
- Move the metadata database to Amazon RDS for PostgreSQL by setting the external database section in
harbor.ymland re-runningprepare - Move the Redis cache to Amazon ElastiCache for Redis in the same way
- Move the registry blob storage to Amazon S3 with the registry's S3 storage driver in
harbor.yml - Or run Harbor on Amazon EKS with the official Harbor Helm chart from
https://github.com/goharbor/harbor-helmand front it with the AWS Load Balancer Controller for managed TLS termination
Screenshots
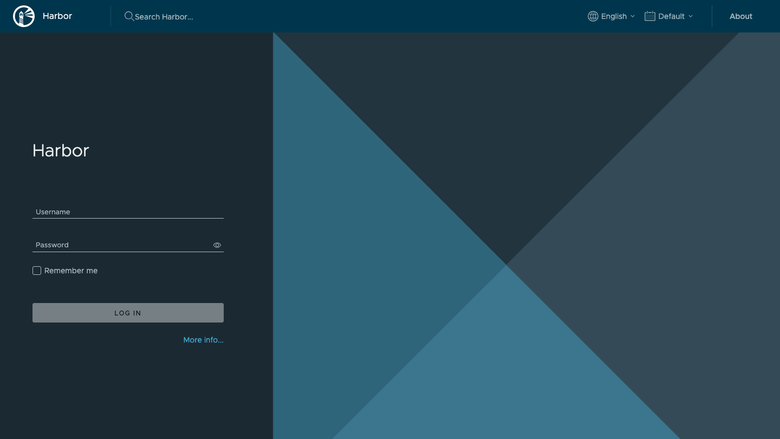
The Harbor web sign-in page, served on first boot with no manual setup.
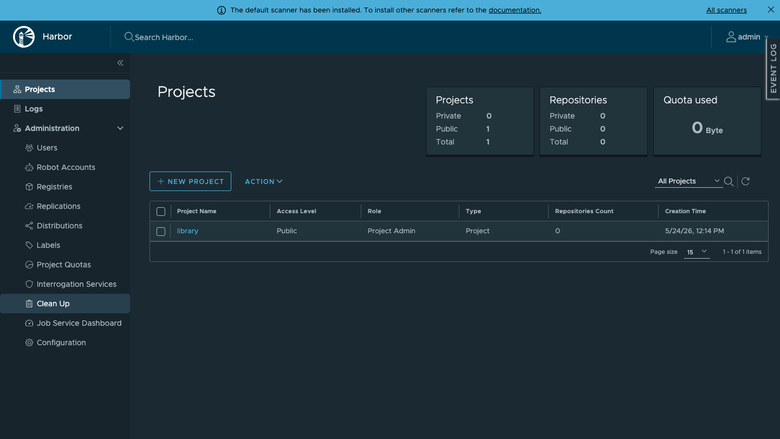
The Harbor Projects page listing the container repositories available on the instance.
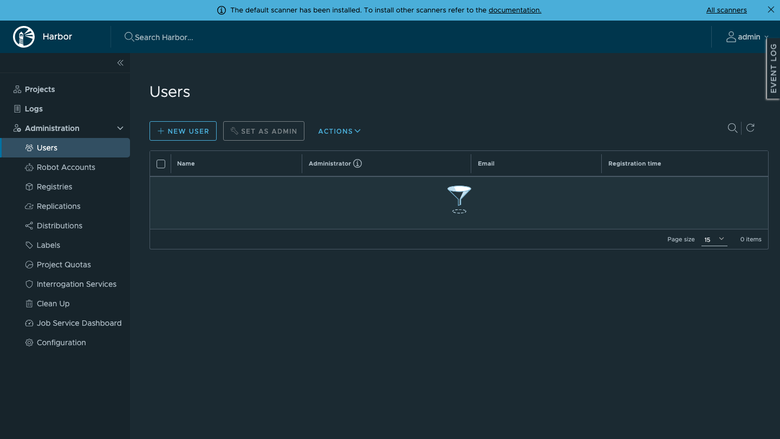
The Harbor system administration page showing users, projects, replication and labels.
Support and Resources
- cloudimg support: 24/7 by email and chat for deployment, upgrades, TLS configuration, replication and vulnerability scanning
- Harbor documentation:
https://goharbor.io/docs/ - Harbor releases:
https://github.com/goharbor/harbor/releases - Harbor REST API reference on every instance:
http://<public-ip>/devcenter-api-2.0