
JupyterHub on AWS User Guide
Overview
This image runs JupyterHub from a dedicated Python virtual environment at /opt/jupyterhub. JupyterLab and the classic notebook are installed alongside, so every spawned single user server has a modern interface. The configurable HTTP proxy is provided by the official NodeSource Node.js LTS package.
Authentication is provided by the native authenticator extension, which gives an in image signup and approval flow with no dependency on Linux system accounts. Single user servers are spawned by the SimpleLocalProcessSpawner, again with no per user system accounts required.
The first administrator account (username cloudimg) and a fresh administrator password are generated on the first boot of every deployed instance. Two instances launched from the same Amazon Machine Image never share passwords. The initial administrator password is written to /root/jupyterhub-credentials.txt with mode 0600 so that only the root user can read it.
JupyterHub listens on port 8000 on all interfaces. There is no nginx reverse proxy in the image and no value to edit on first boot.
Prerequisites
Before you deploy this image you need:
- An Amazon Web Services account where you can launch EC2 instances
- IAM permissions to launch instances, create security groups, and subscribe to AWS Marketplace products
- An EC2 key pair in the target Region for SSH access to the instance
- A VPC and subnet in the target Region, with a security group allowing inbound port 22 from your management network and inbound port 8000 from the networks your users will reach JupyterHub from
- The AWS CLI (version 2) installed locally if you plan to deploy from the command line
Step 1: Launch the Instance from the AWS Marketplace
Sign in to the AWS Management Console, open the EC2 service, and select Launch instance. Under Application and OS Images choose AWS Marketplace AMIs and search for JupyterHub. Select the cloudimg listing and choose Select, then Continue on the subscription summary.
Pick an instance type of m5.large or larger. JupyterLab kernels and the spawned notebook servers run inside the same instance, so size the VM for the number of concurrent users you expect. Choose your EC2 key pair under Key pair (login). Under Network settings select your VPC and subnet, and either create or select a security group that allows inbound port 22 from your management network and inbound port 8000 from the networks your users will reach JupyterHub from. Leave the root volume at the default size or larger.
Select Launch instance. First boot initialisation takes approximately one minute after the instance state becomes Running and the status checks pass.
Step 2: Launch the Instance from the AWS CLI
The following block launches an instance from the cloudimg JupyterHub Marketplace AMI into an existing subnet and security group. Replace <ami-id> with the AMI ID shown on the Marketplace listing, <key-name> with your EC2 key pair name, <subnet-id> with your subnet ID, and <security-group-id> with a security group that opens ports 22 and 8000 as described above.
aws ec2 run-instances \
  --image-id <ami-id> \
  --instance-type m5.large \
  --key-name <key-name> \
  --subnet-id <subnet-id> \
  --security-group-ids <security-group-id> \
  --block-device-mappings '[{"DeviceName":"/dev/sda1","Ebs":{"VolumeSize":30,"VolumeType":"gp3"}}]' \
  --tag-specifications 'ResourceType=instance,Tags=[{Key=Name,Value=jupyterhub-01}]'
The command prints a JSON document on success. Note the instance ID, then retrieve its public address once it is running with aws ec2 describe-instances --instance-ids <instance-id> --query "Reservations[].Instances[].PublicIpAddress" --output text.
Step 3: Connect and Retrieve Initial Credentials
Connect over SSH with the key pair you selected and the public IP address from step 2. The SSH login user depends on the operating system of the AMI variant you launched:
| AMI variant | SSH login user |
|---|---|
| JupyterHub 5 on Ubuntu 24.04 | ubuntu |
The first boot service runs before the SSH daemon becomes ready, so the credentials file is always in place when you log in for the first time.
sudo cat /root/jupyterhub-credentials.txt
You will see a plain text file containing the JupyterHub URL, the administrator username (cloudimg), and the administrator password. Copy these values somewhere secure (a password manager or encrypted vault). Do not commit them to source control.
From the same SSH session you can confirm the deployment is healthy:
curl -fsS -o /dev/null -w 'hub login HTTP %{http_code}\n' http://127.0.0.1:8000/hub/login
curl -fsS -o /dev/null -w 'hub health HTTP %{http_code}\n' http://127.0.0.1:8000/hub/health
A hub login HTTP 200 response and a hub health HTTP 200 response together confirm that JupyterHub, the configurable HTTP proxy, and the SQLite database are all serving.
Step 4: First Login to the JupyterHub Web Interface
Open a web browser and navigate to http://<public-ip>:8000/. JupyterHub presents the sign in form.

Enter the administrator username cloudimg and the administrator password from /root/jupyterhub-credentials.txt, then select Sign In.
If you see a banner about an unsecured HTTP connection, that is expected on a fresh deployment. Step 11 walks through enabling HTTPS in front of JupyterHub.
Step 5: The User Home Page
After signing in, JupyterHub shows the user home page. From here you can start and stop your single user server, switch to JupyterLab or the classic notebook, and (as an administrator) reach the Token and Admin pages.

Select My Server to start a single user JupyterLab session. The first start takes a few seconds while the spawner initialises the user's home directory under /srv/jupyterhub/users/<username> and launches the JupyterLab process.
Step 6: Working in JupyterLab
Once your server is running, you land in JupyterLab. The launcher offers a Python 3 notebook, a console, a terminal, and text, markdown and Python file editors. The left sidebar shows the file browser, running kernels, the Git extension and any installed JupyterLab extensions.

To switch to the classic notebook interface, change the URL fragment from /lab to /tree (for example http://<public-ip>:8000/user/cloudimg/tree). The notebook directory for every user is /srv/jupyterhub/users/<username> on the instance — this is on the dedicated EBS data volume.
Step 7: Add More Users
The native authenticator gives JupyterHub an in image signup flow. To add a second user, sign out and select Sign up on the login page (or visit http://<public-ip>:8000/hub/signup). Enter a username, an email address and a password.
The image is configured with NativeAuthenticator.open_signup = False, so a signup is not active until an administrator approves it. Sign back in as cloudimg, open the Admin page in the navigation bar, and approve the pending user.

From the Admin page you can also add users in bulk with Add Users, manually start or stop any user's server, shut down the Hub, and reach each user's notebook environment with Access Server.
Step 8: Change the Administrator Password
For a production deployment rotate the administrator password that was generated on first boot. Sign in as cloudimg, open the user dropdown next to the username in the top right, and choose Account Details (or navigate to http://<public-ip>:8000/hub/change-password). Enter the new password twice and select Update password.
If you ever lose the administrator password, you can reset it from an SSH session with the JupyterHub CLI's idle-culler configuration helper — the simpler path is to set a new password directly in the native authenticator database. The script lives at /opt/jupyterhub/bin/python and the database at /srv/jupyterhub/jupyterhub.sqlite.
Step 9: Install Extra Python Packages
The single user servers spawned by JupyterHub run inside the same Python virtual environment as JupyterHub itself, at /opt/jupyterhub. To install extra packages such as pandas, numpy, or scikit-learn, install them into that venv.
sudo /opt/jupyterhub/bin/pip install --no-cache-dir pandas numpy
After the install completes, restart any running single user servers from the Admin page so the new packages are picked up by the running kernels. Alternatively, restart JupyterHub:
sudo systemctl restart jupyterhub.service
That stops every single user server and the Hub itself, then restarts the Hub. Users sign in again and start a fresh server.
Step 10: Configure the Spawner and Authenticator
The JupyterHub configuration file is at /etc/jupyterhub/jupyterhub_config.py. The key settings you may want to change are:
c.Spawner.cpu_limitandc.Spawner.mem_limitto cap each user's resourcesc.NativeAuthenticator.open_signupto open or close signupsc.NativeAuthenticator.minimum_password_lengthfor the password policyc.Authenticator.admin_usersto add more administrators (thecloudimgadmin is pre approved by first boot)
After editing the configuration, restart JupyterHub. The Hub will then read the new configuration:
sudo systemctl restart jupyterhub.service
For deeper customisation, consult the JupyterHub documentation at https://jupyterhub.readthedocs.io/.
Step 11: Enable HTTPS in Front of JupyterHub
For any production JupyterHub deployment serve the Hub over HTTPS so session cookies and authentication tokens cannot be intercepted. The simplest path is to put nginx in front of JupyterHub on the same instance and let certbot manage the certificate.
The following assumes you have a DNS record pointing your fully qualified domain name at the instance's public IP address.
sudo apt-get update && sudo apt-get install -y nginx certbot python3-certbot-nginx

sudo tee /etc/nginx/sites-available/jupyterhub > /dev/null <<'NGINX'
server {
    listen 80;
    server_name jupyterhub.your-domain.example;
    location / {
        proxy_pass http://127.0.0.1:8000;
        proxy_http_version 1.1;
        proxy_set_header Upgrade $http_upgrade;
        proxy_set_header Connection "upgrade";
        proxy_set_header Host $host;
        proxy_set_header X-Real-IP $remote_addr;
        proxy_set_header X-Forwarded-For $proxy_add_x_forwarded_for;
        proxy_set_header X-Forwarded-Proto $scheme;
    }
}
NGINX

sudo ln -sf /etc/nginx/sites-available/jupyterhub /etc/nginx/sites-enabled/jupyterhub
sudo rm -f /etc/nginx/sites-enabled/default
sudo nginx -t && sudo systemctl reload nginx

sudo certbot --nginx -d jupyterhub.your-domain.example \
  --non-interactive --agree-tos -m you@your-domain.example \
  --redirect
After certbot finishes, restrict the security group so port 8000 is no longer exposed to the internet, leaving only 80 and 443.
Step 12: Backups and Maintenance
JupyterHub has two data sources that must be backed up together: the JupyterHub SQLite database at /srv/jupyterhub/jupyterhub.sqlite (users, tokens, server records), and the user notebook directories under /srv/jupyterhub/users/ (every user's notebooks and data).
sudo cp /srv/jupyterhub/jupyterhub.sqlite /var/backups/jupyterhub-db-$(date +%F).sqlite
sudo tar --acls --xattrs -czf /var/backups/jupyterhub-users-$(date +%F).tgz -C /srv/jupyterhub users
Ship both artifacts to an Amazon S3 bucket or another object store on a regular schedule. The /srv/jupyterhub mount is a dedicated EBS volume — snapshot it with EBS snapshots for point in time recovery.
For kernel and package updates, Ubuntu's unattended-upgrades is enabled by default. To update JupyterHub itself, upgrade the Python venv:
sudo /opt/jupyterhub/bin/pip install --upgrade 'jupyterhub>=5,<6' jupyterlab notebook jupyterhub-nativeauthenticator
sudo systemctl restart jupyterhub.service
Step 13: Scaling Beyond a Single Instance
For larger deployments decouple JupyterHub from the single instance pattern:
- Move single user servers to Kubernetes with the Zero to JupyterHub with Kubernetes distribution and Amazon EKS, so each user's notebook runs in its own pod
- Move the JupyterHub database from SQLite to Amazon RDS for PostgreSQL by setting
c.JupyterHub.db_url - Replace SimpleLocalProcessSpawner with DockerSpawner or KubeSpawner for isolation between user notebooks
- Replace the native authenticator with OAuthenticator (GitHub, Google, AWS Cognito, Okta) for single sign on
Each of these is documented in the official JupyterHub documentation at https://jupyterhub.readthedocs.io/.
Screenshots
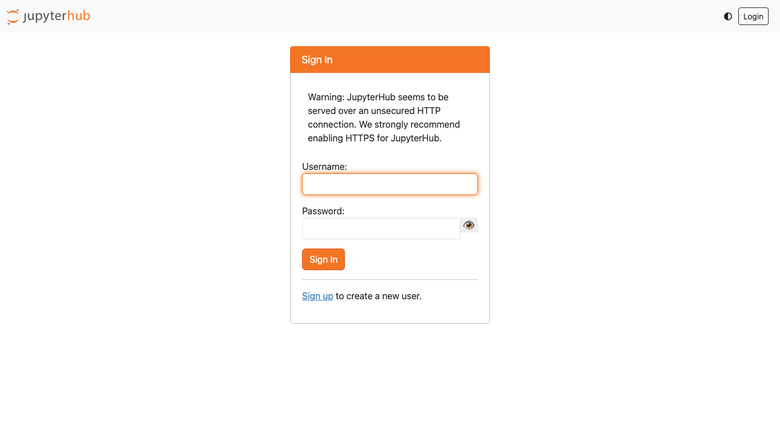
The JupyterHub sign-in page, served on first boot with no manual setup.
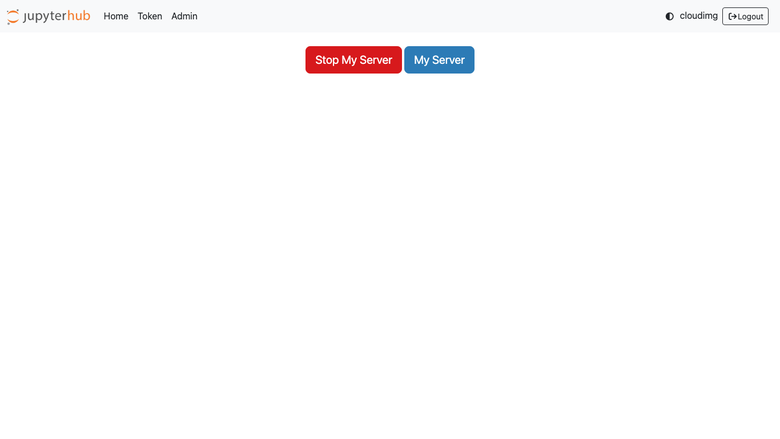
The JupyterHub user home page where the single-user server is started and stopped.
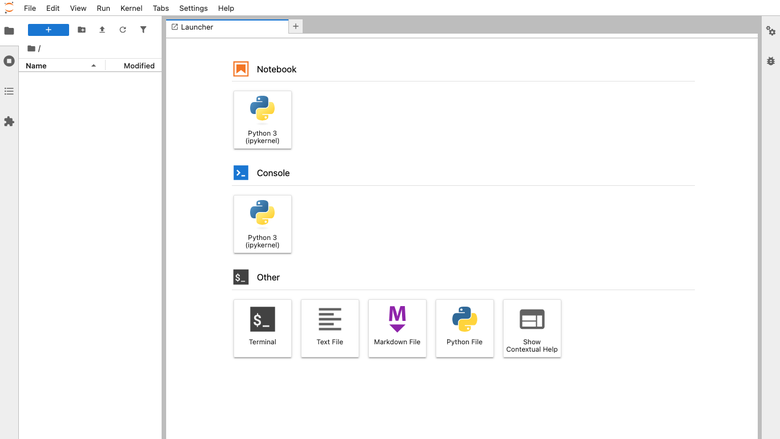
A JupyterLab session spawned by JupyterHub, with notebook, terminal and file browser.
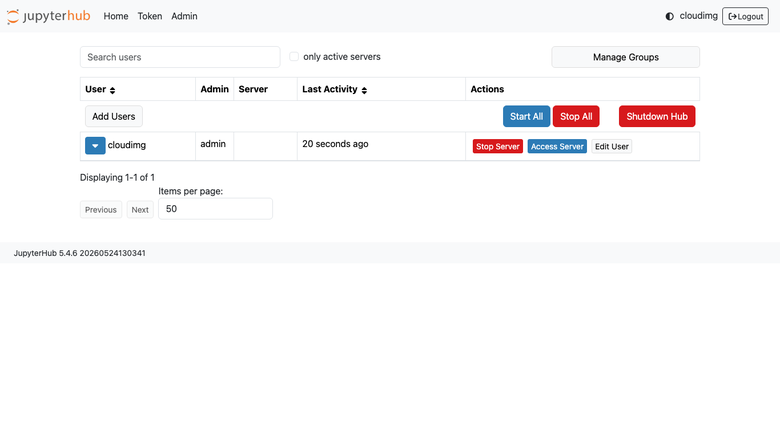
The JupyterHub admin panel for approving signups and managing user servers.
Support
cloudimg provides 24/7/365 expert technical support for this image. Guaranteed response within 24 hours, one hour average for critical issues. Contact support@cloudimg.co.uk.
For general JupyterHub administration questions consult the documentation at https://jupyterhub.readthedocs.io/ and the project's community at https://discourse.jupyter.org/.