
MinIO on AWS User Guide
Overview
This image runs MinIO, the high performance open source object storage server that speaks the Amazon S3 API, in single node, single drive mode. Objects are stored on a dedicated EBS data volume mounted at /var/lib/minio so the storage tier can be resized independently of the operating system disk.
MinIO exposes three network endpoints. Port 9000 serves the S3 compatible REST API and is the endpoint every S3 client points at. Port 9001 serves the MinIO Console, the browser based administration interface used to manage buckets, objects, users and access keys. Port 80 is an nginx reverse proxy that fronts the Console, so a customer can reach the administration interface at http://<instance>/ without having to remember the Console port number. The S3 API on port 9000 is not proxied because S3 signed URL and pre signed POST flows assume the client speaks to the server directly.
The MinIO root username and root password are generated on the first boot of every deployed instance. Two instances launched from the same Amazon Machine Image never share credentials. The well known minioadmin/minioadmin default that ships in upstream MinIO is never present in this image. On first boot a one shot service writes per instance values into /etc/default/minio (the environment file consumed by the systemd unit) and stores the plain text values in /root/minio-credentials.txt with mode 0600 so that only the root user can read them.
The MinIO Client mc, the official command line driver for MinIO and any other S3 compatible service, is installed alongside the server at /usr/local/bin/mc. The validate script uses it during the build, and customers can use it for everything an S3 client can do, including bucket and object management, replication, mirroring, and administration tasks that are not exposed by the standard S3 API.
Prerequisites
Before you deploy this image you need:
- An Amazon Web Services account where you can launch EC2 instances
- IAM permissions to launch instances, create security groups, and subscribe to AWS Marketplace products
- An EC2 key pair in the target Region for SSH access to the instance
- A VPC and subnet in the target Region, with a security group allowing inbound port 22 from your management network, inbound port 80 from the trusted networks that will reach the MinIO Console, and inbound port 9000 from the trusted networks that host the applications which will talk to the S3 API
- The AWS CLI (version 2) installed locally if you plan to deploy from the command line
Step 1: Launch the Instance from the AWS Marketplace
Sign in to the AWS Management Console, open the EC2 service, and select Launch instance. Under Application and OS Images choose AWS Marketplace AMIs and search for MinIO. Select the cloudimg listing and choose Select, then Continue on the subscription summary.
Pick an instance type of m5.large or larger. Choose your EC2 key pair under Key pair (login). Under Network settings select your VPC and subnet, and either create or select a security group that allows inbound port 22 from your management network, inbound port 80 from the trusted networks that will reach the Console, and inbound port 9000 from the trusted networks that will reach the S3 API. Do not open port 9001 directly to the public internet because the Console is fronted by nginx on port 80. Leave the root volume at the default size or larger; the dedicated data volume mounted at /var/lib/minio defaults to 50 GiB and can be resized independently in the EC2 console.
Select Launch instance. First boot initialisation takes approximately one minute after the instance state becomes Running and the status checks pass.
Step 2: Launch the Instance from the AWS CLI
The following block launches an instance from the cloudimg MinIO Marketplace AMI into an existing subnet and security group. Replace <ami-id> with the AMI ID shown on the Marketplace listing, <key-name> with your EC2 key pair name, <subnet-id> with your subnet ID, and <security-group-id> with a security group that opens ports 22, 80 and 9000 as described above.
aws ec2 run-instances \
  --image-id <ami-id> \
  --instance-type m5.large \
  --key-name <key-name> \
  --subnet-id <subnet-id> \
  --security-group-ids <security-group-id> \
  --block-device-mappings '[{"DeviceName":"/dev/sda1","Ebs":{"VolumeSize":30,"VolumeType":"gp3"}}]' \
  --tag-specifications 'ResourceType=instance,Tags=[{Key=Name,Value=minio-01}]'
The command prints a JSON document on success. Note the instance ID, then retrieve its public address once it is running with aws ec2 describe-instances --instance-ids <instance-id> --query "Reservations[].Instances[].PublicIpAddress" --output text.
Step 3: Connect and Retrieve the Root Credentials
Connect over SSH with the key pair you selected and the public IP address from step 2. The SSH login user depends on the operating system of the AMI variant you launched:
| AMI variant | SSH login user |
|---|---|
| MinIO on Ubuntu 24.04 | ubuntu |
The first boot service runs before the SSH daemon becomes ready, so the credentials file is always in place when you log in for the first time.
ssh <login-user>@<public-ip>
sudo cat /root/minio-credentials.txt
You will see a plain text file containing the Console URL, the S3 API URL, the MinIO root user, and the MinIO root password. Copy these values somewhere secure such as a password manager or an encrypted vault, and do not commit them to source control.
Each command block in this guide that talks to MinIO begins by reading the root credentials into shell variables, so every block is self contained:
ROOT_USER="$(sudo awk -F= '/^minio.root.user=/ {print $2}' /root/minio-credentials.txt)"
ROOT_PASS="$(sudo awk -F= '/^minio.root.pass=/ {print $2}' /root/minio-credentials.txt)"
echo "root user: ${ROOT_USER}; password length: ${#ROOT_PASS}"
Step 4: Verify the Server is Healthy
MinIO exposes a built in liveness endpoint that returns HTTP 200 OK whenever the server process is alive, with no authentication required. The endpoint reports only whether the server process is up, not whether any backing storage is healthy.
curl -fsS http://127.0.0.1:9000/minio/health/live -o /dev/null -w "HTTP %{http_code}\n"
You should see HTTP 200. If you see anything else, check the service status with sudo systemctl status minio.service and the journal with sudo journalctl -u minio.service -n 50.
Step 5: Sign in to the MinIO Console
Open a browser on a workstation in the network that is allowed inbound on port 80 and browse to:
http://<public-ip>/
You will see the MinIO Console sign in page. Sign in as the root user with the root password from the credentials file. The Console lands on the buckets overview, which is empty on a fresh instance.

After signing in for the first time you may see a one off AGPLv3 license acknowledgement dialog. Click Acknowledge to dismiss it. You are then taken to the object browser, which is the primary administration surface in the MinIO Community Edition Console. The left sidebar lists every bucket on the server, and the main pane shows the objects in the selected bucket.

Selecting an object opens an inspector pane on the right with the object's metadata (name, size, last modified, ETag, tags) and quick actions to download the object, generate a shareable link, preview, edit tags and delete.

To create a new bucket, click Create Bucket at the top of the sidebar. A dialog appears where you enter the bucket name and click Create Bucket to confirm. Bucket names must follow the standard S3 naming rules: lowercase letters, digits and hyphens only, between 3 and 63 characters, and starting and ending with a letter or digit.

The MinIO Community Edition Console focuses on the object browser; user management, access key issuance, policy management and the admin dashboard are features of the paid AIStor tier of MinIO. On the Community Edition image the equivalent administrative actions are exposed through the mc admin command line, which is covered in the next section.
Step 6: Drive MinIO from the Command Line with mc
The MinIO Client mc is installed at /usr/local/bin/mc. Configure an alias that points at the local MinIO server with the generated root credentials:
ROOT_USER="$(sudo awk -F= '/^minio.root.user=/ {print $2}' /root/minio-credentials.txt)"
ROOT_PASS="$(sudo awk -F= '/^minio.root.pass=/ {print $2}' /root/minio-credentials.txt)"
mc alias set local http://127.0.0.1:9000 "${ROOT_USER}" "${ROOT_PASS}"
mc admin info local
mc admin info prints the server endpoint, drive layout, uptime and a one line health summary. Create your first bucket, upload a small object, and list the bucket contents:
mc mb local/my-first-bucket
echo "hello from cloudimg" > /tmp/hello.txt
mc cp /tmp/hello.txt local/my-first-bucket/
mc ls local/my-first-bucket/
You can browse the same bucket and the same object in the Console. To delete the object and the bucket:
mc rm local/my-first-bucket/hello.txt
mc rb local/my-first-bucket
Step 7: Use the S3 API from the AWS CLI
The MinIO server is fully S3 compatible, so any S3 client speaks to it without changes other than the endpoint URL and the access keys. From a workstation that has the AWS CLI installed and inbound network access to port 9000 of the instance, configure the AWS CLI with the MinIO root credentials and an explicit endpoint URL:
# Run on a workstation that has the AWS CLI v2 installed.
# Replace <root-user>, <root-pass> and <public-ip> with the values from
# /root/minio-credentials.txt on the instance.
AWS_ACCESS_KEY_ID=<root-user> \
AWS_SECRET_ACCESS_KEY=<root-pass> \
aws --endpoint-url http://<public-ip>:9000 s3 mb s3://aws-cli-bucket

AWS_ACCESS_KEY_ID=<root-user> \
AWS_SECRET_ACCESS_KEY=<root-pass> \
aws --endpoint-url http://<public-ip>:9000 s3 ls
In production you should not use the root credentials directly from application code. Create an application user with the mc admin user add command line (the equivalent of the Console Identity, Users page on the paid AIStor tier), attach the least privileged built in or custom policy that the application needs (for example readwrite scoped to a single bucket), generate an access key for that user, and use that access key in the application. Rotate the access key on a schedule that suits your security posture.
Step 8: HTTPS with a Reverse Proxy
The image ships with nginx fronting the Console on port 80 to keep the user experience simple. Production deployments should terminate TLS on nginx so the Console and the S3 API are reachable over HTTPS only. The most common pattern is to attach an Elastic Load Balancer in front of the instance, terminate TLS on the load balancer with an ACM certificate, and forward to the instance on port 80. The alternative is to terminate TLS on the instance itself with a certificate issued by Let's Encrypt and the certbot CLI; this requires a DNS name pointing at the instance and inbound port 443 from the public internet in the security group.
If you terminate TLS on the instance, replace the contents of /etc/nginx/sites-available/minio-console with an HTTPS server block, run sudo certbot --nginx -d <your-domain>, and reload nginx with sudo systemctl reload nginx. The S3 API on port 9000 should also be wrapped in HTTPS for production, either by terminating TLS at the load balancer in front of the instance or by configuring MinIO with MINIO_OPTS that point at a certificate.
Step 9: Backup and Maintenance
The simplest backup strategy is to use the MinIO Client mc to mirror buckets to another S3 compatible target on a schedule. The target can be another MinIO instance, an Amazon S3 bucket, or any other S3 compatible service. The mc mirror command keeps the source and the target in sync, and mc mirror --watch keeps them in sync continuously.
# Replace <aws-access-key> and <aws-secret-key> with an IAM access key pair
# that has s3:* on the destination bucket, and replace <my-offsite-bucket>
# with the name of the destination bucket. Run this on the instance.
mc alias set offsite https://s3.amazonaws.com <aws-access-key> <aws-secret-key>
mc mirror local/my-first-bucket offsite/<my-offsite-bucket>
Routine maintenance of the operating system uses the standard Ubuntu package manager. Apply security updates with sudo apt-get update && sudo apt-get -y dist-upgrade and reboot the instance when a kernel update is installed. The MinIO server itself can be updated with sudo mc admin update local, which downloads the latest upstream binary, verifies its checksum, and asks the running MinIO process to restart itself.
To grow the storage tier, resize the EBS data volume in the EC2 console and run sudo resize2fs /dev/<device> on the instance. MinIO picks up the new capacity immediately. The root volume and the data volume are independent, so growing the storage tier does not require touching the operating system disk.
Troubleshooting
If the Console is not reachable at http://<public-ip>/, confirm that the security group allows inbound port 80 from your workstation, that nginx is running with sudo systemctl status nginx.service, and that MinIO is running with sudo systemctl status minio.service. The nginx error log at /var/log/nginx/error.log and the MinIO journal sudo journalctl -u minio.service -n 100 are the first places to look.
If the S3 API is not reachable on port 9000, confirm that the security group allows inbound port 9000 from the client and that MinIO is bound to all interfaces with sudo ss -tln | grep 9000. The output should show *:9000 or 0.0.0.0:9000.
If you have forgotten the root password, recover it by reading /root/minio-credentials.txt as root over SSH. If that file has been deleted on a running instance, recover the password from /etc/default/minio, which holds the live MINIO_ROOT_USER and MINIO_ROOT_PASSWORD. To rotate the root password, edit /etc/default/minio with sudo and replace MINIO_ROOT_PASSWORD=... with a fresh value, then restart the service with sudo systemctl restart minio.service and update any S3 clients that hold the old password.
Screenshots
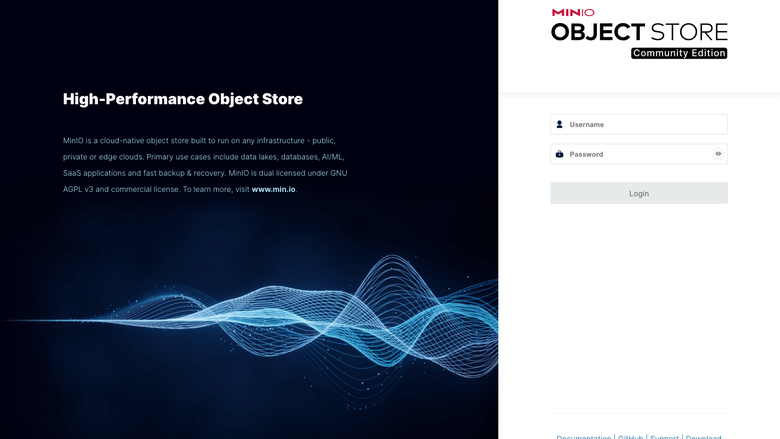
The MinIO Console sign-in page, served on first boot with no manual setup.
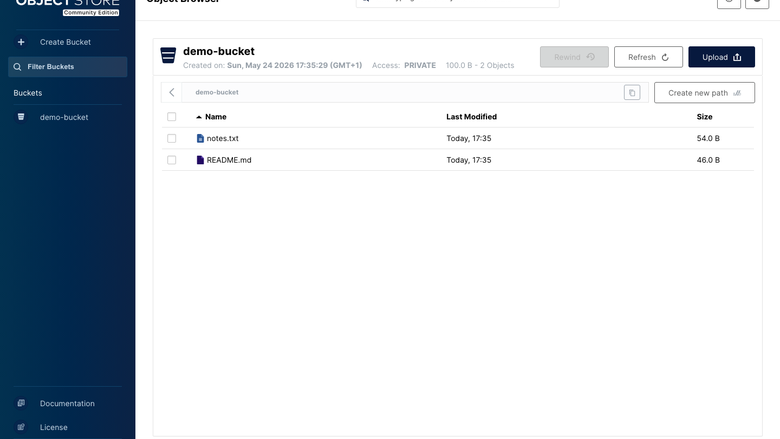
The MinIO Console object browser listing the objects inside a bucket on the MinIO server.
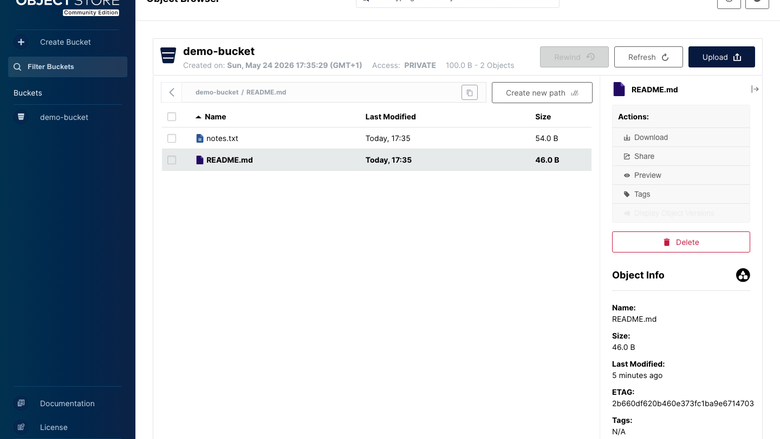
Inspecting an object's metadata and download, share and delete actions from the object browser.
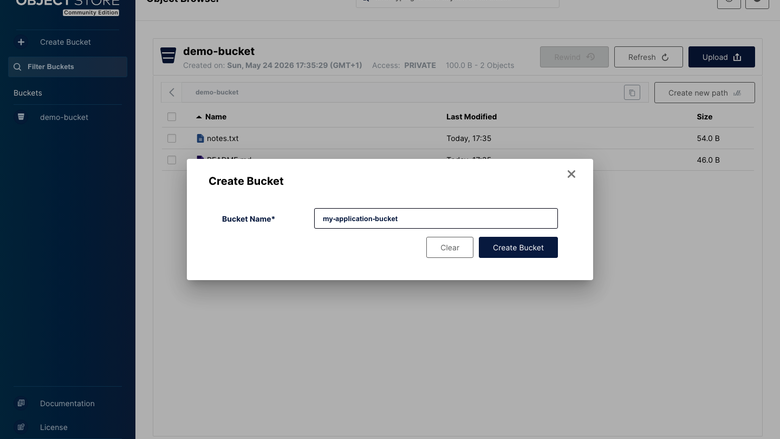
The MinIO Console Create Bucket dialog for creating a new S3 compatible bucket on the server.
Support
cloudimg includes 24/7 technical support for MinIO deployment, IAM and policy configuration, S3 client integration, performance tuning and storage administration. Reach the support team by email at support@cloudimg.co.uk or by chat from the cloudimg website. For upstream MinIO product documentation, see https://min.io/docs/minio/linux/index.html.
All product and company names are trademarks or registered trademarks of their respective holders. Use of them does not imply any affiliation with or endorsement by them.